How the humble hard drive is made
Step 7: Adding the data storage layers
Now we come to the data-storage layers. These are made from an alloy of cobalt, chromium and platinum (CoCrPt). Cobalt is used because it has a hexagonal crystal structure, which is less symmetrical than the cubic crystal structure of other magnetic metals (such as iron and nickel). This allows the metal's crystals to be oriented in the preferred magnetisation direction, which in the case of PMR is up or down. Chromium is added to give the cobalt resistance to corrosion and reduce the interactions between grains with a consequential improvement in the signal-to-noise ratio.
Lastly, the platinum provides thermal stability, preventing data loss if the disk is subjected to external magnetic fields or heat. As with the two sub-layers that form the soft magnetic underlayer, the recording layer is composed of several sub-layers. Often thin layers of ruthenium separate these. Ruthenium also separates the soft magnetic underlayer from the recording layer, but here it performs a quite different function. Ruthenium has a hexagonal close-packed atomic structure similar to that of the CoCrPt alloy, so it's used as a nucleation layer to help orient the crystals of the magnetic grains in the required direction.
It's also used to lower the degree of magnetic exchange coupling between the hard magnetic layers to produce advanced structures such as the widely used exchange coupled composite (ECC) structures. ECCs are used to help solve the 'trilema' in which attempts to improve any of the main requirements – thermal degradation, ease of magnetic switching and signal-to-noise ration – makes the others worse.
Step 8: Adding a protective overcoat
The final stage of the deposition process is to apply a diamond-like carbon overcoat layer to provide corrosion resistance and improve its mechanical reliability. This protective layer is typically 2nm thick and is applied by ion-beam or plasma-enhanced chemical vapour deposition techniques. The platter is now removed from the sputter deposition chamber.
Step 9: Lubricating the platter
Sign up for breaking news, reviews, opinion, top tech deals, and more.
Next, a lubricant layer is applied to the media in one or more steps depending on design. Typically the lubricant is dissolved in a solvent and applied to the platter by pulling it at a controlled rate. The rate of evaporation of the solvent in the meniscus that forms at the liquid air interface during the pulling process and the concentration of lubricant in the solution determine the resulting thickness on the disk, which is approximately 1nm. The layer comprises advanced perfluoropolyether lubricants combined with phosphazene additives that inhibit degradation of the lubricant.
Typically the lubricant layer is partially bonded to the overcoat film and imparts durability to the head media interface system in a drive. The bonding process can be activated thermally or, more typically, by exposure to ultraviolet light. During the bonding process, cross-link chemical bonds form in the lubricant's molecular chains to limit the mobility of the lubricant. However, the top-most portion of the lubricant is left to be fully mobile.
After lubrication, a tape burnish process and then a head burnish process are used to wear out asperities (microscopic unevenness) and remove any loose particles that may remain on the surface of the platter after the sputter and lubrication processes have been completed.
Step 10: Testing and certification
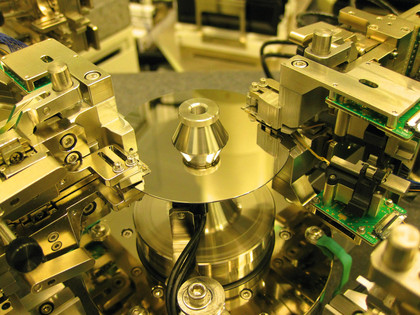
The final step before the platter can take its place in a disk drive is to certify that it can pass what is referred to as a glide test. During the glide process a specially made head is 'glided' over the surface of the platter to detect any remaining asperity on the media. This process ensures that a head will be able to fl y over the surface of the disk without crashing into any projections.

FINAL TEST: The platter has to pass a glide test to make sure that the head won't crash into surface defects
If the platter passes this last step then it's deemed 'flyable' or 'prime' and after a magnetic conditioning step it's appropriately packed up and shipped to the drive factory.
The magnetic conditioning step involves exposure of the finished media to a large magnetic field in order to leave the magnetisation in the storage layer in a uniform state that will not interfere with the drive manufacturing process.
Current page: Adding data storage layers and final testing
Prev Page Polishing, washing and applying the underlayer