How the humble hard drive is made
Step 4: Precision polishing
After NiP plating, the substrate is polished in several steps using progressively finer abrasives based mostly on silicon carbide, diamond and aluminium oxide. The end result is a disk that has a roughness of less than 1Å (an Angstrom unit – 0.1nm, 0.0001μm or 0.0000001mm), which is about the size of an atom and 450 times less than the minimum size of the features in today's microprocessors.
Subsequent processes in the following steps increase the roughness to 4Å, the minimum level of surface flatness that will allow the head to fly reliably over the surface of the media with a controlled spacing of around 2nm.
Step 5: Washing and inspecting
Some manufacturers employ a conditioning step to remove any contamination that may be still present on the substrate. This involves spinning the disk and then very gently pressing a barely abrasive tape onto the surface. Then, before the magnetic data recording layers are applied, the disk is cleaned so that it's free of any particles, scratches or contaminants. This is done using wet chemical exposures to acidic and alkaline solutions, followed by mechanical scrubbing in soapy solutions and then multiple rinses in deionised water.

SHINE UP: Before the active layers are deposited on the platter, it's polished so that any roughness is within atomic dimensions
The disk is dried using a surface tension effect. Before continuing, advanced optical inspection is used to detect particles, contaminants or scratches, and any disks with such defects are rejected. The process is fully automated using optics and electronic detectors combined with smart software to identify imperfections.
Sign up for breaking news, reviews, opinion, top tech deals, and more.
Step 6: Applying a soft magnetic underlayer
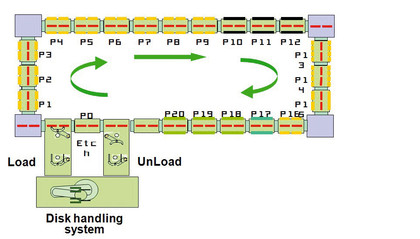
The next few steps involve depositing layers of various materials with differing magnetic properties using a process called 'Sputtering' that takes place in a multi-chamber vacuum deposition tool.
The first of these layers is the soft magnetic underlayer. Otherwise known as the magnetic keeper layer, it's a good conductor of magnetic fields. This layer is unique to Perpendicular Magnetic Recording technology (see 'From LMR to PMR, overleaf) and has the result of enhancing the perpendicular field needed for writing by providing an 'image field' to the field produced by the head. The soft magnetic underlayer is made from an alloy, typically containing cobalt, nickel and iron.

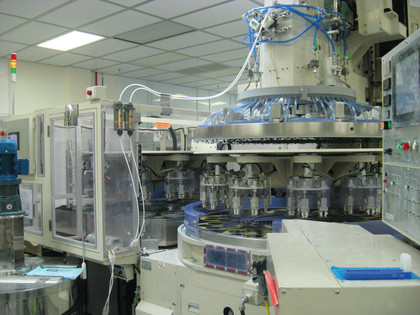
DATA-STORAGE LAYERS: The application of the soft magnetic underlayer is just one of several steps that are carried out as the platter is automatically passed from one chamber to another in a vacuum deposition tool
In Western Digital's latest platters this layer takes the form of two sub-layers separated by a four-atom thick layer of ruthenium. When two ferromagnetic layers are separated by a thin layer of ruthenium, the resulting interaction between the two layers is such that energy is minimised when the magnetisation between those layers is opposite. This is known as a synthetic antiferromagnet, and the end result is a keeper layer with properties that can be finely tuned. Only a few elements are known to do this, and ruthenium has the largest effect – which is why it's used in modern hard disks.
Current page: Polishing, washing and applying the underlayer
Prev Page Extracting minerals and making blanks Next Page Adding data storage layers and final testing