How to install Ubuntu
Get the popular Linux operating system
1. Make room
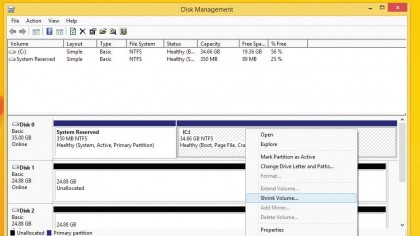
To create an empty partition for Ubuntu, you'll first have to squeeze your existing Windows partition. Fire up the Disk Management tool in Windows, and right-click your main partition; typically assigned the drive letter C.
Then select the Shrink Volume option from the pop-up menu.
2. Shrink Windows
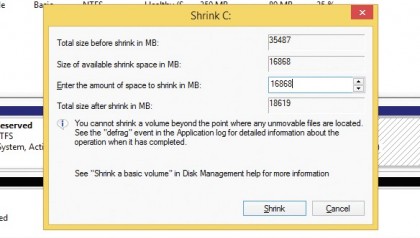
This brings up the Shrink dialog box, which shows you the maximum amount of space you can squeeze out of the partition. To create a new partition, specify the size of the partition in megabytes (MB) and click Shrink to start the process.
Ubuntu needs at least 5,000MB, but 20,000MB would be ideal.
3. Updates & plugins
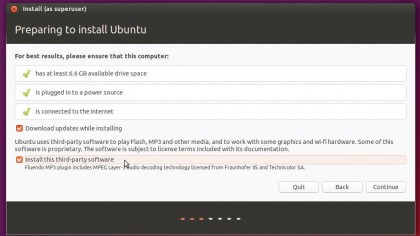
After your PC boots from the Ubuntu installation medium, it'll display a checklist. Make sure you toggle the two available checkboxes on this screen.
The first will fetch any available updates from the internet, and the other will install the plugin required to play MP3 content.
4. Use free space
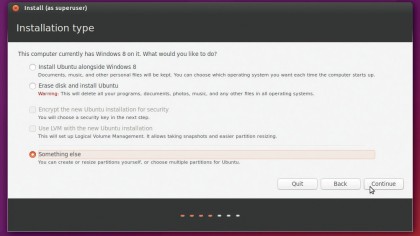
In the screen labelled Installation type, toggle the 'Something else' radio button to manually partition the disk. Ubuntu will now show you a list of partitions on the disk.
Sign up for breaking news, reviews, opinion, top tech deals, and more.
Select the one labelled free space and click the + sign to create a partition out of the space you freed up in Windows.
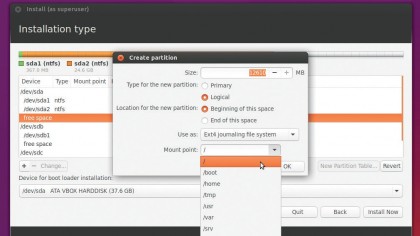
5. Define partitions
In the Create partition box enter the size for the Ubuntu partition leaving enough room for the swap partition. Then use the Mount point pull-down menu to select the / option.
Similarly create a partition for swap but instead of the default Ext4 option, select the swap area option.
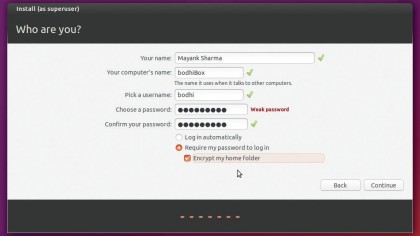
6. Login credentials
That's it. The installer will now start installing Ubuntu. While the files are being copied to the disk in the background, it will ask you for your location and time zone, as well as your keyboard layout.
In the last screen you'll be asked to enter your desired login and password details.