How to use an Xbox or PS4 controller with a Raspberry Pi
RetroPie
Sign up for breaking news, reviews, opinion, top tech deals, and more.
You are now subscribed
Your newsletter sign-up was successful
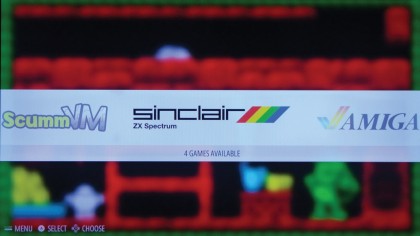
Now reboot the distribution one last time and this time continue with Emulation Station. If you've connected your controller, the distro will pick it up.
Press and hold any key on the controller to help the distro correctly identify the controller. You will then be asked to map the keys on the controller. Be aware that this basic mapping is only for navigating around the graphical interface and helping you switch between the emulated system and selecting a game.
Once you've set up the controller, you're dropped into the main menu of the Emulation Station interface. Now, to set up the controller for gaming, head to the RetroPie menu in Emulation Station and select the 'Configure RetroArch Keyboard/Joystick' option.

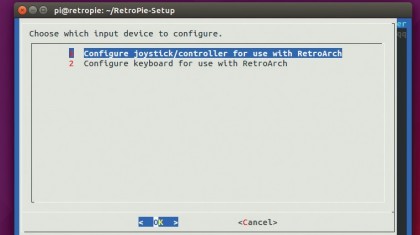
Use the keyboard and select the first option, labelled 'Configure Joystick/Controller'. Then follow the on-screen prompts to set up your controller. If your controller doesn't have the buttons you're being asked for, just wait for a few seconds and the setup will move on to the next button.
Controller drivers
If you use an Xbox 360 or a PS3 controller, you first have to install their drivers before RetroPie can pick them up. In earlier versions, this involved some hacking on the command line.
However, in the latest version of the distro, it's a very simple and straightforward affair. Head to the RetroPie-Setup option in the RetroPie menu inside Emulation Station.
This brings you to the Ncurses menu of the RetroPie-Setup script we were in earlier. Use the keyboard to select the third option to configure the distro.
Sign up for breaking news, reviews, opinion, top tech deals, and more.

Scroll through the list and select the relevant option to install the driver for your controller – '318' to install the PS3 driver and number '332' to install the driver for the Xbox 360.
The Xbox360 script downloads the xboxdrv driver and edits the /etc/rc.local file to start the driver on boot. The script adds entries for wired 360 controllers. If you are using wireless controllers, open the /etc/rc.local file in a text editor, hunt for the lines that begin with xboxdrv and replace the --id option with --wid .
If you are using PS3 controllers, once you've installed the drivers using the script as described earlier, you're prompted to plug in the Bluetooth adaptor for the controllers.
Even after you do so, RetroPie will fail to detect your controllers. This is to be expected, according to the developers. Exit the script and out of Emulation Station. Once you're back on the command line, switch to the /opt/retropie/supplementary/ps3controller/ directory and type
$ sudo ./sixpair
This nifty little utility should detect the Bluetooth adaptor and make it known to RetroPie.
Now reboot the Raspberry Pi and, once it's back up, change to the /dev/input directory and list its contents with ls . If your controller has been detected, it's listed as js0. You can test the controller by using:
$ jstest /dev/input/js0
which brings up the jstest program designed to test the features of a controller. Now head back to the RetroPie menu in Emulation Station and use the 'Configure RetroArch Keyboard/Joystick' option to set up your controller.
And that's it – your controllers are now all set up and ready to go. You can do this with all your controllers and RetroPie saves the configuration and automatically loads it whenever you plug the controller in.
You can now scroll through Emulation Station and play the pre-installed games with your controllers.

Use a virtual gamepad
Don't sweat if you don't have a gaming controller – you can create and use a virtual one from within your phone or tablet instead. To create the virtual gamepad, head to the XTerminal and enter the following commands to install the required components:
$ sudo apt-get update
$ sudo apt-get upgrade
$ wget http://node-arm.herokuapp.com/node_latest_armhf.deb
$ sudo dpkg -i node_latest_armhf.deb
Once you have the components, switch to the root user with the su command. You're prompted for the root user's password (raspberry). Once authenticated, enter
# git clone https://github.com/miroof/nodevirtual-gamepads
# cd node-virtual-gamepads
# npm install
# npm install pm2 -g
The above steps take a little time to complete. Once they've finished, you can launch the controller and enable it to start up automatically at boot:
# pm2 start main.js
# pm2 startup
# sudo pm2 save
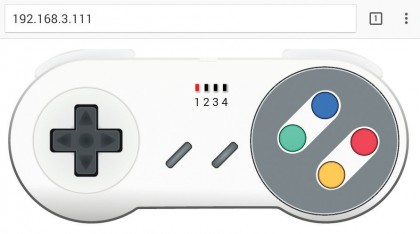
Now grab your phone or tablet, open the web browser (the developers recommend Google Chrome for best results) and enter the IP address of the Raspberry Pi in the address bar. You should now see a virtual controller on the page.
Note that you need to configure your controller with and RetroArch just as you would with a physical controller. The game controller web application also provides haptic feedback – if you find it irritating, you can deactivate it by taking your device off vibration.
- Enjoyed this article? Expand your knowledge of Linux, get more from your code, and discover the latest open source developments inside Linux Format.Read our sampler today and take advantage of the offer inside.

With almost two decades of writing and reporting on Linux, Mayank Sharma would like everyone to think he’s TechRadar Pro’s expert on the topic. Of course, he’s just as interested in other computing topics, particularly cybersecurity, cloud, containers, and coding.