13. Extra Time Spent
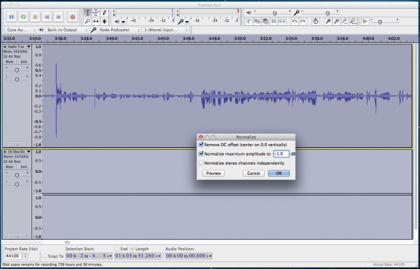
This is actually enough editing for most podcasts, for a number of reasons: they’re not expected to have been through the hands of a professional audio engineer, chances are they’re going to be listened to through less-than-amazing headphones, and most importantly, because the more advanced things you can do are a great way to destroy your sound quality. Done properly, though, they can add a lot, compensating for weaknesses in your equipment, and providing what’s usually referred to as “radio sound” — that booming, full-throated resonance that sounds like it should be declaring, “This is World News Tonight.”
14. Deepen Your Voice
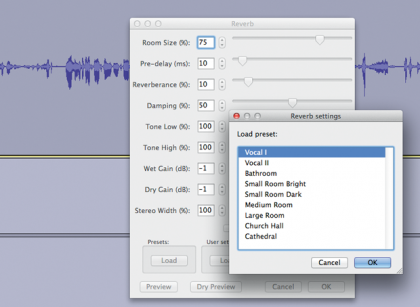
This is one of the easiest but most obvious edits, especially if using a budget microphone, the sound from which is often tinny and hollow. Go to Effect/Change Pitch and drop it by just a little — about 5 percent or so at most, so it still sounds like you. You can also get good effects in the Reverb tool by using the Vocal presets (click the Load button) or turning down the actual Reverberance and Pre-Delay to sound just full-bodied rather than actually echoing. Male voices especially can also benefit from a bit more bass, courtesy of Bass And Treble. All of these options are in the Effects menu.
15. Compression
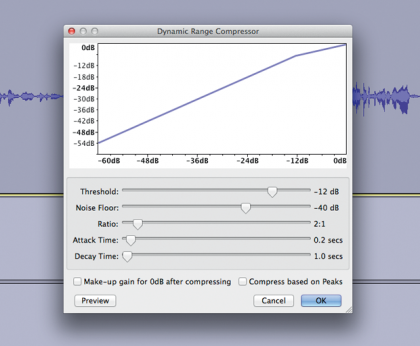
Compressors reduce the audio range of your sound, which allows it to be amplified without the louder parts being clipped — much as we did with Leveler, but with more control. Audacity’s Compressor unfortunately doesn’t have presets, but its standard options are sufficient for podcasting. Select Compressor in the Effects menu, then untick “make-up gain” and adjust Noise Floor to around -20. Now, using Amplify or Normalize gets it as loud as you need, without spikes causing a problem. That said, most podcast editors are fine just using the one-click leveler and won’t notice any meaningful difference.
16. Equalization
Sign up for breaking news, reviews, opinion, top tech deals, and more.
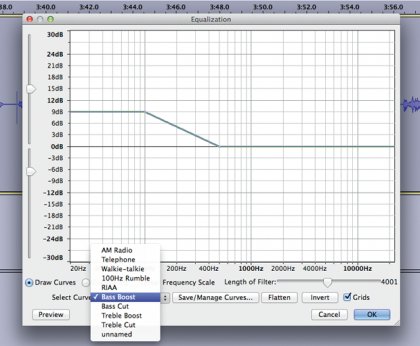
Equalization is the processing of frequencies, and if you choose it in the Effects menu, you see it has a few handy presets. It’s not as complex as it looks, though, with the left side of the curve handling bass, the right treble, and the middle affecting the overall sound. In the presets, select “bass boost” to see how that looks — for these purposes, that’s the most important to play with. Also, try Telephone and Walkie Talkie to see how easy it is to apply a quick effect to your sound. These can be very handy if your podcast is going to include skits of any sort, or you want to simulate someone phoning in to your show.
17. Fixing P-P-Plosives
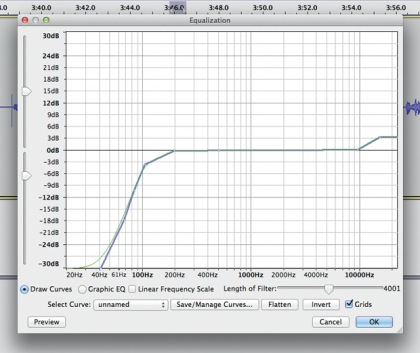
Plosives come from air being sharply expelled into the microphone, primarily from the letter “p.” The best way to deal with them is not to record them, which can be done by using a “pop filter” in front of your microphone, or speaking just above it. After that, you can cut them directly, as with other noise. Alternatively, use the Equalizer, puling down gently from around the 200Hz point and bottoming out at around 40Hz as in the picture. This may take some experimentation, and it won’t get rid of the sound entirely, but it dims it to the point that it shouldn’t offend your audience’s ears.
18. Final Export
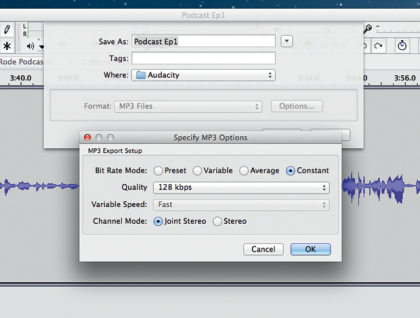
MP3 is the official podcast format, and for the most part, you don’t need to worry about the settings. When you’re also including music, though, it’s worth jumping into the Options and boosting the quality from its default 128kbps to 192kbps. One thing to be careful of is your audio sources — if you use both mono and stereo, it can sound strange in the final edit. You can separate or turn a stereo track mono in the Tracks menu. You can also drag the L/R sliders on your mono tracks to move from one ear to the other. Don’t go all the way to separate multiple voices; a little is effective, a lot is unpleasant.