7. Snap, Crackle, and Pop
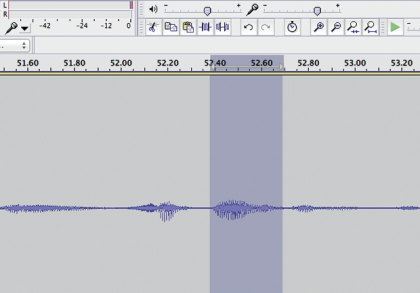
Your microphone picks up a lot of noises, and your audience doesn’t want to hear all of them. Put on your best headphones. Crank up the volume. Zoom in using the magnifying glass. Start listening to each track, ready to hit stop when you hear noises such as sharp breaths. Use the Selection tool to select these moments and either kill them with Command + X, or replace them with silence with Command + L. Don’t be tempted to use a filter to do this for you. It’s better to go through it methodically, in order to avoid damaging the rest of your audio.
8. Precision Editing
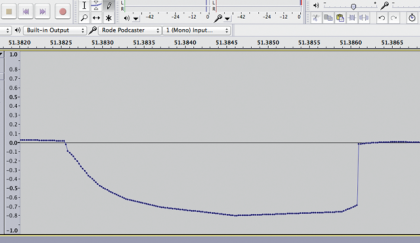
For problems that can’t just be silenced, like a sudden slurp in a section you don’t have a better take to drop in, select the Pen tool. Zoom into the track until the waveform is replaced with a series of dots. You can now draw volume changes onto the wave directly, creating troughs that get rid of the worst of the unwanted noise without the harsh snap of a cut or silence. As well as controlling the level of the volume drop, this lets you control the speed of transition. You don’t have to remove sounds entirely this way, just dull them. Option-clicking smooths the wave. Holding Control after clicking just affects a single dot.
9. Noise Removal
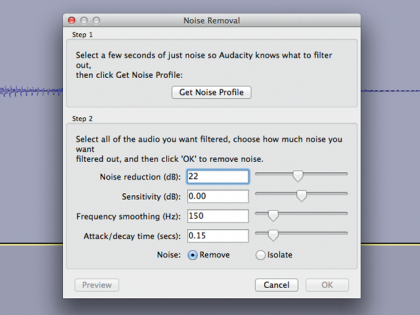
Thankfully, little noises are an easier matter to sort out. Select the silence from the end of the recording, then from the Effect menu, choose Noise Reduction. Click “Get Noise Profile.” This tells Audacity what the ambient in your room is — the hum of plugs, or your gentle breathing, for instance. Now, you can tweak the settings underneath to get rid of it. This takes tweaking for each recording. Focus on the top two options: how much to reduce noise, and what the threshold for it is. Both should be as little as you can get away with. Use Preview until it sounds about right.
10. Leveling
Sign up for breaking news, reviews, opinion, top tech deals, and more.
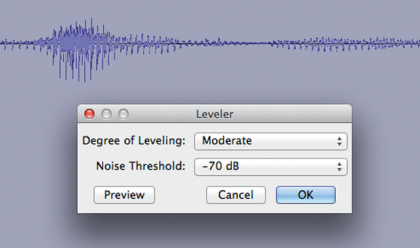
While we’ll look at a more flexible way shortly, Audacity offers a “Leveler” tool designed to reduce the gap between loud and soft audio, and produce a more consistent volume. This compensates for moments when your head was slightly farther from the microphone, or you simply spoke a little more softly, during a section. It’s not a miracle worker, and if the Light or Moderate settings aren’t enough, the higher strength ones are likely to cause a hit to your sound quality. If you’re planning to do more detailed mastering, don’t do this. As a quick way to make a podcast sound better, though, it’s fine.
11. Volume Control
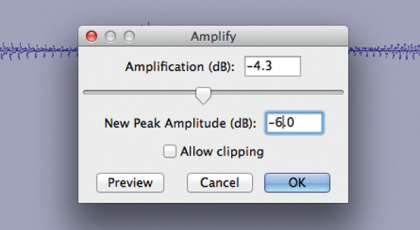
Volume is handled in dB, and you always deal in negative numbers. When setting volume, you’re actually adding “gain”; the definitions don’t really matter for now, but that’s how it’s described. To avoid blowing out an unwary listener’s ears, a podcast should max out at around -12 to -6dB, bottoming out at around -24. For a single track, this is easy — the Amplify Effect lets you pick a peak volume and adjust accordingly. For multiple tracks, use the Normalize tool instead, bringing them to the same peak (“maximum amplitude”) level. The overall dB is based on all tracks together, though, so experiment to find a good balance.
12. Adding Music
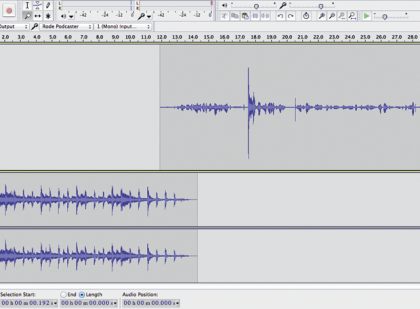
Music should be added as its own track, its volume adjusted to complement the spoken word tracks rather than vice versa. Basic Fade In and Fade Out effects are in the Effect menu, as is an Adjustable Fade with more options. Audacity also offers an “Auto Duck” tool. This automatically dips one track (usually music) when another is making noise so that it’s more prominent. You can pick the amount and how harsh the effect should be. For podcasts, though, you’re generally only going to be using music as an intro and as breaks. Having it run throughout is distracting, unless, of course, it’s a dedicated music podcast.

 Become a TechRadar Insider


