
 Become a TechRadar Insider


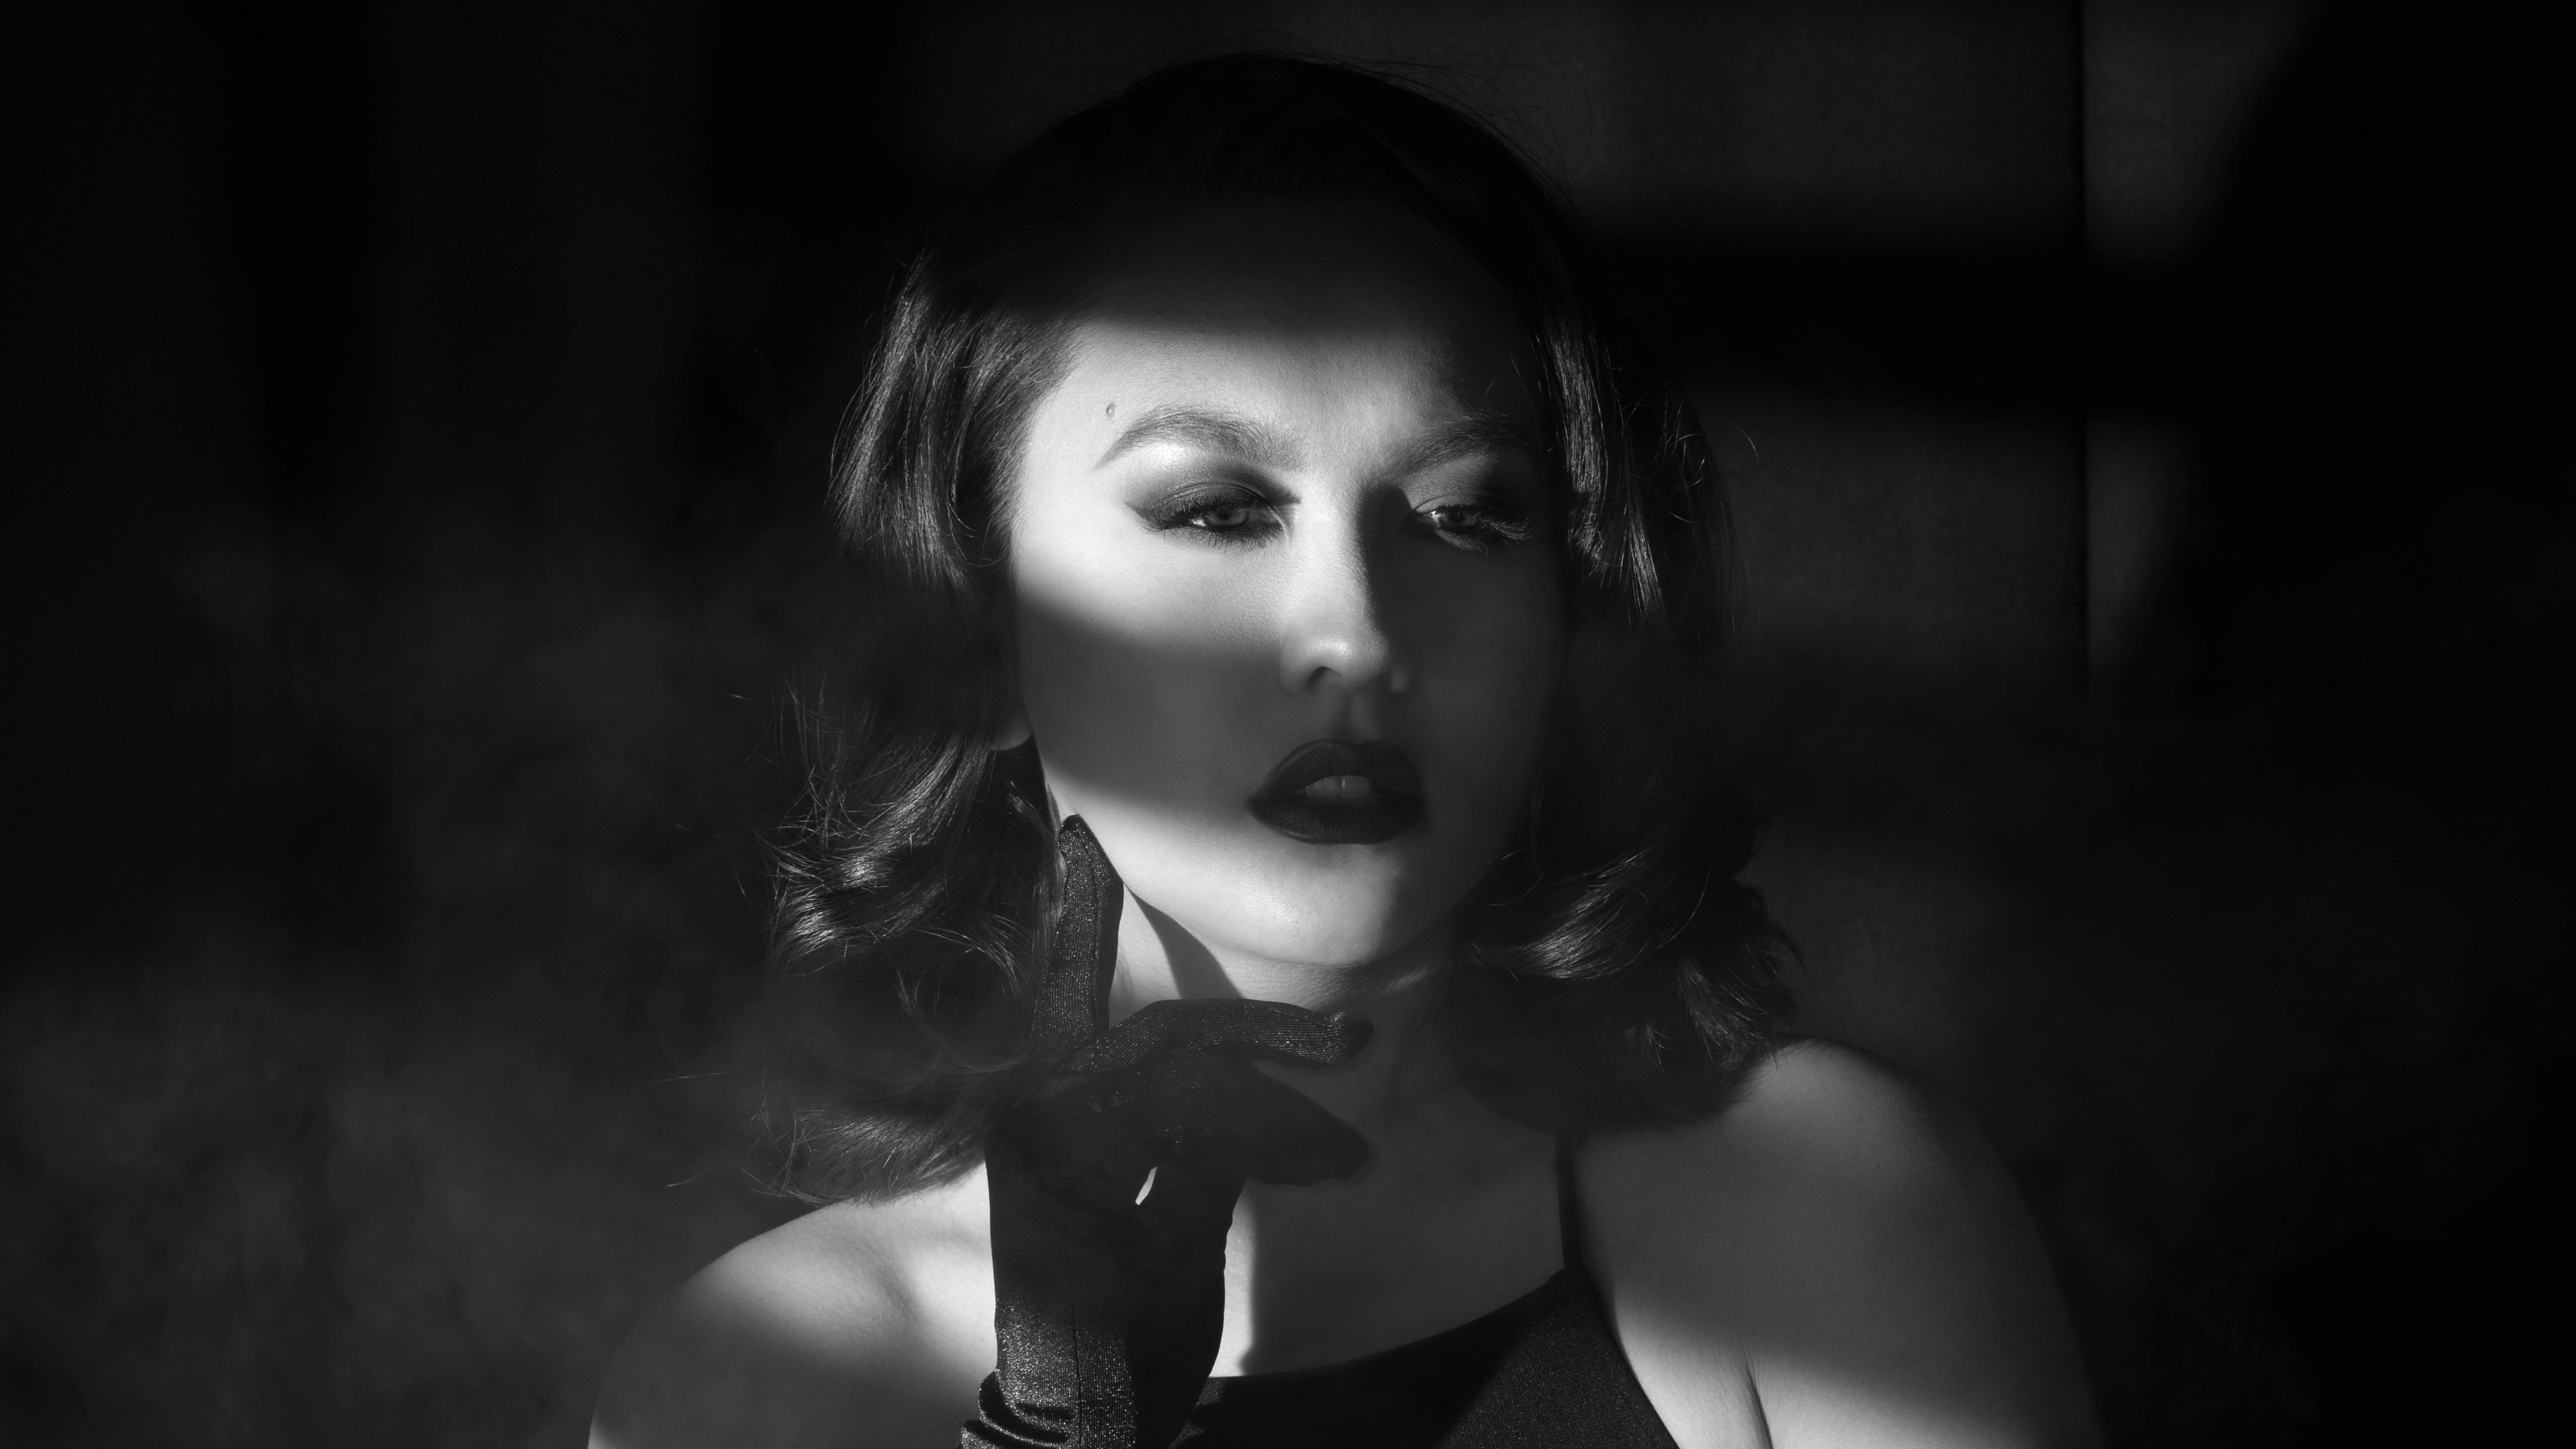
If you've got to grips with off-camera flash, it's now time to take things a step further and modify the light. To do this, we're going to show you how to add impact to a portrait image using a home-made GOBO.
GOBO stands for 'go-between object', and it's simply a light modifier that goes between your light source and your subject. It can be a stencil cut to fit into your lighting, or it can be a freestanding object you've improvised for the job.
A GOBO can block the light, diffuse it, or color it. In this case we're going to cut long rectangles in a sheet of card and place it in front of our flashgun (but not directly on the flashgun) to give the illusion that the light is passing through a blind. We're after a film noir feel here, but you can use a GOBO
to create all sorts of lighting effects, and the principles are the same no matter what shape your GOBO is.
But what's the best way to use a GOBO, and how should you set one up? Let's take a look…
Step by step: Making and shooting with a GOBO
1. Make a GOBO

To make the GOBO you'll need a large sheet of card. Measure out and mark long rectangles about 2.5cm (1 inch) high by 60cm (23.6 inches) long, and space them about 2.5cm (1 inch) apart. Then take a scalpel or some scissors and cut the rectangles out. Use a steel rule to keep the cuts straight.
2. Set up the light

Attach your wireless receiver to the flashgun and mount it on a lightstand, then place the flash camera-left, about two metres away from your model. Turn on the flashgun and receiver, and set the flash to 1/16 power. Attach the wireless transmitter to your camera's hotshoe.
3. Set up the camera

We set f/8 in aperture-priority mode, then adjusted our ISO to 250, so that we had a shutter speed below 1/200 sec (the sync speed of the flash). We then slowed it further, to 1/25 sec, using exposure compensation, to let in more of the ambient light.
4. Position the GOBO

Take your GOBO and strap it to a light stand, or anything that stands upright, then set it up in front
of the flashgun, about half a metre away, so it sits between the flash and the model. You can experiment with the position once you start shooting.
5. Direct the model

Don't keep your model in one place – get them to move around. Ask them to look at the light and shift position, so you can see how the light interacts with the contours of their face. The further your model is from the GOBO, the wider and more diffuse any shadows will be.
6. Add some atmosphere

To add extra atmosphere to your shot you could add some artificial fog to better define the shafts of light as they pass through the GOBO. You can also turn the final result black and white in Photoshop for that classic filmic effect.
This feature was originally published in N-Photo Magazine, to subscribe, click here