 Become a TechRadar Insider


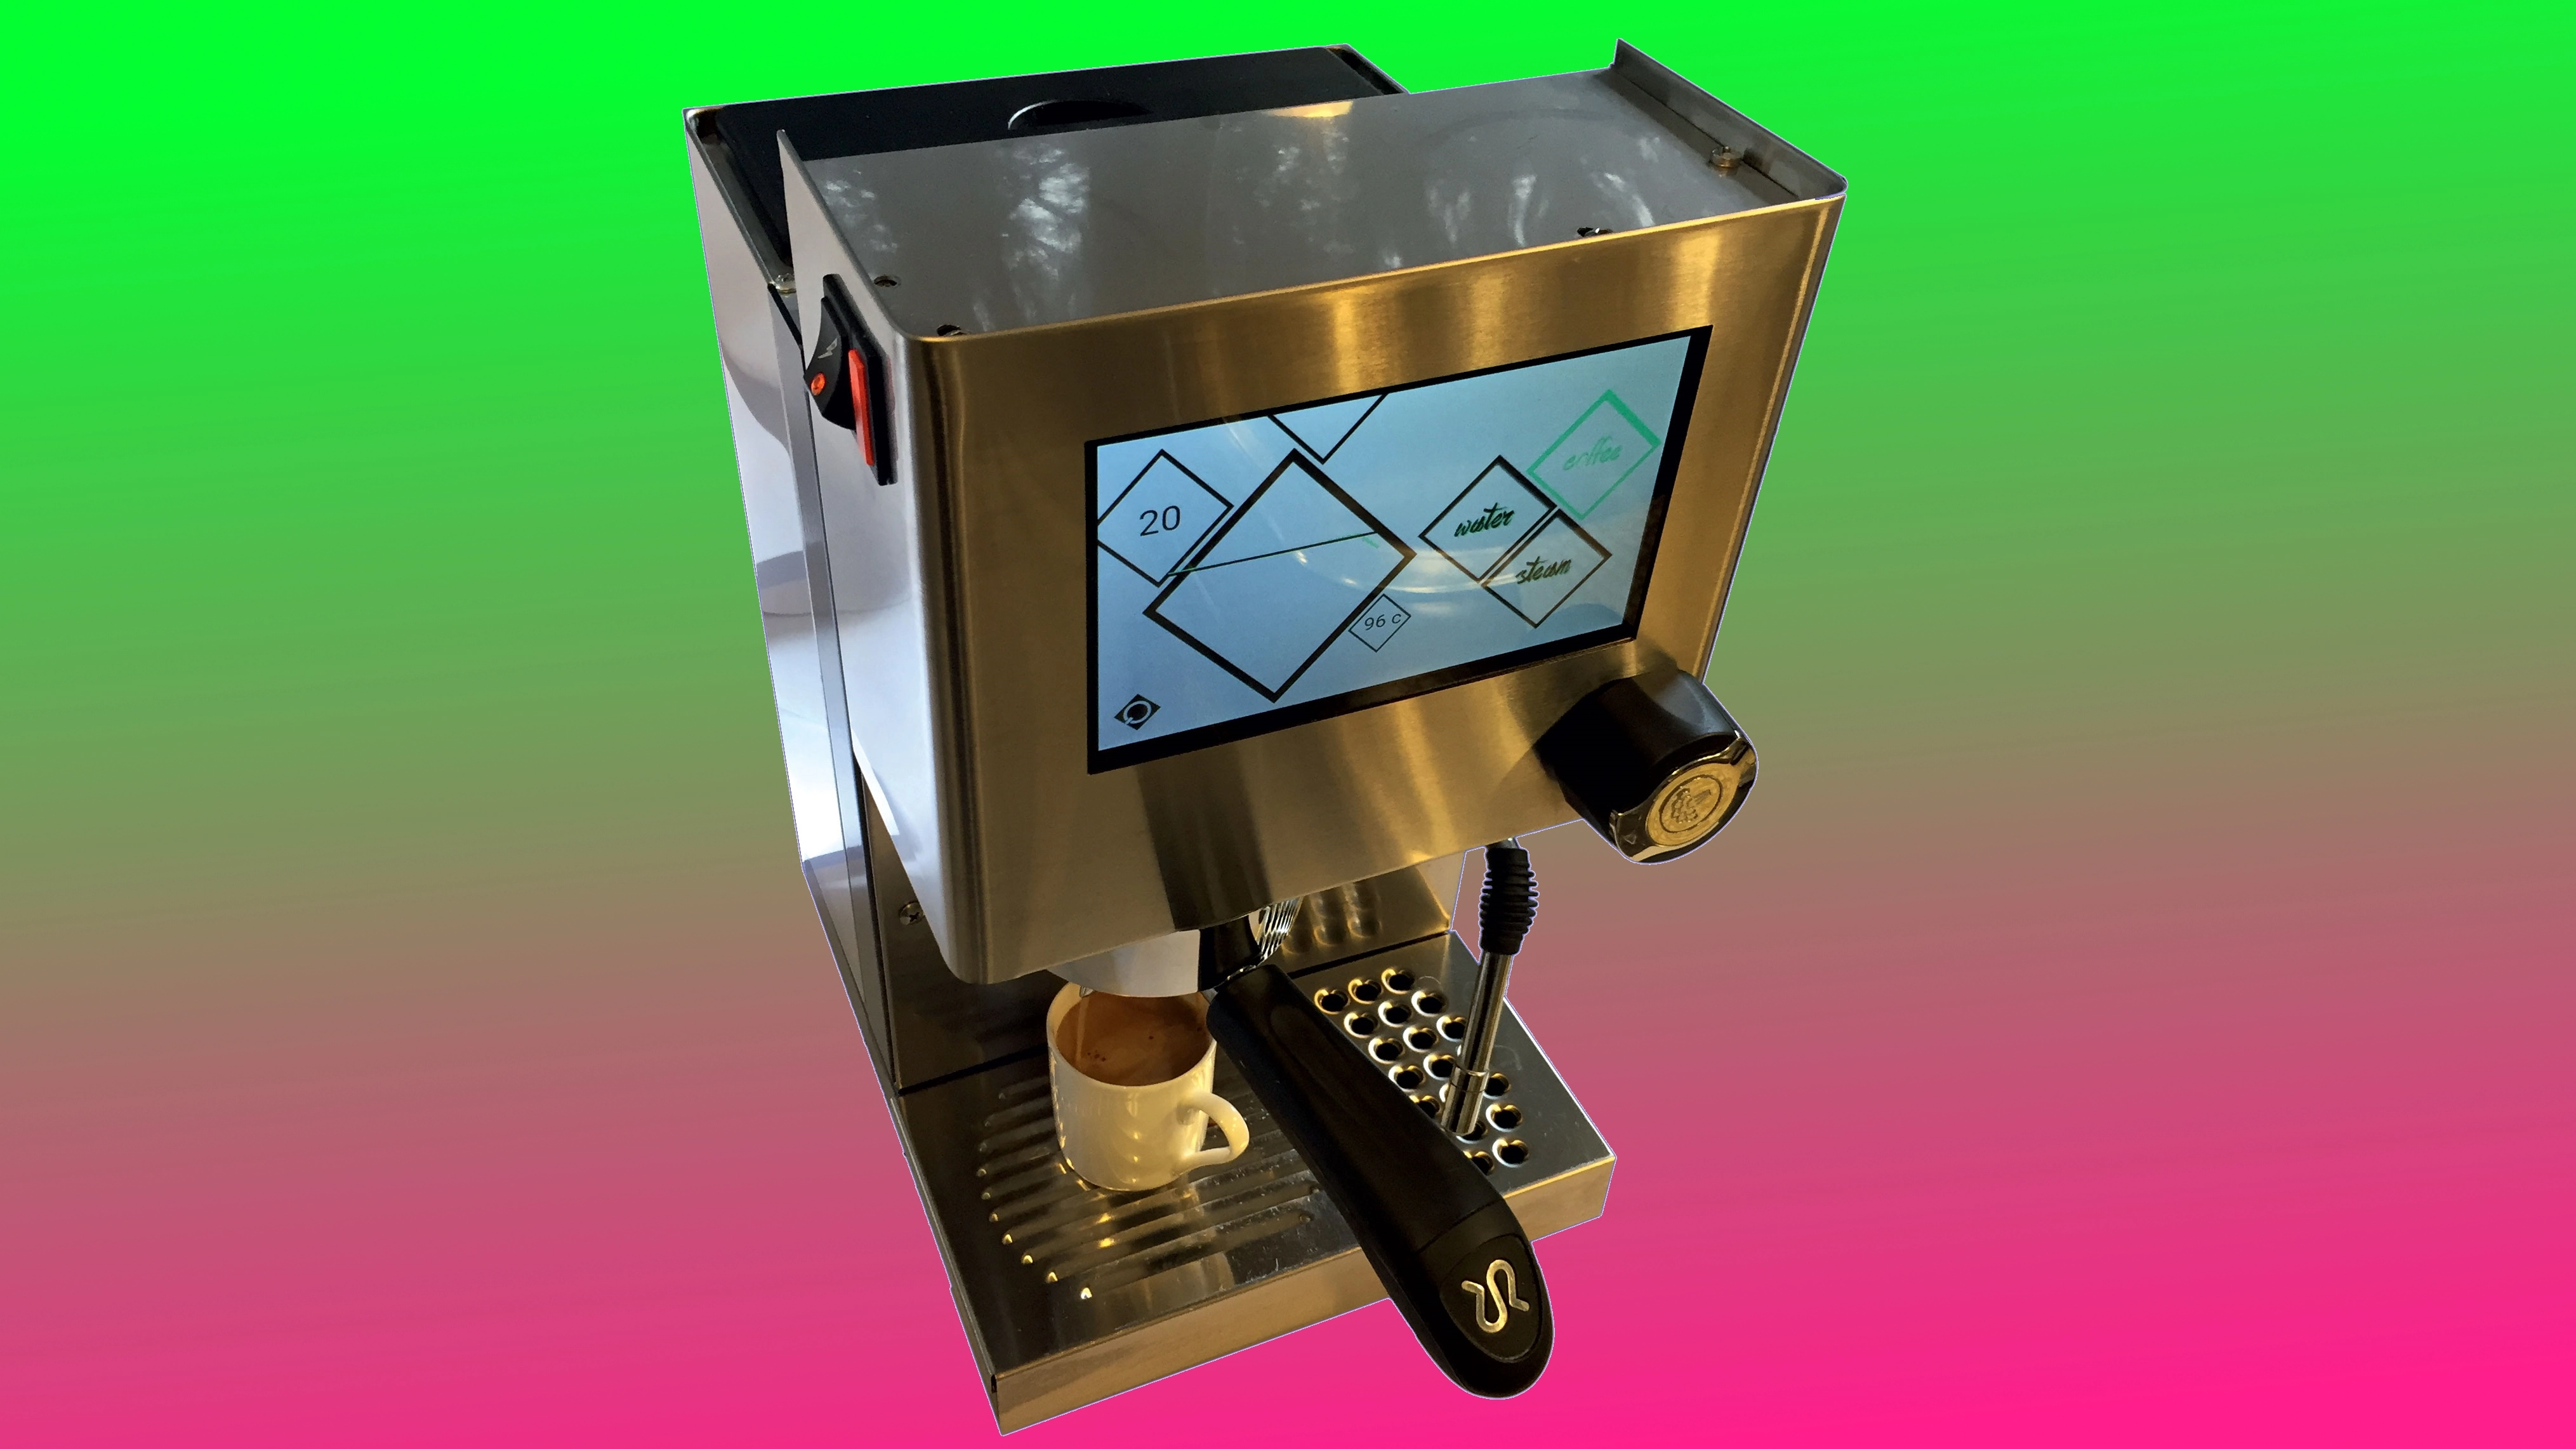
If you love coffee, you will most likely have a beautiful home espresso machine. Maybe even a Rancilio Silvia. The Silvia is a sleek, simple, robust, high-quality machine.
However, one downside of this coffee machine is that, like many others, it uses thermostats in order to control the brew temperature. Utilising thermostats to obtain precision and continuous temperature control is not very effective.
Article continues below- Try out more amazing Raspberry Pi projects
Step one will be to down a couple of double espressos. Then, it is time to get down to business. This hack will require some sweet skills in Linux, Kivy (for the front end GUI) and Python.
But don’t worry if you’re just a beginner – this tutorial is a great way to build up your skills. You’ll also need a soldering iron, basic electronic tools and a solid supply of coffee beans (for your own consumption).
Depending on how far you want to go with the build, you can also fabricate a new front panel (although this makes it a bit more expensive).
What you need
Hardware required for the Silvia-Pi build includes:
- Raspberry Pi 2
- Raspberry Pi 7-inch touchscreen
- Any coffee machine that could do with better temperature control
- Solid State Relay (SSR)
- 2x Double Pole Single Throw (DPST) relays
- 2x transistors & diodes (for the driver circuits on the DPST relays)
- Integrated power supply (your country’s input V AC in, 5 V DC out)
- k-type thermocouple
- 1x thermocouple amplifier (1-wire MAX31850K)
Why are you using an SSR? Why don’t you use a mechanical relay to control the boiler? Well…
This is because of the potentially high switching rate of the controller. In actual practice the switching rate is relatively low, and some low-end machines do use mechanical relays. However, mechanical relays typically fail open. SSRs typically fail closed.
This is definitely something to keep in mind when thinking about safety on your application. In addition, mechanical relays are only good for a specified number of cycles. What’s more, mechanical relays make a noise, while SSRs are quiet.
For this application a good SSR to use is the Kudom KSI240D10-L SSR: 10A 240V AC, 4–32V DC.
The K-type thermocouple temperature range is typically between –250ºC to 1250ºC, and accurate to ±1ºC. For signal processing purposes the K-type is easy to accommodate.
There are numerous varieties of Integrated Circuits that are packaged with amplifiers, filtering, cold-junction compensation and analog-to-digital converters that are specifically built for the K-type thermocouple and are low cost too.
Because of this the K-type is perfect for this coffee machine application.
The touchscreen
In order to troubleshoot, debug and get familiar with the functionality, you will need to start by setting up that 7-inch touchscreen on the Raspberry Pi.
Go to the element14 website and check out their Raspberry Pi 7-inch Touchscreen Display Tutorial. Once you’ve got it hooked up, have a play around with how beautifully Debian, the Pi and the touchscreen work together.
A Graphical User Interface
The GUI specification will be as follows: a real time plotting graph, a coffee button for pulling an espresso shot, a steam button to froth the milk, and a hot water button.
The plotting graph will enable you to see how effective the tuning of your PID controller is by incorporating the set point plot and the actual brew temperature plot – plus it gives your machine the hi-tech, precision-control image it deserves. The Espresso Standard does, after all, specify 88°C at the grouphead outlet
Getting familiar with Kivy
Kivy will be used to build the GUI. Why? Kivy is based on a simple app widget system. The Kivy widget system is easy to figure out. Kivy has good API support and tutorials on the Kivy website. Kivy also has a built-in settings widget manager that makes use of JSON configuration files.
This makes building apps quick and easy. You can modify the standard Kivy settings widget to include sleep and wake-up times. This allows you to set the grouphead to be nice and warm by the time you get out of bed and save power during off-peak times.
Kivy has a super useful plugin manager called Kivy Garden. Kivy also has cross platform functionality (Linux, Android, iOS, OS X, etc). Kivy Garden has some cool plugin widgets this hack will use, such as Graph. This hack utilises Graph for the real-time plotter. Coding with a FOSS IDE such as Eclipse and Secure Shelling into the Pi through your desktop is an effective way to implement this hack.
This will mean you have to set up Kivy on both your desktop and on your Raspberry Pi. Go ahead and do this by logging into your terminal and inputting $ pip install kivy then $ pip install kivy-garden followed by $ garden install graph
Building your Kivy app
Once Kivy is installed you can start building Kivy apps and getting familiar with the Kivy modules. Go to the Kivy website and look through the API library, or even follow the “first app” tutorial – a Pong app – to get your head around the code and the general layout of building Kivy apps.
Here we will be building a CoffeeApp , which will be a combination of Kivy widgets such as BoxLayout, Button, Label, Graph. So, time to get after it. In coffee.py:
#!/usr/bin/kivy
import kivy
from kivy.app import App
from kivy.uix.boxlayout import BoxLayout
class CoffeeApp(App):
 def build(self):
  # Add parent widget
  root = BoxLayout(orientation='horizontal')
  verticalBtns = BoxLayout(orientation='vertical’, size_hint_x
= 0.25)
 # Add child widgets here then add them to the parent
"root."
  return root
# Run the script
if __name__ == '__main__':
CoffeeApp().run()
The above code will create a stock standard BoxLayout Kivy app with a parent widget named root. You will also notice verticalBtns BoxLayout – you will use this to separate your buttons from your graph and display them vertically in the right quarter of the app.
size_hint_x = 0.25. You won’t be able to see this size hint in effect until you add the graph later on. Adding buttons and graphs into the widget is as simple as creating the widget
coffeeButton=Button(text='coffee')and then adding it to the parent widget:
verticalBtns.add_widget(coffeeButton)In this case you will add the three buttons (coffee, steam and water) by repeating this code for each button. You use the simple BoxLayout which handles the position and the size of the buttons within the app’s parent widget root, therefore you need to add verticalBtns to the root widget by adding the following:
root.add_widget(verticalBtns) 
Buttons, bindings and events
Now to get your three buttons sorted. Run the code and you see three buttons arrayed vertically down the app. If you are running via SSH or direct to your Raspberry Pi you will see the app run straight to the 7-inch touchscreen.
Try pressing the buttons to see what happens… Not much? You will see the buttons change from grey to light blue, but that’s about it. Time to bind those buttons to get some functionality. By using bind method and defining on_press() and on_release() methods you can specify what happens.
Start with adding functionality to the coffeeButton in your code. Between creating the buttons and adding the buttons to root, call the following bind method by adding the following code:
coffeeButton.bind(on_press = self.coffeePress_callback)and
coffeeButton.bind(on_release = self.coffeeRelease_callback)Now you need to define the methods within the CoffeeApp class:
coffeePress_callback(self, *args)and
coffeeRelease_callback(self, *args)Do this above the build method within the class. Add some print statements in there as tracers to see if anything happens on press and release, and run the app again.

You will now find on pressing the coffee button that your print statements will be outputted to the terminal. Repeat the above steps again for the steam and water buttons.