How to send secure email messages with Bitmessage
Secure messaging

If you're concerned about the privacy of your emails being compromised, then you should think about using a service that encrypts your messages for the ultimate in security and privacy.
Traditional encryption methods are 'symmetric' in that the key used to encrypt data such as a password can also be used to decrypt it. Meanwhile, asymmetric cryptography uses a separate 'public' key to encrypt data and a 'private' key to decrypt it.
This has been harnessed by programs like PGP (Pretty Good Privacy) to allow emails to be sent securely as users can share their public key with everyone they know to receive messages only they can decrypt.
The Bitmessage client takes this a step further by allowing you to generate any number of addresses where you can receive messages. As public key crypto is built in, even if someone were to intercept your messages they'd be unreadable. Better yet, messages are automatically digitally signed before being broadcast over the network making it almost impossible for somebody to impersonate someone else.
In this guide we'll show you how to set up Bitmessage, generate your own digital addresses and send your first messages.
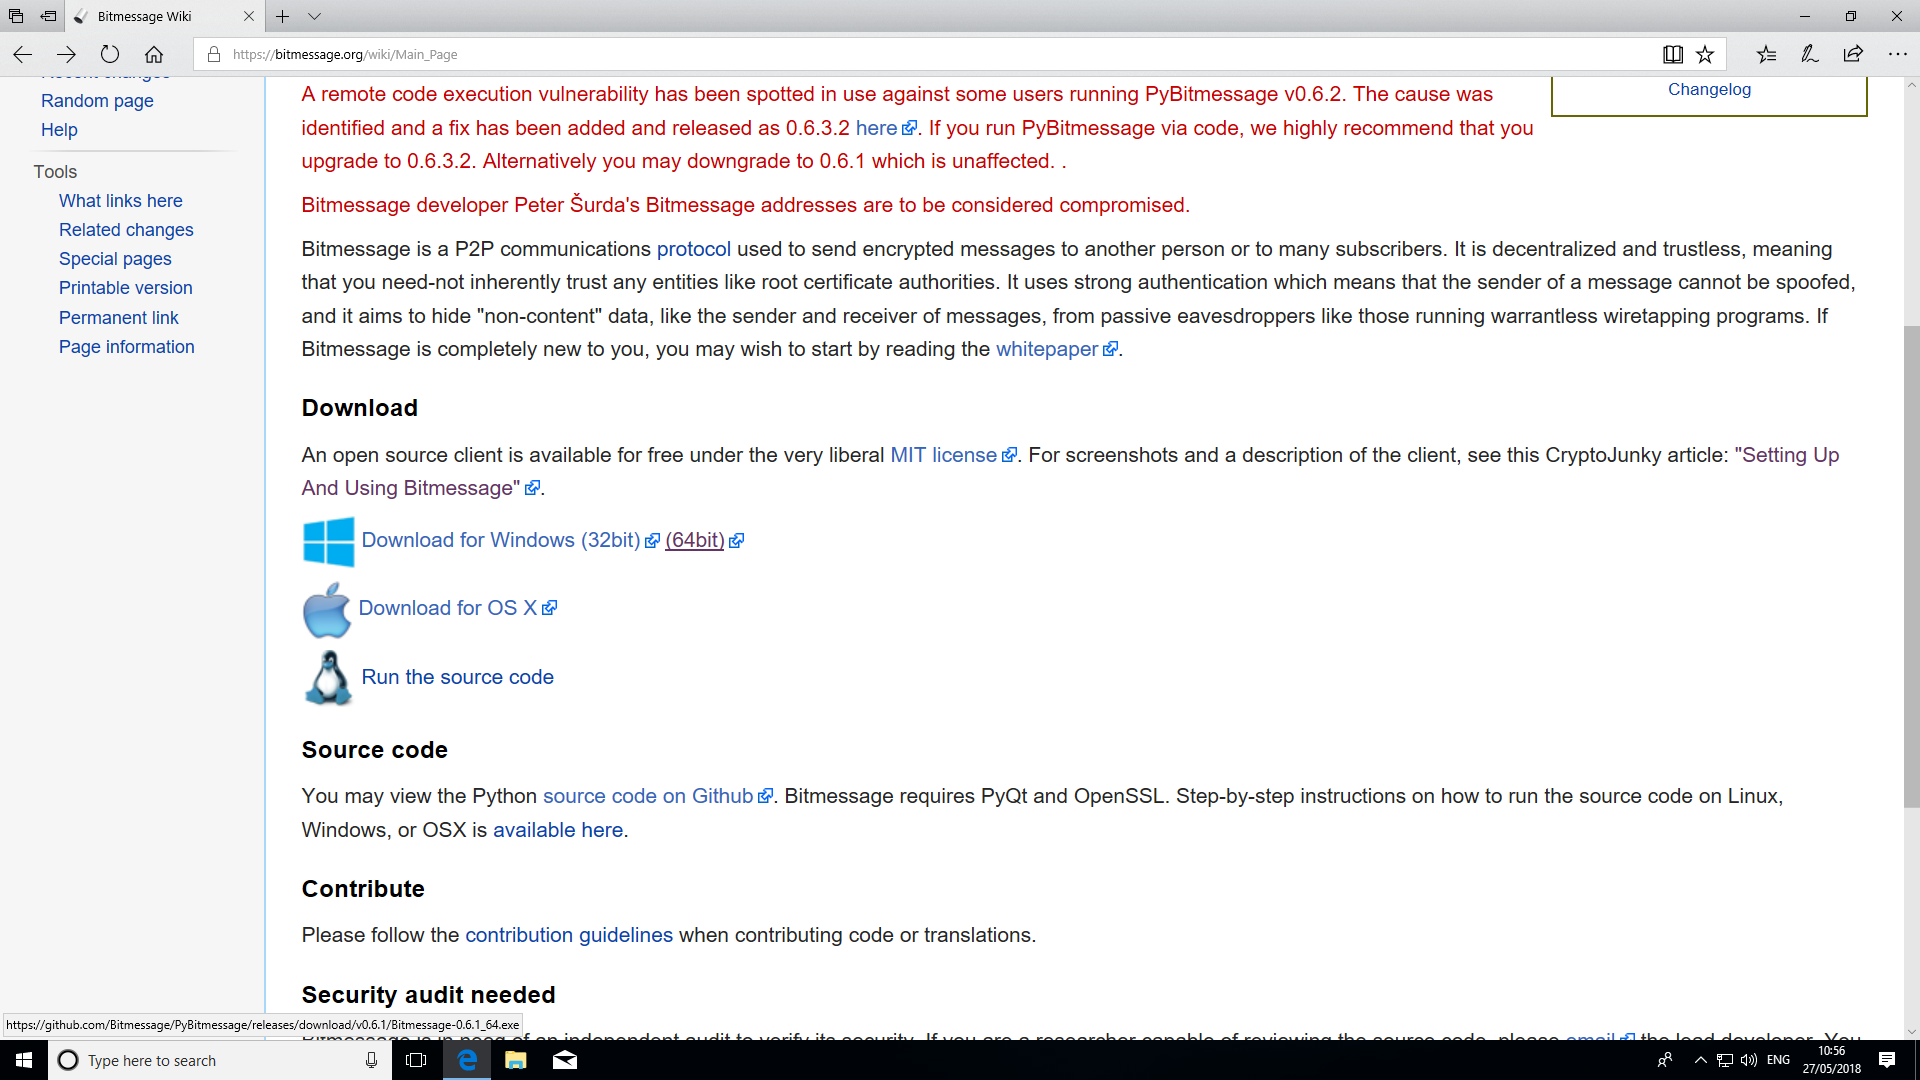
1. Download Bitmessage
Open your web browser and navigate to the Bitmessage website. Scroll down to the 'Download for Windows' section and click the correct link for your processor (if you are unsure choose 64bit).
If you are using Microsoft Edge, select 'Save' then 'Run' the installer. If you are using a different browser, open your 'Downloads' folder and run the application from there.
Sign up for breaking news, reviews, opinion, top tech deals, and more.
The PyBitmessage executable can be run from any location such as a folder or USB drive. Note however that by default it will place your Bitmessage configuration in '%APPDATA%\PyBitmessage'. These files can be placed in the same directory as PyBitmessage by enabling 'Portable mode' once set up is complete.
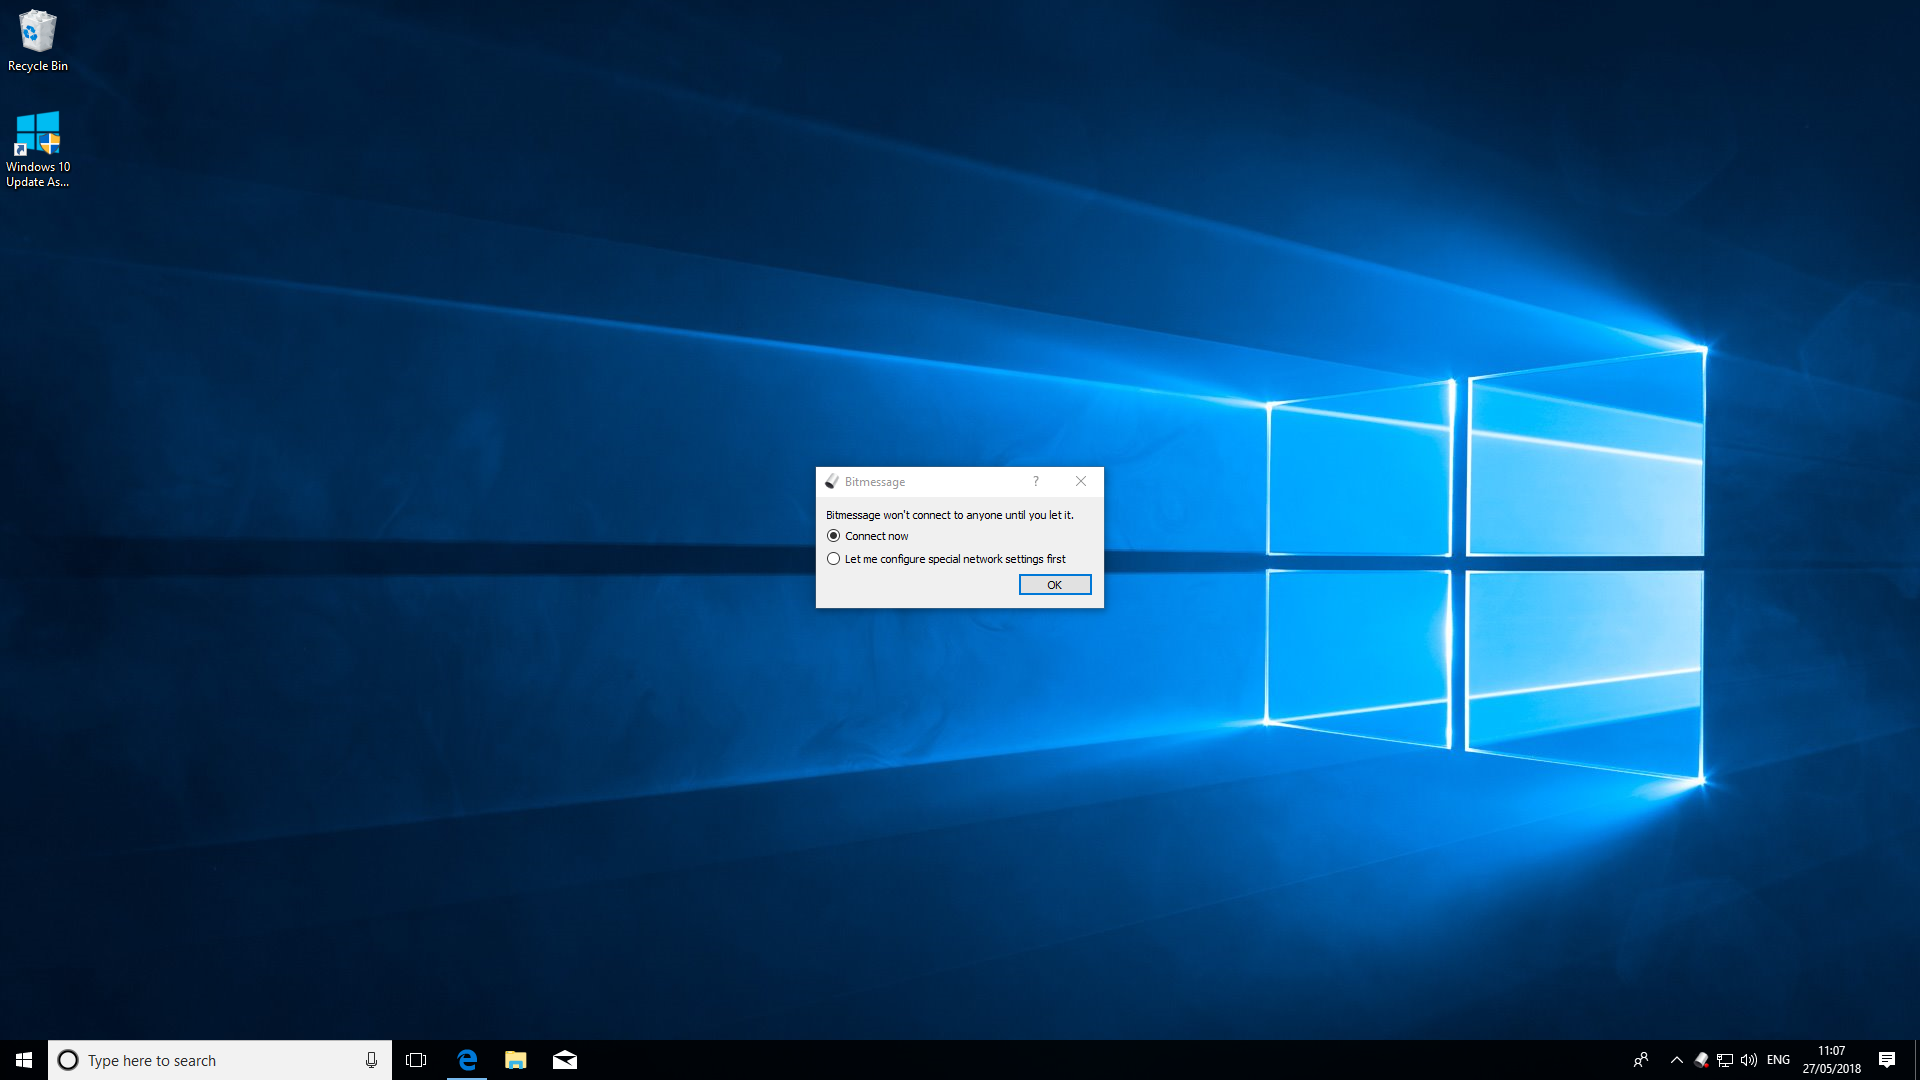
2. Configure Network Settings
On first launch, the Bitmessage client will ask how you connect to the internet. In most cases you can safely select 'Connect Now' then click the 'OK' button.
If your computer connects to the internet via a proxy server, choose 'Let me configure special network settings first' to input your network settings. At this stage Windows 10 may show an alert.
Check the box to allow Bitmessage to connect to Private networks then choose 'Allow Access'. The Network Status icon at the bottom right of the Bitmessage window will appear red, yellow or green to show that it cannot connect to any peers, is connected to outgoing peers only, or can accept both incoming and outgoing connections, respectively. A yellow icon is sufficient for Bitmessage to work.
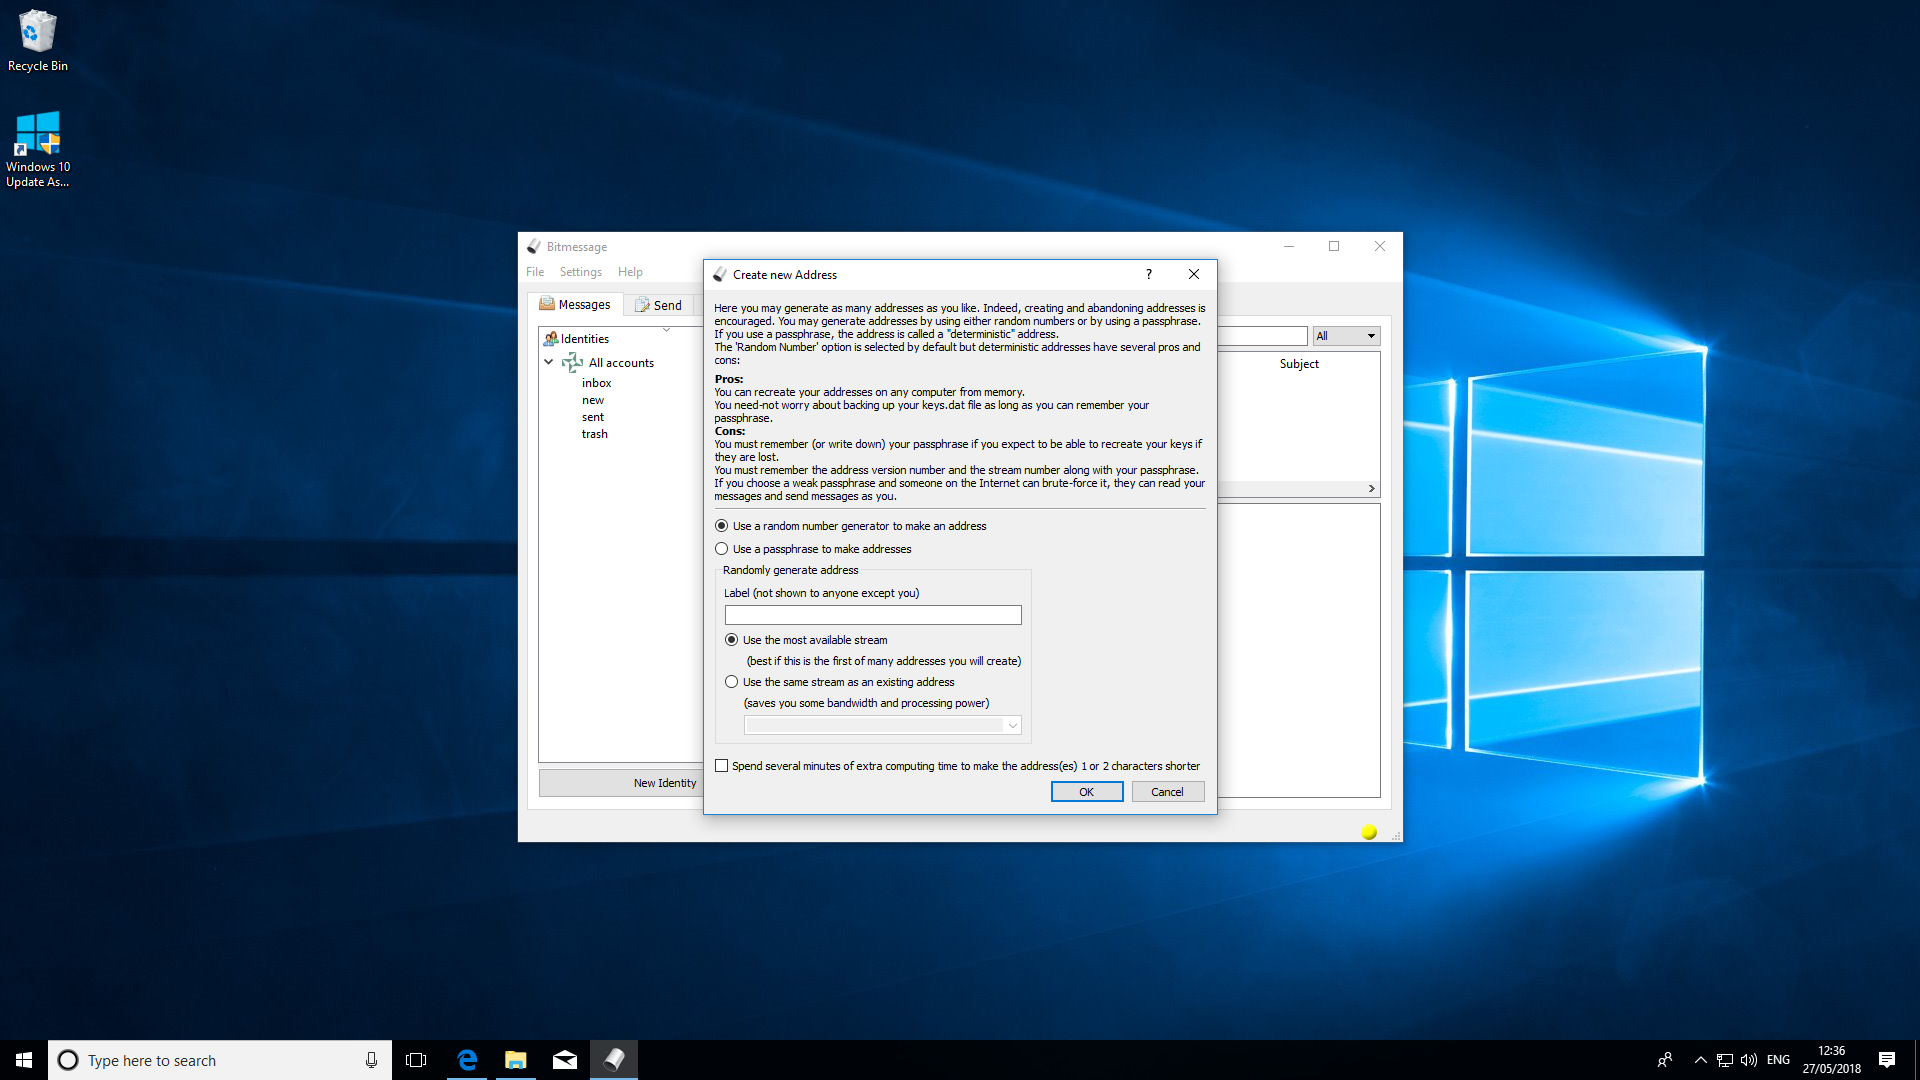
3. Create an 'Identity'
The key to Bitmessages' security lies in your ability to generate new 'Identities'. These are addresses your contacts can use to message you securely. To get started click the 'New Identity' button on the bottom left of the Bitmessage client window.
You can generate addresses in one or two ways. The first way is to use a random number generator to create your addresses. This is the quickest and easiest way to get started with Bitmessage, which is why it is the default option.
Alternatively, you can create 'deterministic addresses' using a passphrase. We recommend using Diceware to generate strong passwords.
Choose either 'Use a random number generator to make an address' or 'Use a passphrase to make addresses' then click 'Ok' to continue.
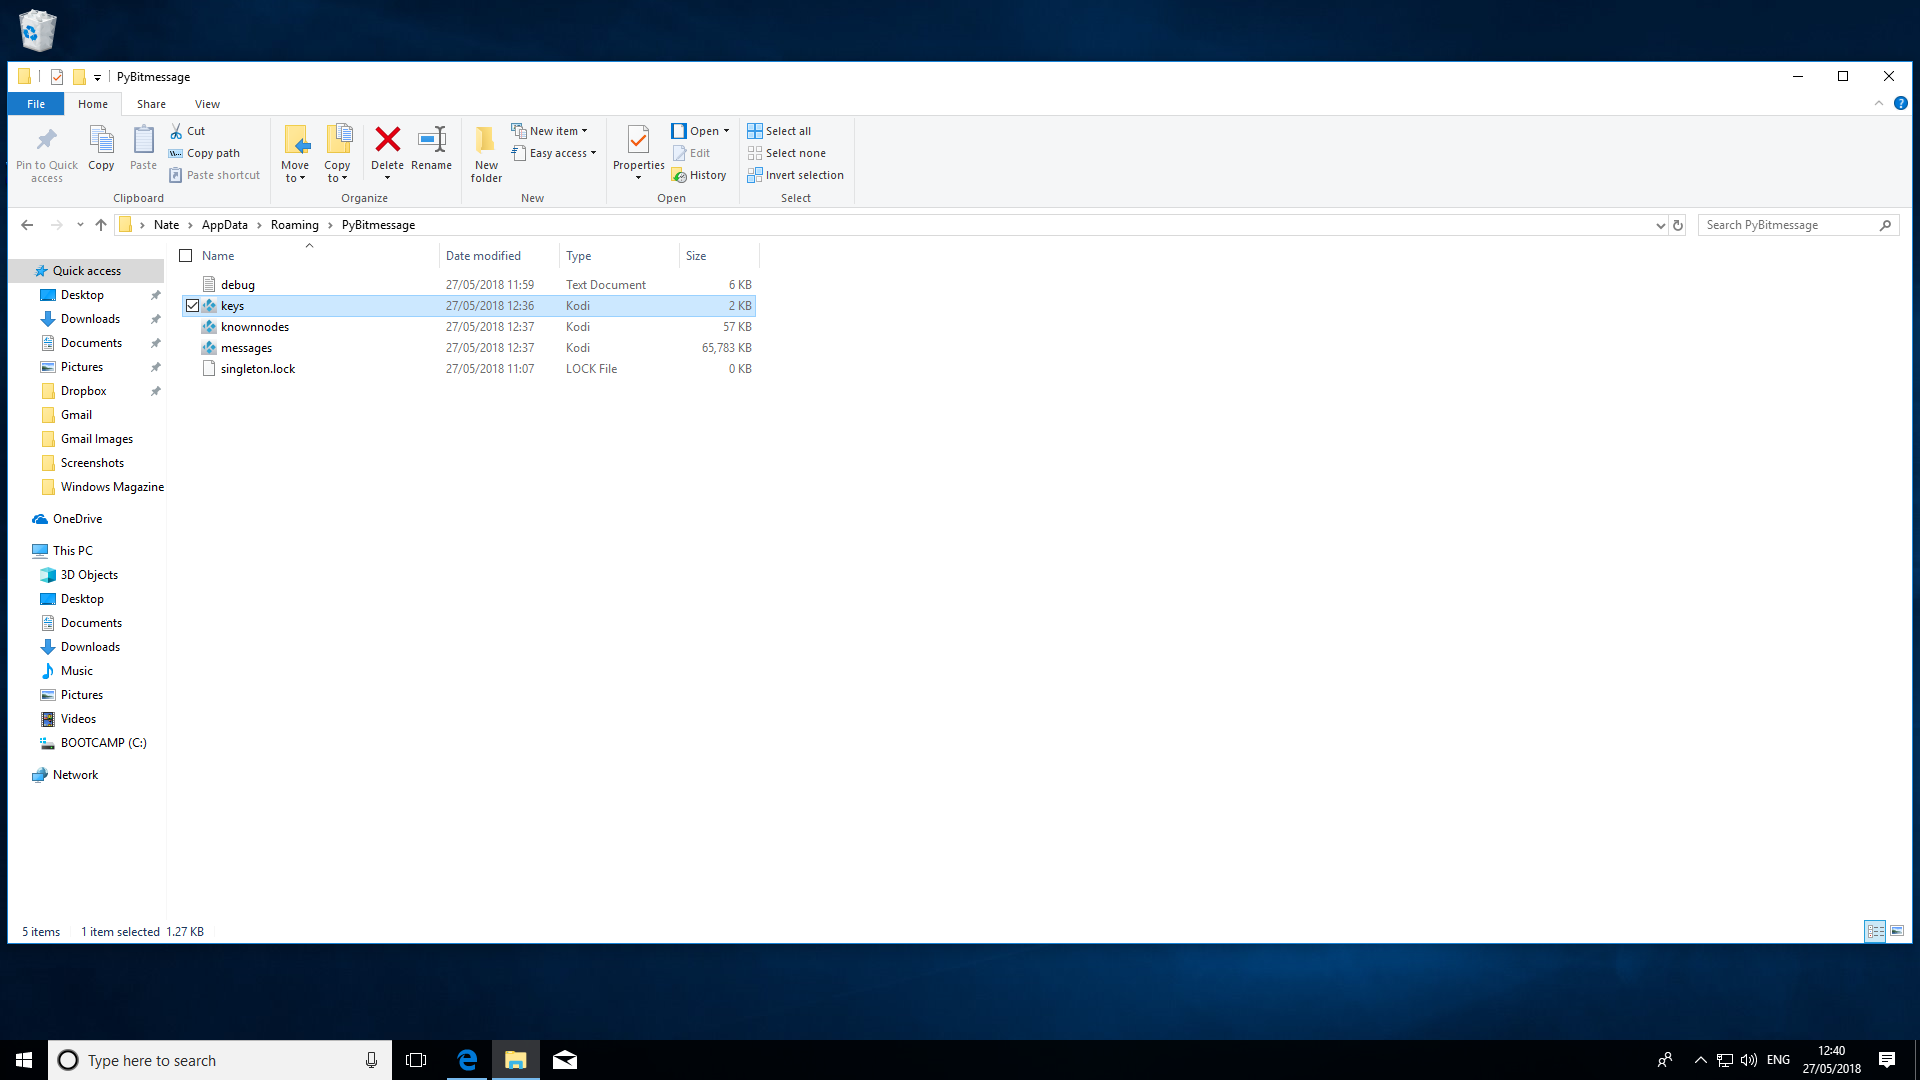
4. Back up Bitmessage keys
If you chose to create a Bitmessage identity using the random number generator, the configuration data will be saved to the file 'keys.dat' in '%APPDATA%\PyBitmessage'.
If this file is lost or damaged, you won't be able to send or receive any messages using the Bitmessage identities you previously created.
To keep your messages safe, make sure to backup 'keys.dat' to a secure location. Remember that in the wrong hands this file can be used to impersonate you, so consider copying to an encrypted airgapped drive.
If you've chosen a deterministic address, write your passphrase down in a safe place. Check out our list of the top recommended passwords managers for tools to help you.
5. Manage your Bitmessage addresses
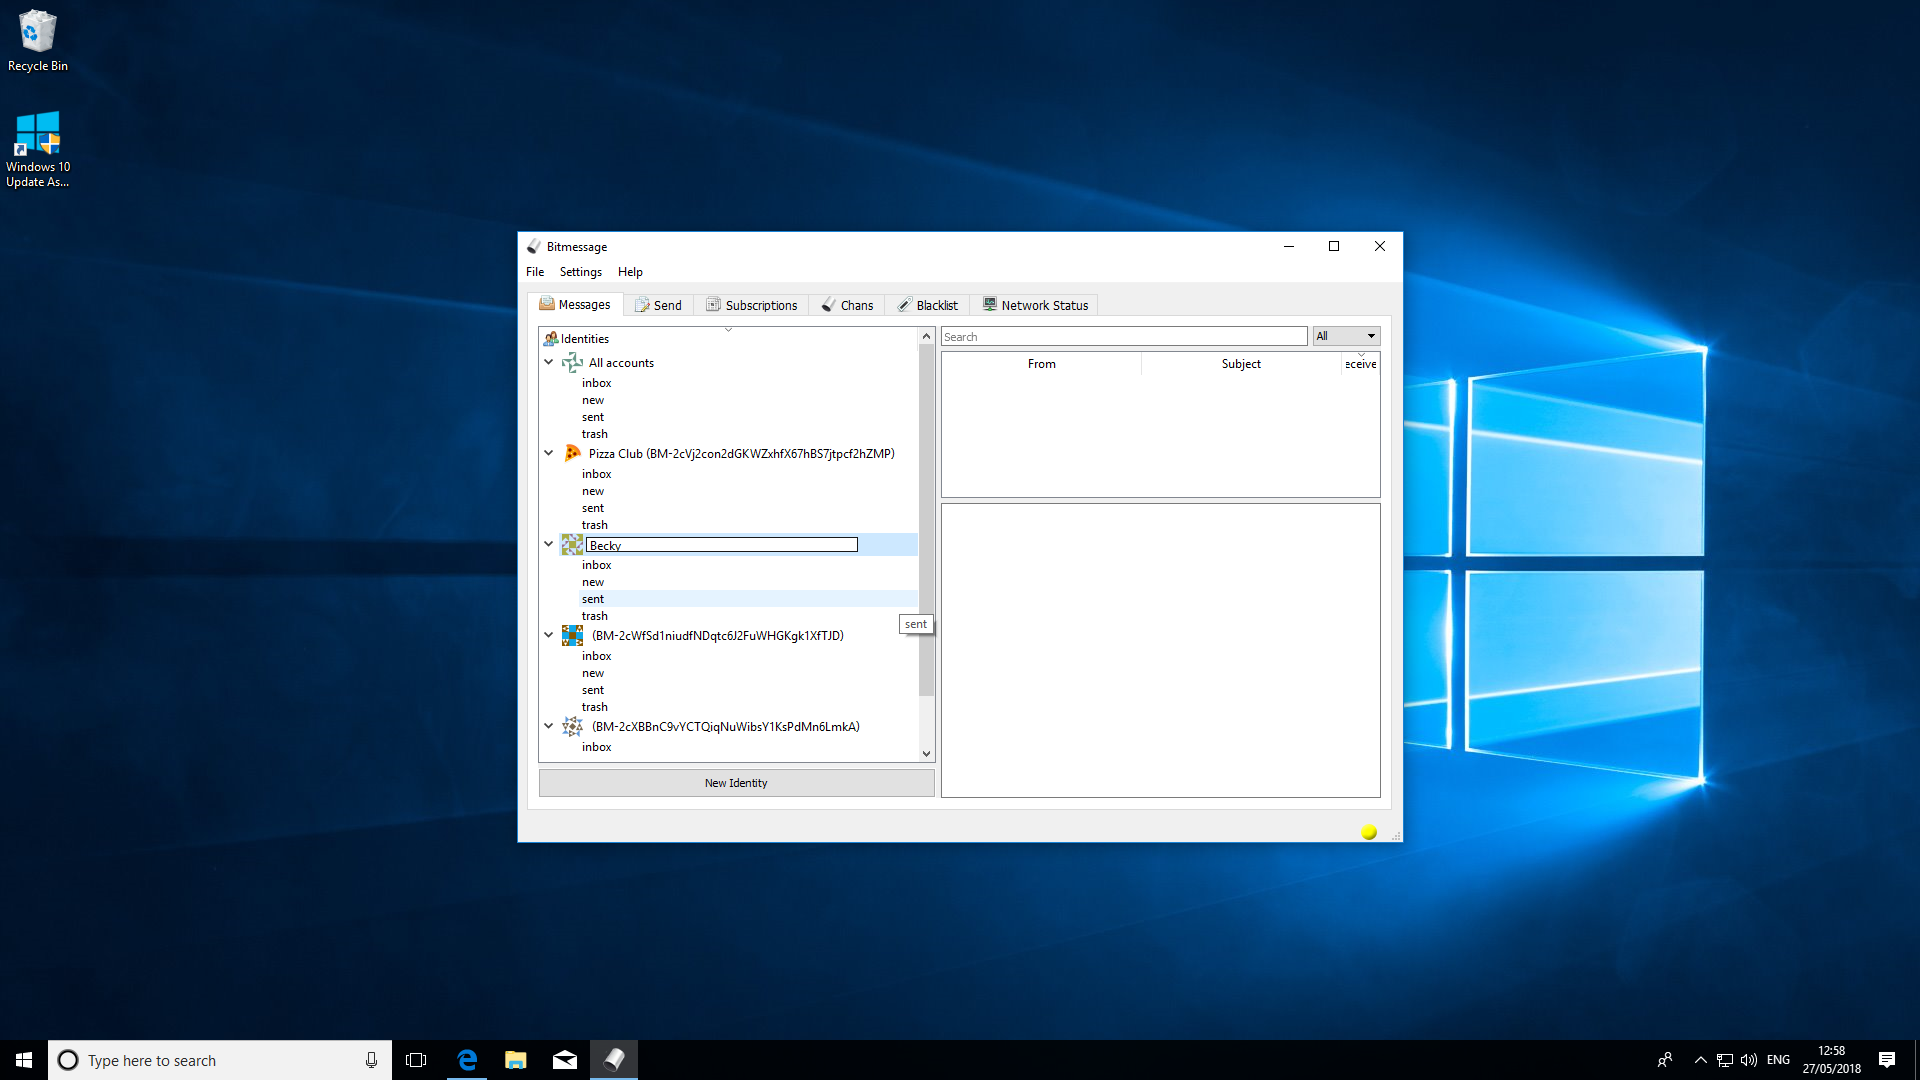
Any Identities that you create are listed in the white box marked 'Identities'. The addresses are designed to be machine readable so first make sure to double click on each one and set a label to give it a more memorable name.
For extra ease of access, click on an address and choose 'Set avatar'. From here you can select an appropriate image.
To view messages sent to individual addresses, simply click on the identity in question. To deactivate an address, right-click it and choose 'Disable'. For best security make sure to generate new addresses regularly as this makes your messages harder to intercept.
6. Manage your contacts
Once you've generated your own identities ask your friends and loved ones to go through the preceding steps and do the same. You will then be able to share your Bitmessage addresses with each other.
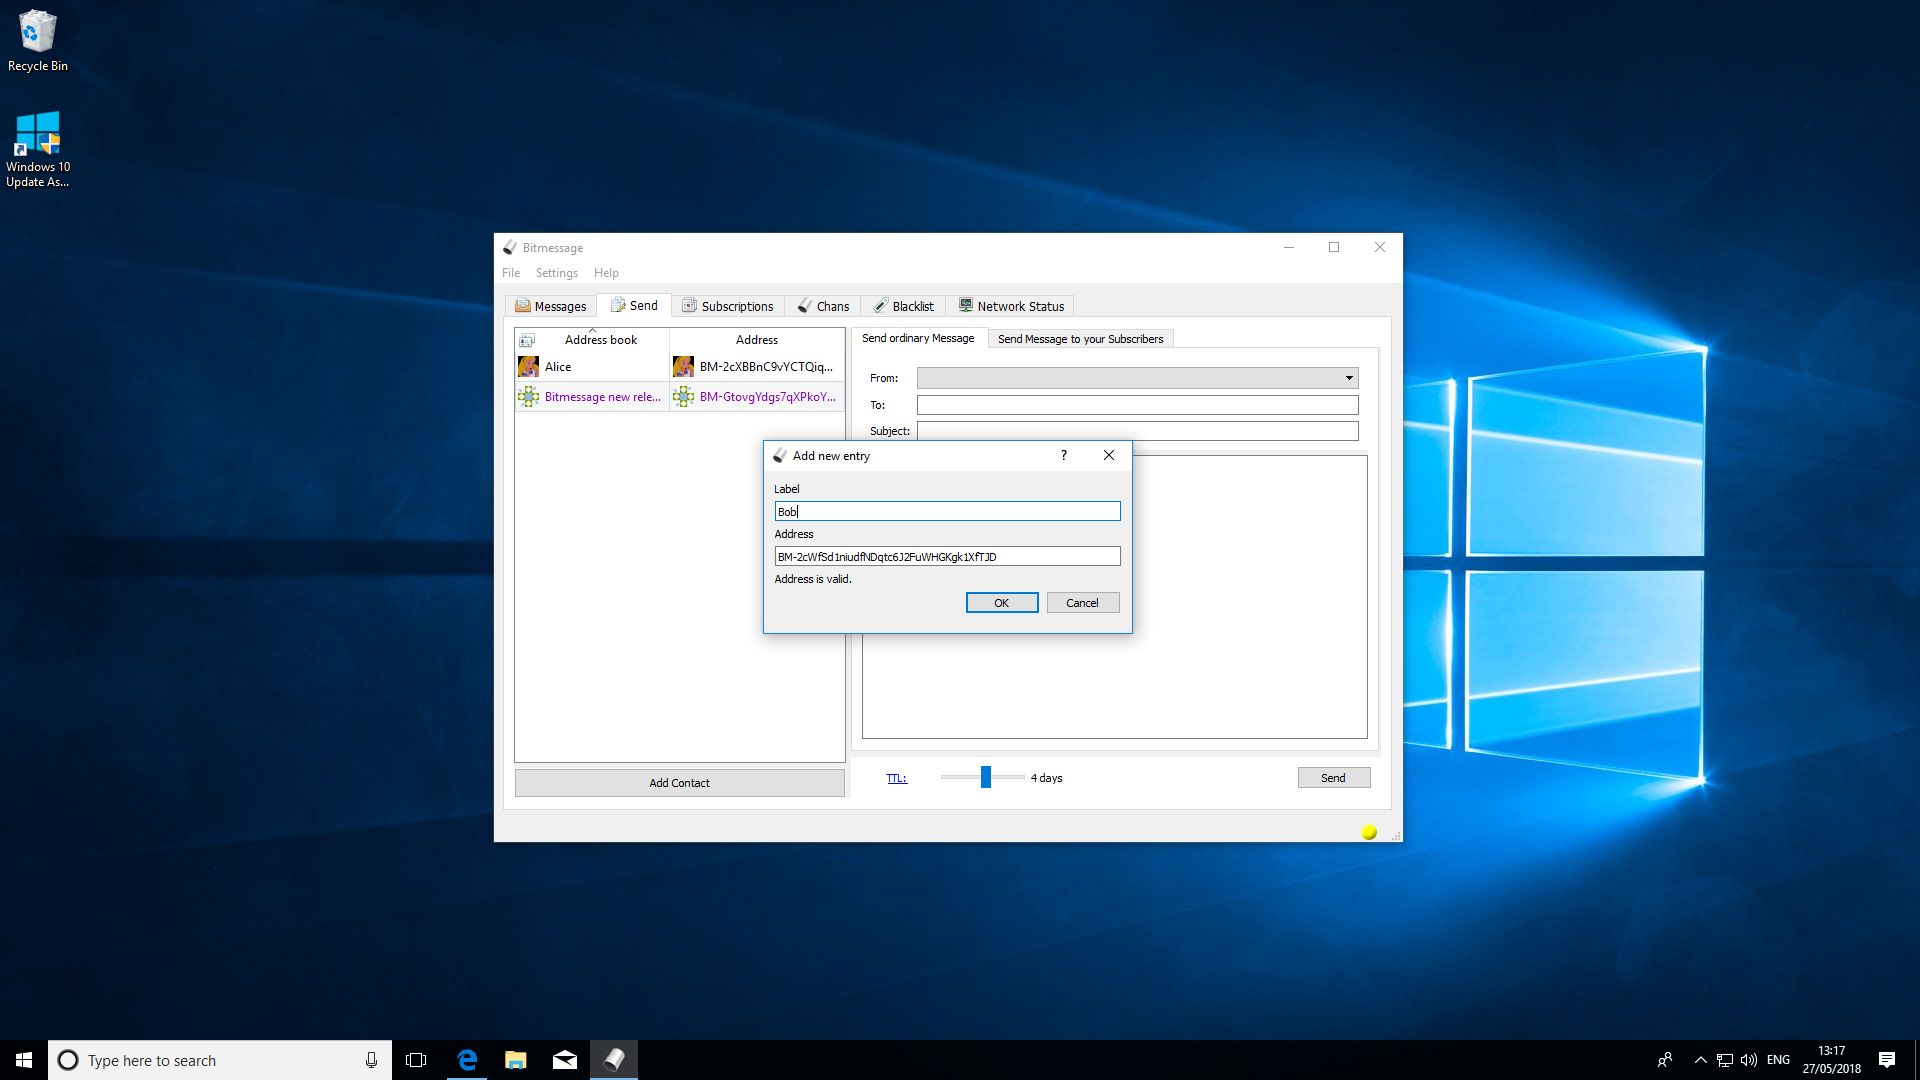
When you have your contacts' addresses, head over to the 'Send' tab and click 'Add Contact' at the bottom left of the window. From here you enter both their Bitmessage address and a label for easy recall. Click 'Ok' when you are done.
Just as with your own identities, you can also write click address book contacts and 'Set an avatar' if you wish.
7. Send your first message
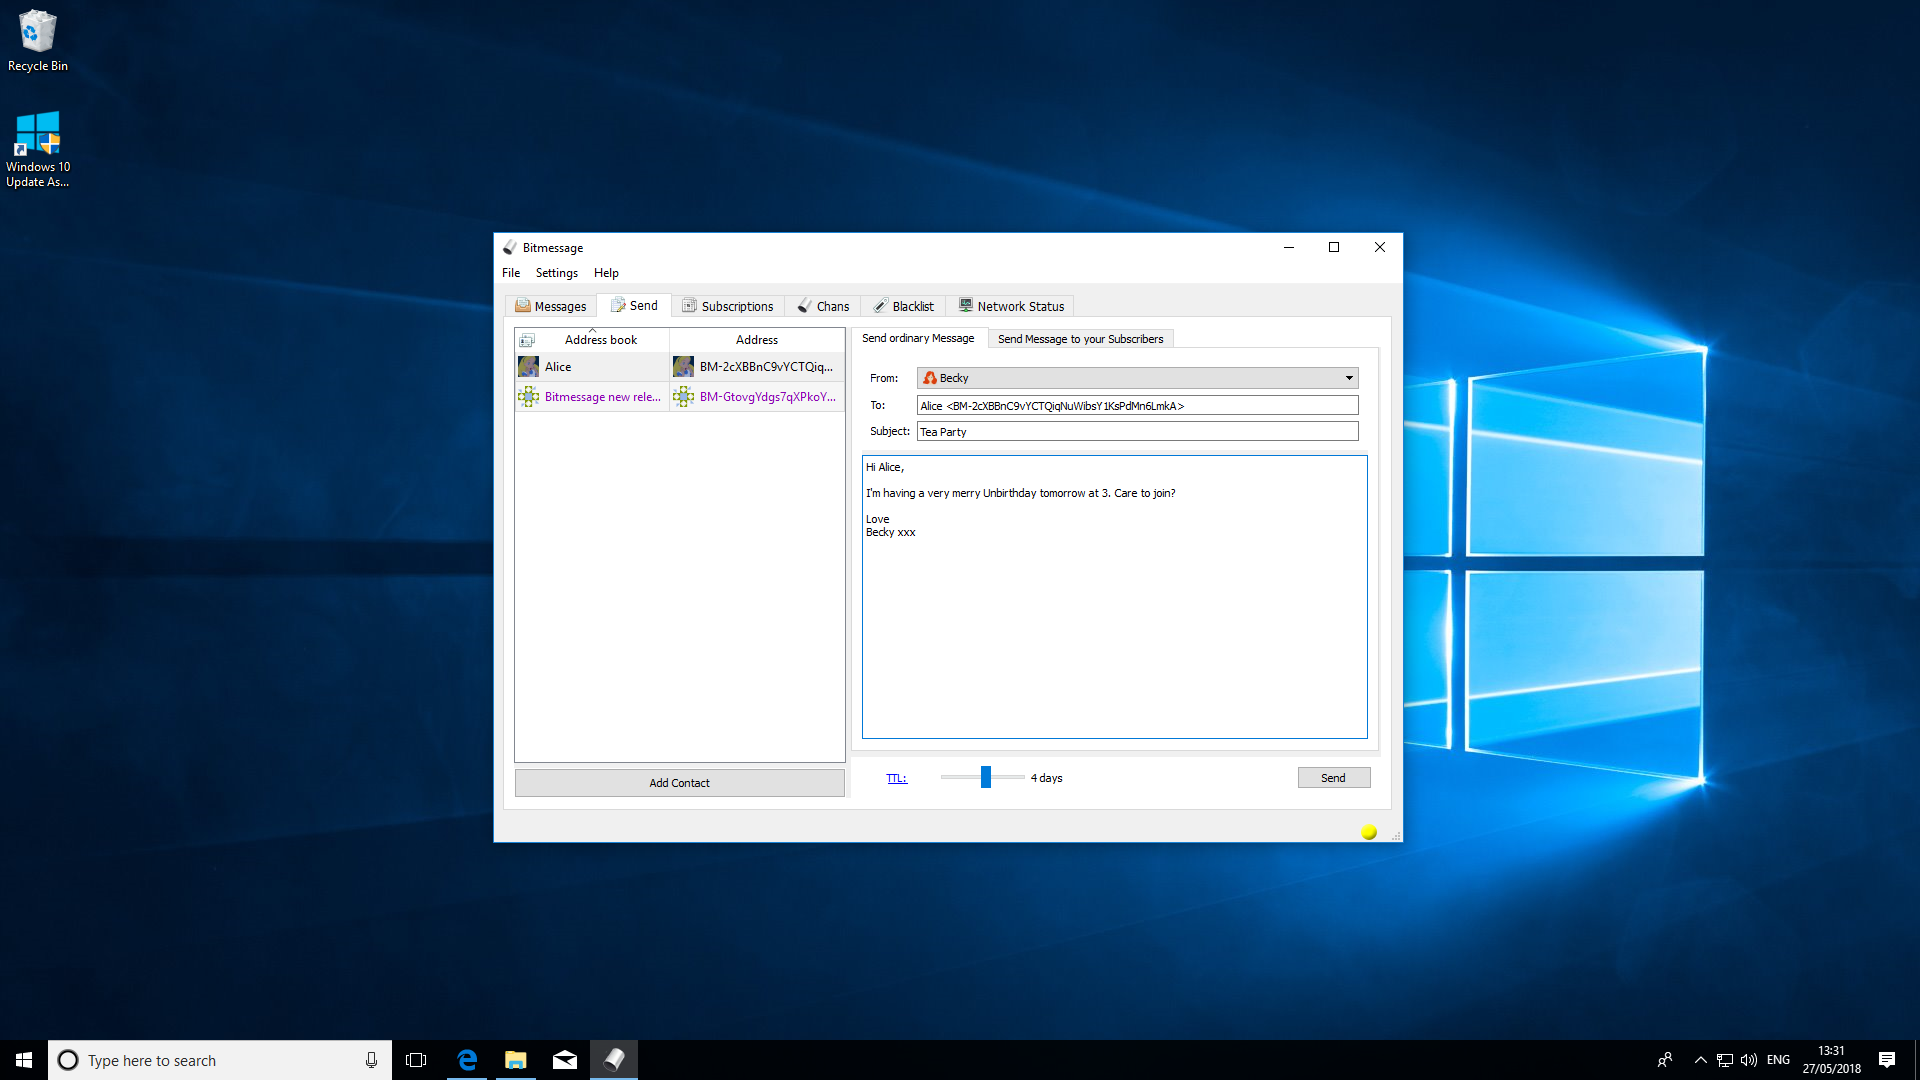
Now that your contacts are in your address book, click the 'Send' tab to compose your first message.
Use the drop-down menu next to 'From' to select the identity from which you want to send the message. In the 'To' field enter the first few letters of a contact name e.g. "Al" for "Alice".
The Bitmessage client will auto complete the address for you. Use the fields below to enter a subject line and message body respectively. Click the 'Send' button at the bottom right.
8. Blacklists and Whitelists
The Bitmessage protocol has powerful built in protection against spammers, as each message sent requires the client to complete a 'proof of work' algorithm. The longer and more frequent the messages, the greater amount of system resources required.
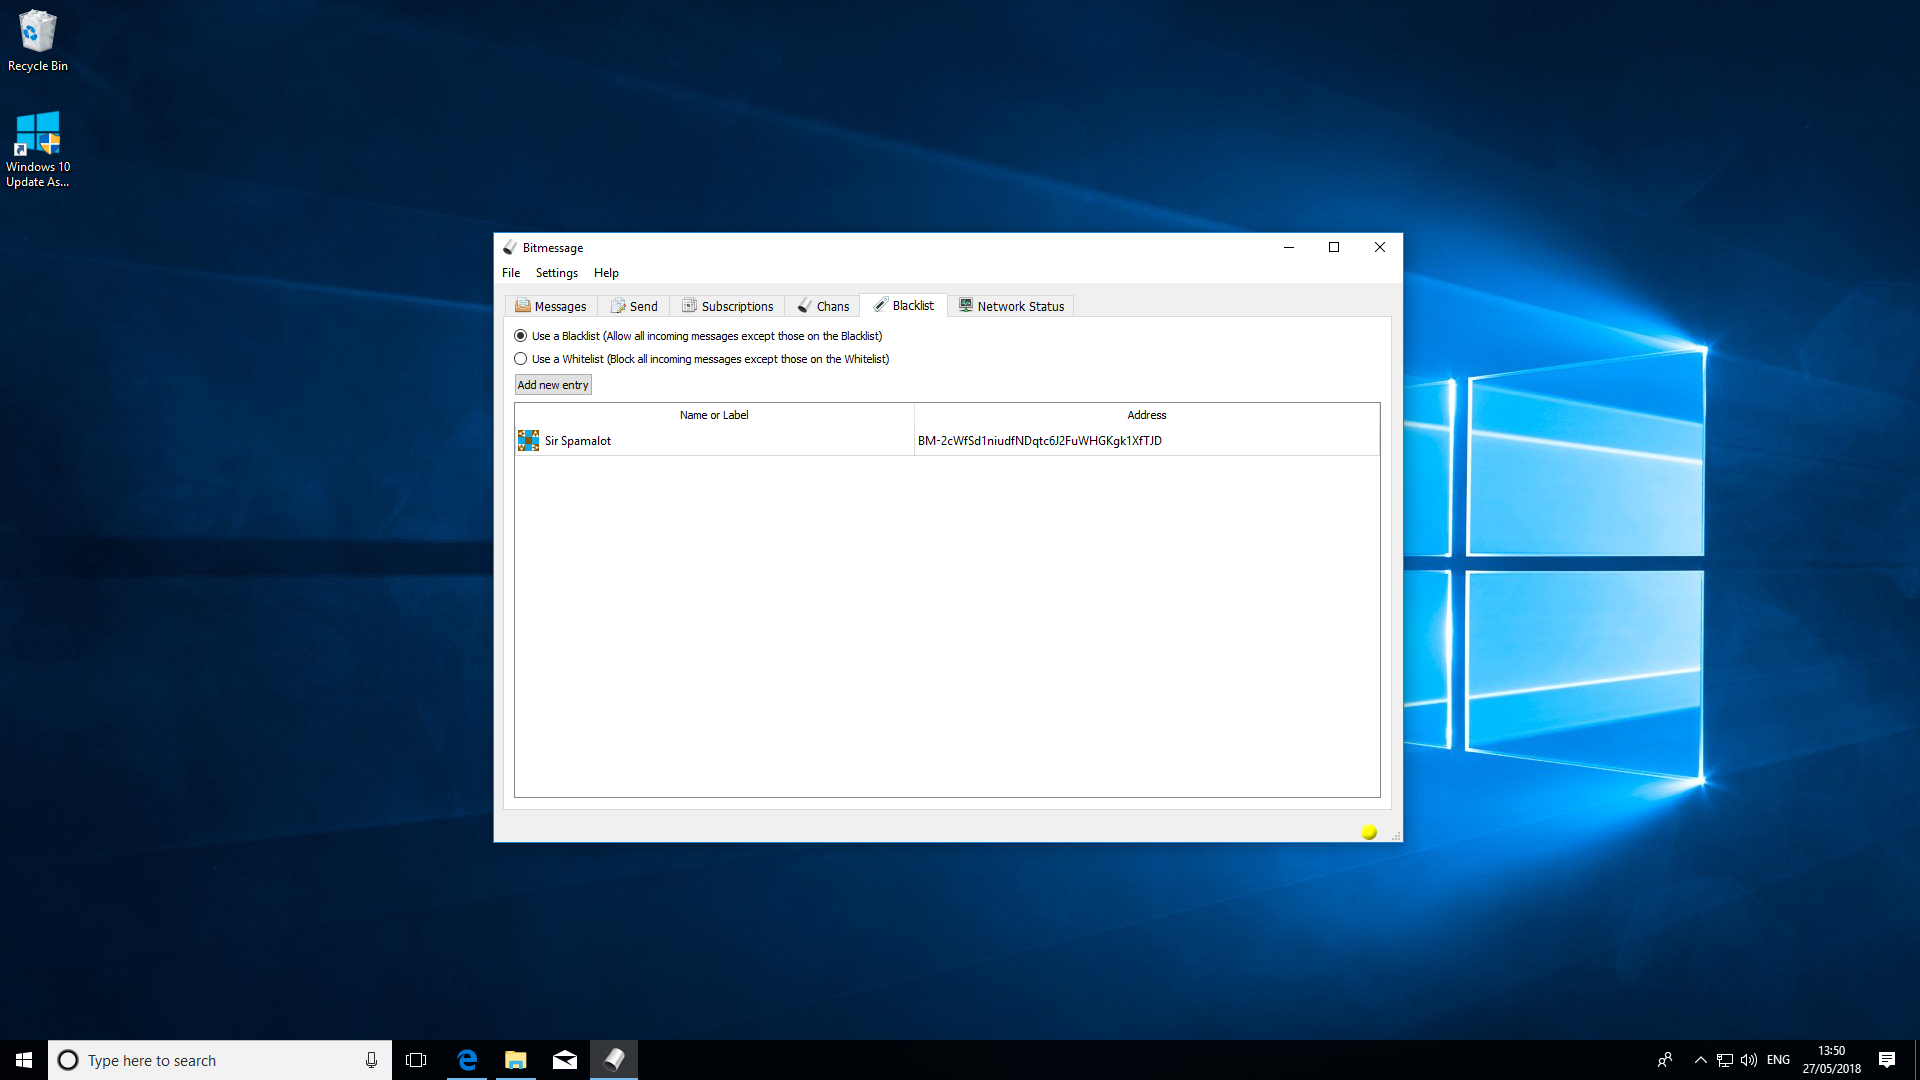
You can also prevent spam by regularly disabling old identities and creating new ones so that only trusted contacts have your address. If all else fails, click on the 'Blacklist' tab. From here, you can block select addresses or setup an exclusive 'Whitelist' so that only messages from pre-approved addresses get through.
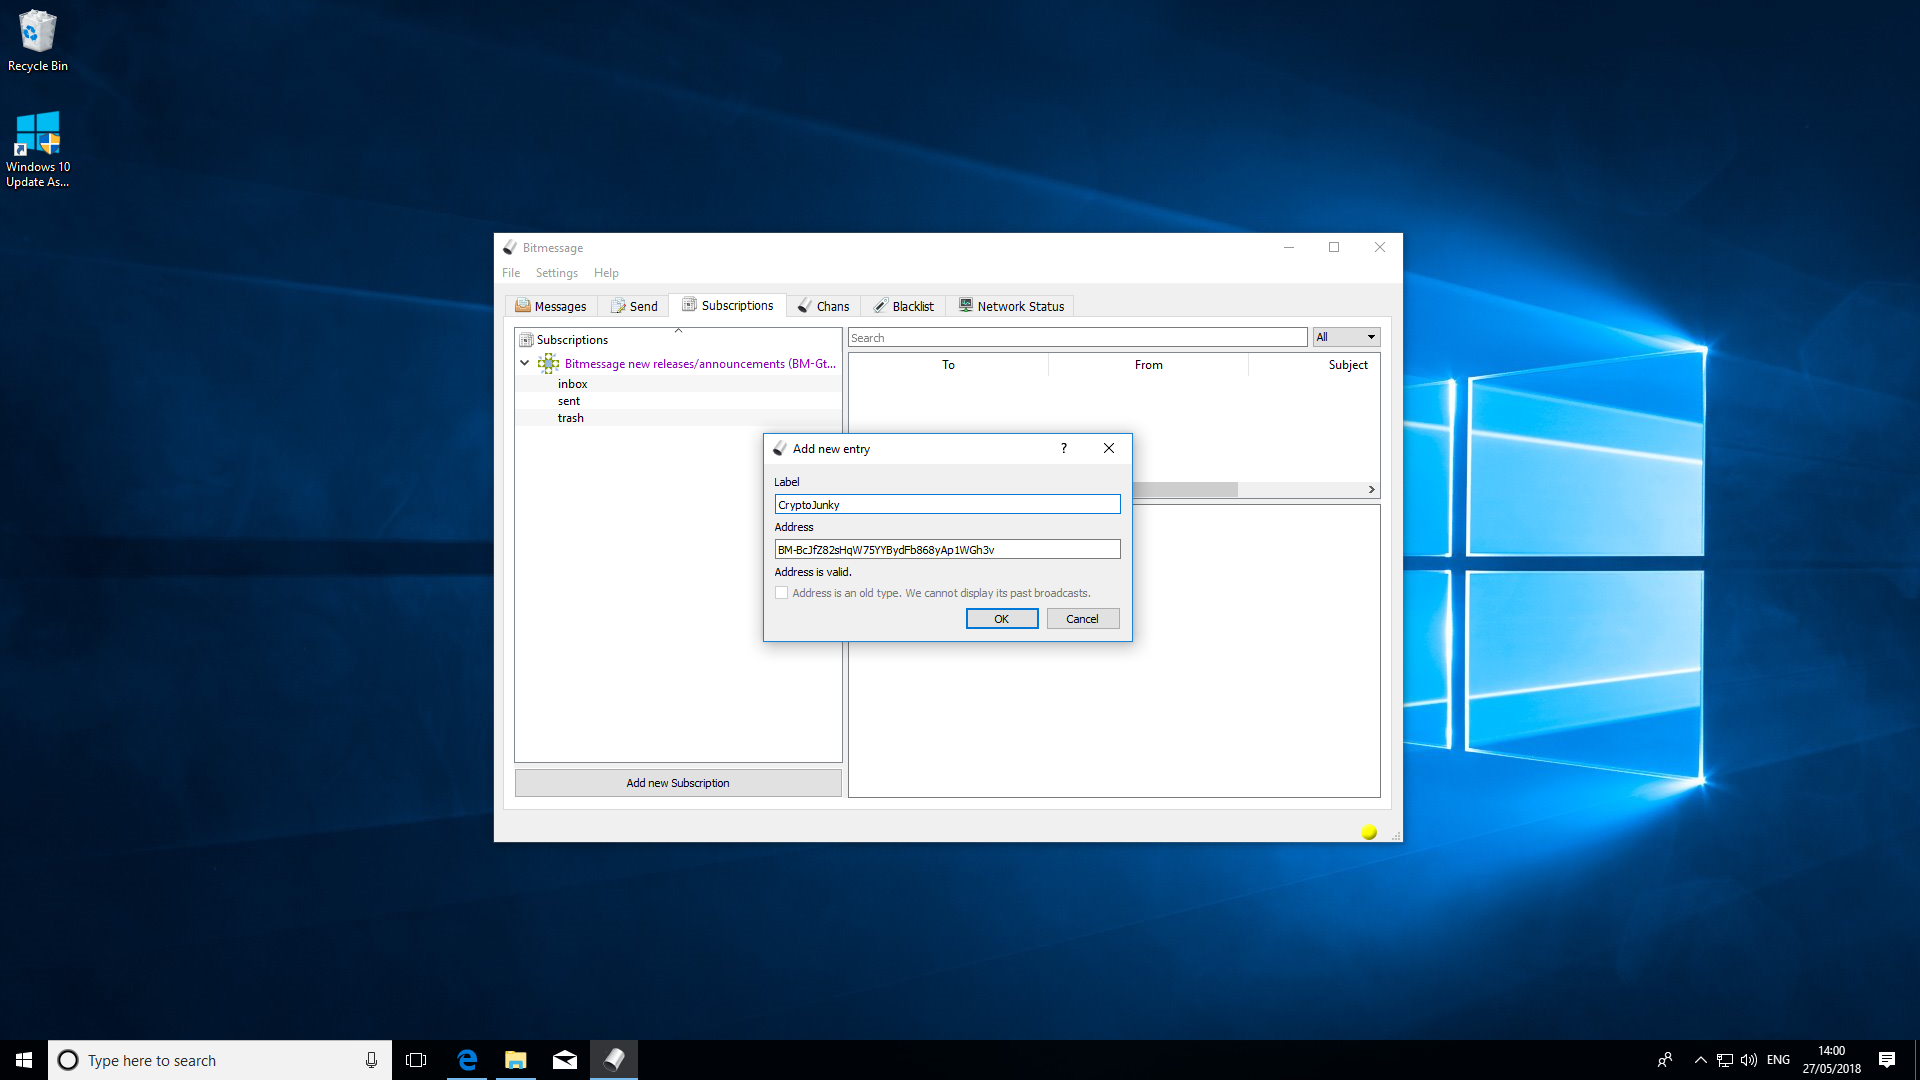
To get started, choose between 'Use a Blacklist' or 'Use a Whitelist'. Next click 'Add new entry'. Enter a meaningful label and then the address you wish to filter. Click 'OK' to save. The address will appear in the 'List' box.
9. Subscriptions
While sending messages in the way oulined in the previous steps is a great method for one-to-one communication, it's not much good for messaging multiple people at the same time.
The Bitmessage client supports subscriptions (also known as 'Broadcast addresses') to work around this problem. These function in a similar way to an email subscription.
To get started, select the 'Subscriptions' tab. By default your client is subscribed 'Atheros' which provides updates about Bitmessage such as when new versions are available. You can find a list of subscriptions for other topics on the Bitmessage forum.
Click the 'Add new Subscription' button and paste the address of your chosen list in the 'Address' field. You can return the 'Subscriptions' tab at any time to view new messages.
10. Using Chans
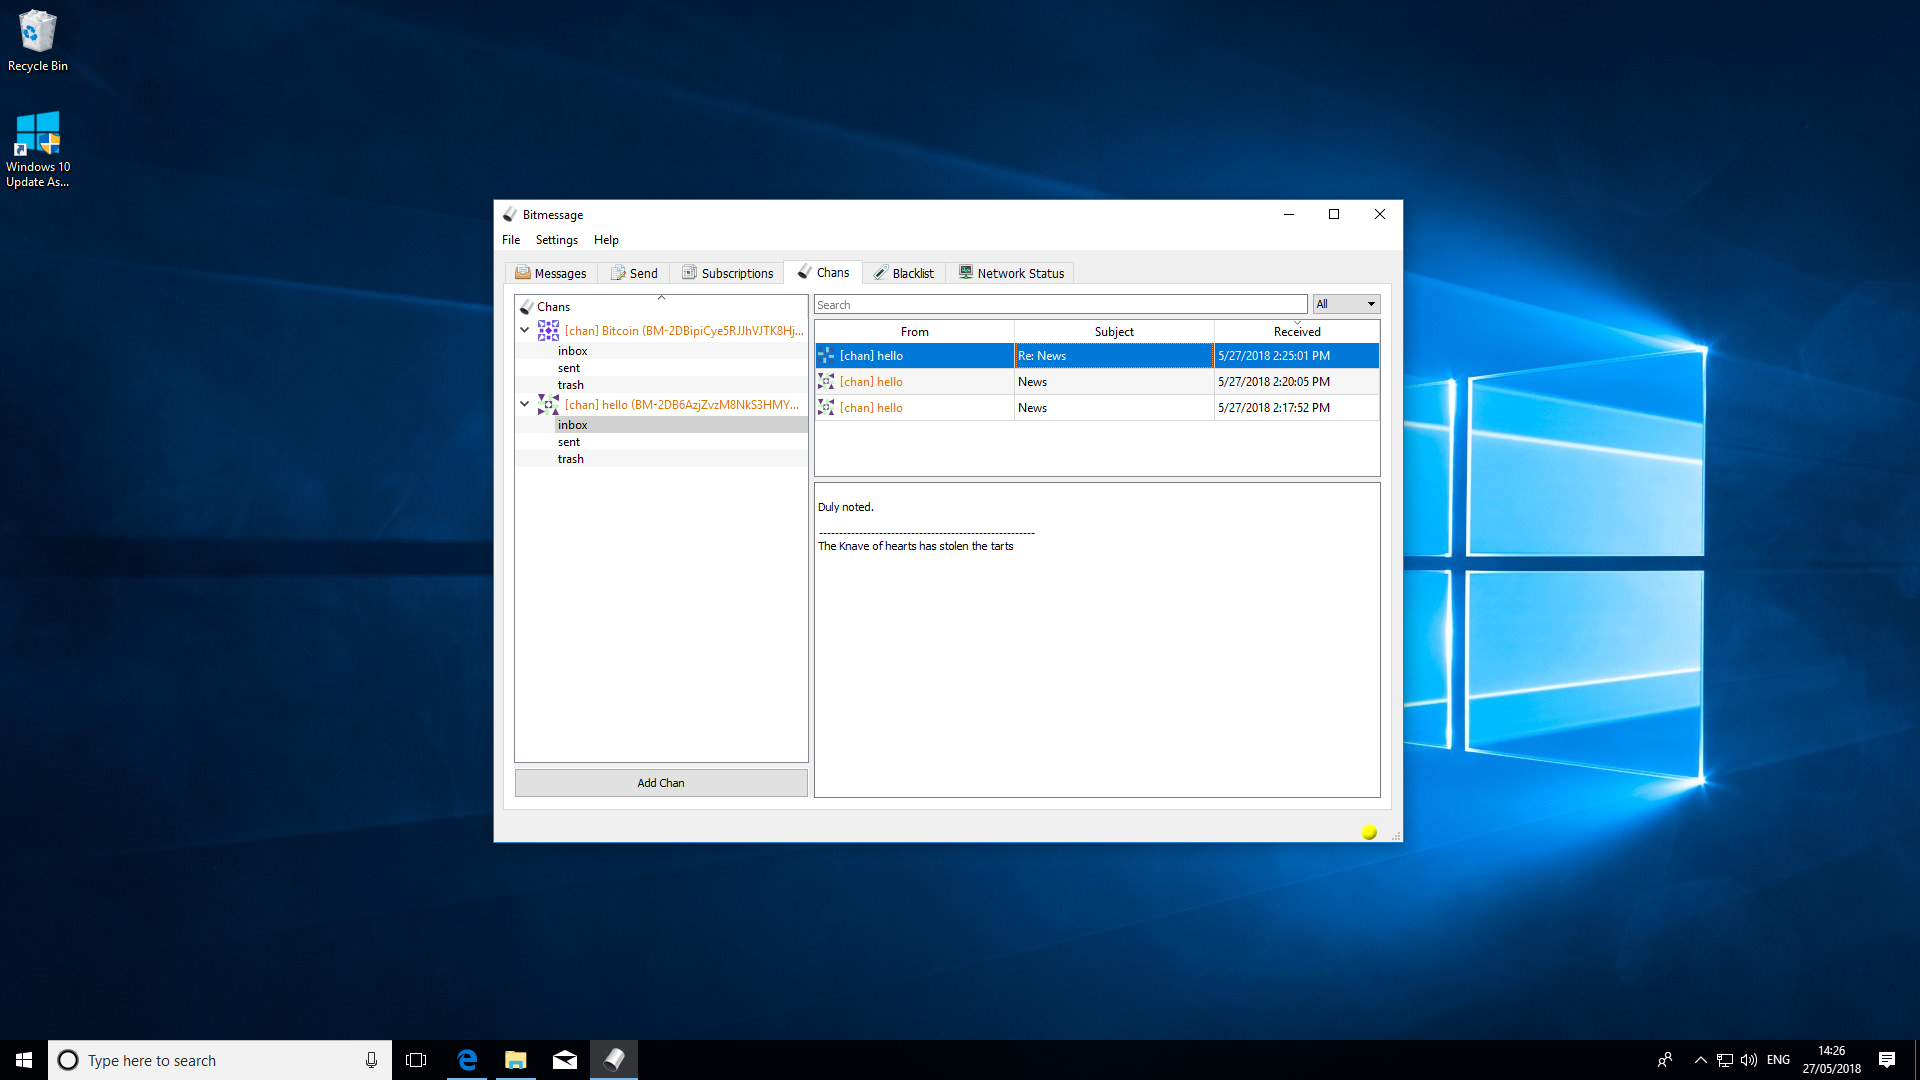
Bitmessage supports the use of Chans (Channels). These are created by people using the same 'description key' e.g. 'hello' allowing them to view and respond to messages in the style of a message board.
The Bitmessage forum contains a list of Chans, although you can create your own if you wish.
To get started, head over to the 'Chans' tab and click the 'Add Chan' button. Take the time to read the dialogue box explaining how Chans work, then enter the address and click 'Ok'. To unsubscribe from a Chan, right click and choose 'Delete'.
- Here are the best ways to share files securely
Nate Drake is a tech journalist specializing in cybersecurity and retro tech. He broke out from his cubicle at Apple 6 years ago and now spends his days sipping Earl Grey tea & writing elegant copy.