Look for light
Getting the best photographs isn't just about having more megapixels, memory and higher resolutions. To get the best from your images, you need to get the light and composition right.
Digital imaging is notoriously bad at coping with low light levels. Our advice if your image looks too dark is not to even try to compensate for it. All built-in light compensation does is boost the brightness and contrast levels, which tends to lead to grainy images with an orange cast. If you have a built-in flash, expect hard shadows and a blue cast instead.
The only real cure for dark conditions is to add more light, which isn't always easy in the kind of impromptu situations where you might use a mobile phone camera. Try to shoot outdoors for the best results, and make sure the light source is always behind you.
If you can't do that, then use the camera's flash to fill in the subject or you'll end up with a photo full of silhouettes.
Your mobile phone's lens is fixed, which means that when you zoom in on something, it's done digitally rather than optically. That means that the software samples part of the image and blows it up in real time. While you get the illusion of zooming into the image, what you're actually seeing is a portion of the image in the viewfinder resized to fit. You'll get much better results from cropping and resizing a portion of an image after you've taken the picture.
Better still, try to use the 'human zoom' instead - get as close as possible to the subject of the photograph to get the best possible image.
Sign up for breaking news, reviews, opinion, top tech deals, and more.
Avoid the shakes

One of the worst problem affecting mobile phone photos is motion blur. A variety of factors contribute to this issue; the small form factor of the average phone, cameras that are slow to respond, and interface design that's bolted on rather than built in.
The worst culprits for this are touch-screen operated devices. To get rid of blur, you need to eliminate shake, which isn't always easy.
There are a few things you can try to keep your phone steady. Brace yourself against something sturdy when you take a picture - plant your elbows on a wall, or lean against a doorway. In an ideal scenario you'd use a tripod, but that defeats many of the advantages of using a mobile phone camera. You may as well use a DSLR if you're going to carry extra equipment anyway.
The best solution we've found is a lateral one: use the timer. You might usually only use this function if you want to get into shot, but it can also help you get sharper pictures by eliminating the shake when you press the shutter button. What you'll lose in spontaneity, you'll gain in pristine pictures.
We've already advised against using light compensation and zoom on your camera, but these aren't the only in-camera tools you should forget. Turn off all effects and shoot images as plainly as possible. When you filter effects, you're degrading the image - subtracting data that you'll never get back.
With mobile phone images, every pixel counts. If you do want to add effects to an image, do it in post-production on your desktop for the best results. In fact, it's a good idea to do all of your picture editing on your PC rather than in your camera.
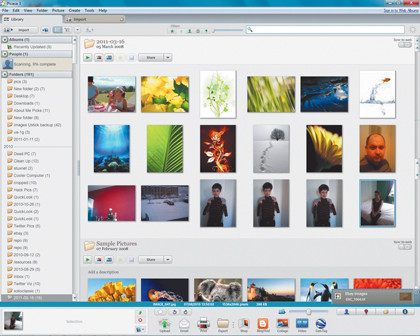
You don't need to spend a lot of money on image-processing tools either. Photoshop is a superb application to use if you can afford it and know how to make the best of it, but for editing mobile phone photos, all you really need is something simple that lets you crop, resize and colour-correct your pictures. Google's Picasa does all that for free.

You can also use Picasa to share your images and organise them into albums. Windows Live Photo Gallery is a similar application, also free.
Follow these tips and make them part of your mobile phone photography routines. You'll end up with superior images that can compete against those taken with dedicated digital cameras.