How to build an Android app
Sign up for breaking news, reviews, opinion, top tech deals, and more.
You are now subscribed
Your newsletter sign-up was successful
App Inventor
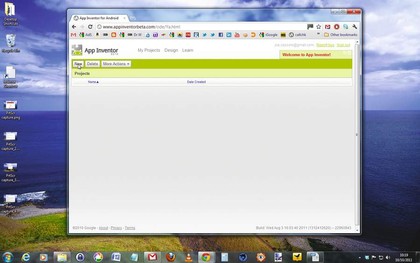
For those whose eyes glaze over at the sight of a few lines of code, App Inventor may well be the answer. This Google Labs innovation lets you create applications using your browser and either a connected phone or an Android phone emulator. All your work is stored on the App Inventor servers, so you can come back to it at any point.
App Inventor consists of three main components. The App Inventor Designer lets you select components for your app, including media, buttons, labels and everything else that's related to the way your app looks and feels.
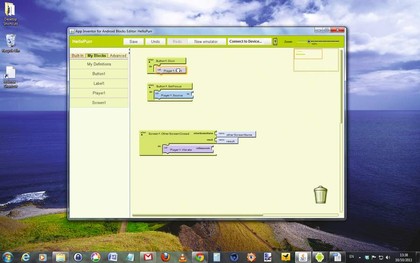
The App Inventor Blocks Editor is concerned with the processing components of your application. Any decision handling is dealt with here, and it's shown as a kind of puzzle. You drag and drop program pieces like a jigsaw.
The emulator provides a virtual phone so you can try your program out, and it's updated as you make changes in real time.
You can opt to use a real Android phone instead of the emulator, as long as there are Windows drivers to support it that will work with App Inventor.
While it's partially cloud-based, there are still components that need to run locally, with the most important being the most recent version of Java. It's worth running a couple of tests to ensure your browser can execute Java code correctly before downloading the full App Inventor local program. If you have any browser extensions installed that stop code running in the browser, such as No Script for Firefox, it's a good idea to disable or even uninstall these before attempting to run App Inventor.
Once you have App Inventor installed, you need to run it by connecting to the App Inventor site. You can't just launch it from the Start menu. In your chosen browser, head to App Inventor at Google Labs; if you have everything in place, the program will start. You may need to log into your Google Account if you haven't already done so, because this is where your development data will be stored.
Sign up for breaking news, reviews, opinion, top tech deals, and more.
Create your first Android app: step-by-step
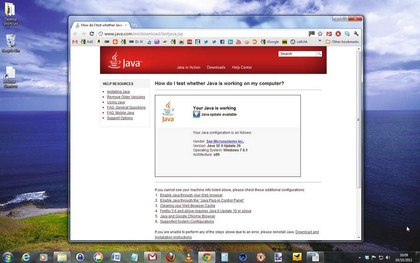
To create an Android app in App Inventor, first download the most recent version of your browser and get Java.
Run a couple of tests to ensure that your system is set up to run App Inventor, first by running the Java test. If it works, you'll be presented with a success message. If it fails, reinstall Java. After this, browse to the Check Java for App Inventor page, signing in with a Google account if prompted. The page will tell you if your browser is correctly configured.
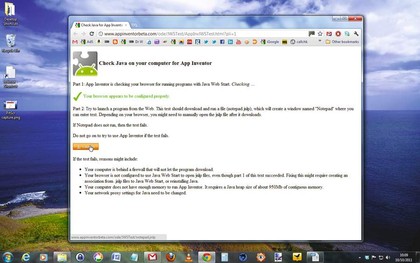
If it is, click the 'Launch' button to check that you can run a simple application in your browser using Java.
Now you know that App Inventor will run in your browser, go to the App Inventor Setup page and click 'Download'. Once downloaded, browse to the file named 'AppInventor_Setup_Installer_v_1_2.exe' and launch it. Follow the installation. Make a note of the installation directory in case you need it later, but don't change it.
The software already supports a number of popular Android phones. These include T-Mobile G1 / ADP1, T-Mobile myTouch 3G / Google Ion / ADP2, Verizon Droid (not Droid X), Google Nexus One and Google Nexus S. If you have a different phone, visit the Windows Drivers page to get its drivers. Alternatively, you can run your app in the emulator.
Next, go to App Inventor at Google Labs and wait for App Inventor to launch. Click 'New' to start a new project, name it 'HelloPurr' as one word and click 'OK'. This project uses two media files: a picture of a cat in PNG format and an MP3 of purring. You can download them from the Building Your First App tutorial webpage or use your own.
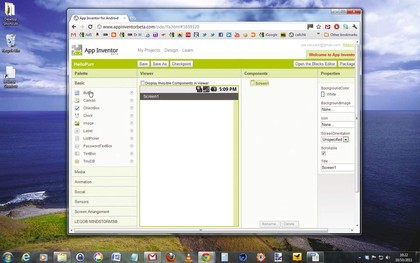
The Designer opens. In the left-hand pane you'll see the palette, which shows each of the components you can use. Click and drag a button onto Screen 1 in the viewer, to the right of the palette. To the right of this is a list of components in use.
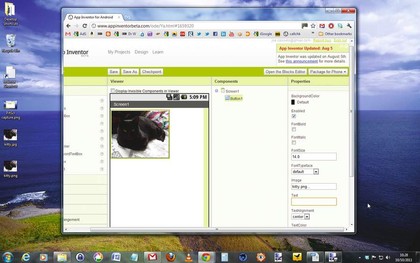
Select Button 1 and click 'None' under 'Image'. Choose 'Add', then browse to your cat picture. This changes the appearance of the button. Click under 'Text' and delete the existing wording.
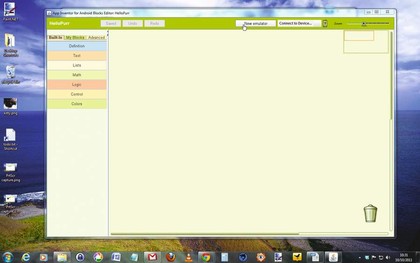
You now need to set up the app in the Blocks Editor. This can run your app via its emulator or through your phone. Click 'Open the blocks editor' and wait for the editor to open in a new window. Keep the existing window open. Choose 'Connect to device' and select your phone from the dropdown list. Wait for the editor to connect properly. If all is well, you'll see a picture of a cat on your phone. Alternatively, click 'New emulator'.
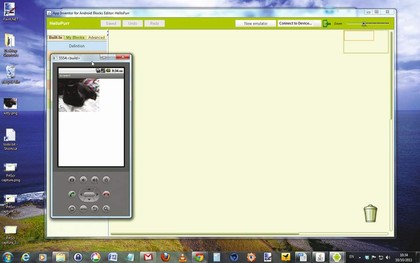
If you're using an emulator, once it's running you need to connect to it in the same way as a phone. Click 'Connect to device' and select the emulator. Once connected, you'll see your cat picture on the emulator's screen. You may need to unlock the emulated phone by dragging the green lock button to the right.
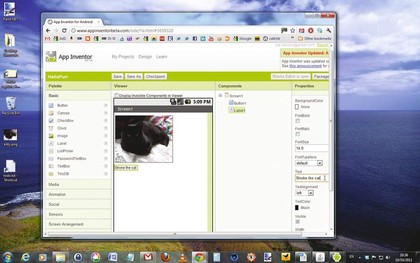
Return to the Designer window and drag a label from the palette to the viewer in Screen 1 so it appears below the picture. In the label properties on the right, enter the text 'Stroke the cat'. Change the font size to 30 and choose a different colour if you like. We'll now add the purring sound for when the cat is stroked.
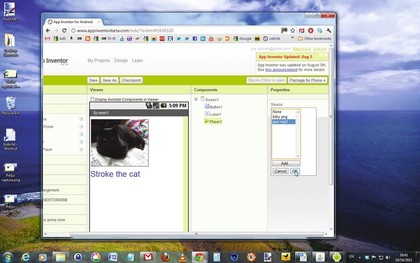
In the Designer window, click 'Palette > Media > Player'. Drag it to Screen 1 in the Viewer. Select 'Components > Player1 > Source and add'. Find the MP3 file of the purring sound, select it and choose 'OK'.
Everything is now in place, but the application needs to know to play the sound only when the cat is touched.
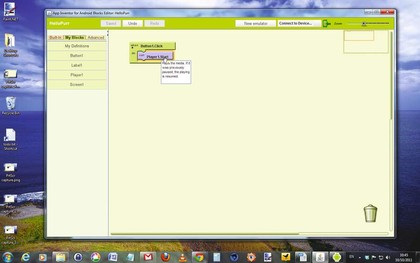
Return to the Blocks Editor, select the tab 'My blocks' and click 'Button 1'. Drag the element 'when Button1.Click do' into the main editor screen. Now click 'Player1' and drag the element 'call Player1.Start' into the space within the existing element. Now click the cat to play the sound.
Back in the editor, choose 'Package for phone and download to this computer', and that's it.
Once you have the simple Hello Purr program running, you can stretch your wings a little. There's a wide range of tutorials for developing applications at App Inventor. These include a simple painting program, various quiz and arcade style games, and apps that use a phone's GPS chip to help find your way back to your car.
You can use and modify these programs to help you to develop similar ones. If you need to get more information about App Inventor, you can find out more about components, blocks and more in the Reference pages.