How to build your own Google Chromebook
Sign up for breaking news, reviews, opinion, top tech deals, and more.
You are now subscribed
Your newsletter sign-up was successful
With the recent release of Google's Chromebooks, you might find yourself asking if you really want to spend your hard-earned cash on one. Don't worry - we'll show you how you can test out all aspects of a Chromebook without having to sink any of your cash into the hardware.
The good news is that the Chrome OS project is an open source one, so anyone with an interest and some spare time can go online, grab the source code and compile their own version of the operating system.
The even better news is that someone has already done that for you. A helpful chap called Hexxeh has been churning out automated nightly builds of the Chrome OS for quite some time, and making them available to download from here.
This makes it easy to try out Chrome OS in various forms, from running it on a virtual machine to booting it on real hardware. The latter part ranges from booting a USB drive to ultimately installing it on a suitable netbook, even in a dual-boot system.
Working hard?
Several big-name manufacturers are planning on releasing Chromebooks, but when you can buy an existing more powerful netbook for less and simply install Chrome OS on to it yourself, buying a specific Chromebook makes no sense - at least to us.
From our experience, most recent x86 netbooks and laptops should run the Chrome OS to some extent without any major difficulty. The exact level of success varies a little, from an installation with complete functionality to one that lacks wireless or audio features, or refuses to wake from sleep modes.
Any Intel Atom system should be a pretty safe bet, and Intel Centrino laptops also seem to provide good compatibility. As a guide, the Samsung, HP and Acer range of netbooks all appear to work, while a long list of laptops is also available here.
Sign up for breaking news, reviews, opinion, top tech deals, and more.
We tried Chrome OS on a cheap Advent 4211 Atom netbook and a Lenovo X200 Intel Centrino 2 laptop without any significant complications.
Writer man
For installation, you'll need a blank USB drive at least 2GB in size. This will hold the Chrome OS drive image that you should have downloaded from www.hexxeh.net. Windows users should grab a copy of Image Writer from here; this is a basic image writer that can write the unpacked Chrome OS file to the USB stick.
Linux users can apt-get usb-imagewriter, which is in the Ubuntu repository. Mac users can also join in the fun, but they'll have to use the Unix command 'DD'.
To get this working on a Mac, unpack the disk image to your desktop, insert your USB drive and use the Disk Utility to check the disk ID number - usually 'Disk1'.
Open a terminal and type sudo diskutil umountdisk diskX. Type cd desktop, then to write the image type sudo dd if=ChromeOS.img of=/dev/X bs=4m, replacing the 'X' with the drive ID number.
With the image written to your USB stick, plug it into your chosen netbook and boot it up. You may need to adjust the BIOS boot settings depending on your device. Many provide a boot device menu, while for others you will need to adjust the priority of the boot devices to elevate the USB drive above any internal options.
Hopefully with that done within seconds you should have Chrome OS up and running. If Chrome OS fails to start after this, there is a slim chance that the nightly build is a broken one, so it's worth trying another night's build.
Network down
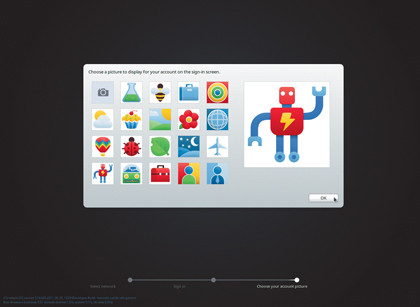
One element you'll need is a network connection of some sort. There's a good chance that any wired Ethernet port will be functional, with a slightly lower chance of any built-in wireless network working. The Chrome OS is designed to be constantly online, so logging into it is effectively logging into your Google account - which you can't do if you're not online.
With an attached Google account, you can to get your pseudo-Chromebook fired up, and start to evaluate how much of the hardware is working and whether or not the OS is something you want to keep. At this point, there are just a couple of simple steps you can take to permanently install the Chrome OS on the internal hard drive of your laptop or netbook.
Be aware this is a dumb installation, so it'll simply write over the top of any drive without attempting to create partitions. So obviously only do this if you're happy to lose your existing OS and data.
In Chrome OS, press [Ctrl]+[Alt]+[T] to open the diagnostic terminal. Type Shell, then to start the installation type /Usr/sbin/chromeos-install. You'll be prompted to enter a login and password, both of which are 'facepunch', and you'll be presented with warnings describing what you're doing.
OS duel
The final option (and the most complex, because we're talking about getting Windows to work with a non-Microsoft product) is to dual-boot Chrome OS alongside Windows. While this is relatively straightforward in principal, in practice it's time-consuming and awkward. This is largely because it involves having to move and create various new partitions for Chrome OS to live on, configure a fresh boot loader and copy the drive images over - all of which must be done manually.
That's all quite a tall order, and to try to keep things as simple as possible we suggest you get a live CD version of a Linux distribution. We're going to go with the reliable Ubuntu.
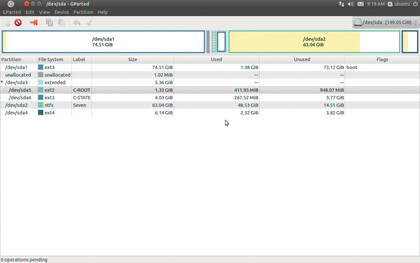
The CD and USB versions will both work, but whichever you choose, you'll need to set it up and boot the soon-to-be Chromebook with it. Among the gaggle of partitions that may already exist on your drive, you'll need two more. You'll have to shrink, delete and generally shuffle the existing partitions around to create the two new ones, which should be 1GB in size each. One should be ext2 and the other ext3.
These will store the main Chrome OS work partition and the standard swap partition. In Ubuntu we're using GParted, but if you're more comfortable doing this in Windows then we'd recommend EASEUS Partition Master from www.easeus.com. Alternatively, you can try the Disk Management snap-in that's built into Windows Vista/7.
Do remember that MBR disks can only have four primary partitions, so it's better to create an extended partition with two logical ones inside for the Chrome OS to live on.
Making it stick
If you haven't done so already, plug in the Chrome OS USB drive. We're assuming you're still using GParted from the Ubuntu Live CD or USB. If necessary, refresh the devices and select the Chrome OS device so you can view its partitions. You should see quite a gaggle of them but you're only interested in two: C-State and C_Root.
As we've already said, the first should be ext3 and the other ext2, both around 1GB in size. Using GParted it's easy enough to copy and paste these partitions over to the waiting blank ones on the internal drive. Don't forget to click the 'Apply' button to make sure that your changes stick.
Finally, for the boot loader we've found that by far the most straightforward solution for installing GRUB is to simply install a base Ubuntu installation without a swap partition - primarily because it automatically detects the Chrome OS, along with everything else, and adds boot options for all of this within GRUB. Doing this saves you the headache of resettling with a manual GRUB configuration.
If you do opt for this when the machine is restarted you'll see 'Unknown Linux distro' in the list of operating system choices. This is your Chrome OS. Select it to start up your newly installed Google operating system.
You may find Chrome OS wants to run a repair operation on its first boot, this didn't always happen for us but if it does it only has to be run the once and will leave you with a fully-functioning Chrome OS Chromebook.
Step-by-step: Boot to Chrome OS
Get Google's operating system on your device quickly and easily
1. Find nightly builds
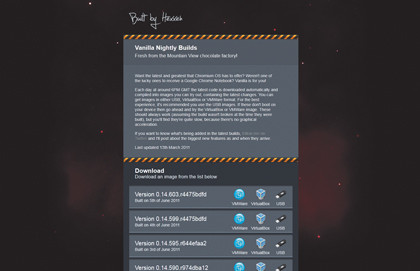
Go to http://chromeos.hexxeh.net and take a look at the list of nightly builds that are automatically compiled ready to run for VMWare, VirtualBox or primed for a USB installation. The latest will usually work fine but if you have problems you can usually get around them by choosing a slightly older version instead.
2. Get Image Writer
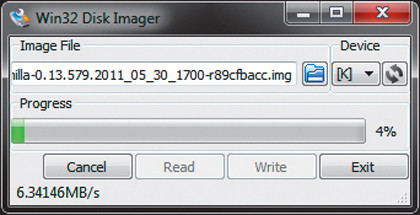
Once you've snatched the USB version, you'll also need Image Writer from here, which is a little utility that will write the image to the USB flash drive. Chrome OS takes up less than 2GB of space, so you could even opt to install this on an SD card, as long as your netbook or laptop supports the boot options.
3. Give it the boot
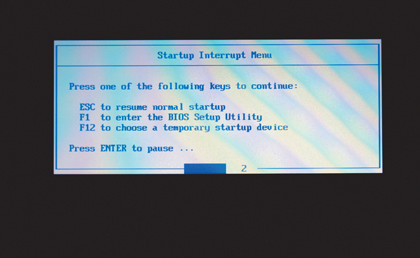
Most up to date laptops and netbooks have very flexible boot option hiding away within the BIOS, so it doesn't matter you've used a standard USB drive or an SD card. Once you've powered up your Chromebook-to-be, press the key for the BIOS or the Boot menu (often [Delete], [F2] or [F12]) and then choose the inserted media.
4. Get connected
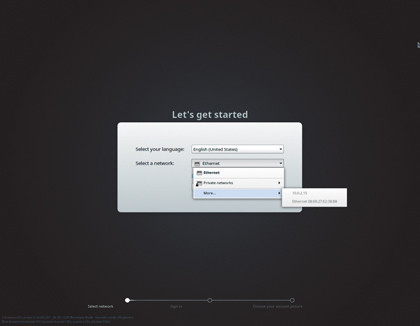
Although you don't always need an internet connection to use a Chromebook, you do need one for the first boot, because it runs you through a setup procedure that requires either a wired Ethernet or wireless network connection in order to create a link between your Chromebook and your Google account.
5. Shiny chrome
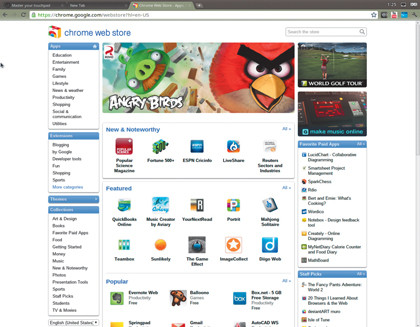
The basic vanilla builds that are created by Hexxeh come with no additional bells or whistles, so your first impression of Chrome OS will be very dull. The OS runs all of the Chrome browser extensions, so head to http://chrome.google.com/webstore and grab any extensions you're likely to need, like Google Cloud Print.
6. Together forever
If you decide to keep Chrome OS on your device permanently, there's an installer built into the OS itself. Press [Ctrl]+ [Alt]+[T], type Shell, then type /Usr/sbin/chromeos-install. You'll be prompted for the admin password, which is 'facepunch'. Be warned, this wipes the internal drive, but you could opt for a dual-boot version.
-------------------------------------------------------------------------------------------------------
First published in PC Plus Issue 311
Liked this? Then check out Samsung Chromebook vs Acer Chromebook
Sign up for TechRadar's free Week in Tech newsletter
Get the hottest tech stories of the week, plus the most popular reviews delivered straight to your inbox. Sign up at http://www.techradar.com/register