How to wall mount your PC
Part 3: Drilling for England
The heaviest component needs the most work
1. Fitting brackets
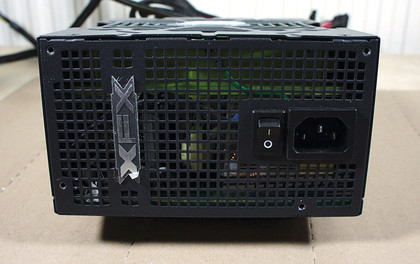
The PSU presents an issue on two fronts. Firstly, they often use UTS screws and secondly most PSUs only provide screw holes at one end. Of those screw holes, we can only really use the bottom two and even these aren't located at the same height, so securing this weighty item is an issue. We're going to use four 90 degree brackets to get around this pesky little problem.
2. Power on
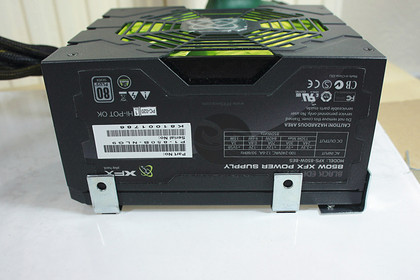
Two of the brackets are going to work as supports for the 'bottom' side of the PSU. Effectively these won't be offering a screw-based fixing, but will support the weight of the PSU, rather like a little shelf. Although we're only using 25mm brackets, you may feel you want to opt for something more secure, such as double-hole 39mm or 64mm types.
3. The hard one
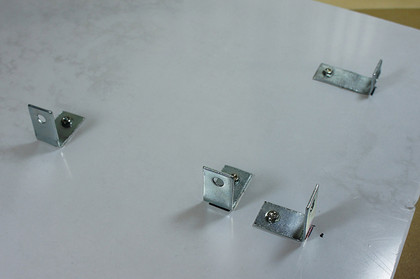
It turns out 25mm brackets provide easy fittings for the higher hole, but they provide a problem for the lower. You'll need to hammer one bracket flat and then use your pliers to create a 90 degree bend just after the hole. If you make a mistake, don't worry too much as these things are pliable enough to be reshaped, just as long as you keep it roughly flat enough.
Sign up for breaking news, reviews, opinion, top tech deals, and more.
4. The easy one
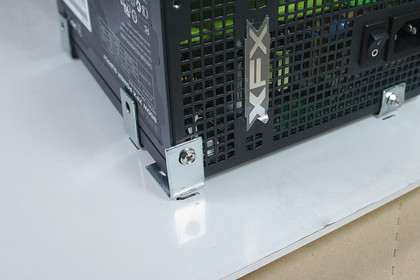
The final normal bracket should fit the higher fixing hole perfectly, so you just need to mark off where you want it. We're placing the brackets under the PSU, but these will work either way around. We use 10mm fixing screws, along with washers and fixing nuts. However, standard case screws should also be just fine for fixing the PSU into place.
The Wall
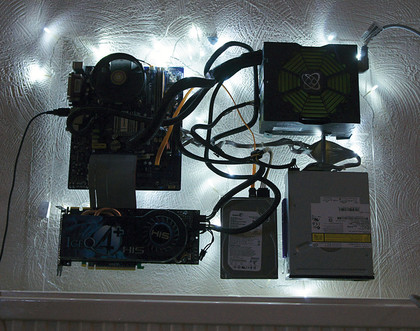
We love this as something new to try. If you like showing off your hardware why shouldn't it go on the wall? Modern system are works of art in their own right, or if you want to start your own sub-cult devoted to technology it's a suitable place to start for that new altar.
This obviously isn't for everyone, having exposed wiring - that in itself is perfectly safe - will likely cause mild panic attacks in certain segments of the population. But the stout of heart should feel happy proudly exposing their arty wiring to a bewildered world. This really is just a getting started guide, so let your imagination run wild and mount the components on whatever surface you feel is most suitable.
Our primary goal for most of these projects is to keep costs close to £20. But you could start throwing metal-style sheeting and lighting kits for an even more attractive finish. For people who feel an entirely exposed PC isn't a great idea, then man up and enclose the system yourself.
The simplest solution would be to double up the sheeting and use four Perspex posts to simply add a top. The next step along from this would be to buy a 60mm-wide strip of thick - say at least 6mm - Perspex and box in the two pieces, cutting a hole for the bigger PSU.
You could also get more creative with the mountings. We've tried to hide them as much as possible, but there's no reason why you couldn't go the complete opposite and make more of shiny mountings.