Being able to launch programs is useful, but it's actually just the first step in automating your PC. The next comes in controlling those programs or Windows services to make them do what you need them to do, something that AutoIt can do by feeding them simulated keypresses with the Send function, as follows:
Run("Notepad.exe")
WinWaitActive("Untitled - Notepad")
Send("The time and date is {F5}")
Send("^p")
WinWaitActive("Print")
Send("!p")
Here we're launching Notepad and using WinWaitActive to wait until the Notepad window decides to appear. The script then sends the raw text 'the time and date is' before simulating pressing [F5] to display the current time and date.

Using the caret symbol in a Send function simulates pressing the [Ctrl] key, so sending ^p is equivalent to pressing [Ctrl]+[P]. (Beware: case often matters, so ^p and ^P rarely have the same effect. Use lowercase letters unless you're sure upper case is required.)
The next WinWaitActive function waits for the Print window to appear. Finally, using an exclamation mark simulates the [Alt] key, so sending !p has the same effect as pressing [Alt]+[P] – which clicks the Print button.
You can apply the same principles to automate any application. Launch Internet Explorer, for instance – Run("c:\program files\internet explorer\iexplore.exe") – then use Send ("!d") to simulate [Alt]+[D], selecting the address bar. Add a URL and the [Enter] key – Send ("www.google.com{enter}") and IE will access that site for you.
You can also automate some useful Windows keypresses. The '#' character represents the [Windows] key, for example, so you could use Send("#d") to simulate [Win]+[D], which would minimise all windows and display the desktop. Another thing you could do is lock your PC from a script with Send("#l").
Sign up for breaking news, reviews, opinion, top tech deals, and more.
The Send function also supports special codes for simulating many alternative keypresses, including [Tab], [Page Up], [Page Down], [Numlock Off], [Numlock On], [Printscreen] and a wide range of others (see the online documentation for the full list).
Macro recorder
Send is an extremely powerful function, then, that will let you automate just about any Windows or application task. But getting it to work manually can be tedious, especially for long sequences.
You'll have to take careful notes of each keypress you make, perhaps adding WinWaitActive or other statements to make sure your simulated keys go to the right place, and if you get it wrong then there's no telling what problems might follow.

Fortunately, there's a simple alternative: use AutoIt's SciTE script editor to record the necessary steps for us.
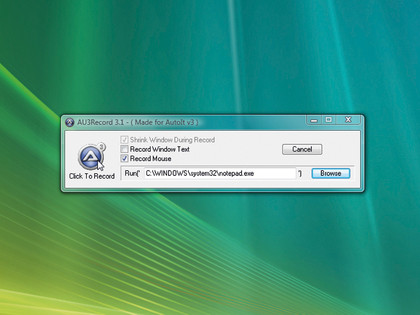
To try this, first open SciTE, click 'File | Save As' and give your file a name like First Macro.au3. Click 'Tools | Au3 Recorder' to launch the macro recorder.
If you don't see an Au3 Recorder menu option, make sure you've downloaded and installed the full version of SciTE from here.
Click 'Browse' and navigate to the program you'd like to automate. Pick something simple like Notepad.exe, MSPaint.exe or Calc.exe when you're getting started – these and many other Windows applets are generally in the \Windows\System32 folder.
Click the 'Record' button and Au3 Recorder will launch the application you specified, then begin recording your mouse movements, clicks and keypresses.
Complete whatever steps you want to try – clicking '2+2=' in Calc, for example – then click the 'Au3 Recorder' button again to stop recording. It will immediately pop up a script representing everything you've done: a Run command, Send functions for any keypresses, WinWaitActive statements; everything we've seen so far, and mouse movements, too.
Does it work, though? Try it: close the application you've been automating if you've not done so already, then switch back to SciTE and press [F5] to launch the script. You should see the program open and follow the sequence you've defined, in just a few seconds. It's all very straightforward and makes it much easier to start automating more complex Windows tasks.
Automated installs
The AutoIt commands we've looked at so far are very simple: run a program, send a keypress, wait for a window and so on. These aren't exceptions, either – the rest of the language is just as straightforward. If you needed to download a file within a script, for instance, you'd use a command like this:
InetGet("http://www.domain.com/folder/file.exe", "c:\downloads\file.exe")
This grabs a file from the remote URL, then copies it to the local path you specify. It even works with both FTP and HTTP servers.
The real value of AutoIt, though, comes when you begin to string these commands together. What if, for instance, you were to build a 'disaster recovery' script – something that you could use in case you suspected a malware infection?
If you wanted to download a free, on-demand antivirus scanner to protect your computer, you'd normally have to go online, browse to the manufacturer's website, follow the download link, locate the right version for your system and then download and install it.
With AutoIt, though, there's none of this hassle. You could use InetGet to download the latest version of a few antivirus tools – simply entering InetGet("http:// security.symantec.com/sscv6/Setup.exe","c:\setup.exe") would get you Norton Security Scanner, for instance.
A Run command will launch it, then you could use Send to simulate keypresses and step through the set-up wizard. That's easier – and probably quicker – than doing it all manually.

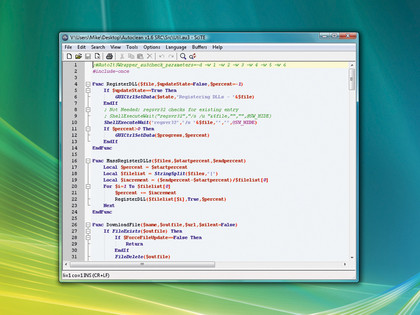
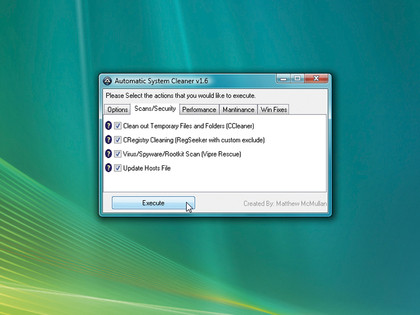
The excellent AutoClean script takes this idea even further by creating a tool that can be used to fix broken or infected PCs. It automates the download and launching of great tools such as CCleaner, RegSeeker, Defraggler, Vipre Rescue and more, as well as automatically uninstalling common junk, optimising Windows settings and so on. Download a copy and browse the source to see how it's all done.
That's it for the first part of the AutoIt tutorial, then. Next issue we'll take a look at automation that goes beyond keypresses, and explain how you can control key functions of Windows using just a few short and very simple AutoIt scripts.