macOS Ventura problems: how to fix the most common issues on your Mac
How to get macOS Ventura working perfectly once again
- macOS Ventura won’t download
- macOS Ventura installation failed
- Can’t log in to macOS after updating
- AirDrop isn’t working
- Wi-Fi isn’t working
- Battery life is too short
- Running out of storage space
- Disk needs to be repaired
- Problems with iCloud
- An app won’t quit
- Remove duplicate photos
- Widget data isn’t updating
Apple’s macOS Ventura is the latest and greatest operating system to land on the Mac, and it comes with a host of fantastic features for a range of use cases. But that doesn’t mean it always runs smoothly. In fact, it can have its fair share of frustrating problems and glitchy mishaps.
Luckily, there’s often a solution close at hand. In this guide, we’ve rounded up some of the most common problems you’re likely to face in macOS Ventura and paired them with the often-simple fixes that can put things right again. If you’re having trouble with you Mac, give this guide a try.
macOS Ventura won’t download
Aside from that, you should check if you have enough disk space for the macOS update installer to download. The installer is about 12GB, but you need around 25GB spare for the operating system itself. If that still isn’t the problem, find the macOS installer file (it’ll either be in your Downloads or Applications folders) and drag it to the Trash, then try downloading again.
When you want to update to macOS Ventura, it can be frustrating when you encounter download issues. If this happens to you, the first thing to do is check your internet connection. If that’s all in proper working order, try Apple’s System Status page to see if the ‘macOS Software Update’ service is down.
macOS Ventura installation failed
While the download might not be the problem, there could be other reasons your macOS Ventura installation failed. First things first, check your Mac is compatible with macOS Ventura on Apple’s support page.
If it is, try restarting your Mac in safe mode and starting the installation again. If you have an Apple silicon Mac (with an M1 or M2 chip), shut down your Mac, then press and hold the power button until “Loading start-up options” appears. Click a volume, then hold Shift and click “Continue in Safe Mode.” For a Mac with an Intel chip, simply restart your Mac, then immediately hold the Shift key until the login window appears. Now try installing macOS Ventura in safe mode.
If you’re still having problems, try resetting the NVRAM. Restart your Mac and then immediately hold the Command, Option, P and R keys at once. Let go once you hear the start-up chime a second time or see the Apple logo.
Sign up for breaking news, reviews, opinion, top tech deals, and more.
Can’t log in to macOS after updating
These commands tell your Mac that you are loading macOS for the first time. You’ll be asked to create a new admin user account, after which the log-in problems should hopefully be fixed.
Occasionally, you might have problems logging in after updating macOS. If that’s the case, restart your Mac and hold the Command and S keys together. This loads up a command prompt window. Enter /sbin/mount -uw / and press Return, then type rm /var/db/.applesetupdone and press Return again.
AirDrop isn’t working
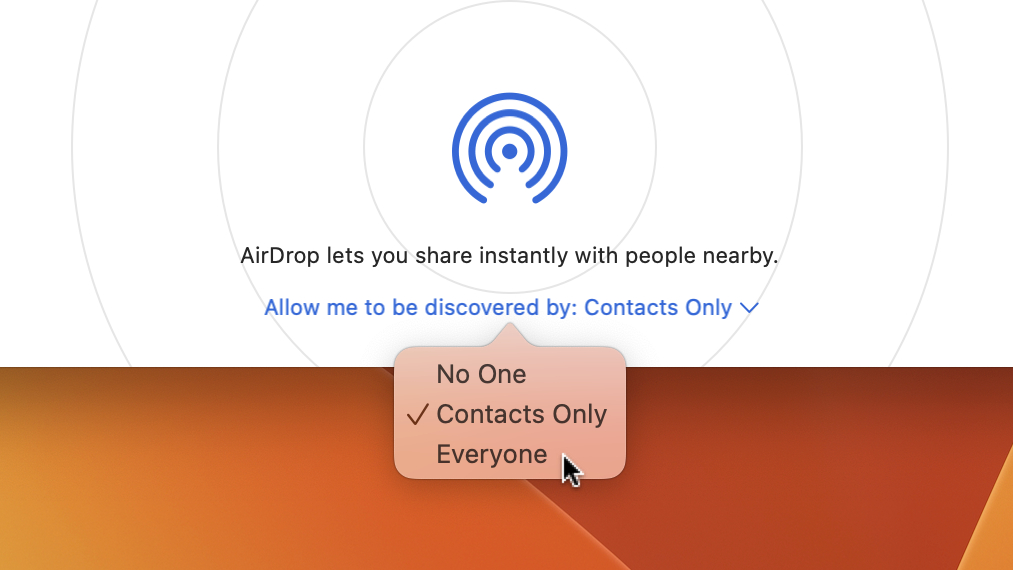
Having trouble with AirDrop? Sometimes it's as simple as turning it off and turning it on again. From the System Settings app, disable Wi-Fi and Bluetooth, then re-enable both of them. That might be all it takes to fix AirDrop.
If it’s not, you could also try adjusting your AirDrop settings. Open Finder, then click Go > AirDrop from the menu bar. Next to “Allow me to be discovered by,” choose Everyone and try sending or receiving the file again. If this works, it's likely because you had previously set AirDrop to only accept files from contacts (or no one at all), and the sender was not on your contact list.
Wi-Fi isn’t working
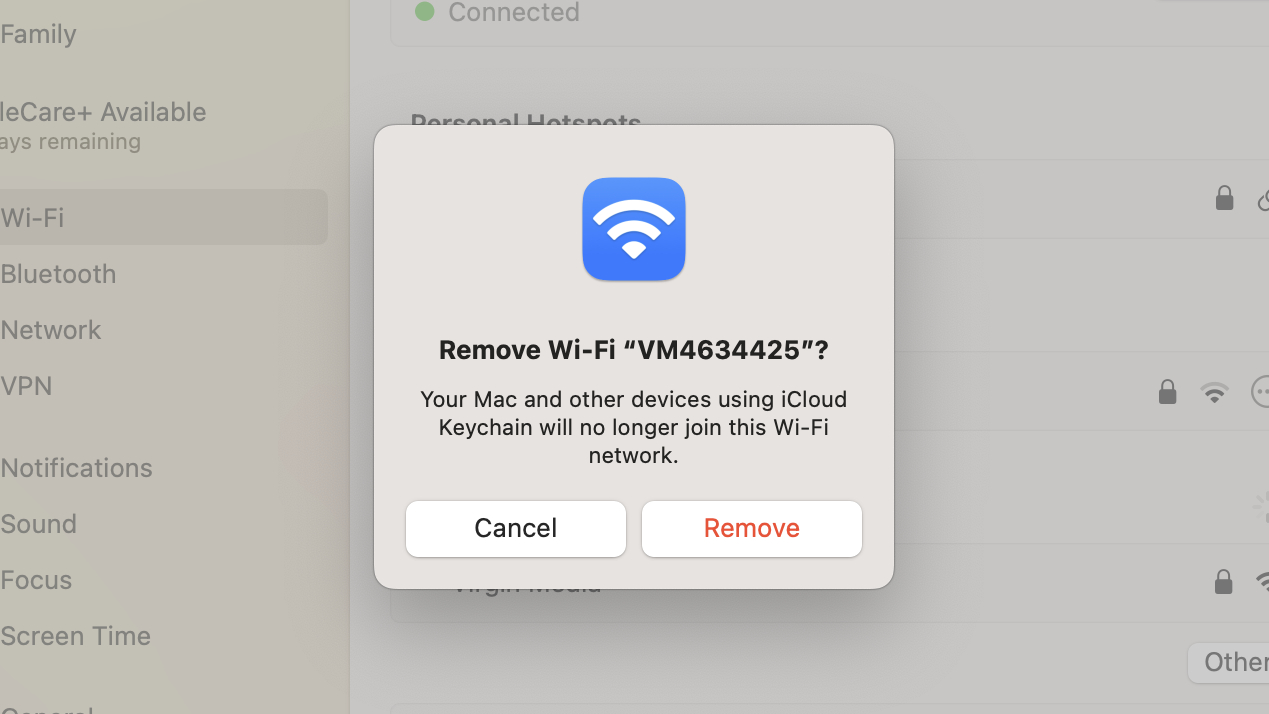
Wi-Fi bugging out? Try restarting your Mac in safe mode. If your internet connection returns, it suggests an app or extension is at fault.
Additionally, try forgetting your current network settings and then reconnecting to your Wi-Fi. To do this, open System Settings and click Wi-Fi in the sidebar. Under Known Networks, click … next to the network you are currently connected to (it’ll have a checkmark next to it) and click Forget This Network > Remove. Then try re-joining it from the list of Other Networks. You’ll need your Wi-Fi password for that last step, so make sure you have it to hand.
Battery life is too short
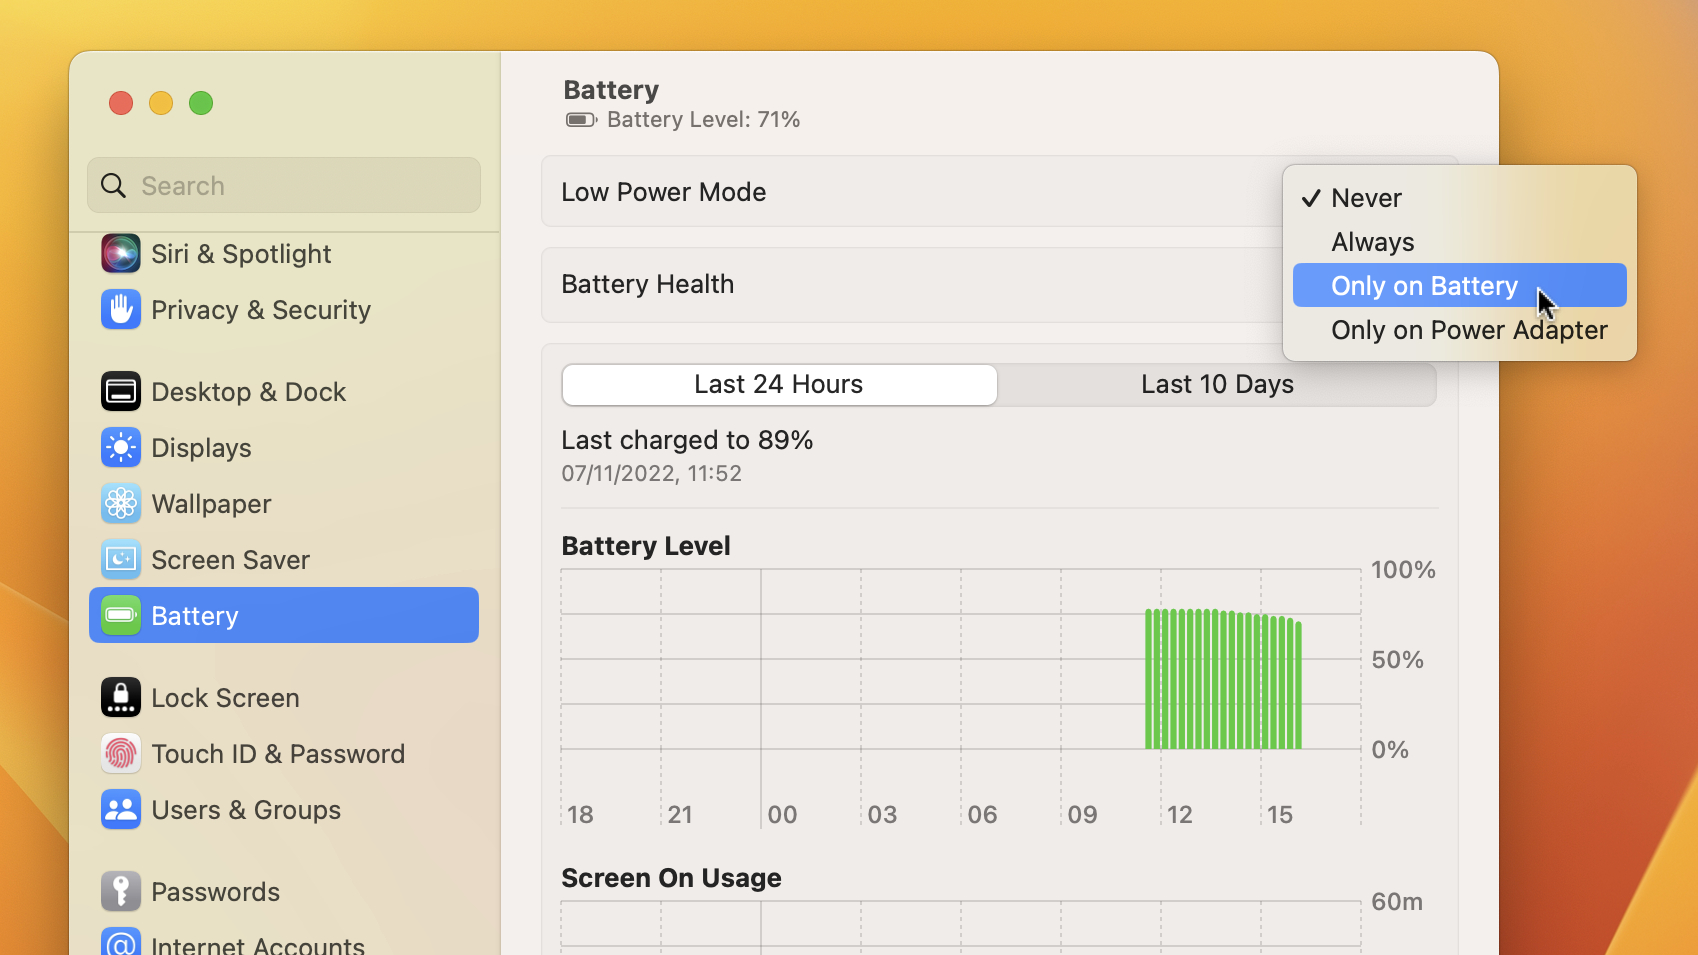
When you first update to macOS Ventura, you might find your battery draining faster than expected. This could simply be because macOS is setting things up in the background – once that’s done, your battery performance might go back to normal.
You can also try tweaking your battery settings. Open System Settings and click Battery in the sidebar. You can enable Low Power Mode, or click Options to optimize video streaming while on battery power.
Beyond that, make sure both macOS and your apps are up to date. Developers often fix issues that cause battery drain, so a quick app update could fix that problem. You could also try switching to apps that are less taxing on your Mac – Google Chrome is a notorious resource hog, which in turn can negatively impact your Mac’s battery life.
Running out of storage space
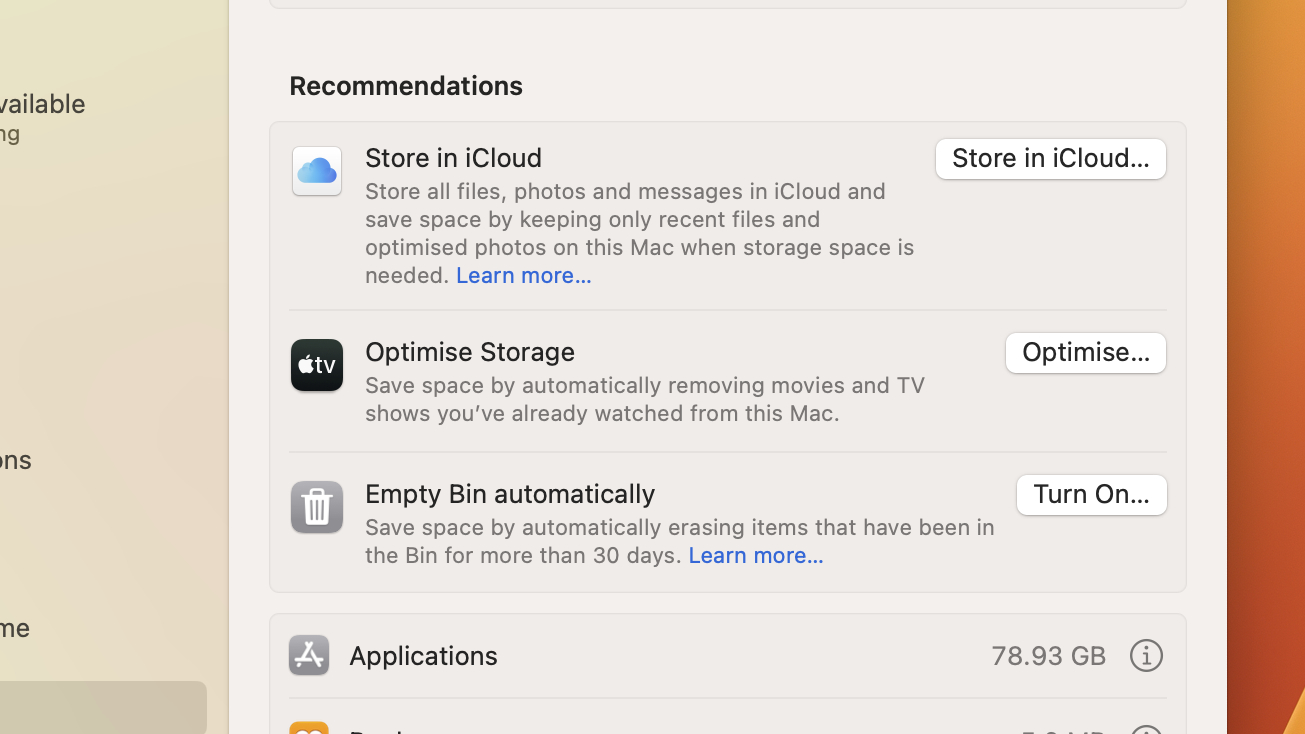
As your Mac’s storage disk starts to fill up, you might notice your computer begins to slow down. The easiest way to free up space – and thus speed up your Mac – is to uninstall old and large apps you no longer use. Another surefire way to help is to regularly empty the Trash.
And there’s a third way: the Optimize Storage feature in macOS Ventura. Open the System Settings app and go to General > Storage. Under Recommendations, click Optimize Storage (if it appears). This automatically deletes things like old movies and email attachments to free up space.
Disk needs to be repaired
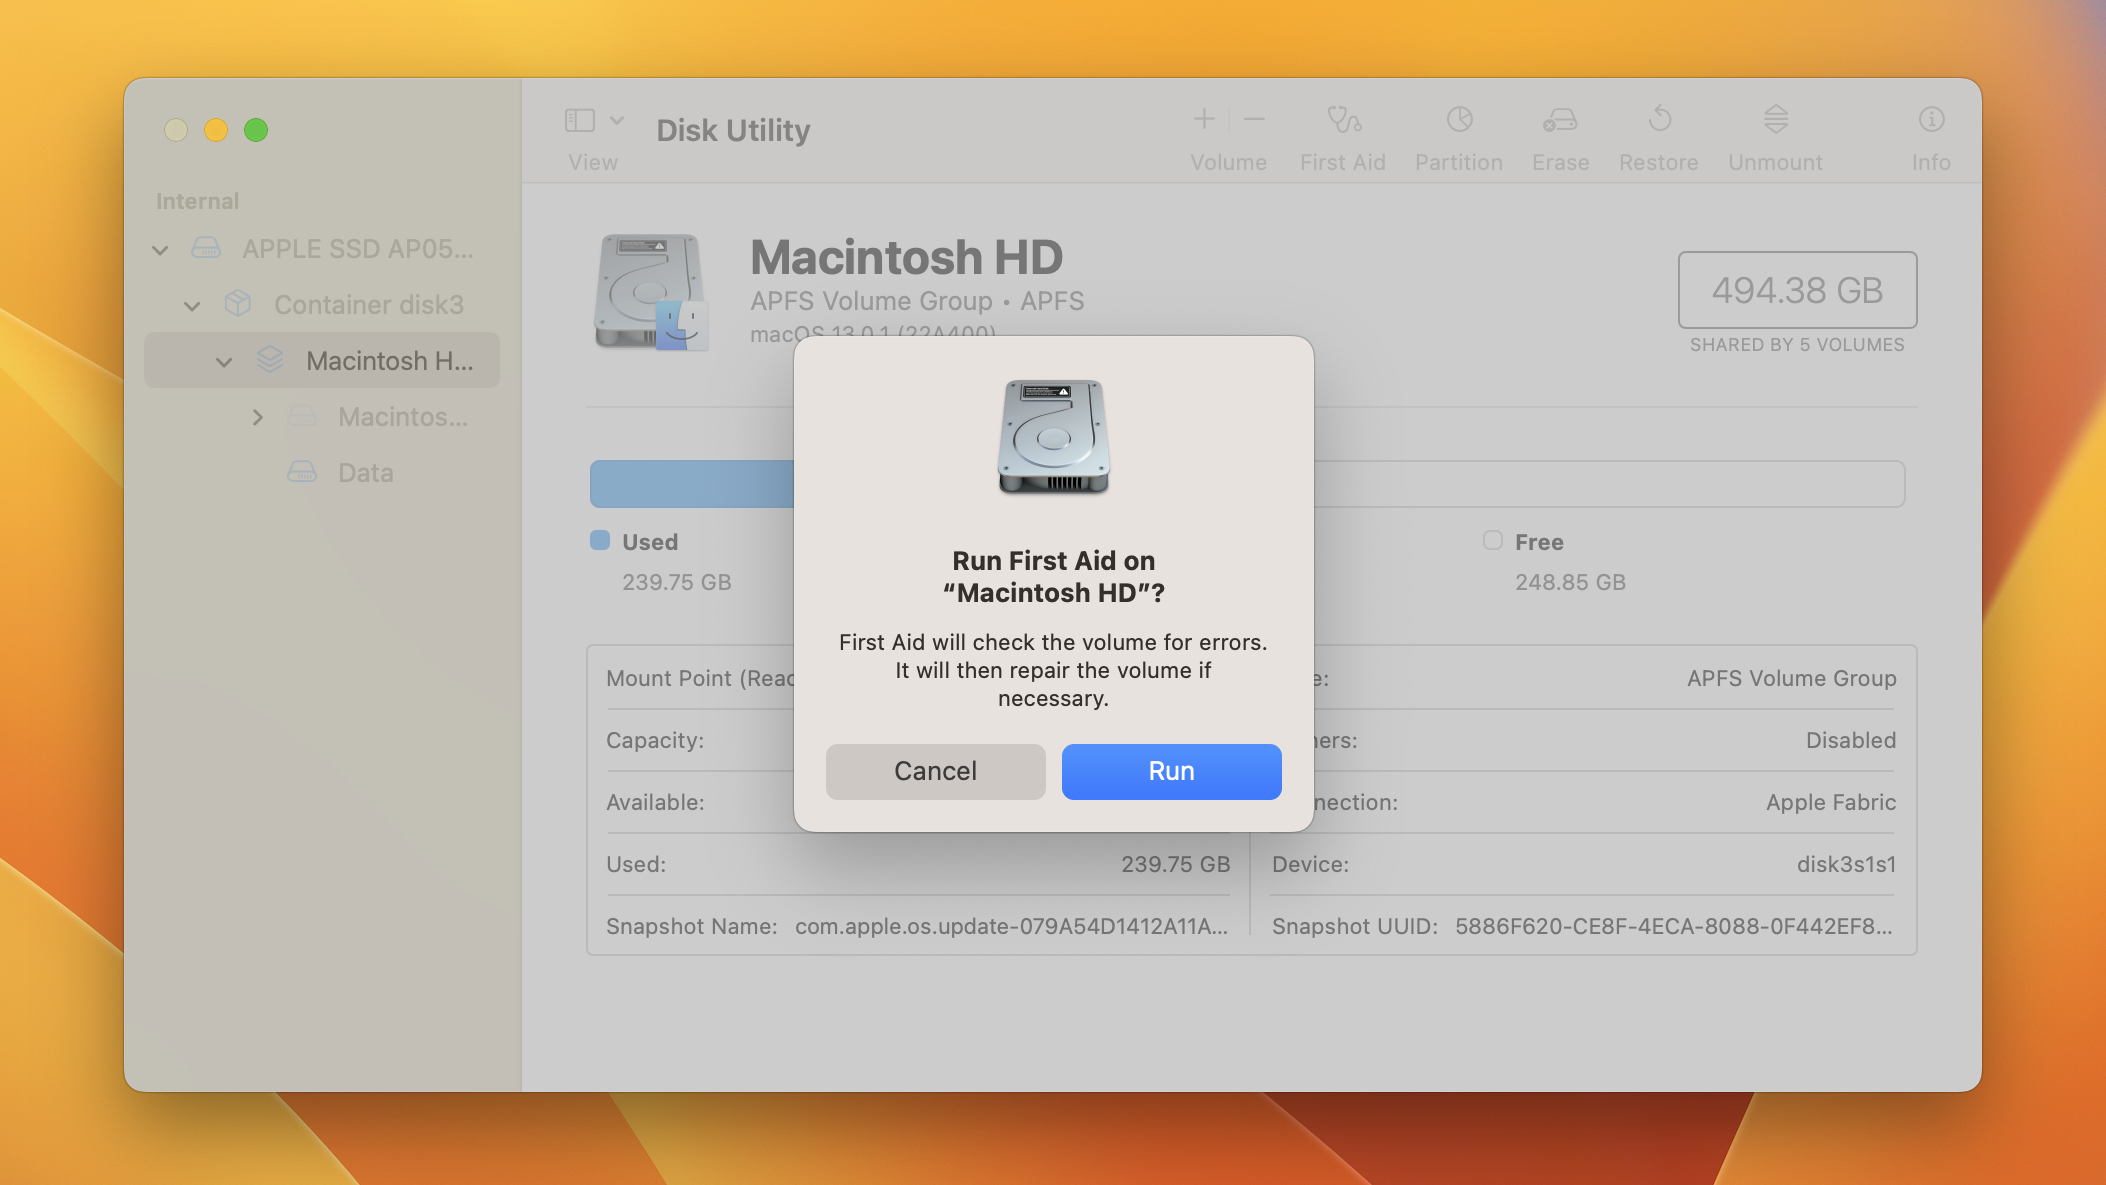
Sometimes, you Mac can fail to boot up properly. Don’t panic if that happens to you – it can be fixed using Disk Utility. First, reboot your Mac. If you have an Apple Silicon Mac, press and hold the power button until you see the “Loading start-up options.” For Intel Macs, restart your Mac and hold Command and R until the start-up options appear.
Now, click Options > Continue, choose a language, then click Disk Utility > Continue. From the menu bar, click View > Show All Devices. Now click your start-up disk in the sidebar and click First Aid > Run. Let First Aid do its thing, then choose Restart from the Apple icon in the menu bar once it’s finished.
Problems with iCloud
Apple’s iCloud is a great way to store your files in the cloud, but it can have its issues. Whether your iCloud account is failing to sync or is throwing a different tantrum, often the first thing to try is signing out and signing in again. In the System Settings app, click your Apple ID in the top-left corner, then scroll to the bottom and click Sign Out. Once you’ve signed out, try signing back in again from the same menu.
Recently changed your iCloud password? When you do, you’ll need to sign out of any iCloud services you use (including on other devices) and sign back in again, otherwise you could run into problems with those services. Simply sign out, then use your new password to sign back in.
An app won’t quit
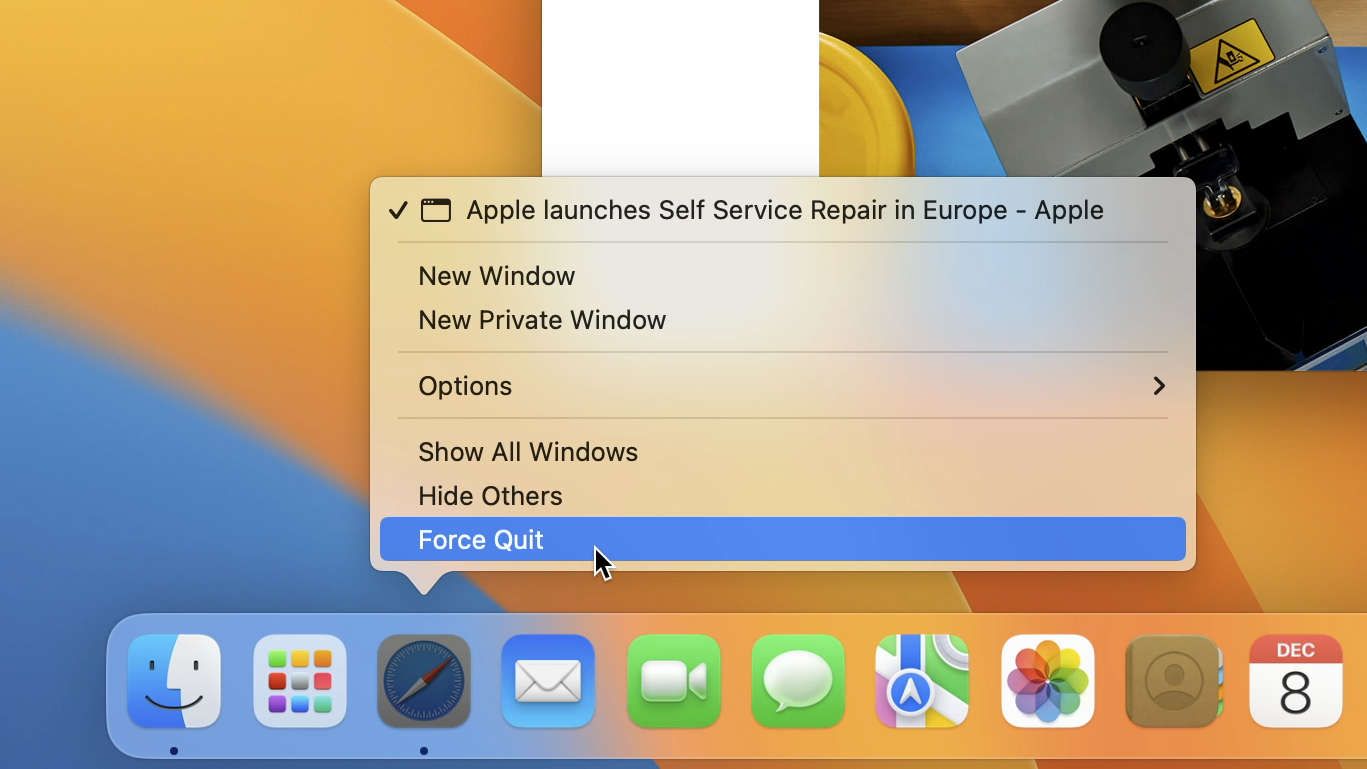
From time to time, an app you’re using will hang, freeze, or fail to quit when you want it to. Luckily, there’s a built-in way to close a bothersome app, even when it refuses to quit normally.
In times like that, right-click the app’s icon in the Dock, then hold the Option key. This will change the Quit command in the context menu to Force Quit. Click this and the app should close, even if it isn’t responding. Alternatively, you can click the Apple icon in the menu bar and click Force Quit (or press Option, Command and Escape together), then choose the app from the Force Quit Applications window.
Remove duplicate photos
In 2022, Apple introduced a new feature in iOS 16 that automatically detects and removes duplicate photos, and that same feature is present in macOS Ventura. Better yet, using it is incredibly easy.
First, open the Photos app. In the left-hand sidebar, you might notice an option titled Duplicates. Click this and you’ll see all the duplicate images Photos has found. Go through the list and select any doubled-up pictures, then click Merge [number] Duplicates. This will choose the best-quality photo for you, ensure all the relevant data is present from both images, then remove the unneeded extra.
Widget data isn’t updating
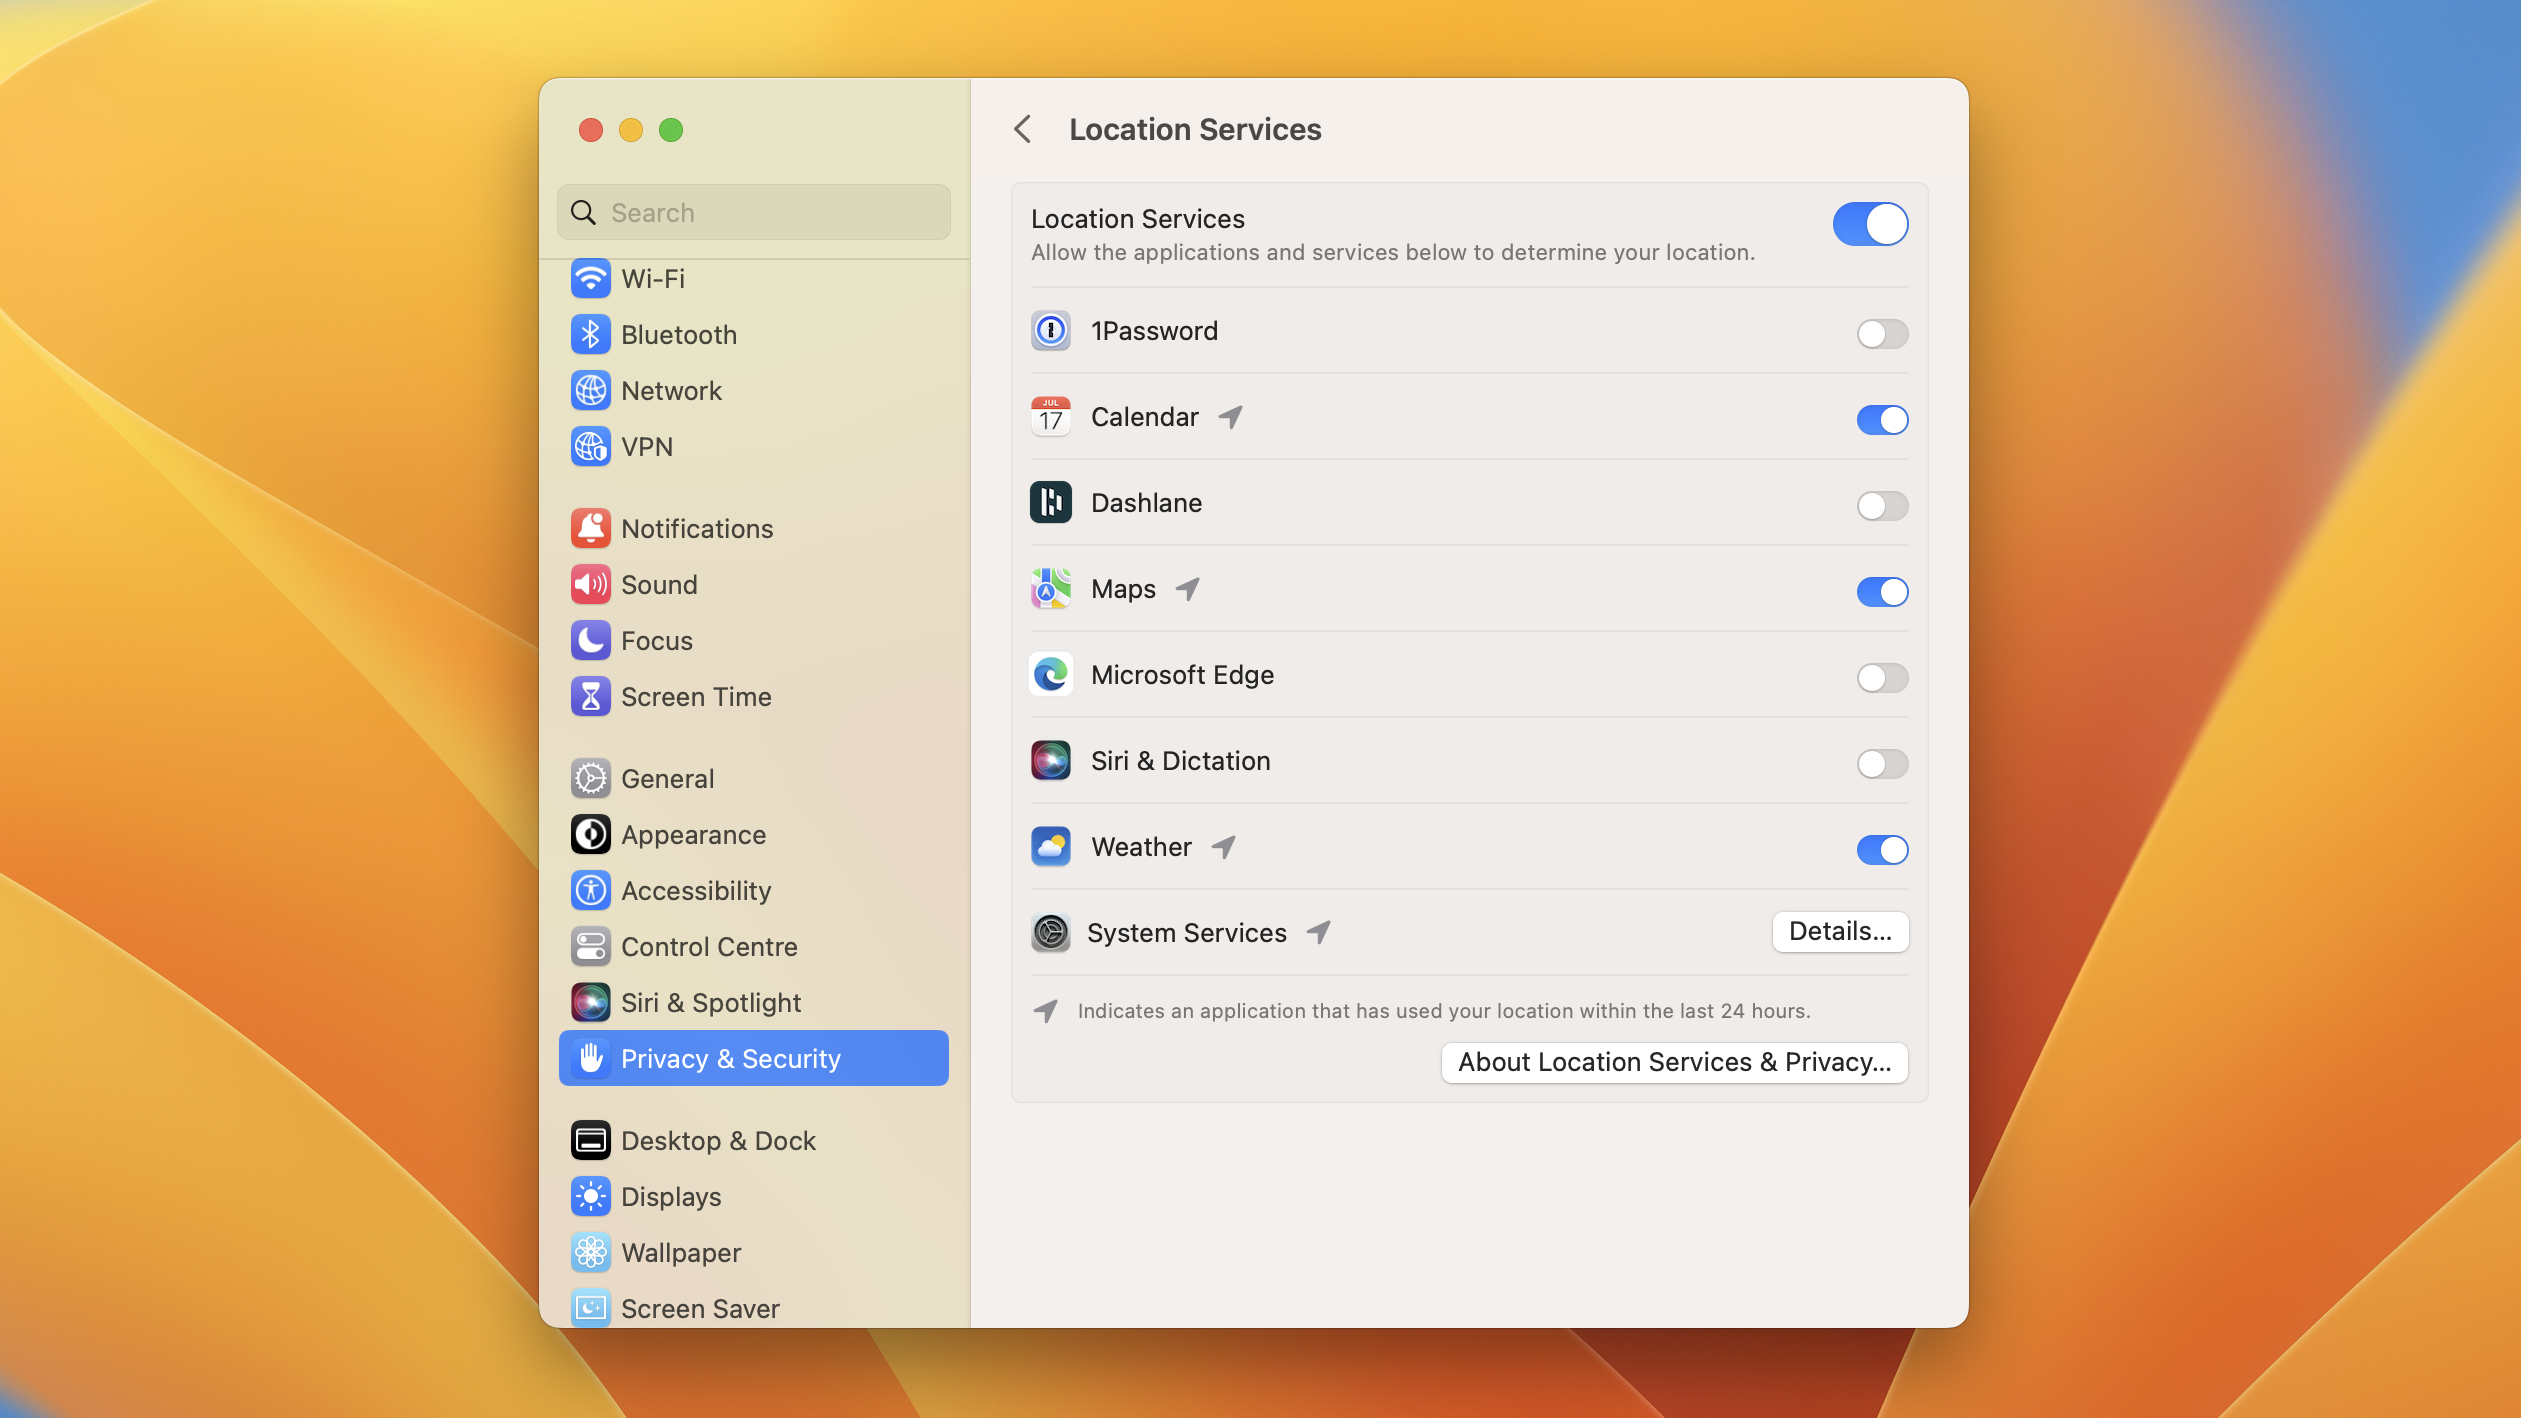
The Notification Center in macOS Ventura lets you display a number of widgets with helpful info. However, sometimes they might show incorrect data or stop updating properly. Often, that’s because there’s a problem with the location data they’re using – you’ll see this in weather widgets or those that display the time, for example.
To fix the problem, open System Settings and click Privacy & Security > Location Services. From here, find the app whose widget is having difficulties (for example, the Weather app) and toggle its location services off, then switch them on again. Alternatively, you can try turning off Locations Services entirely from the same menu, then re-enabling the toggle.

Alex Blake has been fooling around with computers since the early 1990s, and since that time he's learned a thing or two about tech. No more than two things, though. That's all his brain can hold. As well as TechRadar, Alex writes for iMore, Digital Trends and Creative Bloq, among others. He was previously commissioning editor at MacFormat magazine. That means he mostly covers the world of Apple and its latest products, but also Windows, computer peripherals, mobile apps, and much more beyond. When not writing, you can find him hiking the English countryside and gaming on his PC.