


The Raspberry Pi is an impressive platform for prototyping projects of any scale. From a simple blinking LED to a quadcopter, anything is possible with a Raspberry Pi – all you need is a little imagination and some extra components.
One of the most interesting areas of practical use is sensing the world around us, and using the data gathered in all sorts of ways. The world is full of data just waiting to be recorded and manipulated – for example, weather stations come with many different sensors to measure temperature, wind speed, humidity and pressure.
All this data can be stored and manipulated by a savvy hacker to produce graphs and tables that can be imported into other applications or projects. And of all the sensors on the market, the cheapest and most simple is the humble PIR, which is present in so many parts of everyday life.

PIR plans
Passive infrared sensors (PIR) are commonly used in devices such as triggers for burglar alarms in homes and offices. In fact, they are so cheap that they're found inside motion-activated air fresheners, which could be a ripe source of components for this project.
The PIR sensor works on the simple principle of sending a beam of infrared light into a room. If the beam remains unbroken – by which we mean there is no movement in the room – no action is taken.
But the second the beam is broken, a signal is sent to a device that's programmed to respond in a certain manner. These PIR sensors are very cheap – around £4 (about $6, AU$8.40) delivered on eBay – and they are also an excellent starter project because they require very little breadboarding or prototyping.
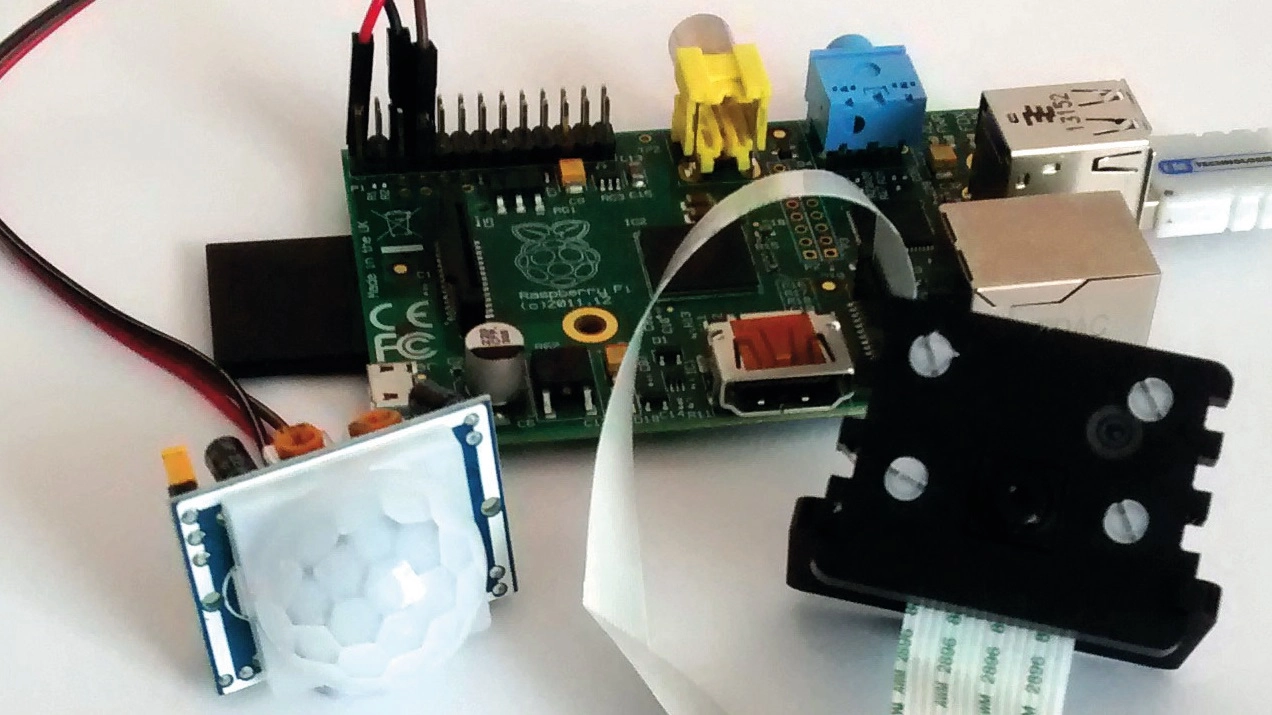
For our project, we will set up a PIR sensor to watch an area for any movement. Once movement is detected, it will trigger the code to complete a sequence of events that will capture a picture of the event and record a short 10-second video at a resolution of 640 pixels by 480 pixels.
The project will culminate with a text message being sent to our phone, alerting us to an intruder or other event. To explain how this project will work, we'll illustrate it using pseudocode, which is a way of explaining a programming sequence using easy-to-understand language. Here's how the project will work in pseudo code:
PIR sensor sends out a beam.
If the beam is broken.
Send a signal to our Raspberry Pi.
On receiving the signal, the Raspberry Pi will take a picture of the activity.
The Pi will then record 10 seconds of video.
After the picture is created, the Pi will attempt to send a text alerting us to the activity.
This text will contain a picture and video .
Once the text has been sent, the Pi will wait for 30 seconds before looping the process.
So where could you use this project? The most obvious answer would be home security but let's think of something nicer.
In the summer there are lots of plants growing and animals moving in the sunshine, so why not use your Raspberry Pi and this project to capture the joys of summer?
You could house this project in a weatherproof case and leave it outside to record animal life. In fact, a project similar to this was used to monitor the feeding patterns of birds caring for their offspring.
A sensor was placed near the nesting box, and this would record the comings and goings of the parent birds. This data was then linked to weather data for that area.
When comparing the data, it became clear that the natural food of birds – insects – were not as abundant when the weather was rainy or windy. This meant the offspring were not being fed as often.
Alert! Alert! In this project, we're choosing to alert the user via a text message, because no matter what type of phone you have, and what type of signal you receive, a text message is more reliable as a method of delivery than an email or tweet, which rely on 3G or Wi-Fi coverage to receive data.
This project can be built upon to include other methods of delivering the alert – in fact, you can send more than one alert from the project.
To send an email, you can use the smtplib, and we found a great how-to. You can also send a tweet from Python using the tweepy library.
To do this you will need to create an application via https://dev.twitter.com. Once you have completed this part of the process, you can import the API key into tweepy and use it to send and receive tweets.
You can read more about tweepy via its website. The pictures and video that are captured in this project are stored on our Raspberry Pi for later retrieval via any means that is convenient.