How to guard your home with Raspberry Pi
Guard your home with a Pi
Sign up for breaking news, reviews, opinion, top tech deals, and more.
You are now subscribed
Your newsletter sign-up was successful

1. Store the pin number
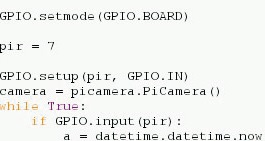
Earlier we referred to connecting the Out pin of the PIR sensor to Pin 7 of our Raspberry Pi.
Well, in order to be efficient with our code, we need to create a variable that stores the pin number ready for use in our code.
To do that, use the following code:
pir = 7
By doing this, we can easily change the pin in our code if we need to.

2. Enable text messages
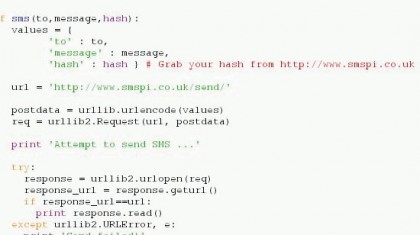
Creating a function called sms() on line 14 is a great way contain the code kindly provided by smspi.co.uk.
Using three arguments called to, message and hash we can easily pass the target phone number, the alert message and the unique hash which permits the use of the SMSpi text message gateway.
Sign up for breaking news, reviews, opinion, top tech deals, and more.
To use the text message service, you will need to sign up for a free login and hash to use in your project.

3. Easier coding
In the code you can see:
GPIO.setup(pir, GPIO.IN)
This line of code sets our pin 7, which is referenced as a variable called pir, as an input, so that it waits to receive a signal from the sensor.
The next line of code shortens the full picamera function down to just camera making it easier to work with.
camera = picamera.PiCamera()

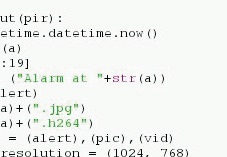
4. How the main loop works
If the alarm is triggered.
Get the date and time and convert it to a string.
Alter the string to only contain the first 20 characters.
Create the message and file name for the alert.
Take the picture and record 10 seconds of video.
Use the sms function to send the alert to our phone.
Sleep for 30 seconds.
Loop the process if the alarm is triggered.

SMSpi
The team at SMSpi project has kindly provided its Python code for this project. SMSpi offers a free text messaging service for Pibased projects. The SMSpi project is powered by Raspberry Pi; all your texts are routed via the same device that is powering our alarm.
The API can be dropped into most common programming languages, including CURL, PERL, Python, PHP and Ruby.
To use the service, you need to sign up for a free login, which then allows access to the network via a hash that acts as your unique key.
Using the service, you can easily send SMS messages over the SMSpi network, as proven by this project, but you can also receive text messages and have them forwarded to an email address or posted to a web page for use in web apps.
Once you have your hash, paste it into your Python project code on line 11.
With your alarm now installed and working, you need to remotely access your Raspberry Pi to see the pictures and video.
The easiest way would be to remove the card and view the media on your computer. But you could enable SSH on your Raspberry Pi via the raspi-config advanced menu and then use your file manager to SSHFS into the folder where the pics are.
If you are feeling adventurous, you could install lighttpd or nginx to serve the content over a network. The choice is yours but remember to be careful with sharing the images over an open connection to the internet.
- Find out what else you can do with the tiny PC with our collection of Raspberry Pi Projects