How to check AirPods' battery level, and how to make them last longer
See whether your AirPods need a charge, and make it so it doesn't happen as often
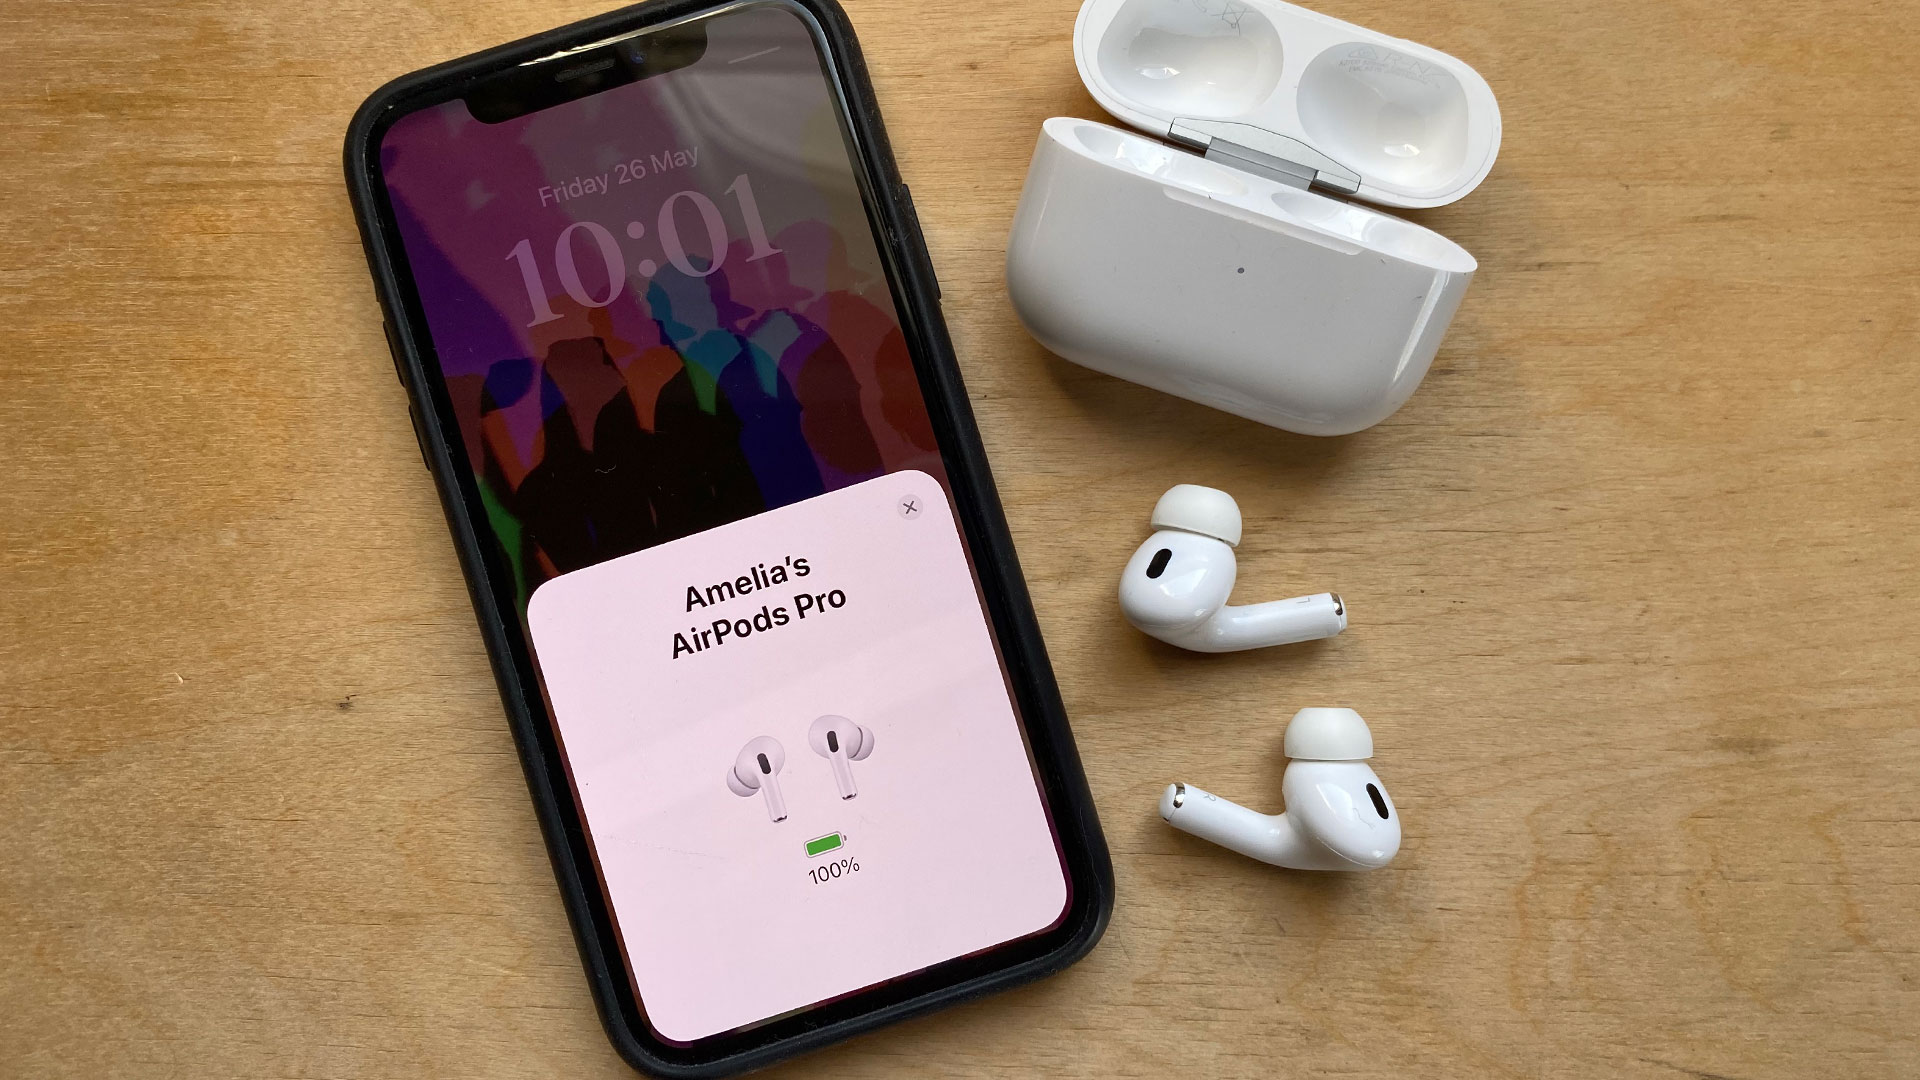
It’s never good when the music stops. Whether you’re listening to your favourite album on the way to work or in the middle of a call, a dead pair of Apple AirPods are as sad as it sounds. Thankfully, it's easy to check your AirPods' battery levels, and there are few different ways you can improve their longevity.
If you own one of the best AirPods, then how long they last will of course vary depending on which model you own, but we've got some tips and tricks to extend their battery life that will work on any of them, from the cheapest AirPods 2nd Gen up to the latest AirPods Pro 2.
How to check your AirPods battery
See how much battery your AirPods have left
There are three different easy ways to check your AirPods battery. The first and quickest way is a pop-up on your iPhone's screen when you open the AirPods' lid. You’ll recognize this from when you first paired your AirPods to your iPhone, as it automatically brings up a notification on your screen, and if shows you the AirPods' charge percentage in both the buds and the case.
The second way is to ask Siri: How much charge do my AirPods have?
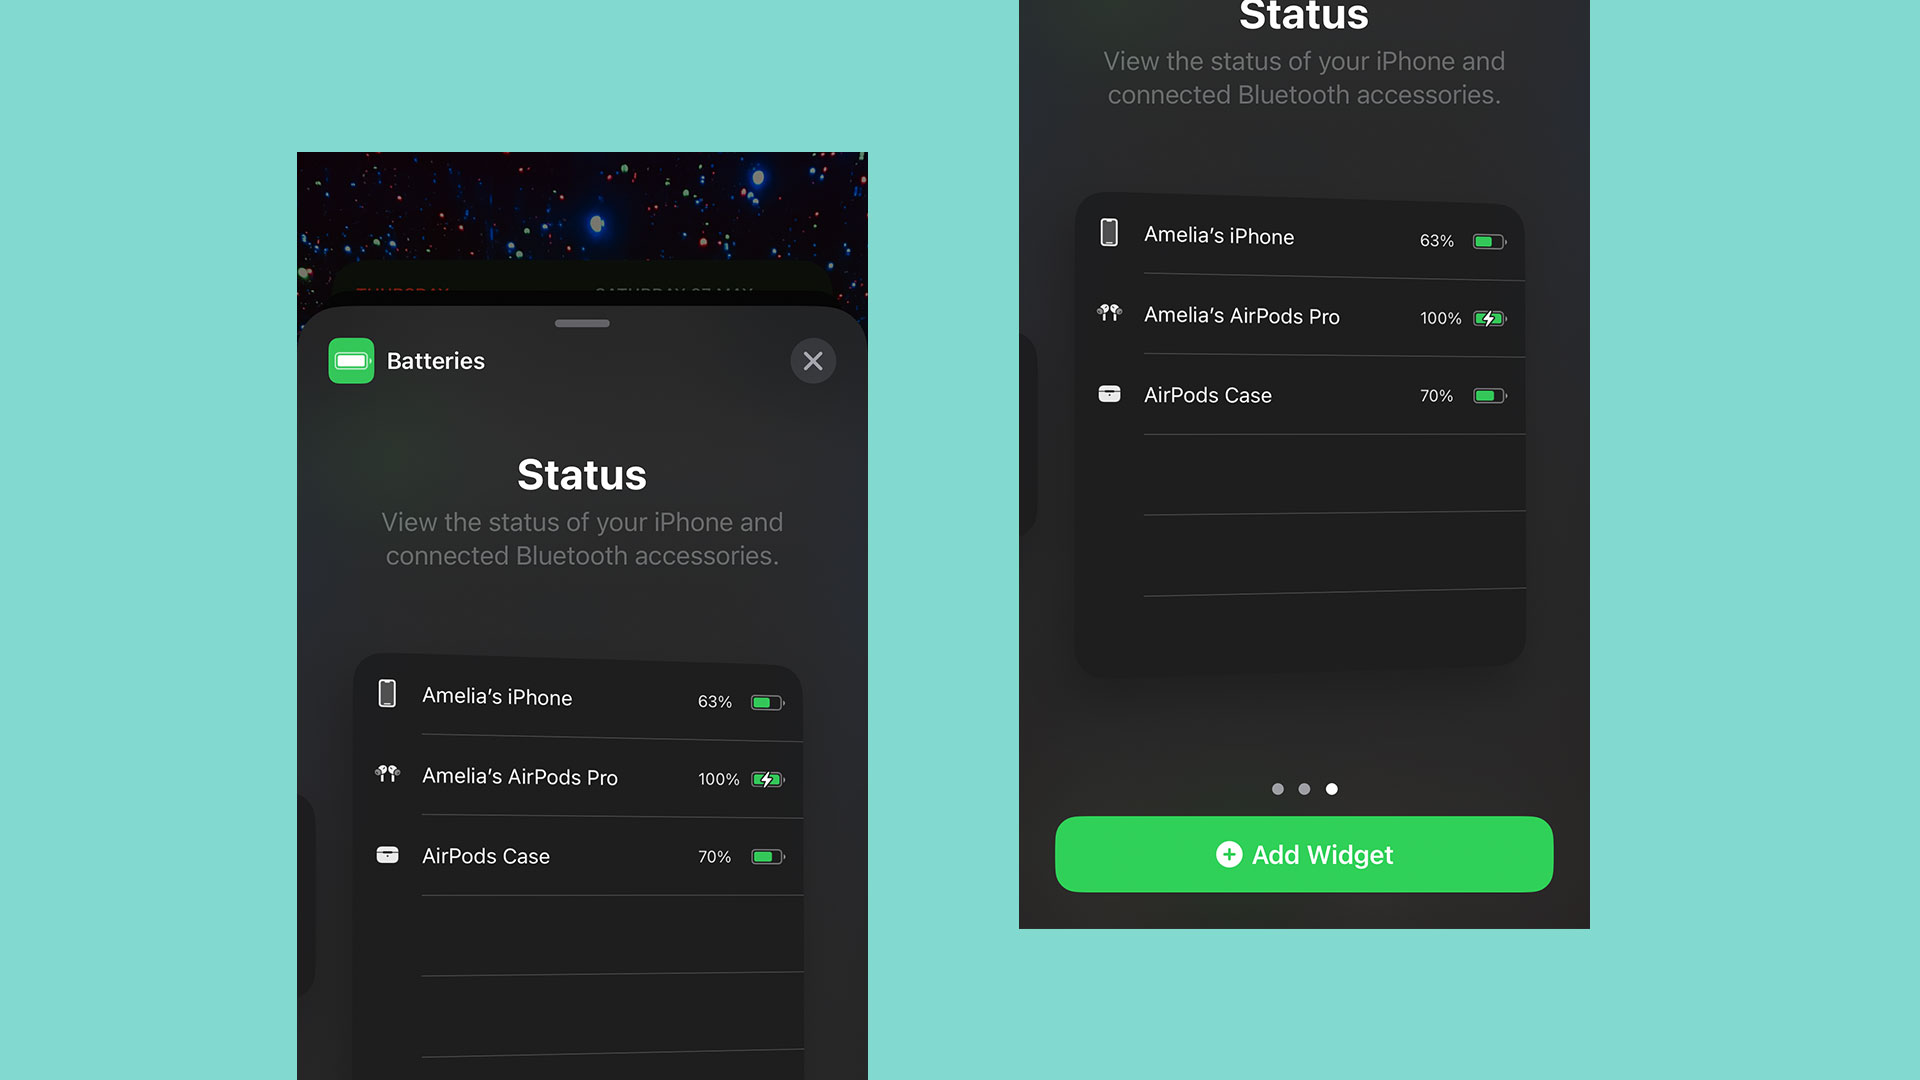
The third way that you can use to keep track of your battery level is on your iPhone’s Home screen or Lock screen with a widget. To set this up, press and hold anywhere on your home screen, then press the + icon at the top left side of your screen. This will bring up all your widgets so you’ll need to search Batteries to find the right one. There are three different styles that you can then choose from. Once you’ve decided on one you like, press Add Widget, which will place it in your home screen.
There are two slightly more complex ways you can do it, too. The first is to open Control Center by swiping down from the top-right of your iPhone's screen (or up from the bottom if your iPhone has a Home button) while your AirPods are in your ears, and tapping the blue dot with an AirPods symbol in at the too right, then the AirPods symbol to the right of the skip tracks forward button.
And finally, you can also check the battery life in your iPhone’s Settings when connected by pressing [your name] AirPods.
Steps for how to improve your AirPods battery
- Turn on Optimized Charging
- Turn off noise cancellation features
- Lower the volume
- Charge one AirPod at a time
1. Turn on Optimized Charging
First things first: prevention is better than cure. Keep your AirPods' battery healthy and they'll hold their charge for longer, and Apple has a way to help make sure the battery stays strong.
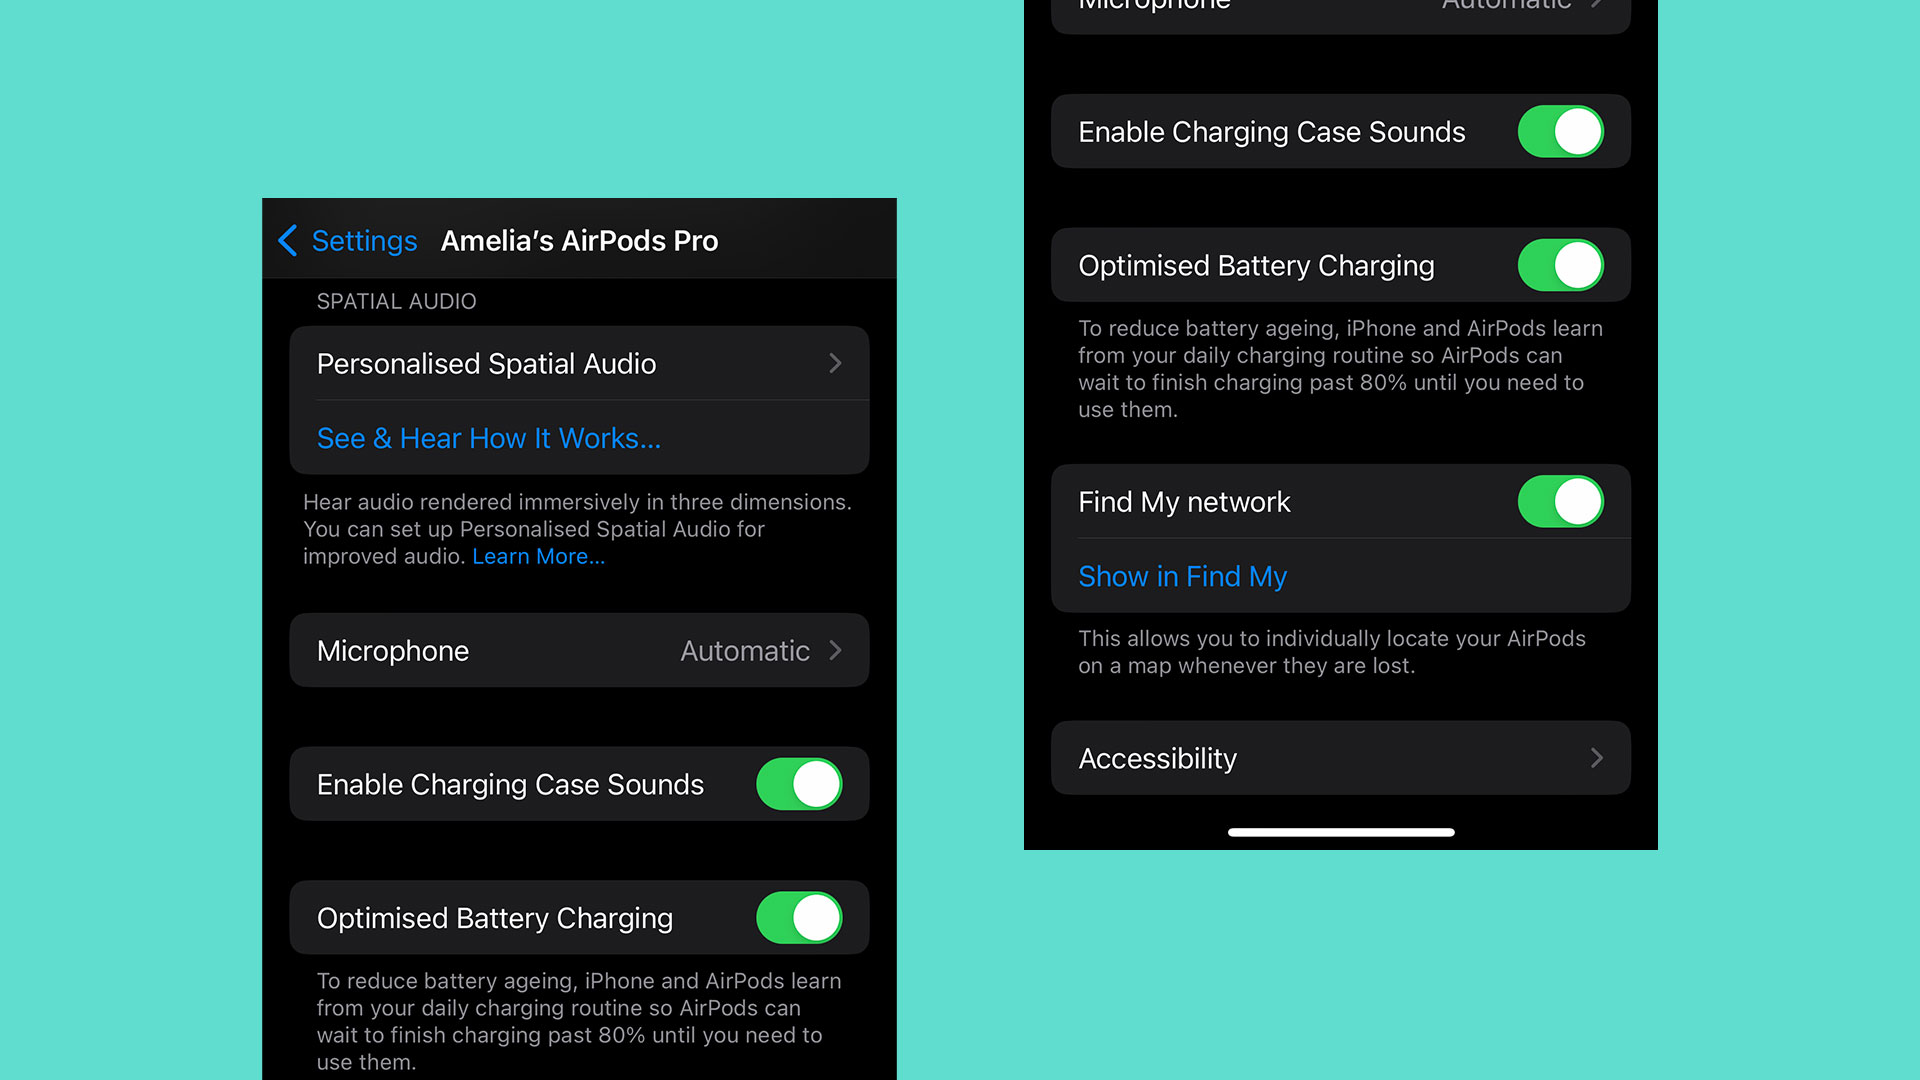
You can activated it by opening your iPhone’s Settings app, then open your AirPods case – make sure to close the battery life display if that pops up – which will bring up more settings options. Tap to see your AirPods' settings.
Scroll down to Optimized Charging and make sure that this feature is turned on – you can check this by making sure that it is green.
By enabling this, your AirPods will be able to maintain their maximum possible battery life for longer, through learning your regular charging routine and only charging them to full nearer to the time you'll use them, which will help stop your battery ageing and losing capacity over time.
2. Turn off noise cancellation and Spatial Audio
If you’ve made the jump to the AirPods Pro, AirPods Pro 2 or AirPods Max then you’ll likely have found the active noise cancellation (ANC) to be one of their top features – and the latest-gen AirPods 2 are a major improvement on their predecessors – but this does use up quite a substantial amount of battery. And the same goes for Spatial Audio.
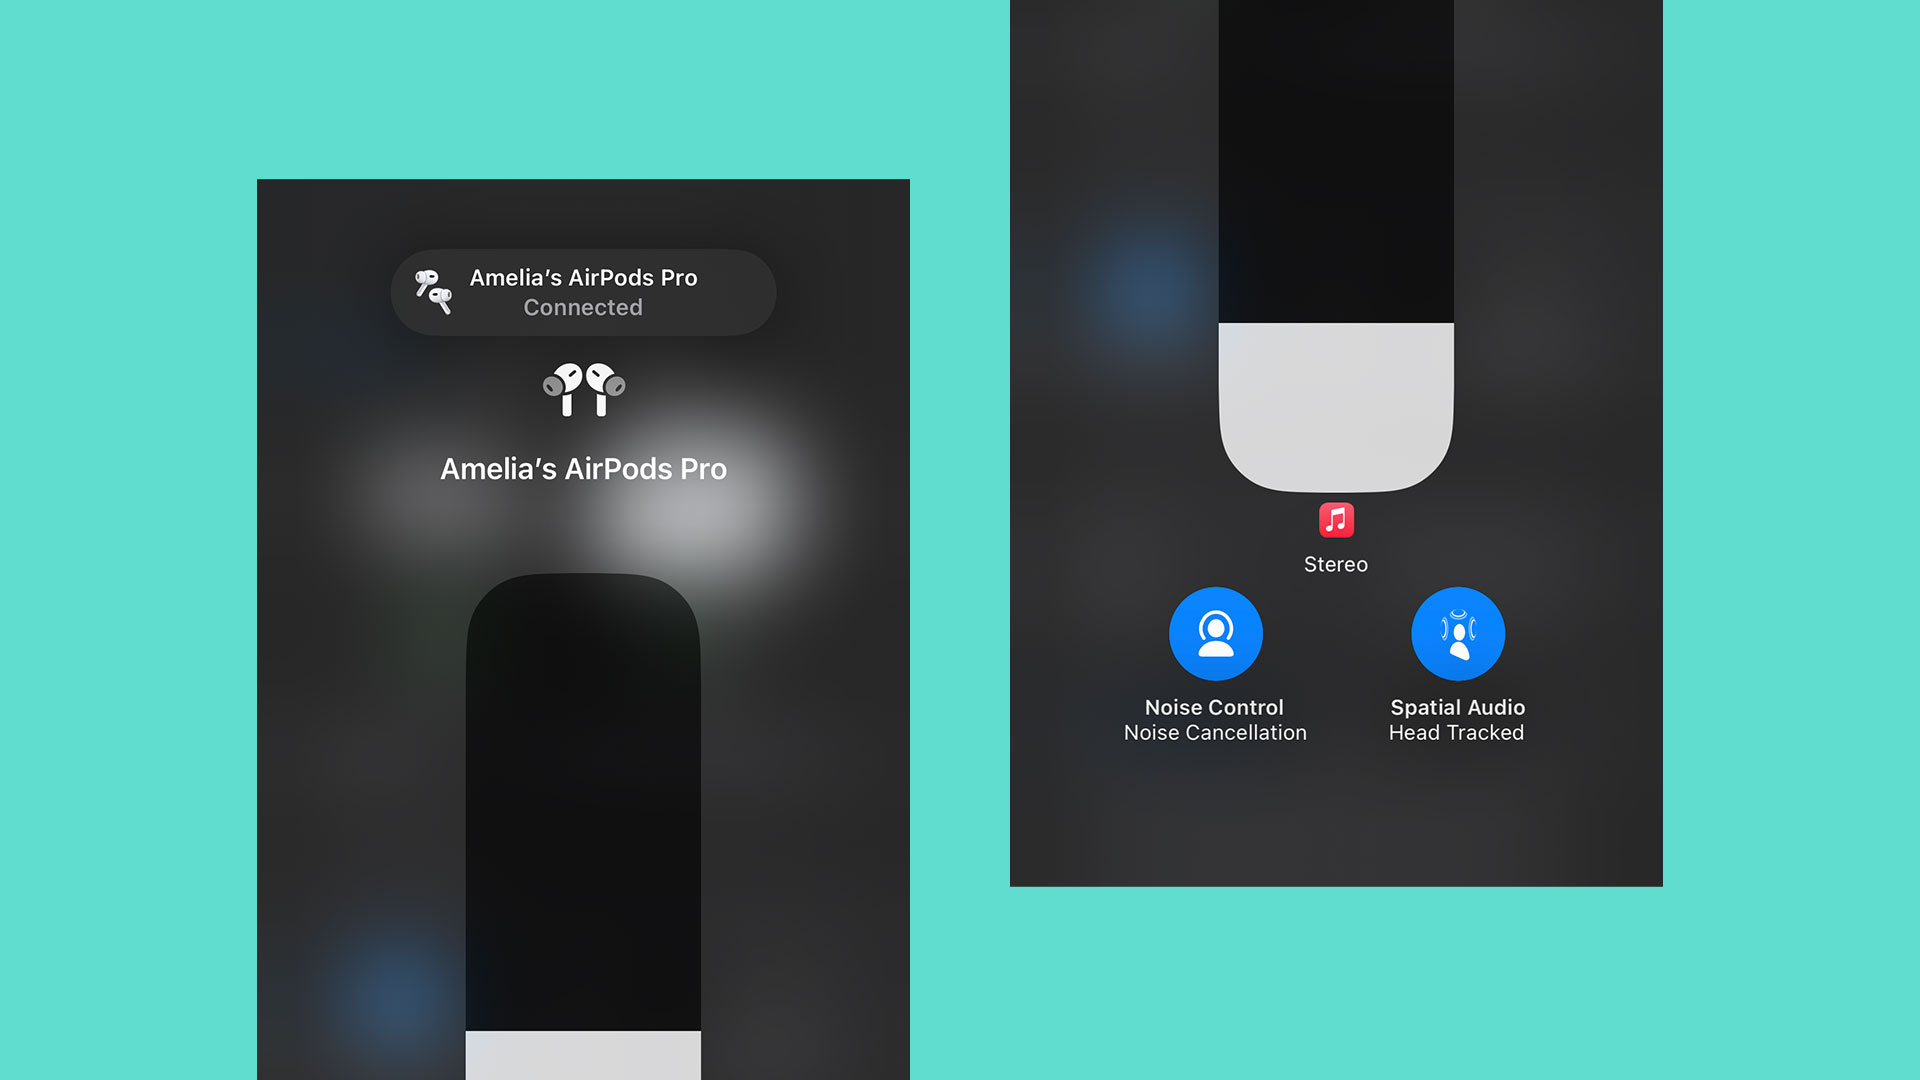
By switching it off, you can get longer use out of your AirPods. To switch these off while your AirPods Pro are playing, bring up Control Center by swiping from the top-right of the screen (or swiping up from the button if your iPhone has a Home button), pressing and holding on the volume control, then tapping either the noise controls on the bottom left, or the spatial controls on the bottom right and setting them to Off.
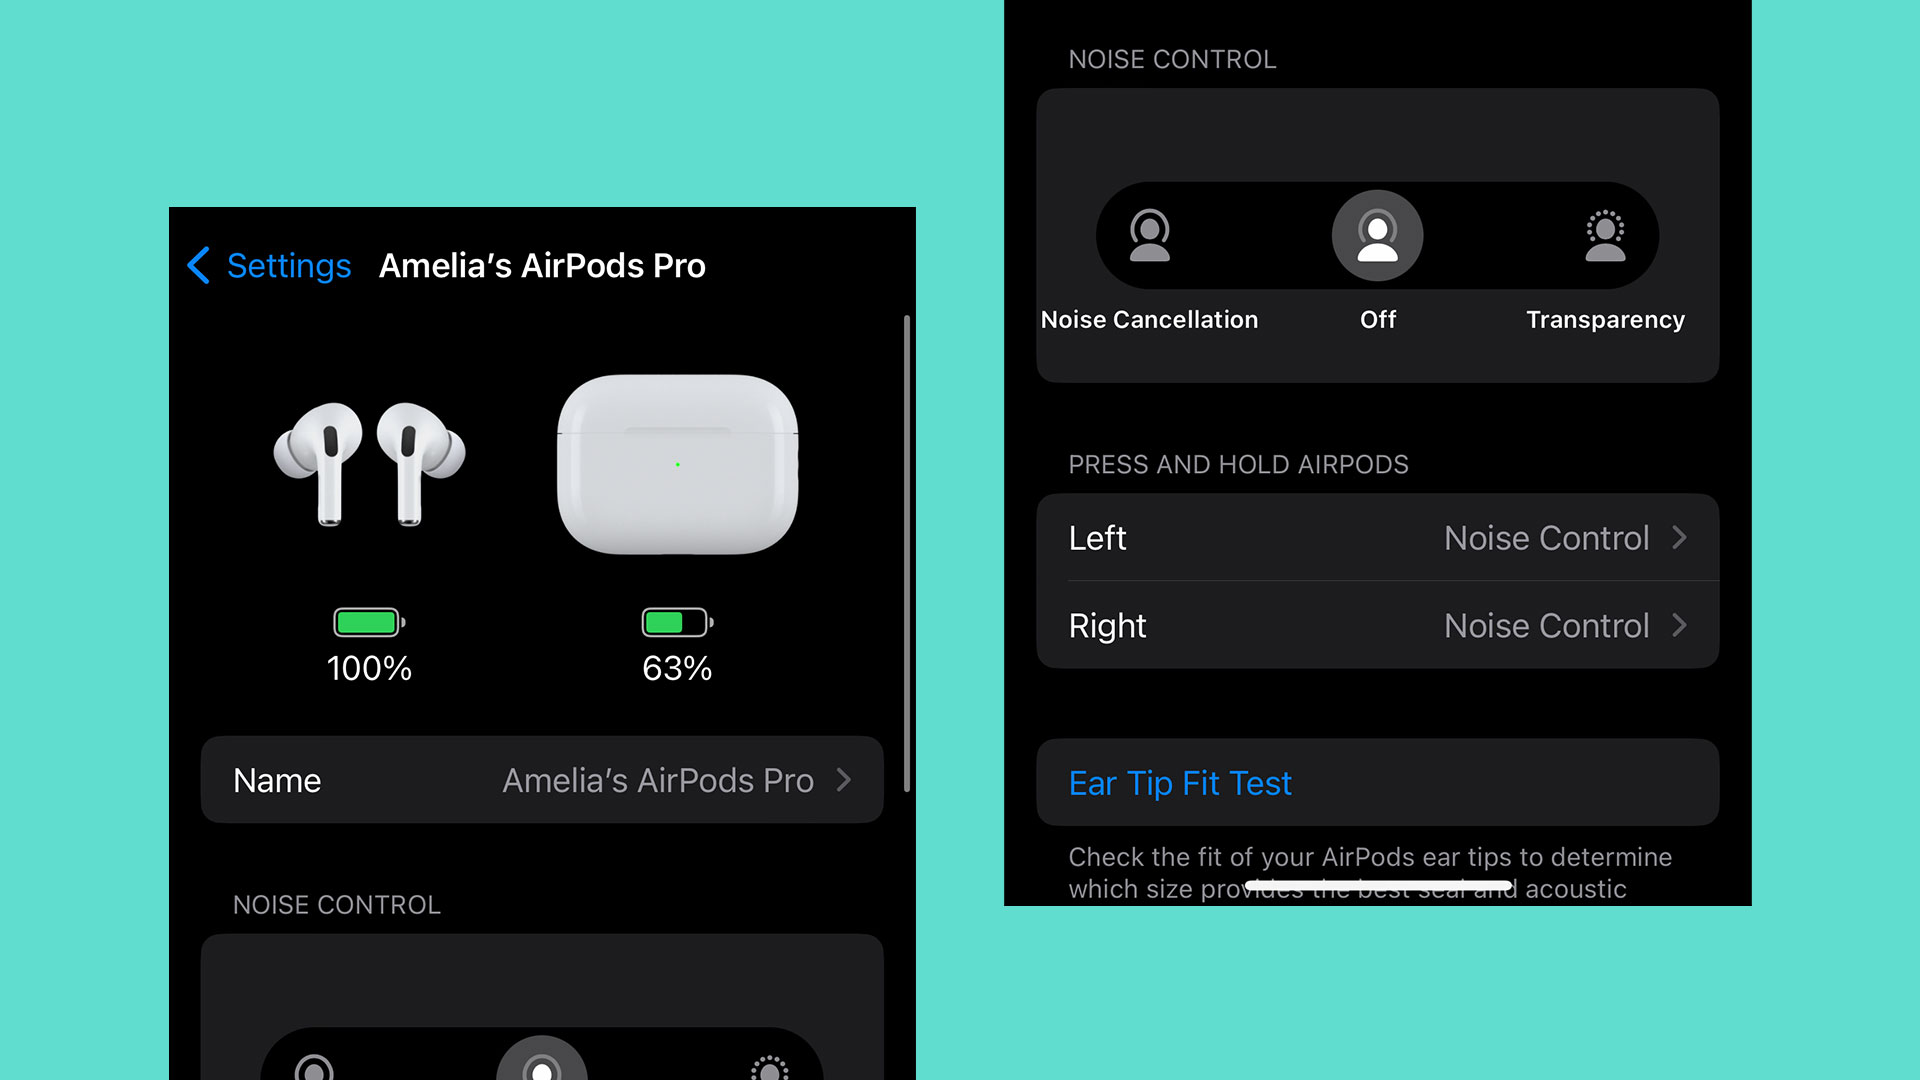
You can can also change the noise cancellation by going to Settings – make sure your AirPods case is open – and then pressing [your name] AirPods. Under Noise Control you’ll be able to switch this mode to Off, further down you’ll also be able to turn off Adaptive Transparency.
3. Turn down the volume
We hear you. There are times when playing music loudly is absolutely necessary because you're in a loud place, or just because the song's a banger, but it isn’t always needed. Whether you’re at work or just wanting to block out background noise to focus, you might not need the volume up high.
Just like how additional features such as noise cancellation and transparency mode drain your battery faster than if you didn’t have them turned on, so does a higher volume setting. By turning down the volume on your AirPods to a more ambient level, you can eke a little more time out of them.
4. Charge one AirPod at a time when desperate
If you’re on a call or just want to finish that podcast, a neat trick that you can use to get more out of your battery life when your case is really close it drained is by charging one AirPod at a time, which allows you to still be able to listen, and you'll get twice as much listening time from charging one AirPod than if you charged two.
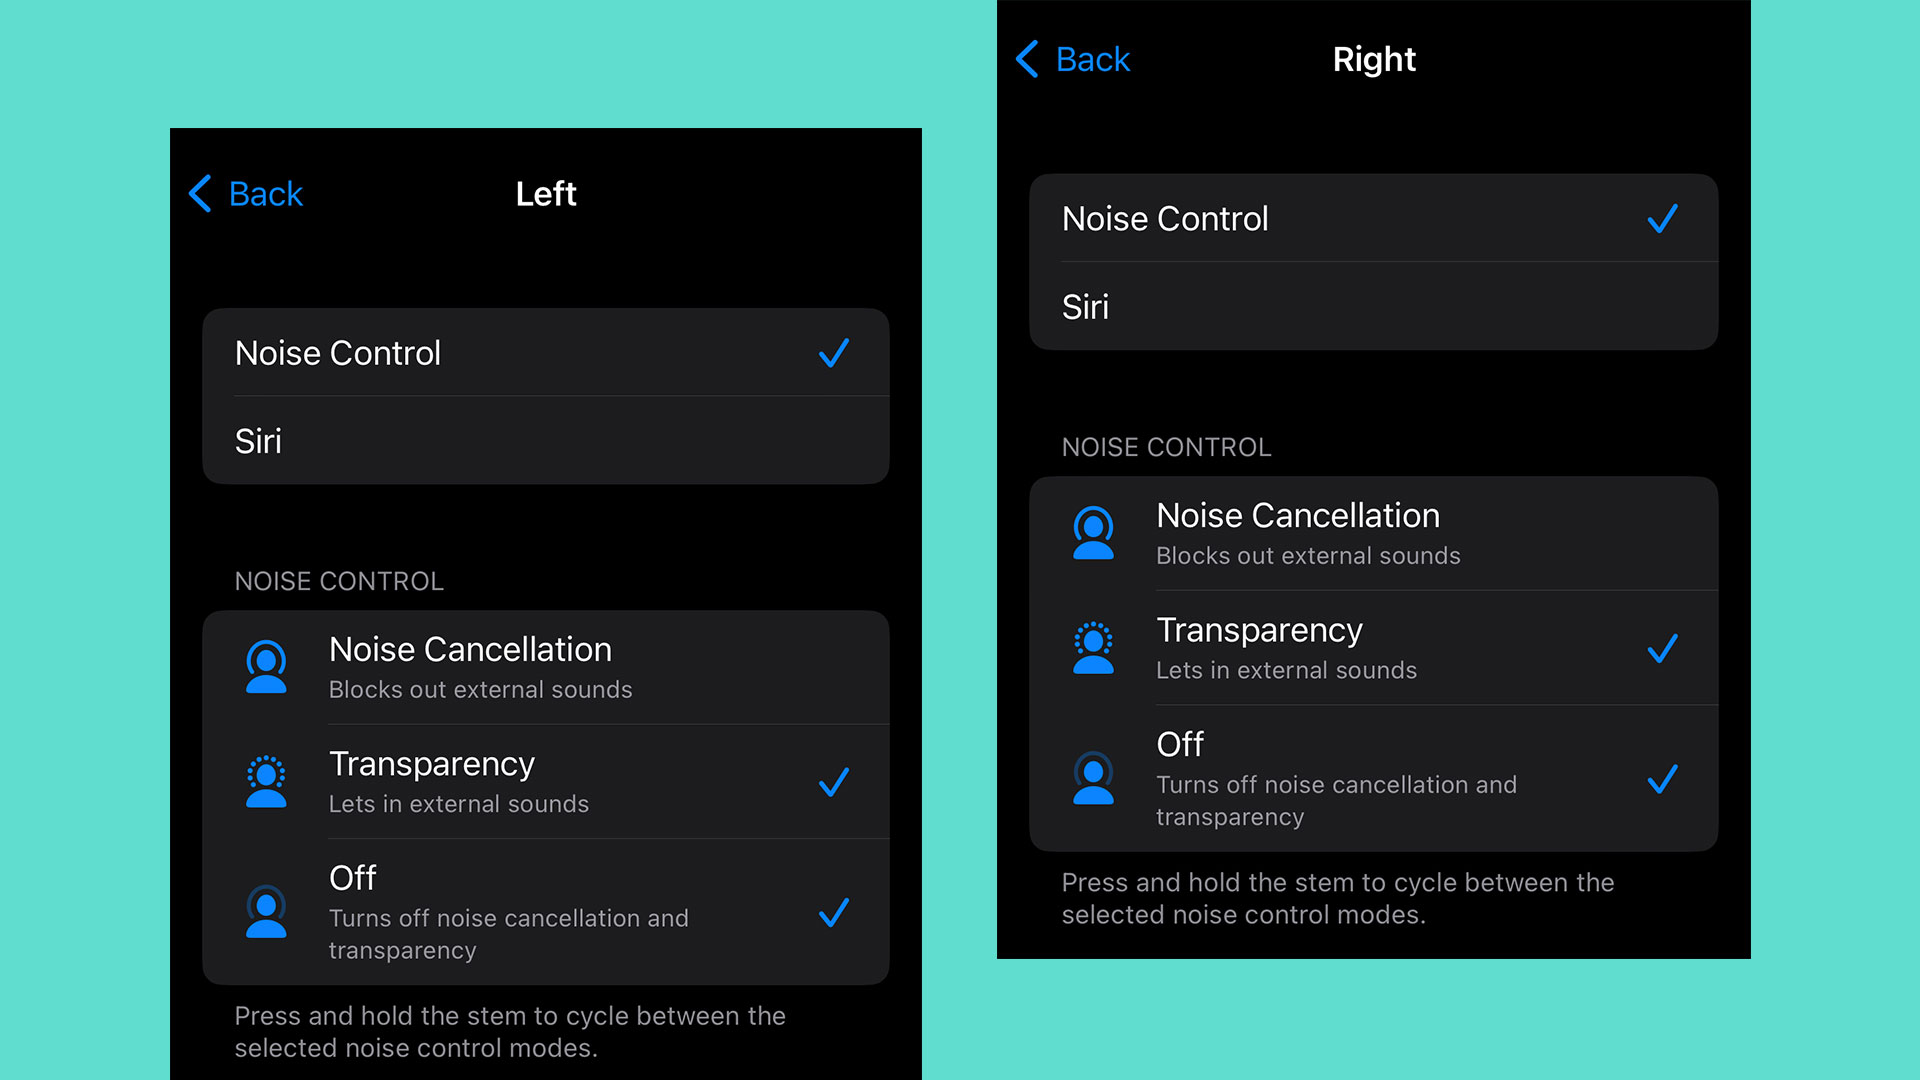
Another nice feature of AirPods is that you can turn ANC and transparency mode off in each individual Pod, giving you flexibility if you need to be able to still hear what’s going on around you. You can do this by accessing your AirPods Settings and under Press and Hold AirPods you will have control for each Pod.
Final thoughts
As one of the first best wireless earbuds to go to market, Apple has come a long way since launching the original Apple AirPods in 2016. It’s a testament to the company’s design and quality build, which is why we count the AirPods among our best wireless earbuds – but they're no good if they're dead. You don't need to use our tips above all the time, but it's good to know about them, so you can make use of them when needed.
Sign up for breaking news, reviews, opinion, top tech deals, and more.

Amelia became the Senior Editor for Home Entertainment at TechRadar in the UK in April 2023. With a background of more than eight years in tech and finance publishing, she's now leading our coverage to bring you a fresh perspective on everything to do with TV and audio. When she's not tinkering with the latest gadgets and gizmos in the ever-evolving world of home entertainment, you’ll find her watching movies, taking pictures and travelling.