How to install and configure graphics drivers in Linux
Boost your graphics performance

The hunt for gaming performance on Linux is a constant and ever-changing challenge. The market for discrete graphics cards has become dominated by the two graphics giants: Nvidia and Advanced Micro Devices (AMD).
This has meant the decision boils down to one simple question: Which company's graphics card do I buy? But once you delve deeper into the details this question becomes quite a complex one.
The answer will change depending on your price/performance preferance; your operating system; other components in your computer; and at times even where you live.
If you visit online forums for answers there's also a constant back and forth between fans of both AMD and Nvidia over which graphics card has the best price/performance ratio, has a longer useful life and which performs best in which popular game.
As Linux becomes more user-friendly and game developers add Linux support, the biggest question – outside of what physical card to buy – seems to be graphics driver performance. With varying levels of support for each platform, the performance of a graphics card will vary from OS to OS.

Going more in depth, let's start with Nvidia. Its Linux driver support is widely considered the best with consistent updates at almost the same frequency as Windows driver updates.
However, the caveat here is that its driver software isn't opensource, which leaves many Linux users frustrated or forced to compromise. AMD's driver support lags behind Nvidia in terms of gaming performance, but AMD's graphics driver support is friendlier to open-source, as it offers both a higher-performing, closed-source Catalyst driver and an opensource Radeon driver.
Get daily insight, inspiration and deals in your inbox
Get the hottest deals available in your inbox plus news, reviews, opinion, analysis and more from the TechRadar team.
Intel, which offers integrated graphics processors on its newer processors, provides completely open-source drivers, although its integrated graphics chips are not powerful enough to compete with the dedicated graphics cards of AMD and Nvidia.
Although Nvidia only releases a proprietary GeForce driver, the Linux community has created its own open-source driver called nouveau. Unlike the AMD open-source driver which was helped along by AMD's release of specifications, the nouveau driver has been built almost entirely through reverse engineering.
To Nvidia's credit, it has recently begun helping nouveau development by releasing documentation and specifications. So to recap, Nvidia cards have both proprietary GeForce drivers and open-source nouveau drivers. AMD has proprietary Catalyst drivers and opensource Radeon drivers. Intel provides an open-source driver that's included in all Ubuntu installations.
Now that you have a brief overview of the drivers available, let's get to work installing the right one for you. First, we'll cover the installation of Nvidia's GeForce and nouveau drivers. We will be using the Ubuntu distribution (distro) for this tutorial, but these steps can be applied to any Linux platform with only minor modifications.
In Ubuntu, the nouveau driver is the default for any new user. In theory, it's a great feature because it's open-source. In practice, it's usable only for 2D graphics and may not work well, or at all, with newer Nvidia graphics cards and technologies. For 3D applications, such as games and modelling, it's usually recommended to stick to the Nvidia proprietary driver for the sake of performance and stability as well as support for Nvidia's latest graphics technologies, such as Nvidia HairWorks.
How to install Nvidia drivers in Linux
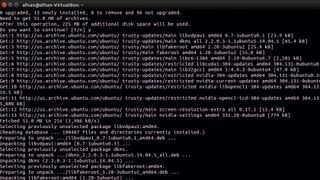
The nice thing about Nvidia's proprietary driver is that they are quite easy to install. First, make sure that your system is updated and Linux headers are installed.
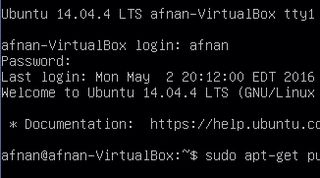
To make sure they are, just use the following command in the terminal:
$ sudo apt-get install linux-headers-generic
Installing the Nvidia drivers can be done in three easy steps. First, install the drivers themselves with $ sudo apt-get install nvidia-current in a terminal.
The next step is more of a safety measure as there are cases when the Nvidia installation script doesn't run this command. This can lead to severe problems when the system reboots, so the solution here is just to run the command again separately: $ sudo nvidia-xconfig .
Finally, reboot your system using the reboot command to apply your changes. That's it! You should now be using Nvidia GeForce driver. The driver can be updated as you see fit by either running the command again or going to the Nvidia website and downloading and installing the new one.
We recommend sticking to running the command as there's less risk of a new driver causing unwanted problems on your system. However, it's important to note that you must remove the previous driver before installing the new one. The commands to do that are:
$ sudo apt-get remove nvidia* && sudo apt-get autoremove
Next, reboot and when you're back at the login screen press CTRL + Alt + F1 to switch to command console. Login here with your username and password. When you're at the text console, you'll have to kill the current graphics session by running $ sudo stop lightdm.
Finally, give permissions to the downloaded driver package and run it with:
cd /Downloads && chmod +x NVIDIA-Linux-*-346.35.run && sudo sh NVIDIA-Linux-*-361.42.run
From here, just follow the onscreen instructions and then reboot your computer. At next boot, run $ sudo nvidiaxconfig to save your new configuration. Optionally, you can also blacklist the nouveau driver to prevent it from installing itself during a system update or uninstall them completely.
If you want to do this, edit the following config file with:
$ gksudo gedit /etc/modprobe.d/blacklist-nouveau.conf
Once in the file, add the following lines at the end and save the file.
blacklist nouveau
blacklist lbm-nouveauoptions nouveau modeset=0
alias nouveau off
alias lbm-nouveau off
You can also choose to disable the kernel nouveau by running the following commands one by one:
$ echo options nouveau modeset=0 | sudo tee -a /etc/
modprobe.d/nouveau-kms.conf
$ sudo update-initramfs –u
And once you reboot you're done!

Graphics Drivers PPA
Another method that was recently developed is the introduction of the Graphics Drivers PPA, which can distribute the latest GeForce drivers to desktop users if you opt-in for it.
This method isn't completely devoid of errors, but can be much easier for the novice user to maintain and keep up to date with the best-performing drivers. To add the PPA and update drivers run the following commands in the terminal:
$ sudo add-apt-repository ppa:graphics-drivers/ppa
$ sudo apt-get update
If you ever run into an error due to a driver update, run the ppa-purge command to roll back the driver. The open-source nouveau driver can also be uninstalled after installing the GeForce drivers. However, this isn't necessary and therefore not recommended for most users.
If you still want to remove nouveau, enter the following command in the terminal:
$ sudo apt-get –purge remove xserver-xorg-video-nouveau
- 1
- 2
Current page: How to install Nvidia drivers in Linux
Next Page How to install AMD drivers in Linux