Terminal 101: Changing File Owner with Chown
What is File Ownership?
File ownership simply means the files that were created by a particular user. These files are therefore “owned” by that user. Users who do not own the files cannot edit them unless that user has super user privileges (and can run the “sudo” modifier on the edit command), or that user belongs to the same group as the file is assigned to.
Changing one File

If you only wish to change the owner of a single file, then we’ll use a specific command that is different from the recursive command for directories. Before you begin, however, you’ll need to know the shortname of the user you will be assigning the files to. This will be the name of the user’s home directory in the Finder.
Once you have this bit of information, you can issue the following command:
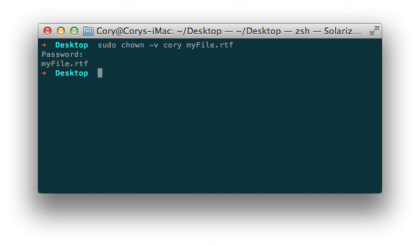
sudo chown -v username file
Replace “username” with the shortname of the user who will be assigned the files, and replace “file” with the path and name of the file to be assigned. Because we used the -v flag (for verbose mode), you will see the file and what changed printed to the command line.
Changing a group of Files

You may need to change ownership for a directory and all of the files and subdirectories contained within. You can easily do this by adding the recursive flag to the command, like so:
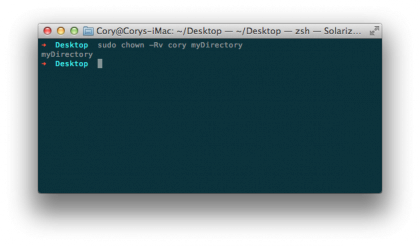
sudo chown -Rv username directory
Replace the “username” placeholder above with the shortname of the user who will be assigned the files, and replace “directory” with the path and name of the directory whose contents will be assigned to the user. Again, we used the -v flag in addition to the -R flag. This means that the command will output the files changed to the screen, so you can see exactly what happened.
Cory Bohon is a freelance technology writer, indie Mac and iOS developer, and amateur photographer. Follow this article's author on Twitter.
Sign up for breaking news, reviews, opinion, top tech deals, and more.