Terminal 101: Zip and Unzip Files

Every Monday, we'll show you how to do something new and simple with Apple's built-in command line application. You don't need any fancy software, or a knowledge of coding to do any of these. All you need is a keyboard to type 'em out!
Getting a lot of files to their final destination can be difficult, which is why we usually zip multiple files and directories into one, easy to transmit file. The process for zipping files in the Finder is a little different from the zip and unzip commands used in Terminal to compress and decompress files. Zipping files through the Terminal can be helpful, especially if SSH is enabled on a remote Mac, because you can log in and zip files remotely.
Zipping Files
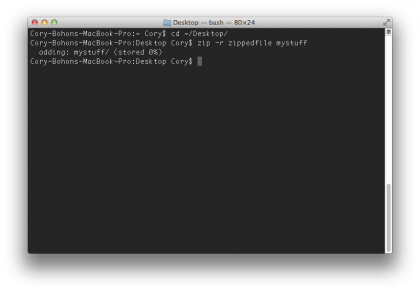
Using the zip command in the Terminal, we can easily compress multiple files and folders into one. First, you will need to navigate to the directory containing the folder you wish to zip. All of the files to be zipped should be in a single folder. Once you’ve navigated to the parent directory of the folder to be zipped, type the following command:
zip -r x y
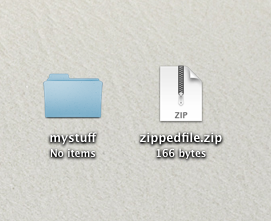
In the above command, replace x with the name that you wish the zipped file to be called, and replace y with the name of the folder that you wish to zip. When you press Return, the folder contents will be zipped, creating a new zip file in the same location you navigated to in the Terminal.

As files and folders are added during the compression process, you will see notifications in the Terminal window.

Unzipping Files

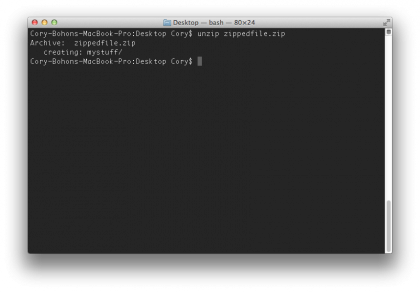
Unzipping your files through the Terminal is an easy process that begins with navigating to the folder where the zip file is stored. After doing that, type the following command:
Sign up for breaking news, reviews, opinion, top tech deals, and more.
unzip x
Replace x in the above command with the name of the zip file (including the “.zip” file extension). When you press enter, the command will be run and the contents of the zip file will be unzipped to the same location where the zip file is located.
Cory Bohon is a freelance technology writer, indie Mac and iOS developer, and amateur photographer. Follow this article's author, Cory Bohon on Twitter.