 Become a TechRadar Insider


There are plenty of comprehensive and capable media conversion applications on the Mac, such as Roxio Toast/Popcorn, Handbrake and Elgato Turbo.264 HD.
But if all you want is a straightforward means of converting your music and video to an iTunes-friendly format, ready for streaming to an Apple TV or playing on your iOS device, look no further than Kiwi Fruitware's Media Converter.
Article continues below1. Select output format

On opening the application for the first time, you're invited to update the presets to take account of its new subtitle support. Do so – it doesn't take long.
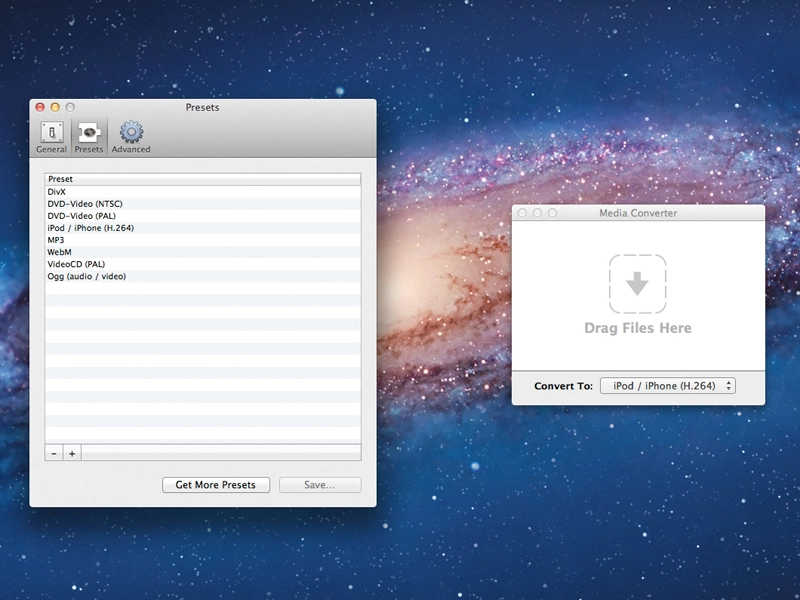
You're now ready to convert your media. Using the pull-down menu labelled Convert To, select which format you wish to save it as. By default, DivX, DVD-Video (NTSC), DVD-Video (PAL), iPod/iPhone (H.264), MP3 and WebM are available.
2. Drag and drop

After selecting your output format, simply drag and drop the media file onto the Media Converter window; it's as simple as that. Conversion starts automatically, and by default, converted files are saved in your Movies folder. Here we're converting a sample video for playback on an iPod or iPhone, or streaming to an Apple TV.
3. Conversion in progress

While the conversion is being carried out, a progress bar shows how far the encoding has got, with a percentage displayed too. You can cancel the conversion if you wish. Completed conversions retain the original's filename, but with an extension that reflects the file format you've converted it to. In this case, it's M4V.
4. Batch conversions

You can drop a bundle of files or even entire folders into the Media Converter window, and re-encode them as a batch. Here we're converting a folder full of OGG files into MP3 files. Unlike the Ogg Vorbis audio format, MP3s can be played using iTunes, copied to iOS devices and streamed to an Apple TV using your wireless network.
5. Preferences

The app can be customised using its Preferences window (found under the Media Converter menu bar). You can set up a new target folder (Movies by default), or have it ask where to save. This is useful when batch-converting a folder, as the folder itself isn't retained; completed files are saved loose in the target folder.
6. Changing presets

Under the Presets tab, you can reorder or customise your preset encoding settings. Modified presets can be saved, though doing so overrides the original. If you need both, just change the name of the custom preset before you save it, then download and reinstall the original preset using the method described in Step 7.
7. Adding presets

The Get More Presets button takes you to the Media Converter website, from where you can download the default presets and also custom-built settings created by other users. Click on a preset's icon to download it, then double-click on the downloaded file to install. You can even email your own custom presets to the developers.