I use my Kindle for notetaking every day, and these 5 tips and tricks make it the ultimate organization station
Is it a bird? Is it a plane? No, it's a Kindle Scribe!
Sign up for breaking news, reviews, opinion, top tech deals, and more.
You are now subscribed
Your newsletter sign-up was successful
Whether you journal daily or you're working towards your next creative project, the siren song of a new notebook has undoubtedly called you more than once; but I think my new Kindle Scribe might just be the antidote to my stack of unfinished scrapbooks.
It's been a long time since I owned a Kindle; until a few years ago, I was still rocking my original Kindle Fire from 2011. I love physical books, so over time its usefulness waned and I've favored of more general-use tablets such as my iPad Pro – that was, at least, until I saw the new Kindle Scribe.
Packed with useful AI tools, Kindle's latest Scribe is no iPad beater, lacking the entertainment value and versatility of Apple's smart slates. However, for quick note-taking and productivity, it's a dream.
Not only does the lightweight Kindle Scribe fit deftly into my handbag (read: overflowing backpack stuffed to the brim with wires, gadgets and other tech journalist nonsense), but I've found there are some pretty easy tips and tricks a lot of users seem to miss which turn it into a productivity powerhouse when you're on the go.
1. Try some custom note-taking templates
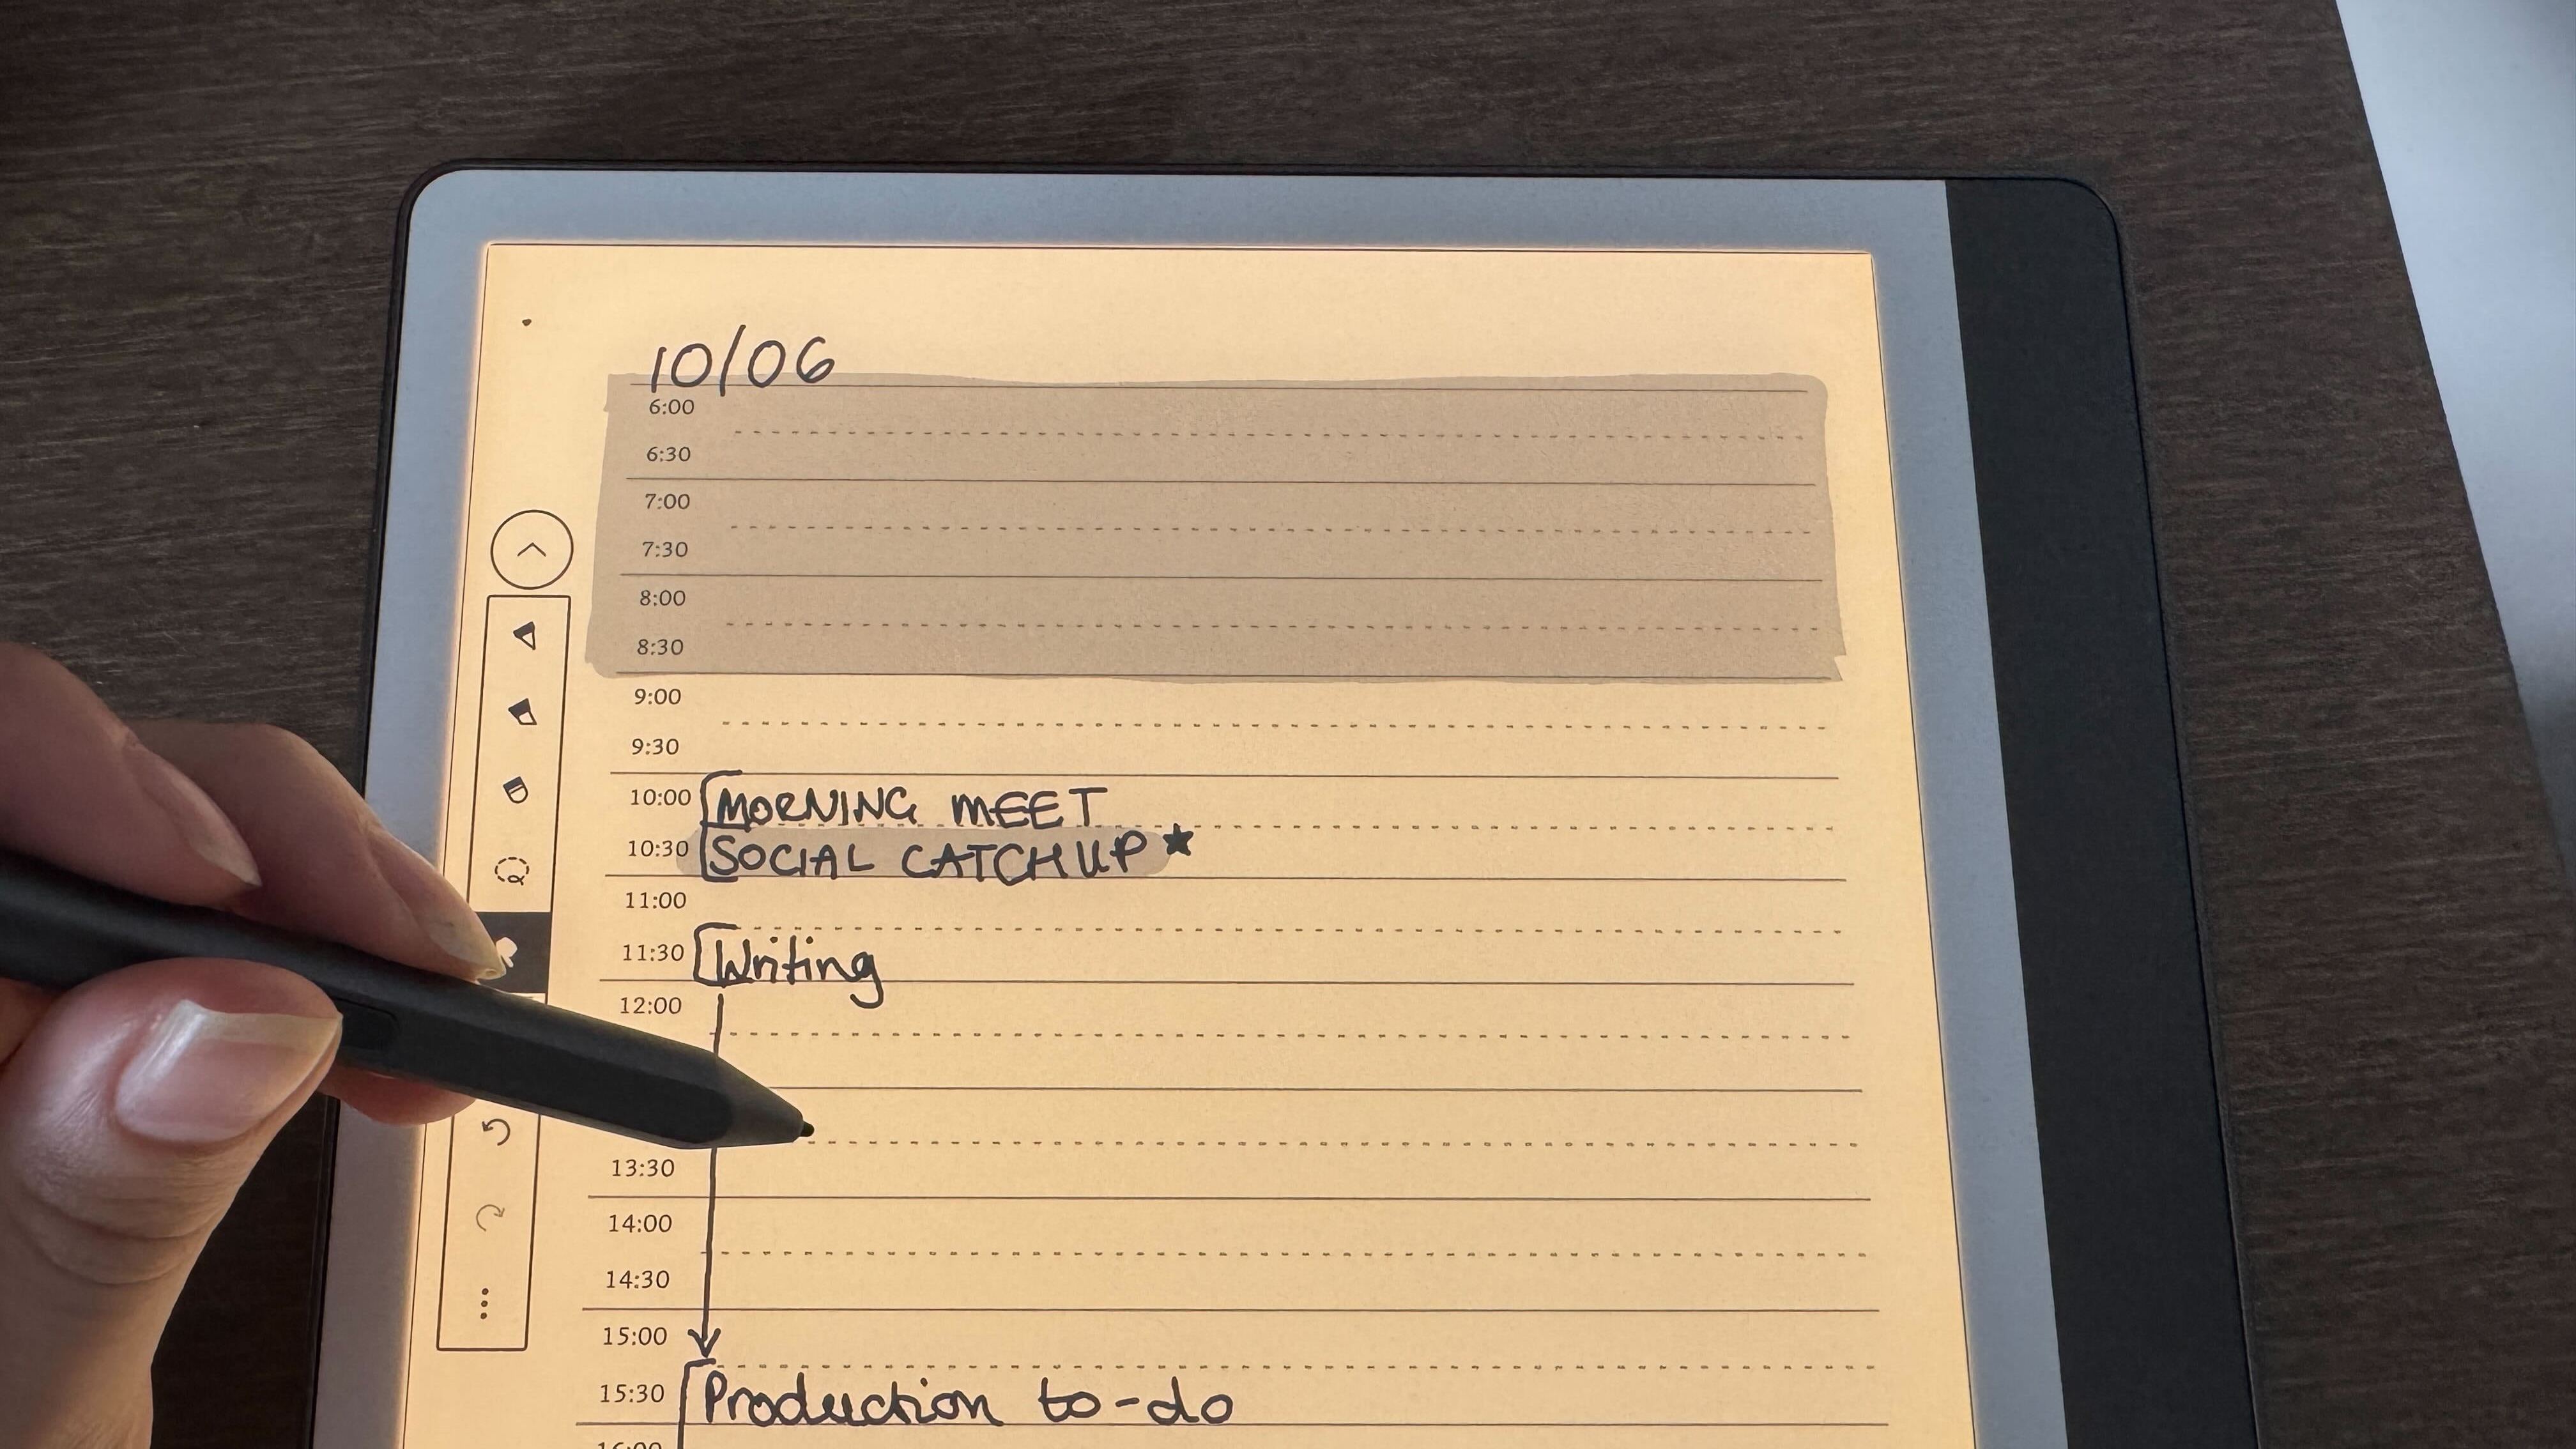
The Kindle Scribe comes with a set of simple, versatile note-taking templates, which broadly speaking will cover your bases: however, if you want something more specific, it's also possible to download your own custom template or download one of the hundreds available online.
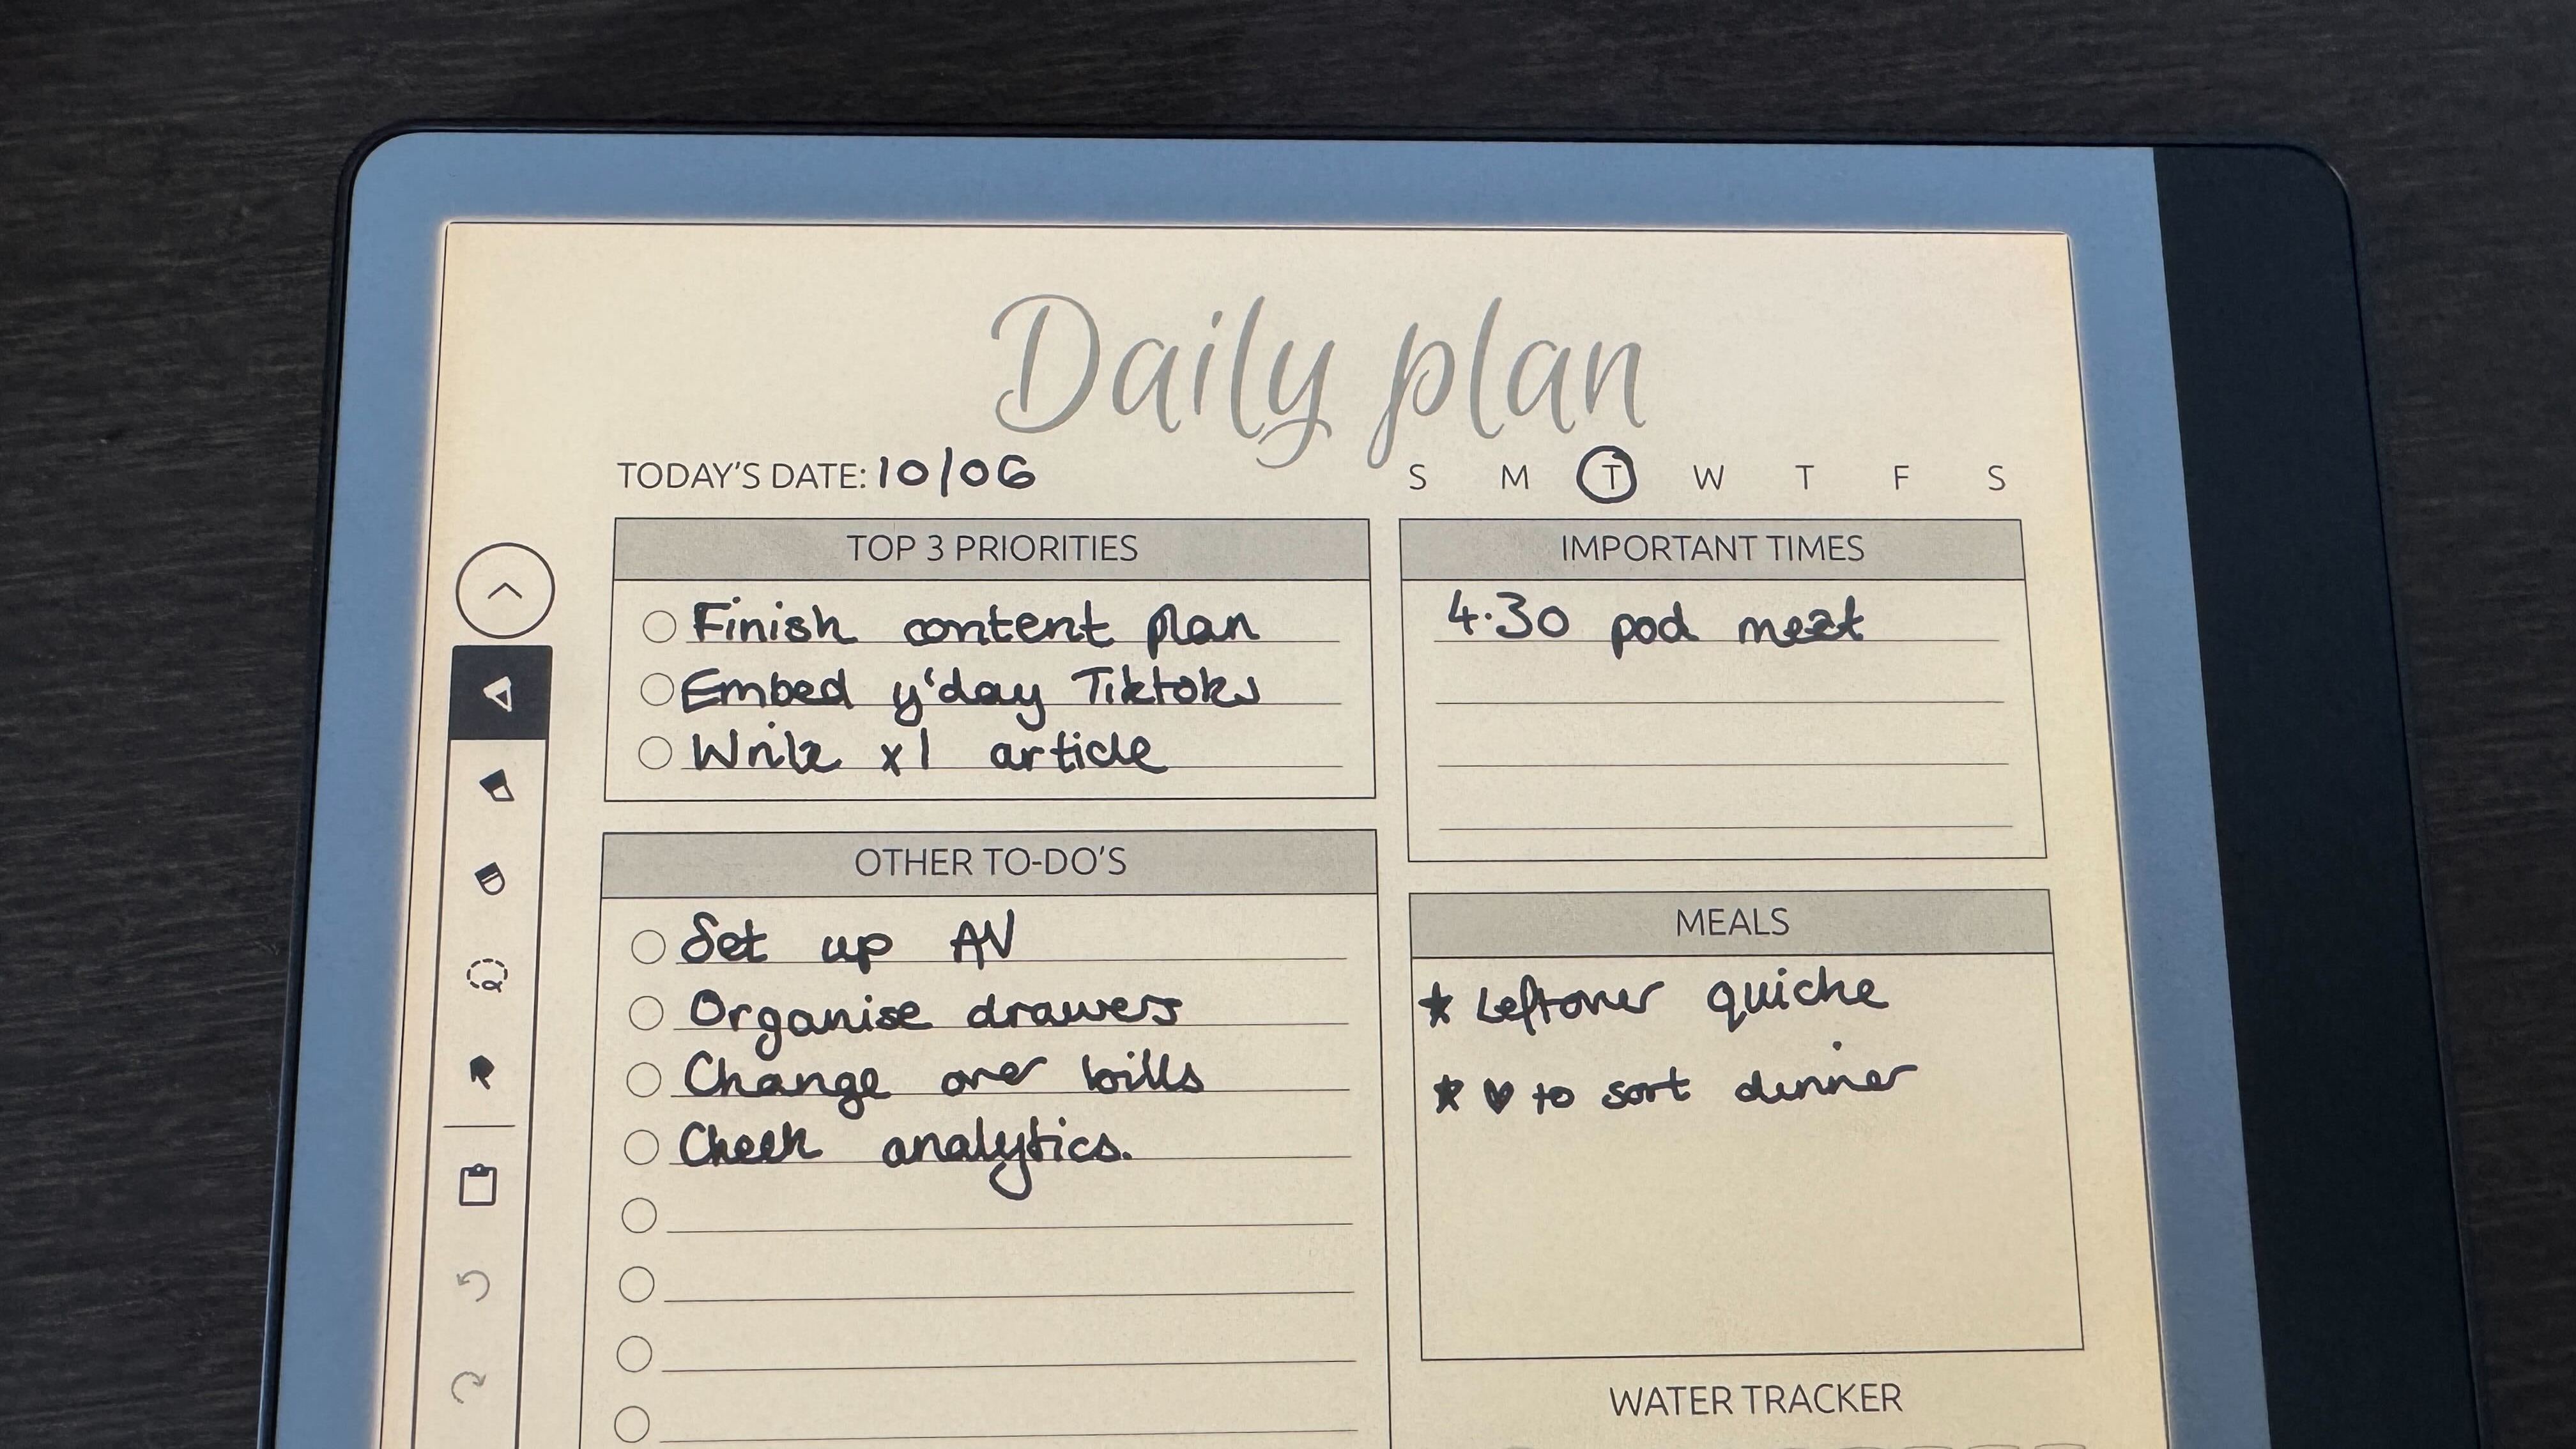
For me, that meant downloading a more structured daily to-do list with a couple of the key trackers I want and need every day; from important to-do's to meal and exercise planning.
It's worth highlighting that these are broadly downloaded as .pdf files, so you'll need to learn how to send PDF files to your Kindle and locate them in your Library, not the Notebooks tab. It's worth highlighting you will need to use the Send to Kindle method of transfer in order to have drawing-compatible .pdf files.
Sign up for breaking news, reviews, opinion, top tech deals, and more.
Of course, there are some small concessions to curtailing Amazon's pre-selected templates; where Scribe Notebooks have unlimited pages in your selected template, most custom templates are one-pagers or have a finite number of pages, on account of their .pdf file format. That does mean you'll need to wipe the slate clean at the end of every day; that, or clone a fresh copy of your .pdf file if you want to save previous notes.
Here's to hoping Amazon allows for cleaner custom template uploads soon!
2. Organize your notes and blend templates
Unlike a physical pen and pad, your Kindle Scribe gives you the option to keep your ramblings and notations organized using folders; simply head to the Notebooks tab, click the plus button in the top-right hand corner of the screen and select "Create folder".
Once your folder is up and ready, you can create new Notebooks directly into them, or move your older notebooks by tapping the three dots at the bottom-right of the Notebook icon, opening the menu where you'll want to select "Move".
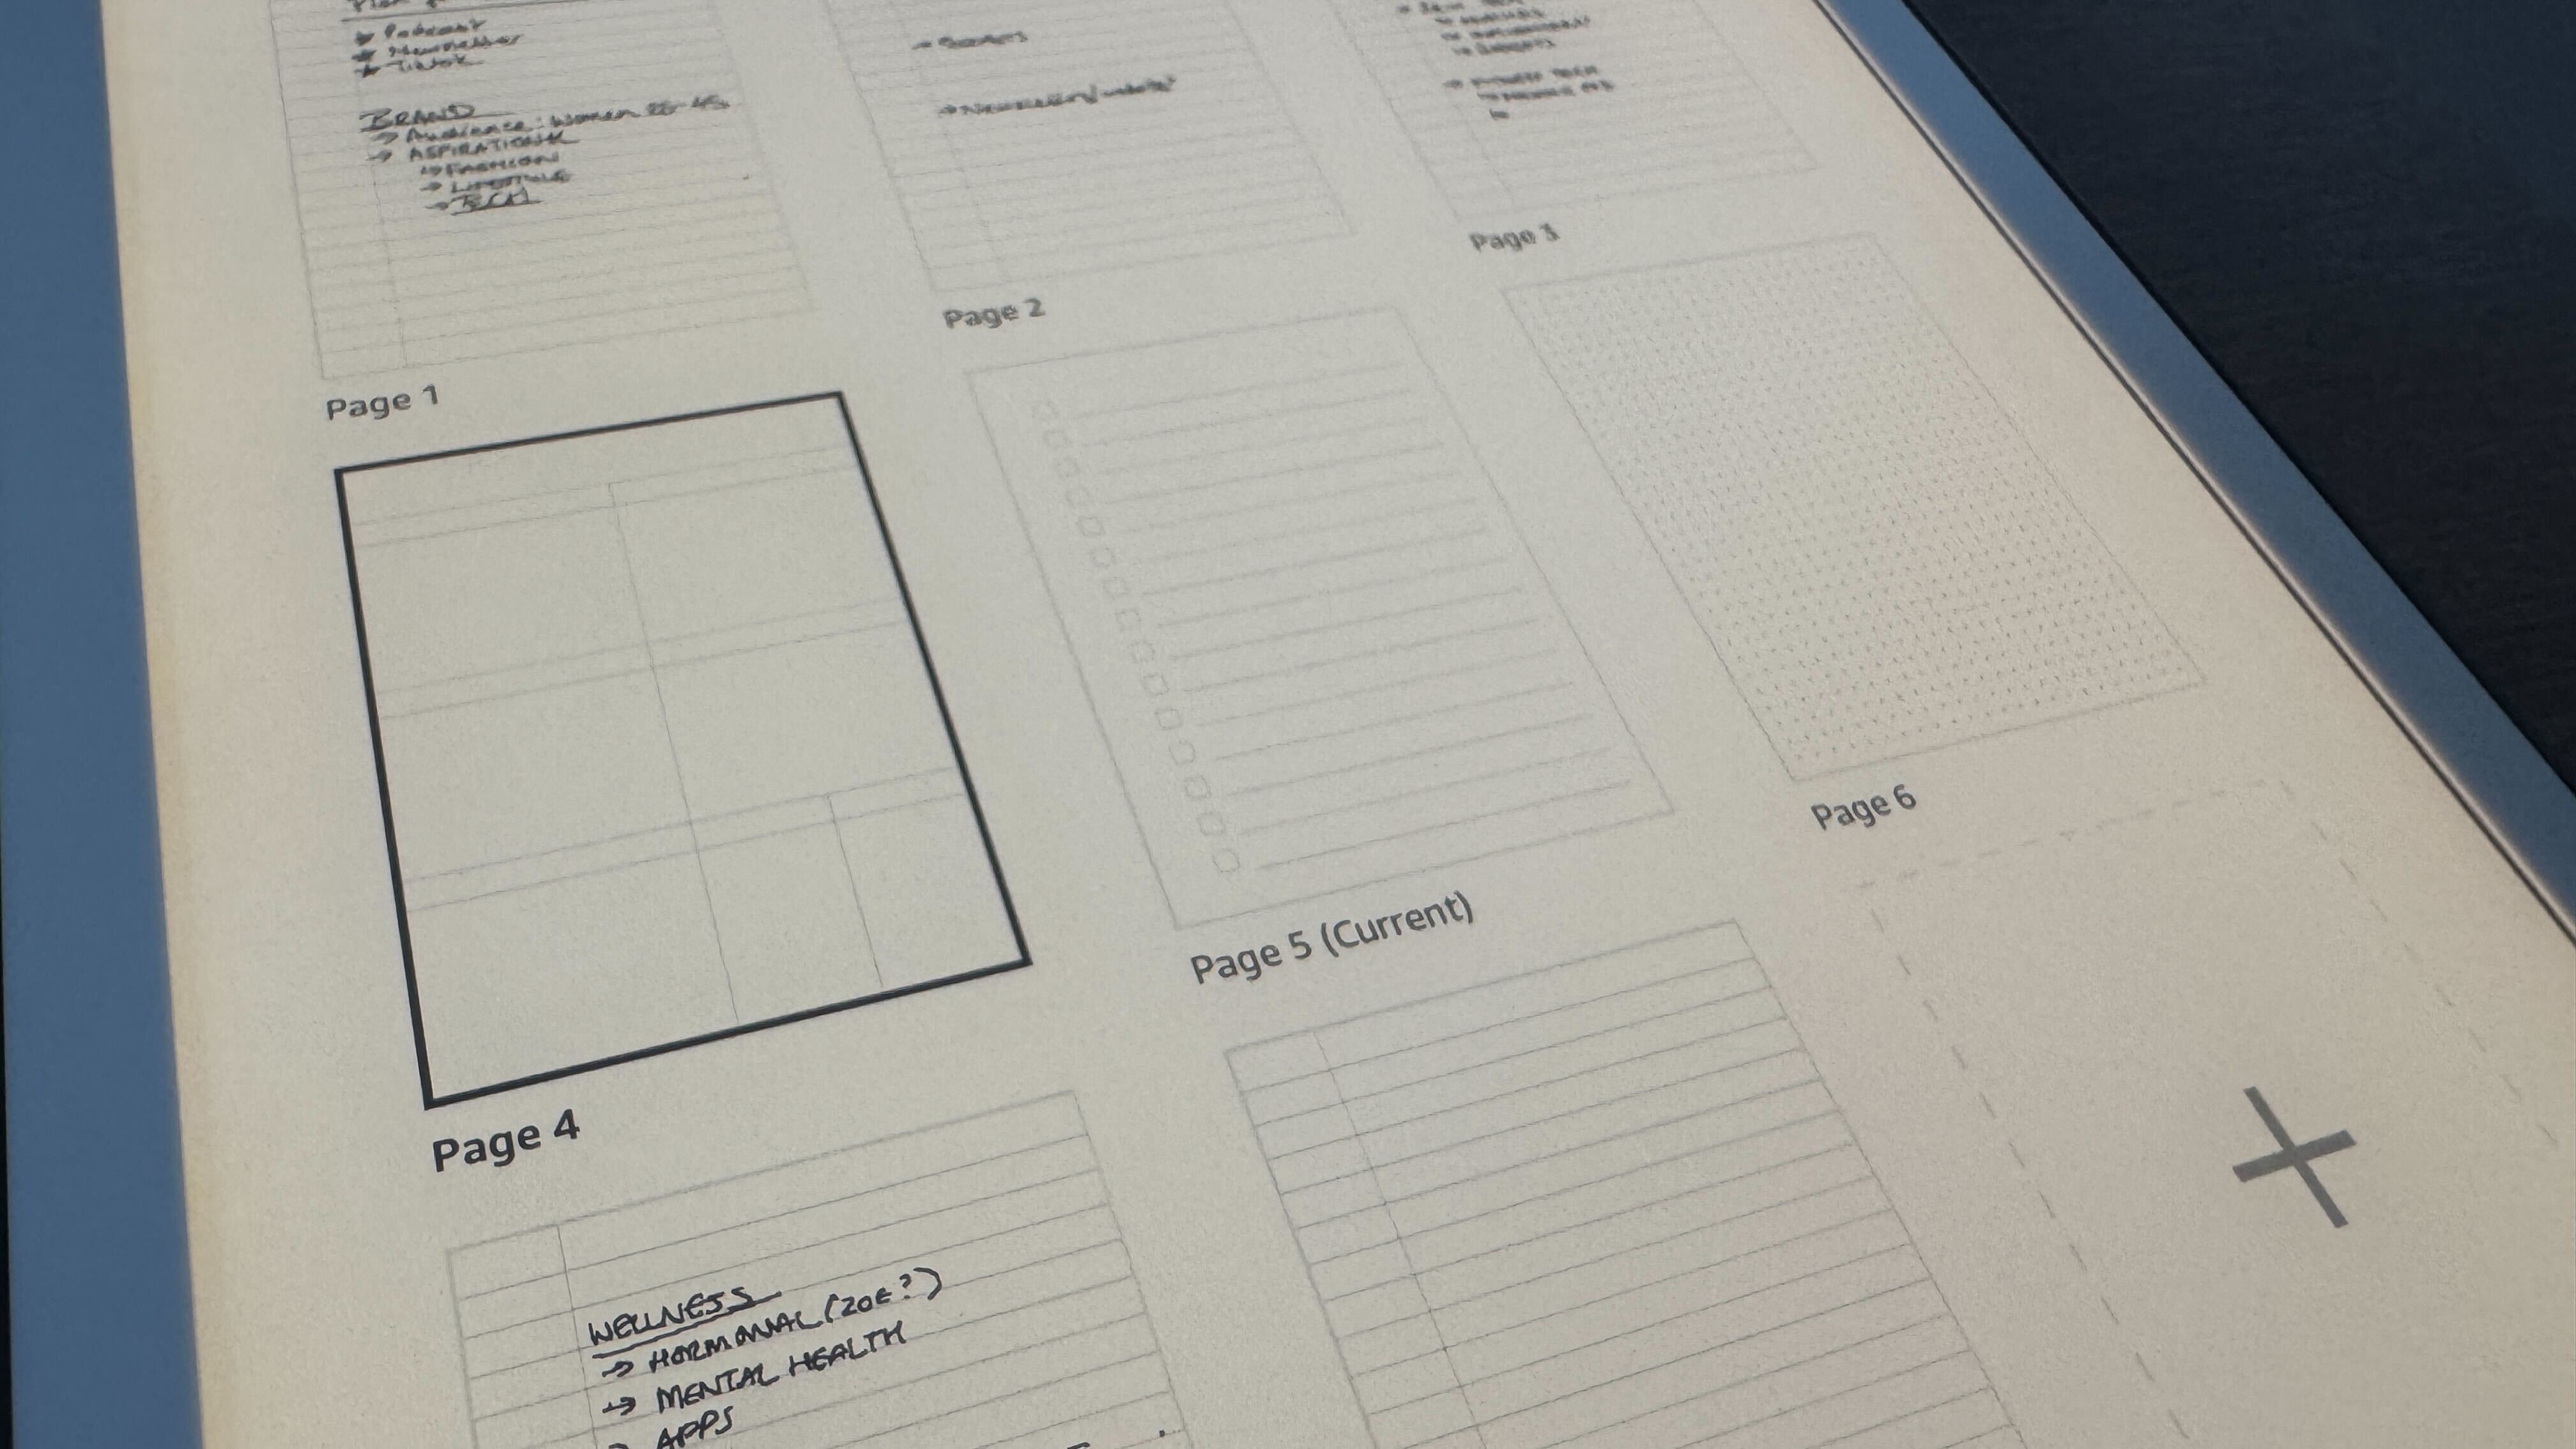
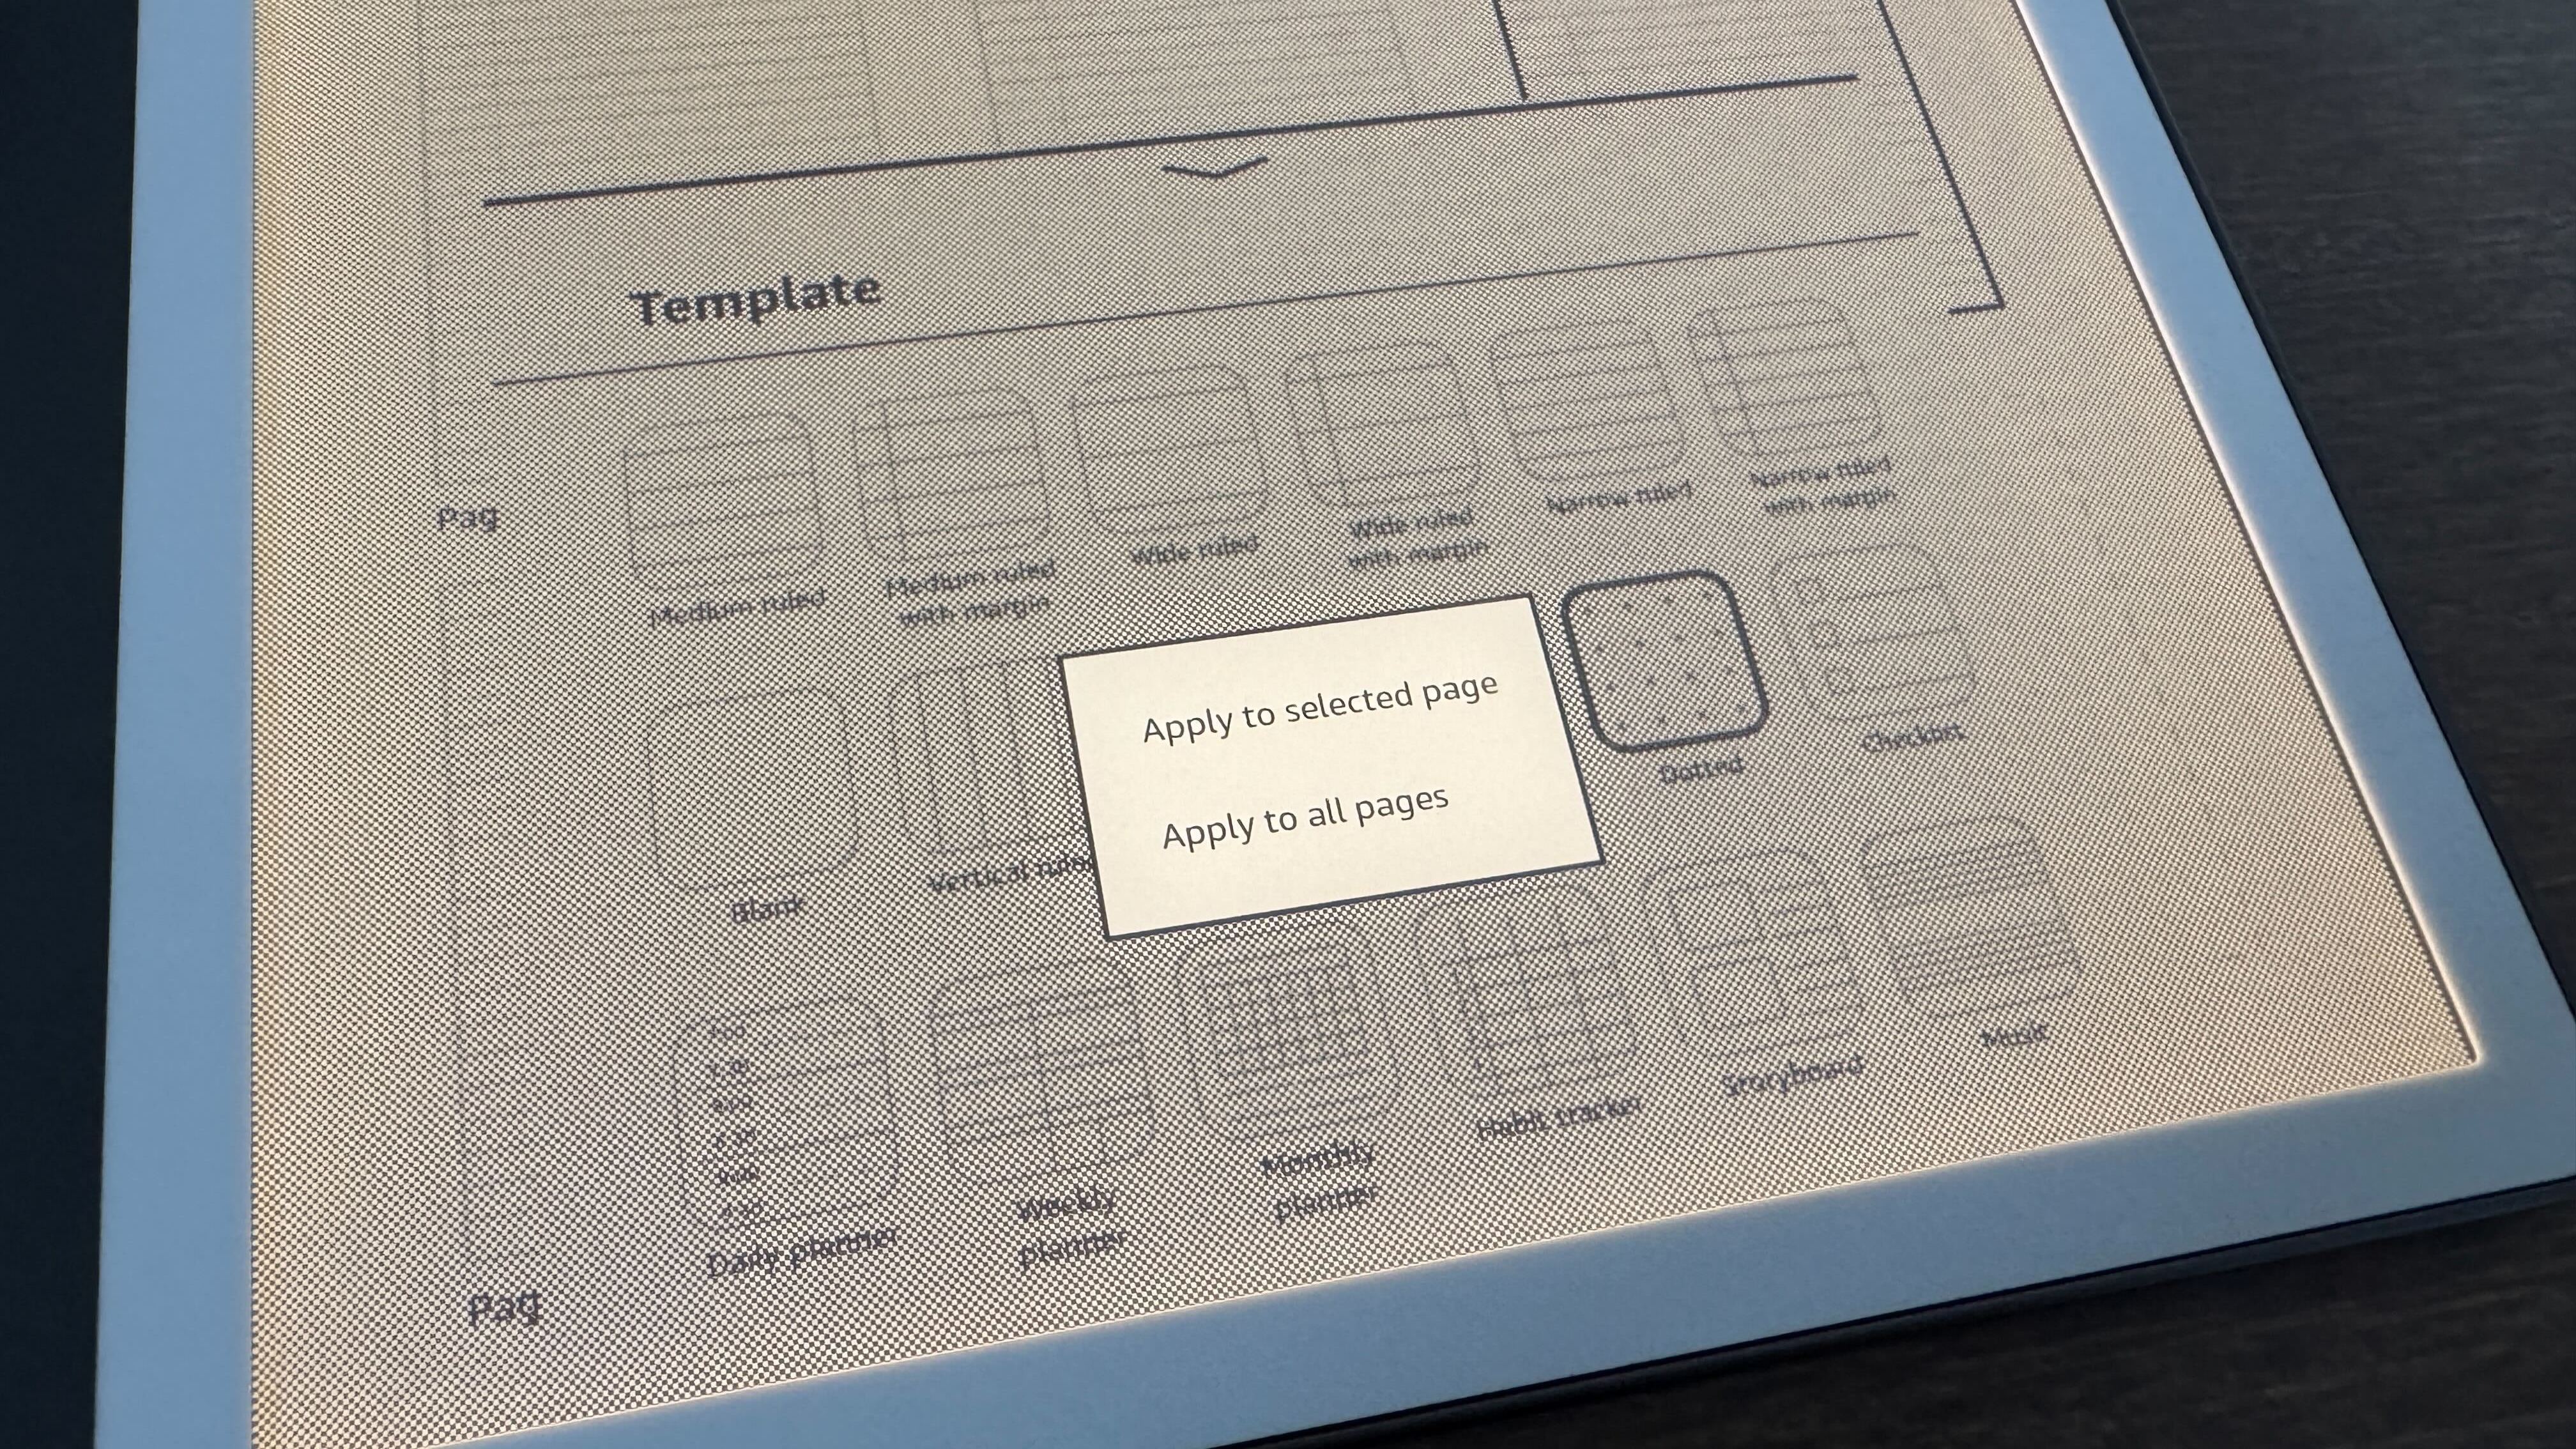
Sometimes, it's easier just to have the right page layout in the right place; thankfully, the Kindle Scribe allows you to use different page templates within notebooks. From within a notebook, select the icon with nine squares in the menu bar. From this page, you can add, delete, move, share and use AI tools in your Notebook; for now, make sure you select the page you want in a different template and tap the three dots at the right side of the toolbar. Choose "Change template", then select the preferred template, then "Apply to selected page".
Worth highlighting; if you're using custom templates, you won't be able to add these to folders (Amazon, fix it!) but you can create a collection for them in your Library. If you want a blended template, you'll need to edit the .pdfs yourself!
3. Use the stylus to its full potential
The Kindle Scribe (2024)'s stylus packs some excellent features in its slimline body, and while it's no Apple Pencil, it's pretty capable.
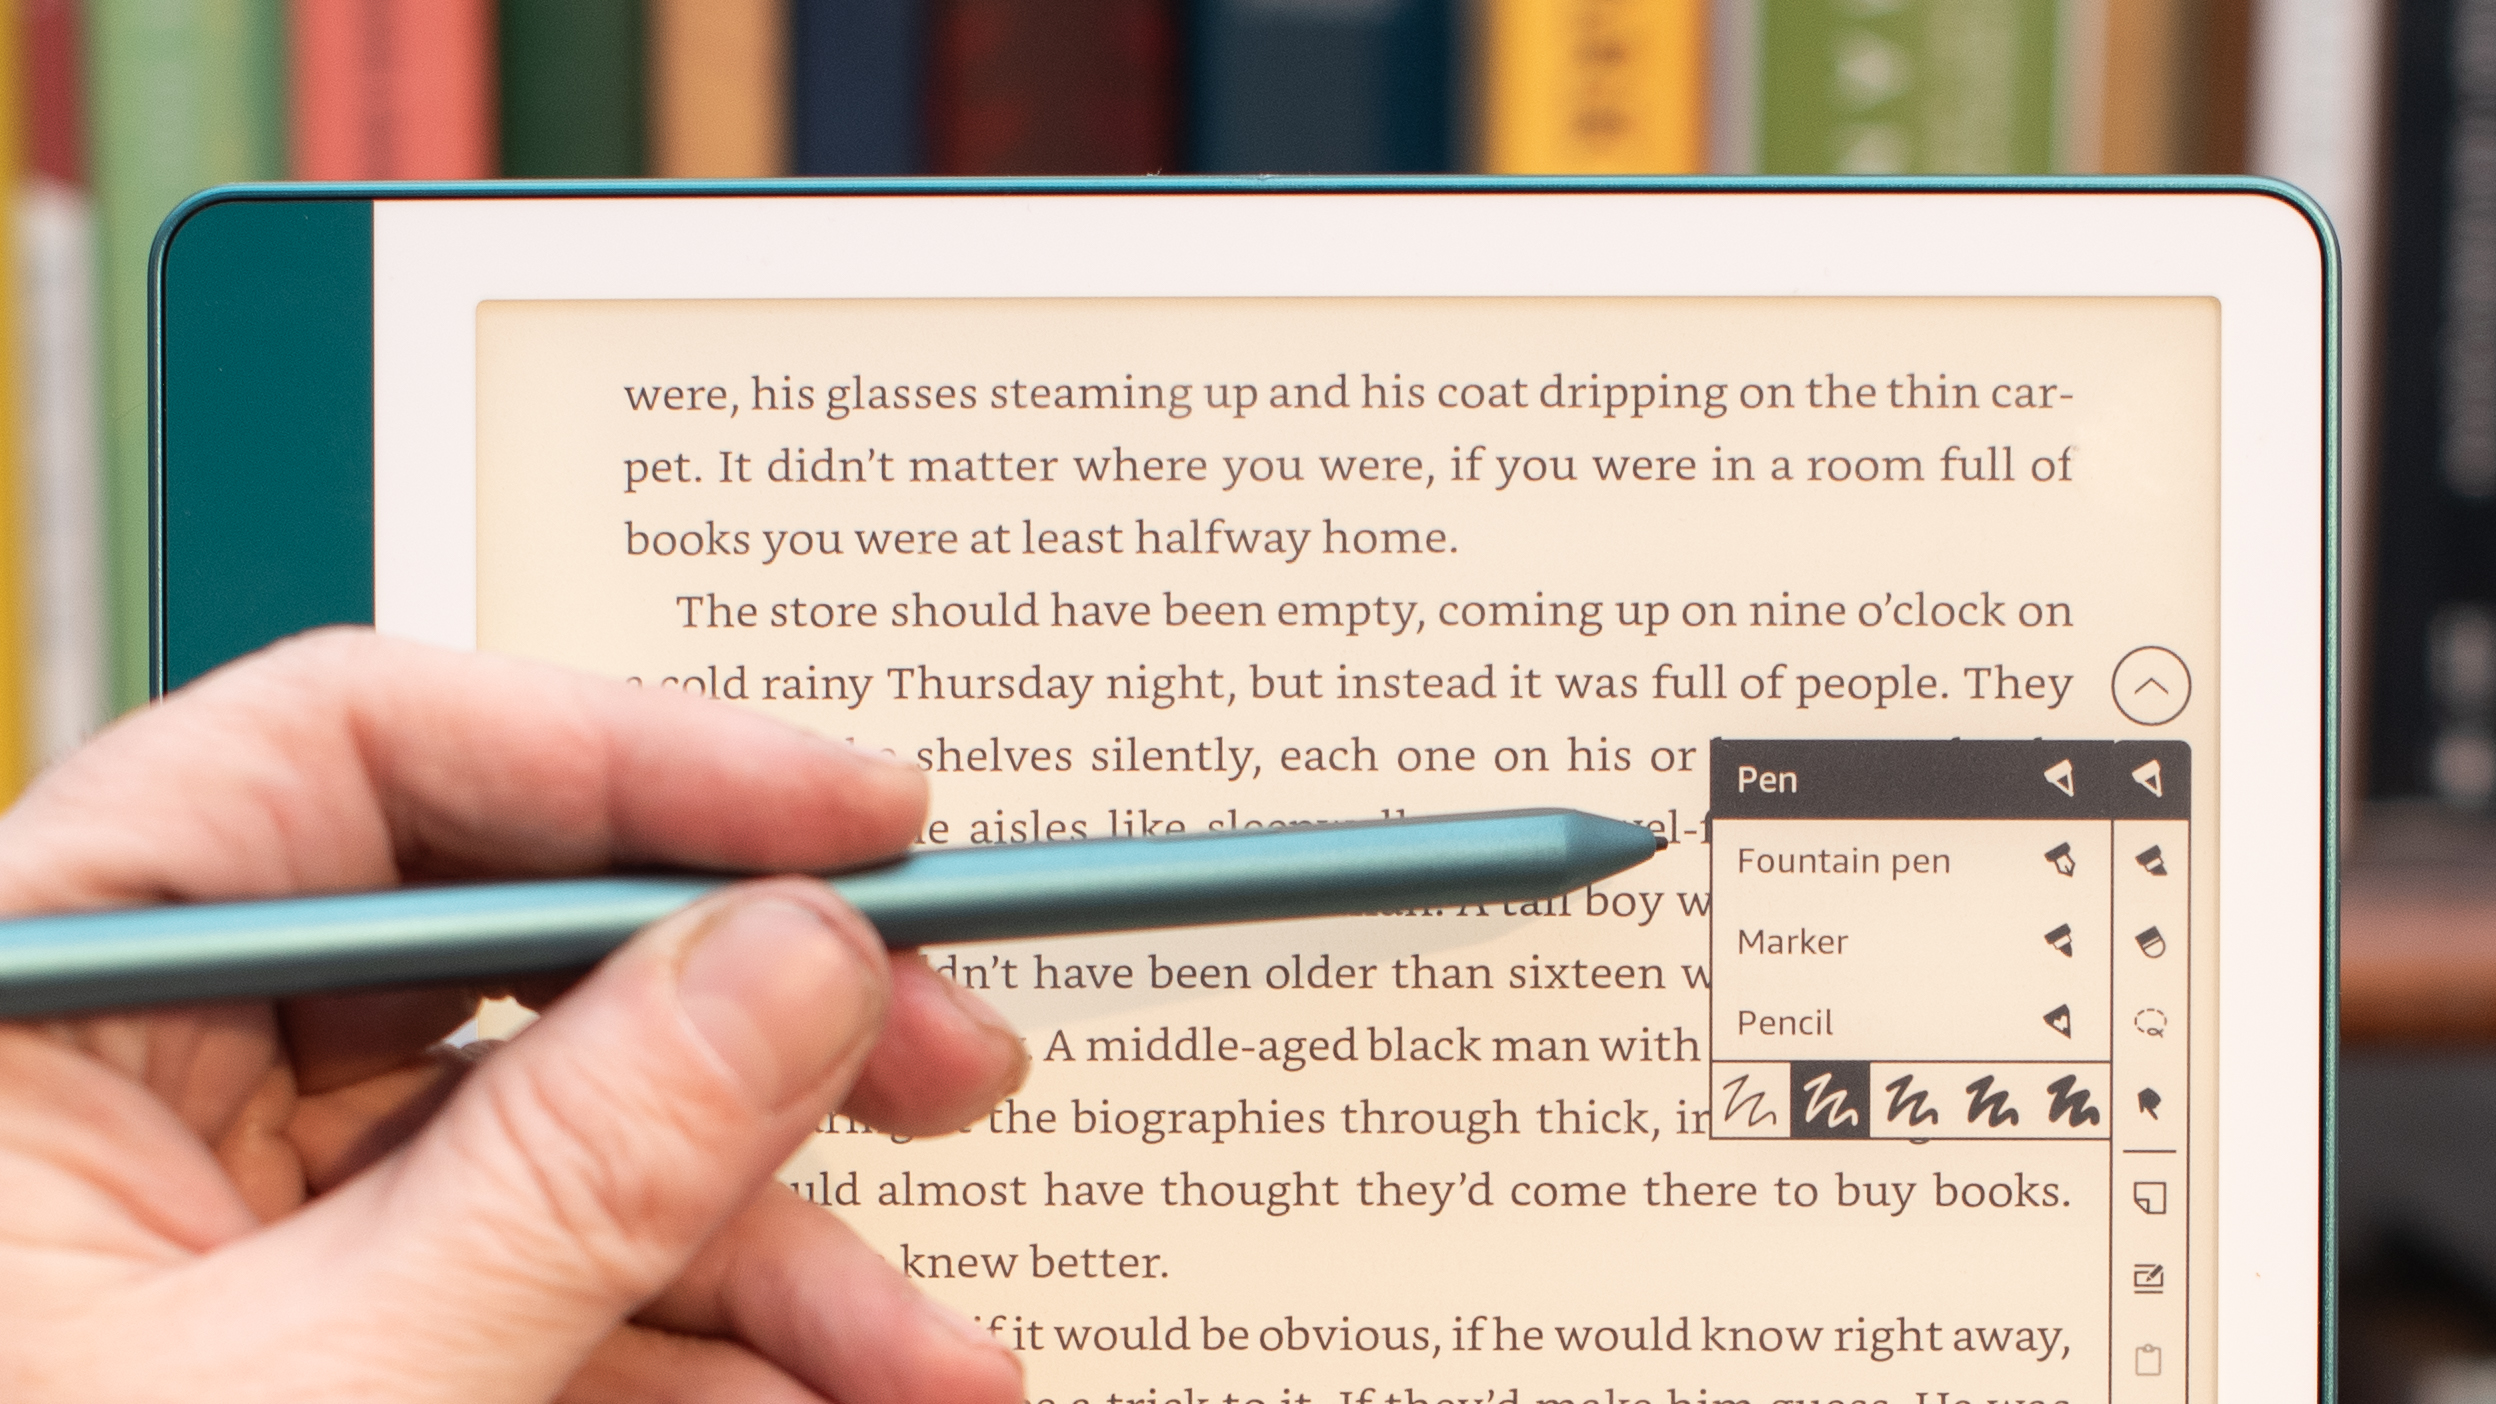
Of course, in notebook mode, you've naturally got pretty free reign to use the stylus; a toolbar will appear on screen from which you can select different pen modes and an eraser mode - or you can just flip the stylus and use the end as an eraser just as you would a pencil in real life.
It's not all about using the stylus in "pen-mode" either; did you know you can also use it as a pointer to navigate your Kindle? Simply head to the pen toolbar and select the icon of a finger pointing and voila, no more grubby finger marks on your screen.
However, it's in directly annotating your books that the Kindle Scribe shines. Not only can you quickly highlight important passages by pressing down the shortcut key on the stylus and drawing over text, but you can also underline exerpts, add text notes and even handwritten notes. The latter can be handy, especially if you're learning a language; as of writing, I'm using a Japanese textbook on my Kindle, and the handwritten note feature is a real boon when it comes to translation exercises.
4. View, manage and export your annotations
Speaking of annotations, it's important not to let these go to waste by leaving them in your books to fester. You can easily view and manage your annotations by entering an e-book, selecting the toolbar and then selecting the notebook icon.
From here, you can quickly navigate through your musings, and if you select one, you'll jump straight to the associated passage in your book.
If you tap the share button in the top right of your annotations notebook, you'll see the option to send annotations directly to your email; a real boon for students, creatives and professionals alike.
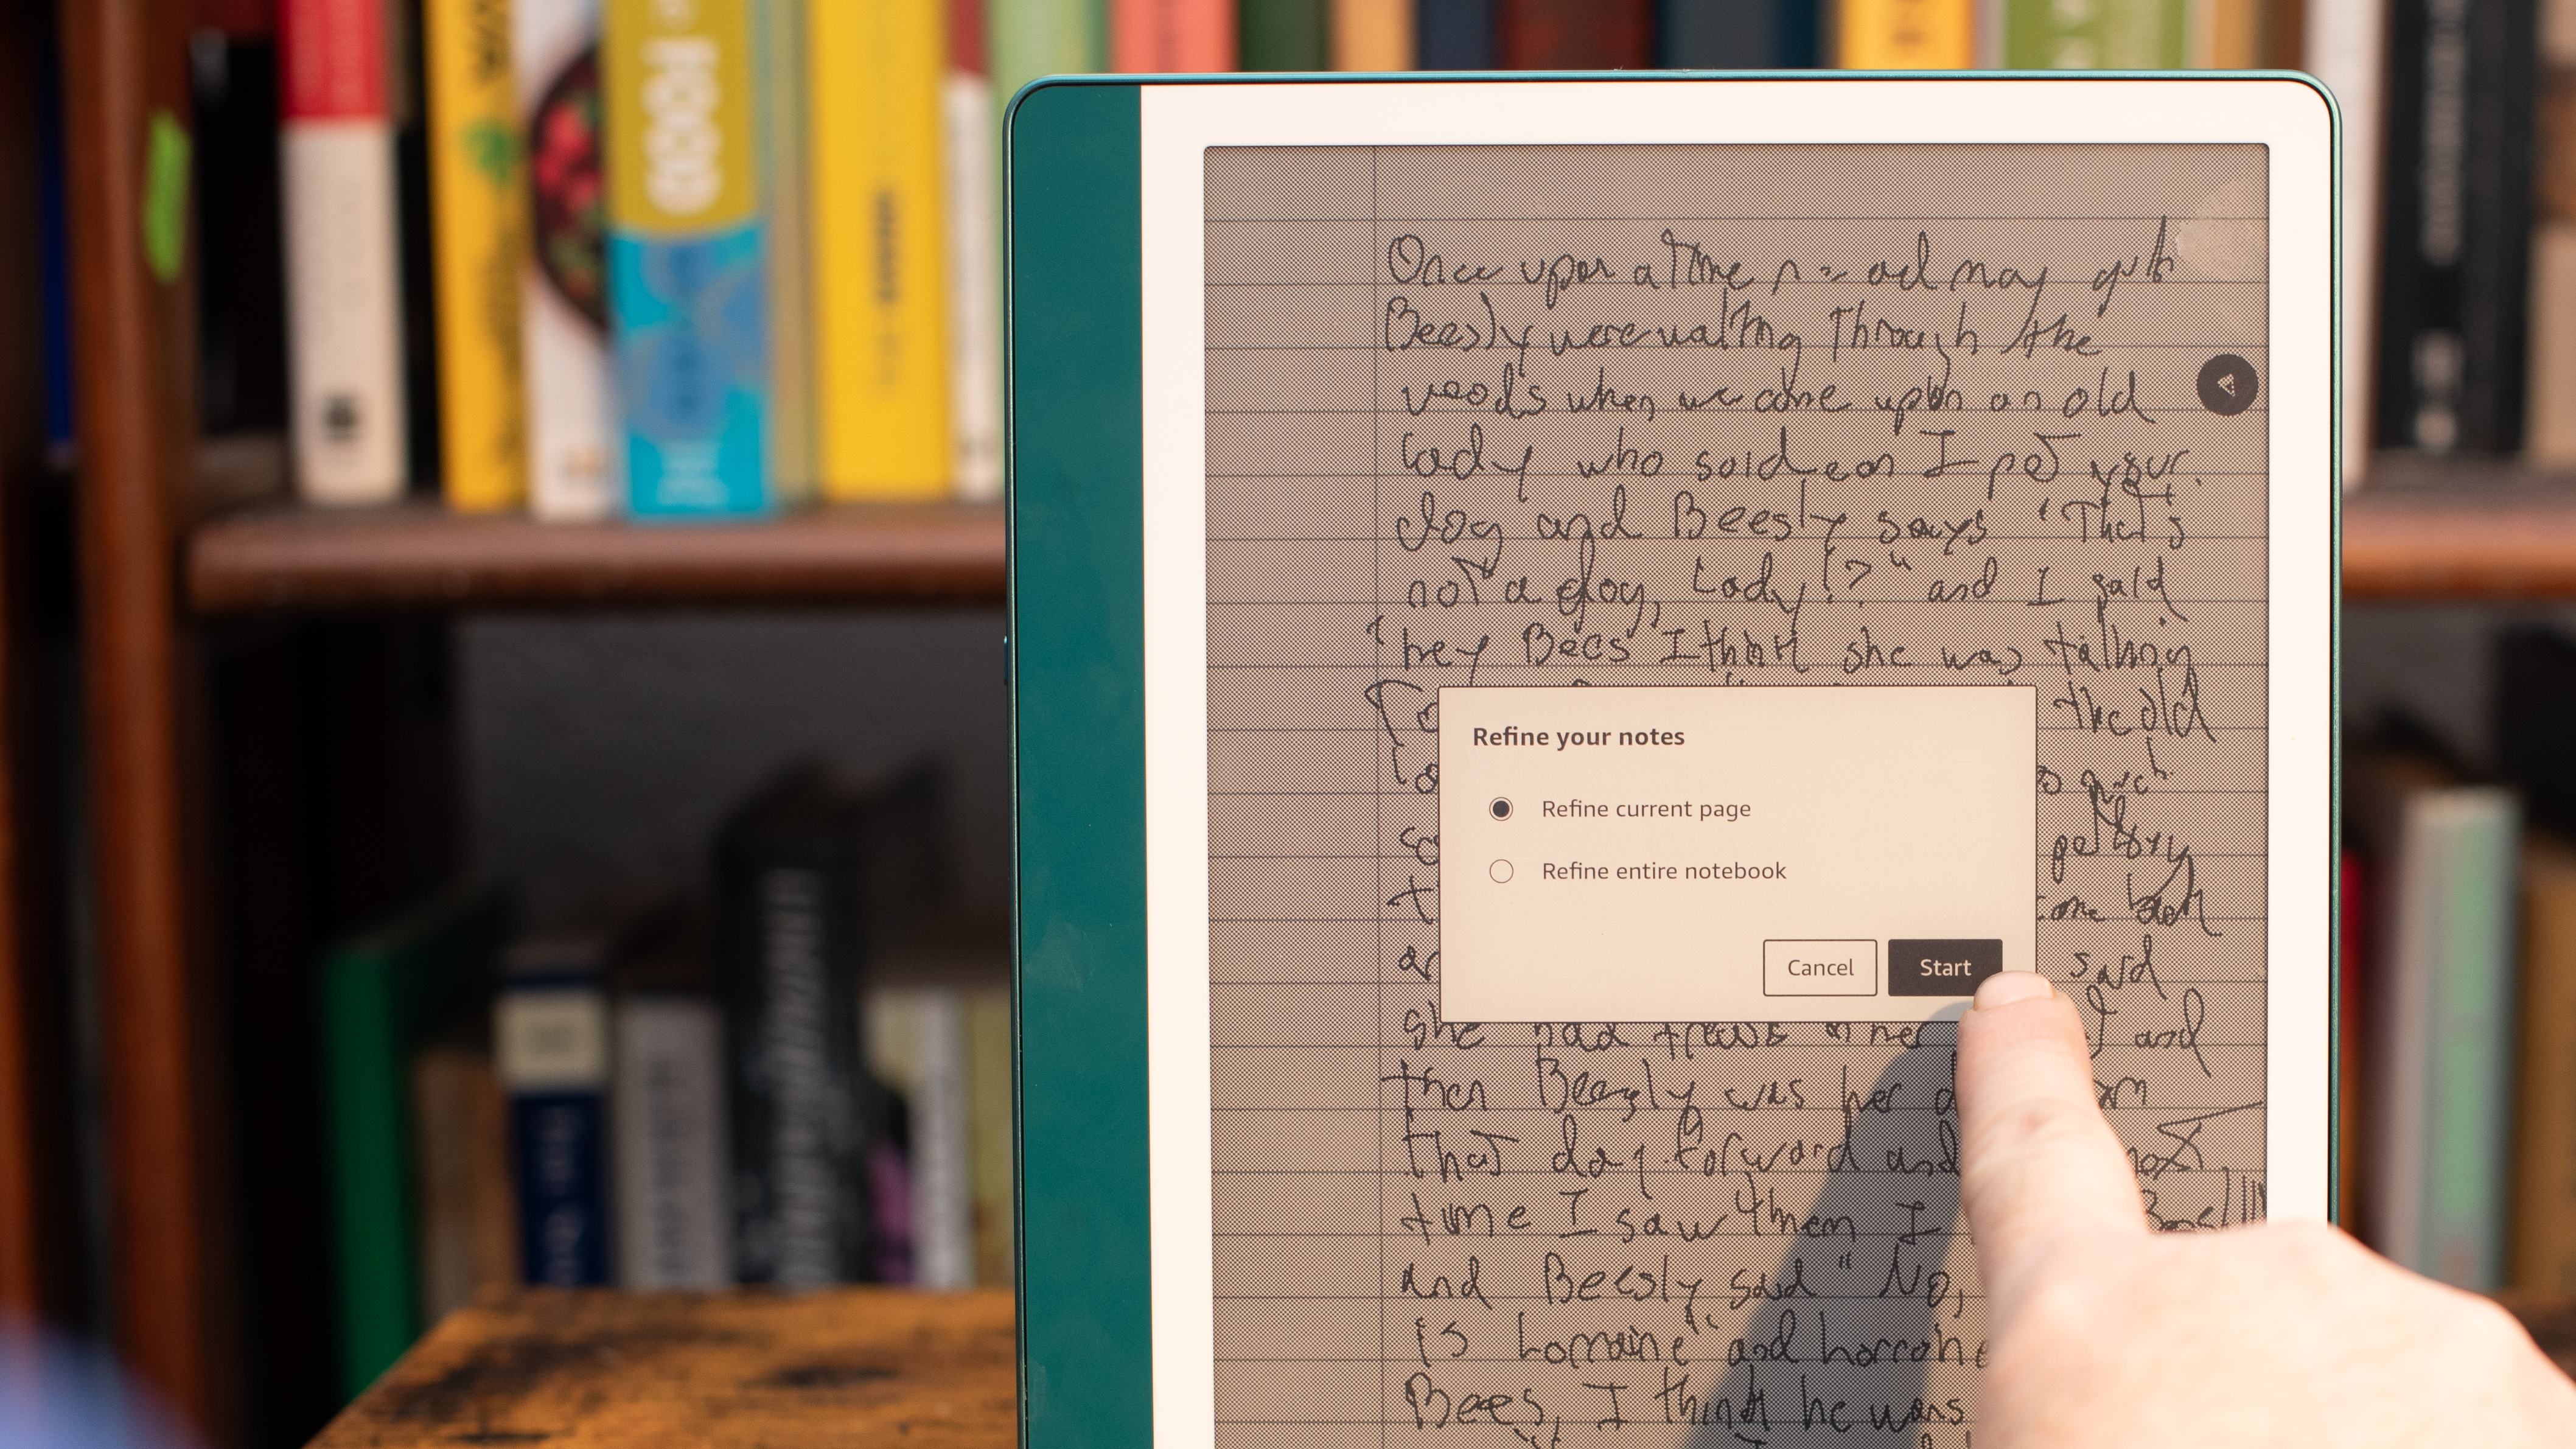
In a similar vein, you can also export your notebooks to email by following the same process within the Motebooks tab, where you'll also have the option to use Amazon's cloud-based AI services to transform your handwritten notes into a more readable typeface.
5. Kindle turned doodle pad
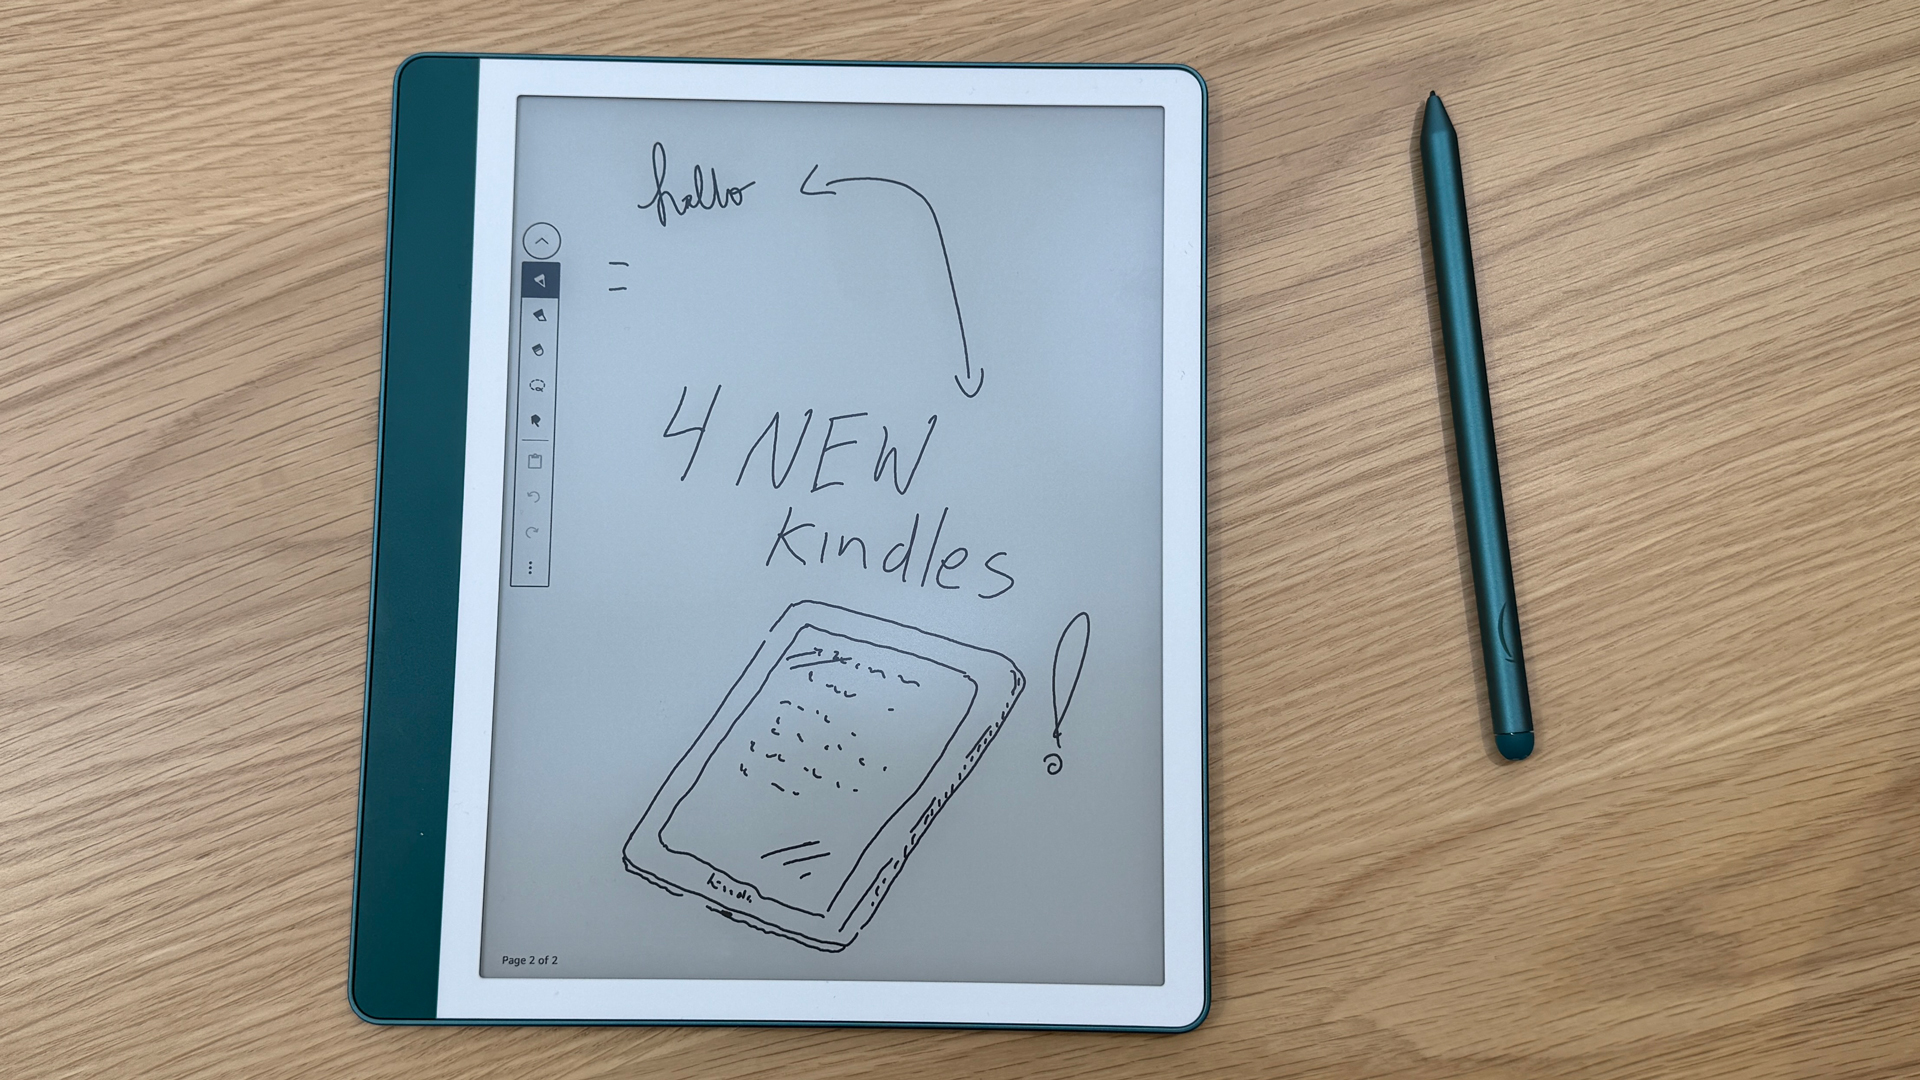
Naturally, there's more than one way to take a note, and some of us (read: me) are borderline incapable of note-taking without a few drawings along the way.
Thankfully, the stylus and pen tools are ample for some quick illustrations, but if you want to sketch images too, you can take your Kindle-based drawing to the next level by following the same .pdf transfer method as the custom templates tip. Simply send a PDF file to your Kindle using the 'Send to Kindle' method, open it in your library and you're all set.
Once you've finished laying down the groundwork with your sketch, you can even use the lasso tool to move your work to a blank canvas. Sure, it's no iPad Pro, but it gets the job done at a very basic level.
You might also like...

Josephine Watson is TechRadar's Managing Editor - Lifestyle. Josephine is an award-winning journalist (PPA 30 under 30 2024), having previously written on a variety of topics, from pop culture to gaming and even the energy industry, joining TechRadar to support general site management. She is a smart home nerd, champion of TechRadar's sustainability efforts as well and an advocate for internet safety and education. She has used her position to fight for progressive approaches towards diversity and inclusion, mental health, and neurodiversity in corporate settings. Generally, you'll find her fiddling with her smart home setup, watching Disney movies, playing on her Switch, or rewatching the extended edition of Lord of the Rings... again.
You must confirm your public display name before commenting
Please logout and then login again, you will then be prompted to enter your display name.