
 Become a TechRadar Insider


Using a few simple tools we'll show how you can create your own multi-touch Magic Trackpad-style controller for your PC - although admittedly slightly larger than Apple's little trinket.
Now, you're able to download the software to implement a multi-touchand Windows 7 is set and ready for your fingers, but it's the hardware interface that's the tricky part.

1. How to get touchy-touchy Seriously, is this lot going to become a multi-touch surface? We hope so.

2. If you want a neat finish, measure the Perspex sheet to the size of the frame.

3. You can then cut it to fit.

4. Trim and tape plain laser printer paper to the sheeting, it shouldn't be too thick.

5. Hopefully you'll get a neat picture-frame finish.

6. This is an exciting photo of a cardboard box. For this to work you'll want it to be 30cm high, a wine box would work well for some reason we have a lot of those.

7. Pop a hole in the side of the box and secure the webcam to the base. You'll still need to be able to focus it.

8. Never has such high-tech kit graced PC Format towers.

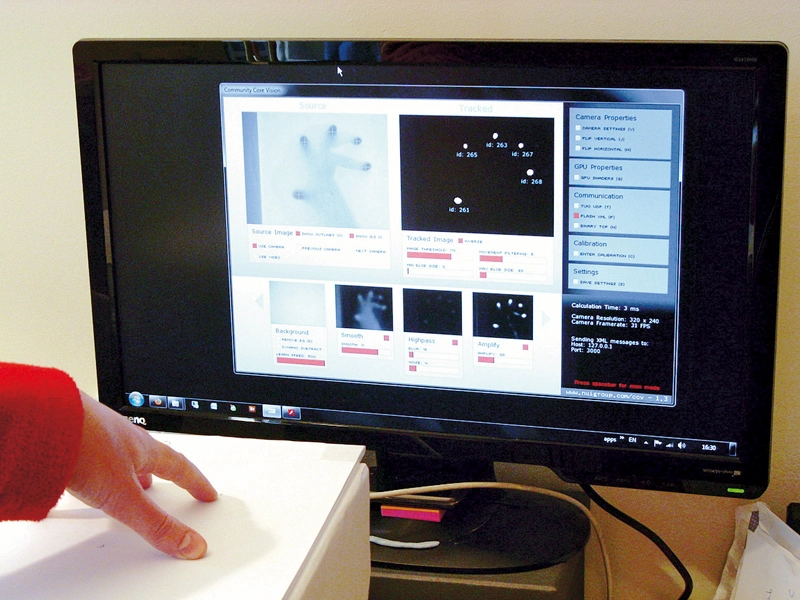
9. Now the clever bit. Head to ccv.nuigroup.com and download the Windows software. Extract it, locate the Community Core Vision executable and run it.
To start click the 'Use Camera' setting at the top left. Make sure the 'Amplify module' is active. Adjust the 'Tracked Image' sliders so only your fingertips are detected and selected.
Pay attention to the minimum and maximum blob size, as the outlines in the left display are the actual selected areas.

10. The system seems to work best with flat, consistence lighting. Make sure you save the settings but leave the program running.
Using the Communication section you can pass tracking information to various programs, such as Flash-based ones. Grab the Flash examples from ccv.nuigroup.com or the Windows mouse driverand have fun!