How to edit a YouTube video
Need to know how to edit a YouTube video? Find out how to perform simple tweaks without having to delete your video
Sign up to the TechRadar Pro newsletter to get all the top news, opinion, features and guidance your business needs to succeed!
You are now subscribed
Your newsletter sign-up was successful
Join the club
Get full access to premium articles, exclusive features and a growing list of member rewards.
Want to know how to edit a YouTube video? Whether you’re a budding YouTuber or an experienced content creator, you’ve likely heard of the YouTube Studio Video Editor.
Now don’t let the name confuse you. This is not like the best video editing software- dedicated apps that let you build your project, add clips, tweak the audio, apply effects, and so on. For those cases, we’ve previously explored how to make a YouTube video using some of the best video editing software for beginners and professionals alike. .
Instead, YouTube Studio Video Editor is aimed at helping you remove segments of a video that might be causing you a problem, like when you get a complaint that something you shot needs to be removed. This, along with blurring out sections or adding some music is something you can do, all without losing your views, comments or URL. Let’s check it out.
How to edit a YouTube video: Basic steps
What to do
- Go to YouTube Studio
- Click on the selected video’s ‘Edit’ button
- Use the ‘Trim and cut’, ‘Blur’ and ‘Audio’ tools as needed
What you'll need
- A video already uploaded to your channel
- Skill level: Medium
In order to access the editor, you need to be in YouTube Studio. You can access it directly by going to studio.youtube.com, or if you’ve already got a YouTube page open in your browser, click on your profile picture, top right of the interface, and select ‘YouTube Studio’.
You’ll see all the videos you’ve uploaded to your channel in the ‘Content’ section. Mouse over the one you wish to alter, and click on ‘Details’ (represented by an icon in the shape of a pencil), to get started.
Step 1: The Editor
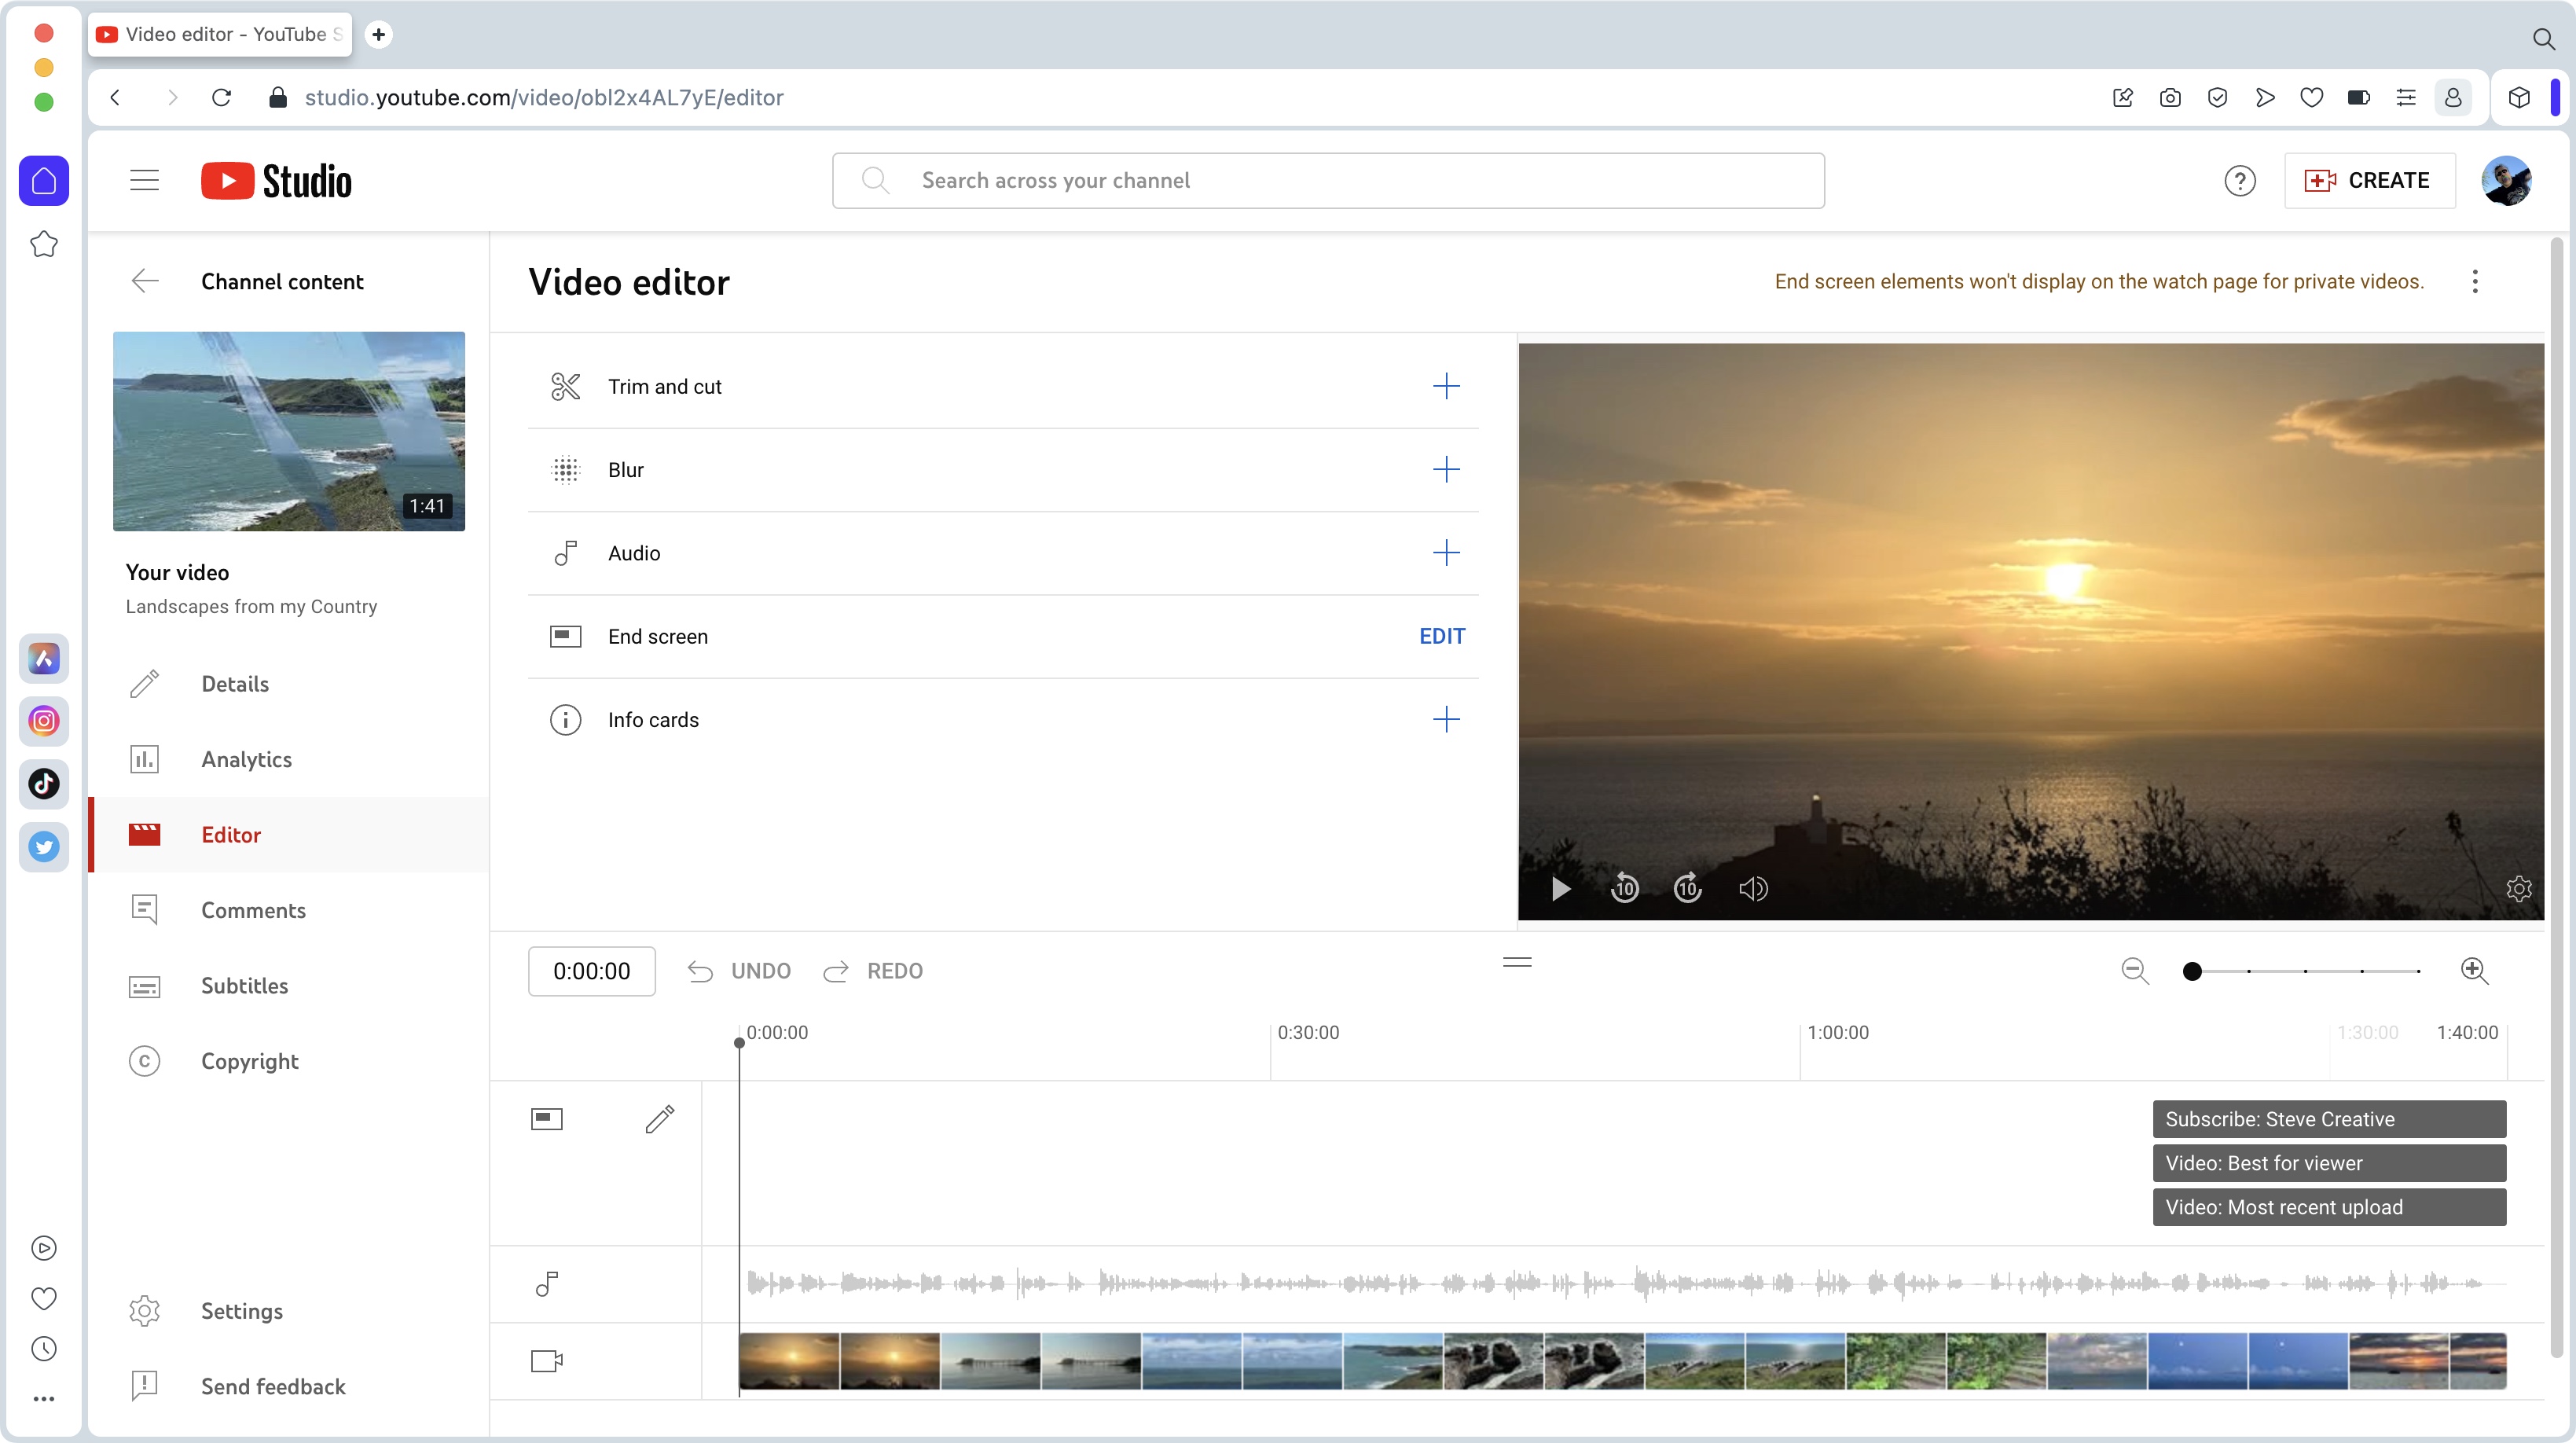
Studio offers you many tools. This is where you get to add a thumbnail and a description to your video, check out its analytics, work on the subtitles, and of course, the reason why we’re here, edit your project.
Click on the ‘Editor’ button in the sidebar to get to it. You’ll find a handful of options in the centre of the interface, with a large preview of your video to the right, and at the bottom, your timeline. We’ll look through each tool in turn, the first one being ‘Trim and Cut’.
Sign up to the TechRadar Pro newsletter to get all the top news, opinion, features and guidance your business needs to succeed!
Step 2: Trim
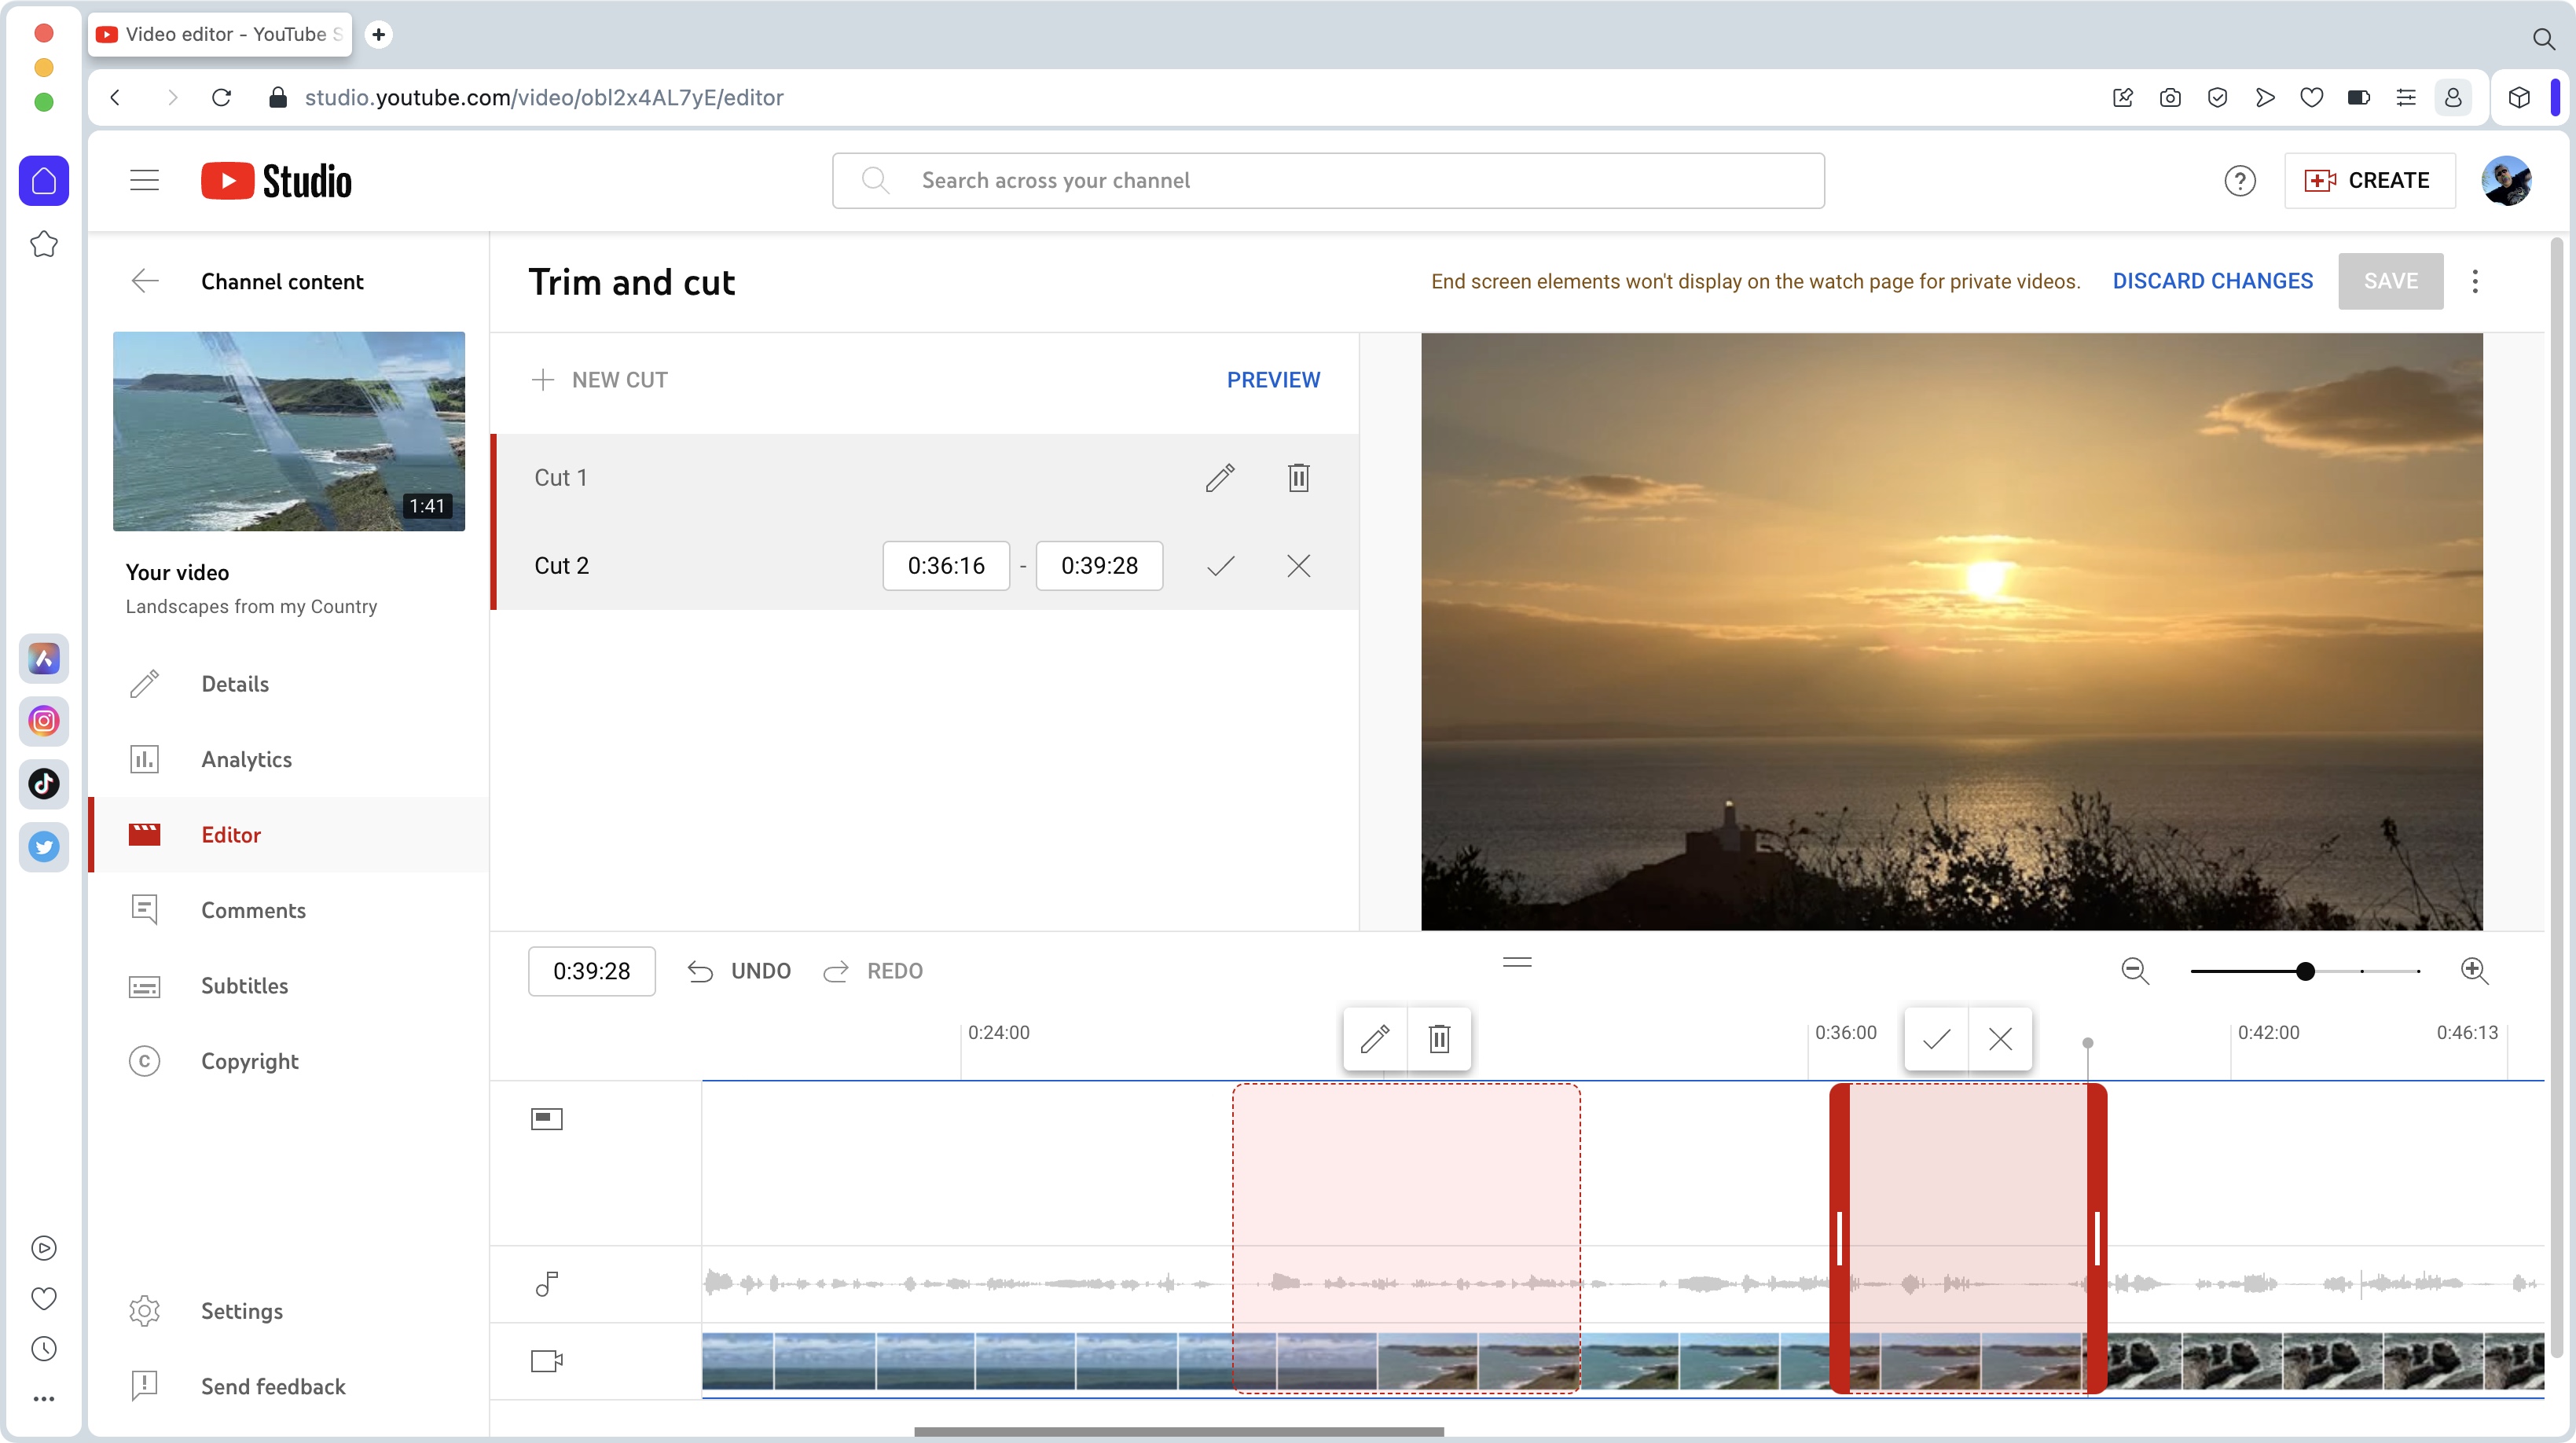
If you need to cut something out of your video, this is the tool to use. Click on it and thick blue lines will appear in the Timeline at the start and end of your video. This allows you to trim the beginning and end of it until you’re left with exactly what you want, by dragging those lines inwards.
If you need more precision, use the Zoom tool, represented by a slider bearing a couple of magnifying glasses on either end of it, on the right, just above the timeline.
But what if you need to trim something inside the video? Move the playhead to where the offending section is, then click on ‘New Cut’ (top left of the interface). This reveals a red section this time, which you can expand and contract as before. Once you’re happy with the selection, click on its ‘tick’.
You can add as many cuts as you need, then further edit them or delete them entirely at your leisure, and you can click on the ‘Preview’ button to check what your new edit looks like.
Step 3: Blur

If you need to blur something out (like a person, or an object), then click on ‘Blur’s ‘plus’ button, which reveals a menu: choose either ‘Face blur’ or ‘Custom blur’.
The former triggers an analysis of your video which can take a little time, as it finds all the faces present in your video. Select the one(s) you wish to blur out, and a blurred oval will appear over the face. Even better, that oval alters its shape and position as the face itself moves. The cover may not be perfect, but you’re able to alter its dimension and position to better match what’s going on on screen over time.
The ‘Custom blur’ works in a similar way, but no potentially lengthy analysis is involved: just add a rectangle or oval anywhere on the screen, resize it, select its duration, either by dragging its edges in the timeline, or by manually typing the timecode in the fields provided. You also have the option to fix the blurred element where it is, or let it move as it tracks an object on screen (this would also work on faces, should you wish to avoid the analysis and know exactly which specific faces to censure).
Step 4: Overlay music
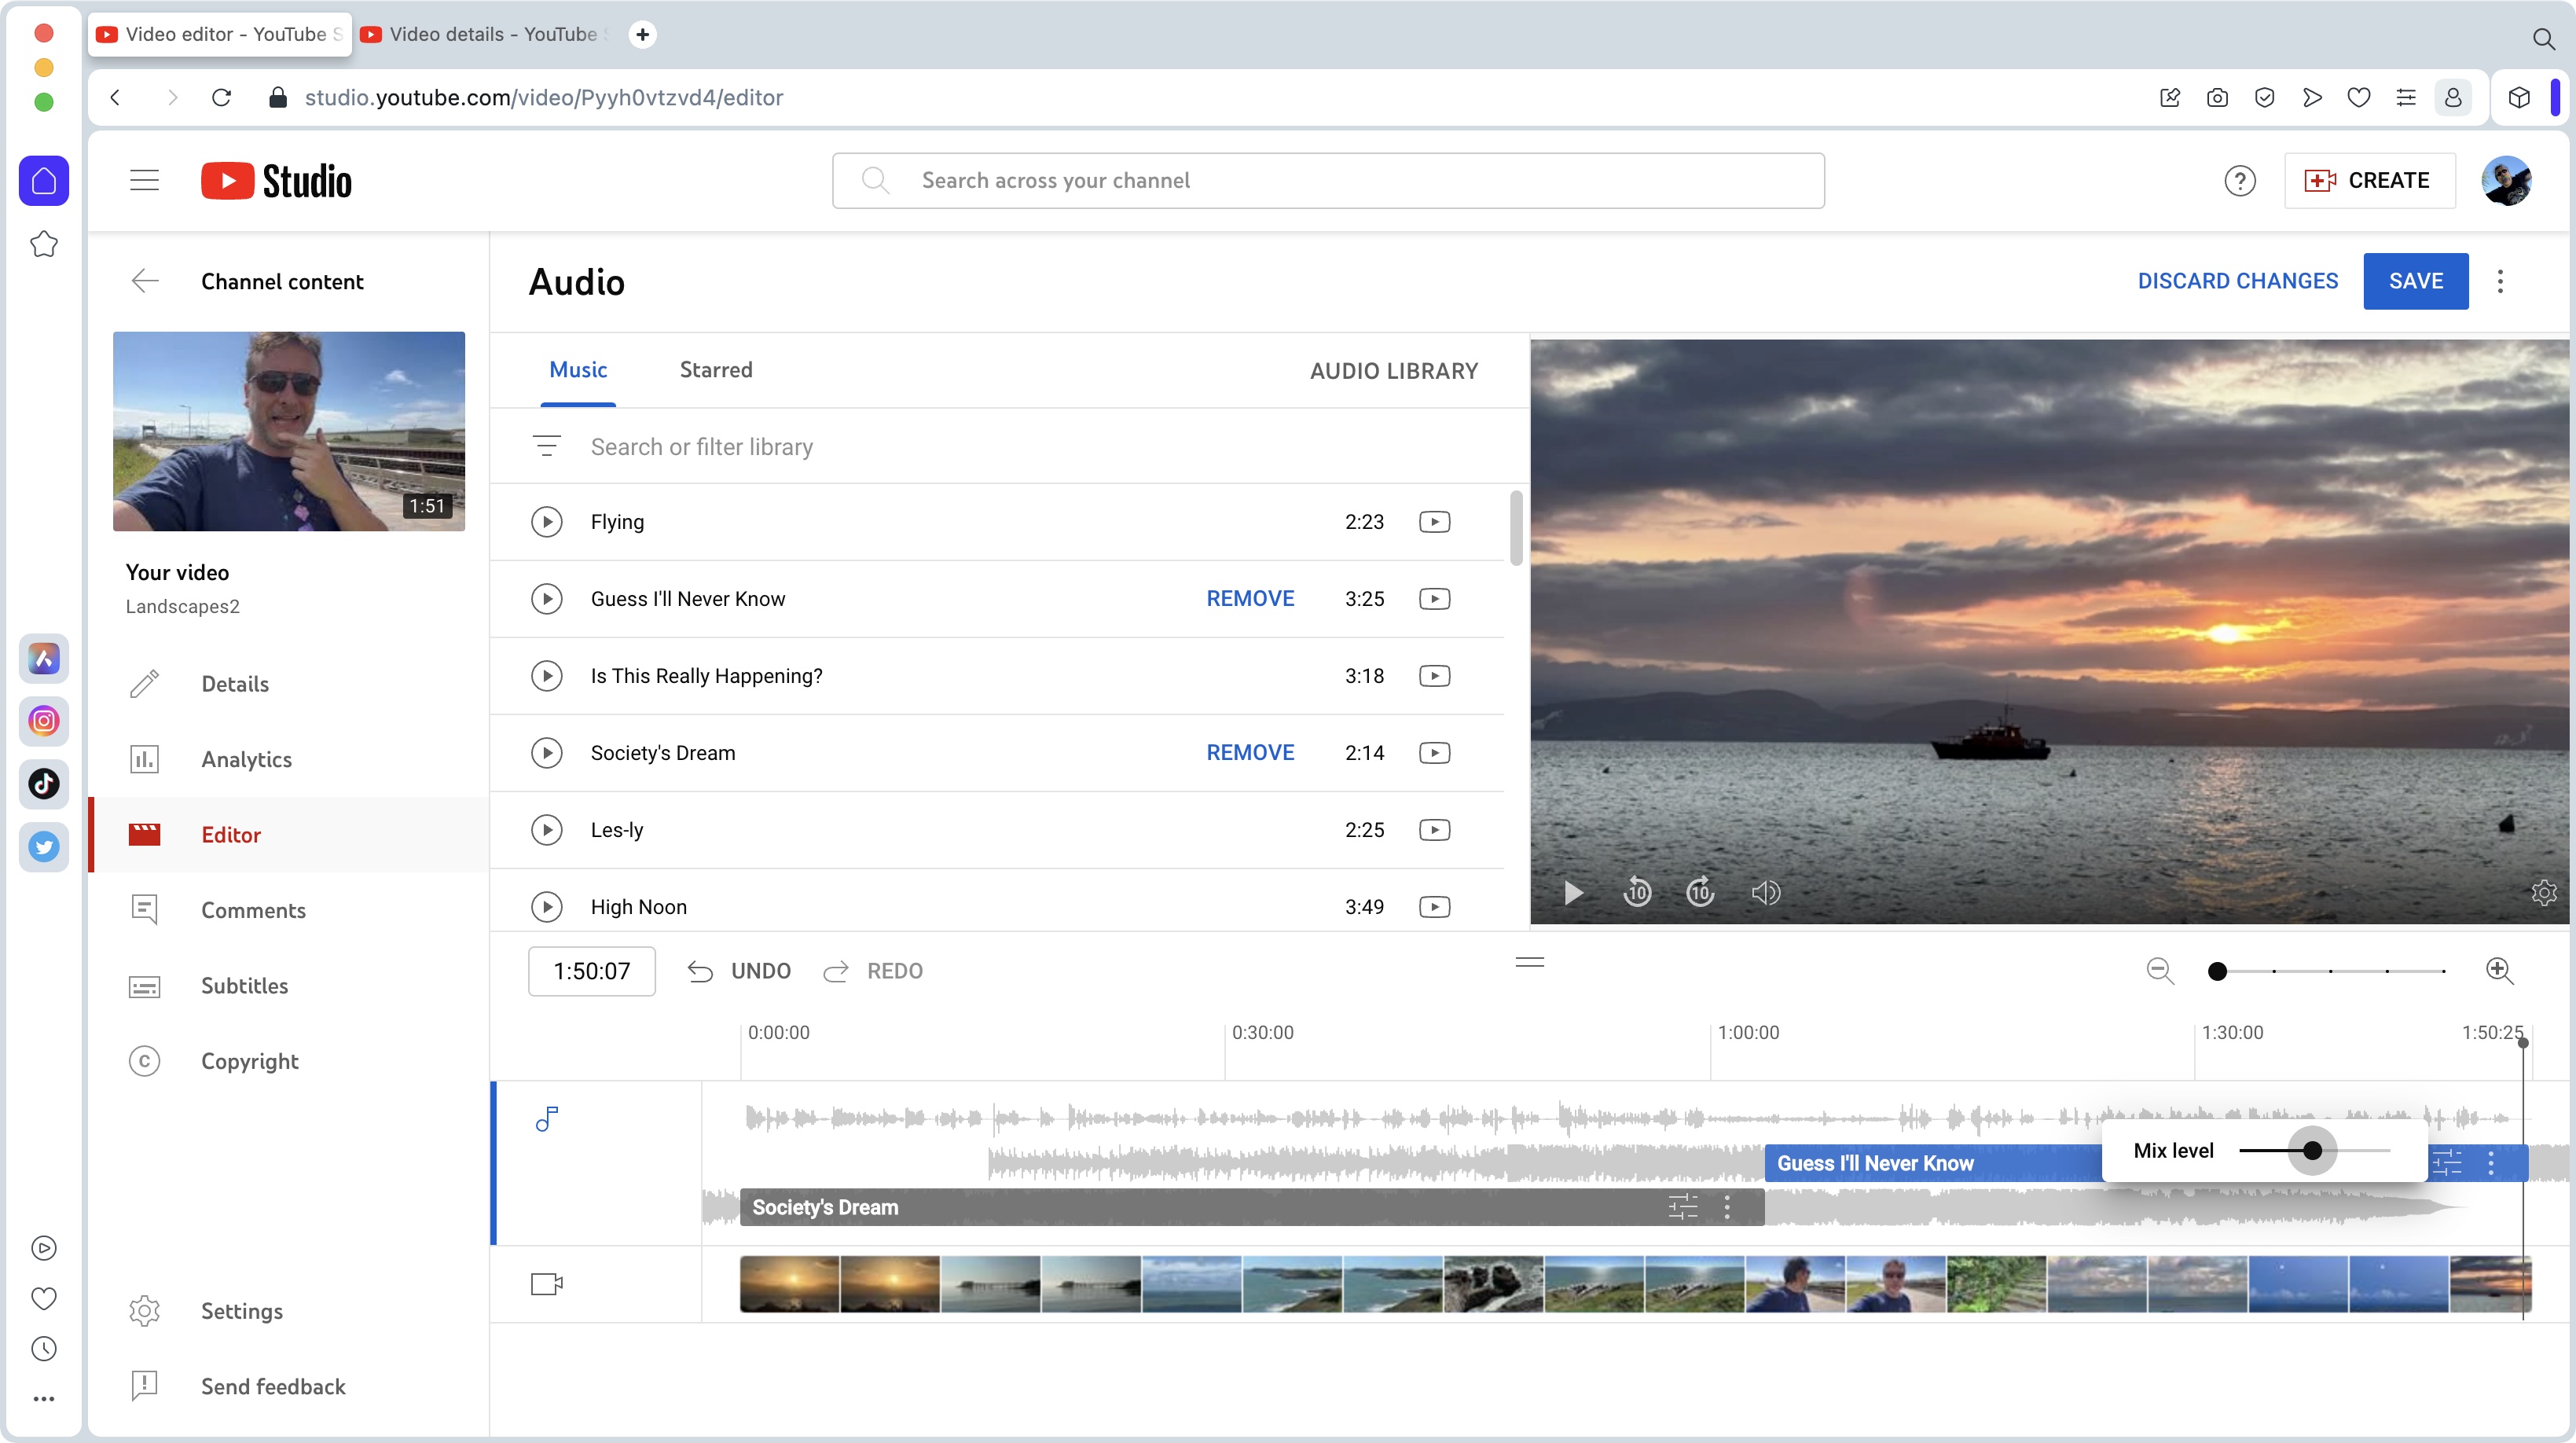
The Audio option sounds much grander than it actually is. You can’t alter your project’s default audio, or even add sound effects - like maybe to bleep out a swear word or two. Instead this section grants you access to YouTube’s music library.
Now that’s not necessarily a bad thing: you can drown out music you haven’t got the rights to for instance, by dubbing it over with something more royalty free and approved by YouTube, or you could just add a musical backdrop over your entire piece if you’d forgotten to do so beforehand.
How it works is very simple: open up that section, then find a music track you like. Click on ‘Add’ to insert it over the whole duration of your video. Resizing it is done by dragging its edges inwards in the timeline, and once the duration is shorter than your project, it’s then possible to drag it around to only have it over a specific section of your video. Adjusting its volume is done by clicking on the icon to its right.
Interestingly enough, you can add multiple clips to a single video if you like.
Step 5: End Screen & Info Cards
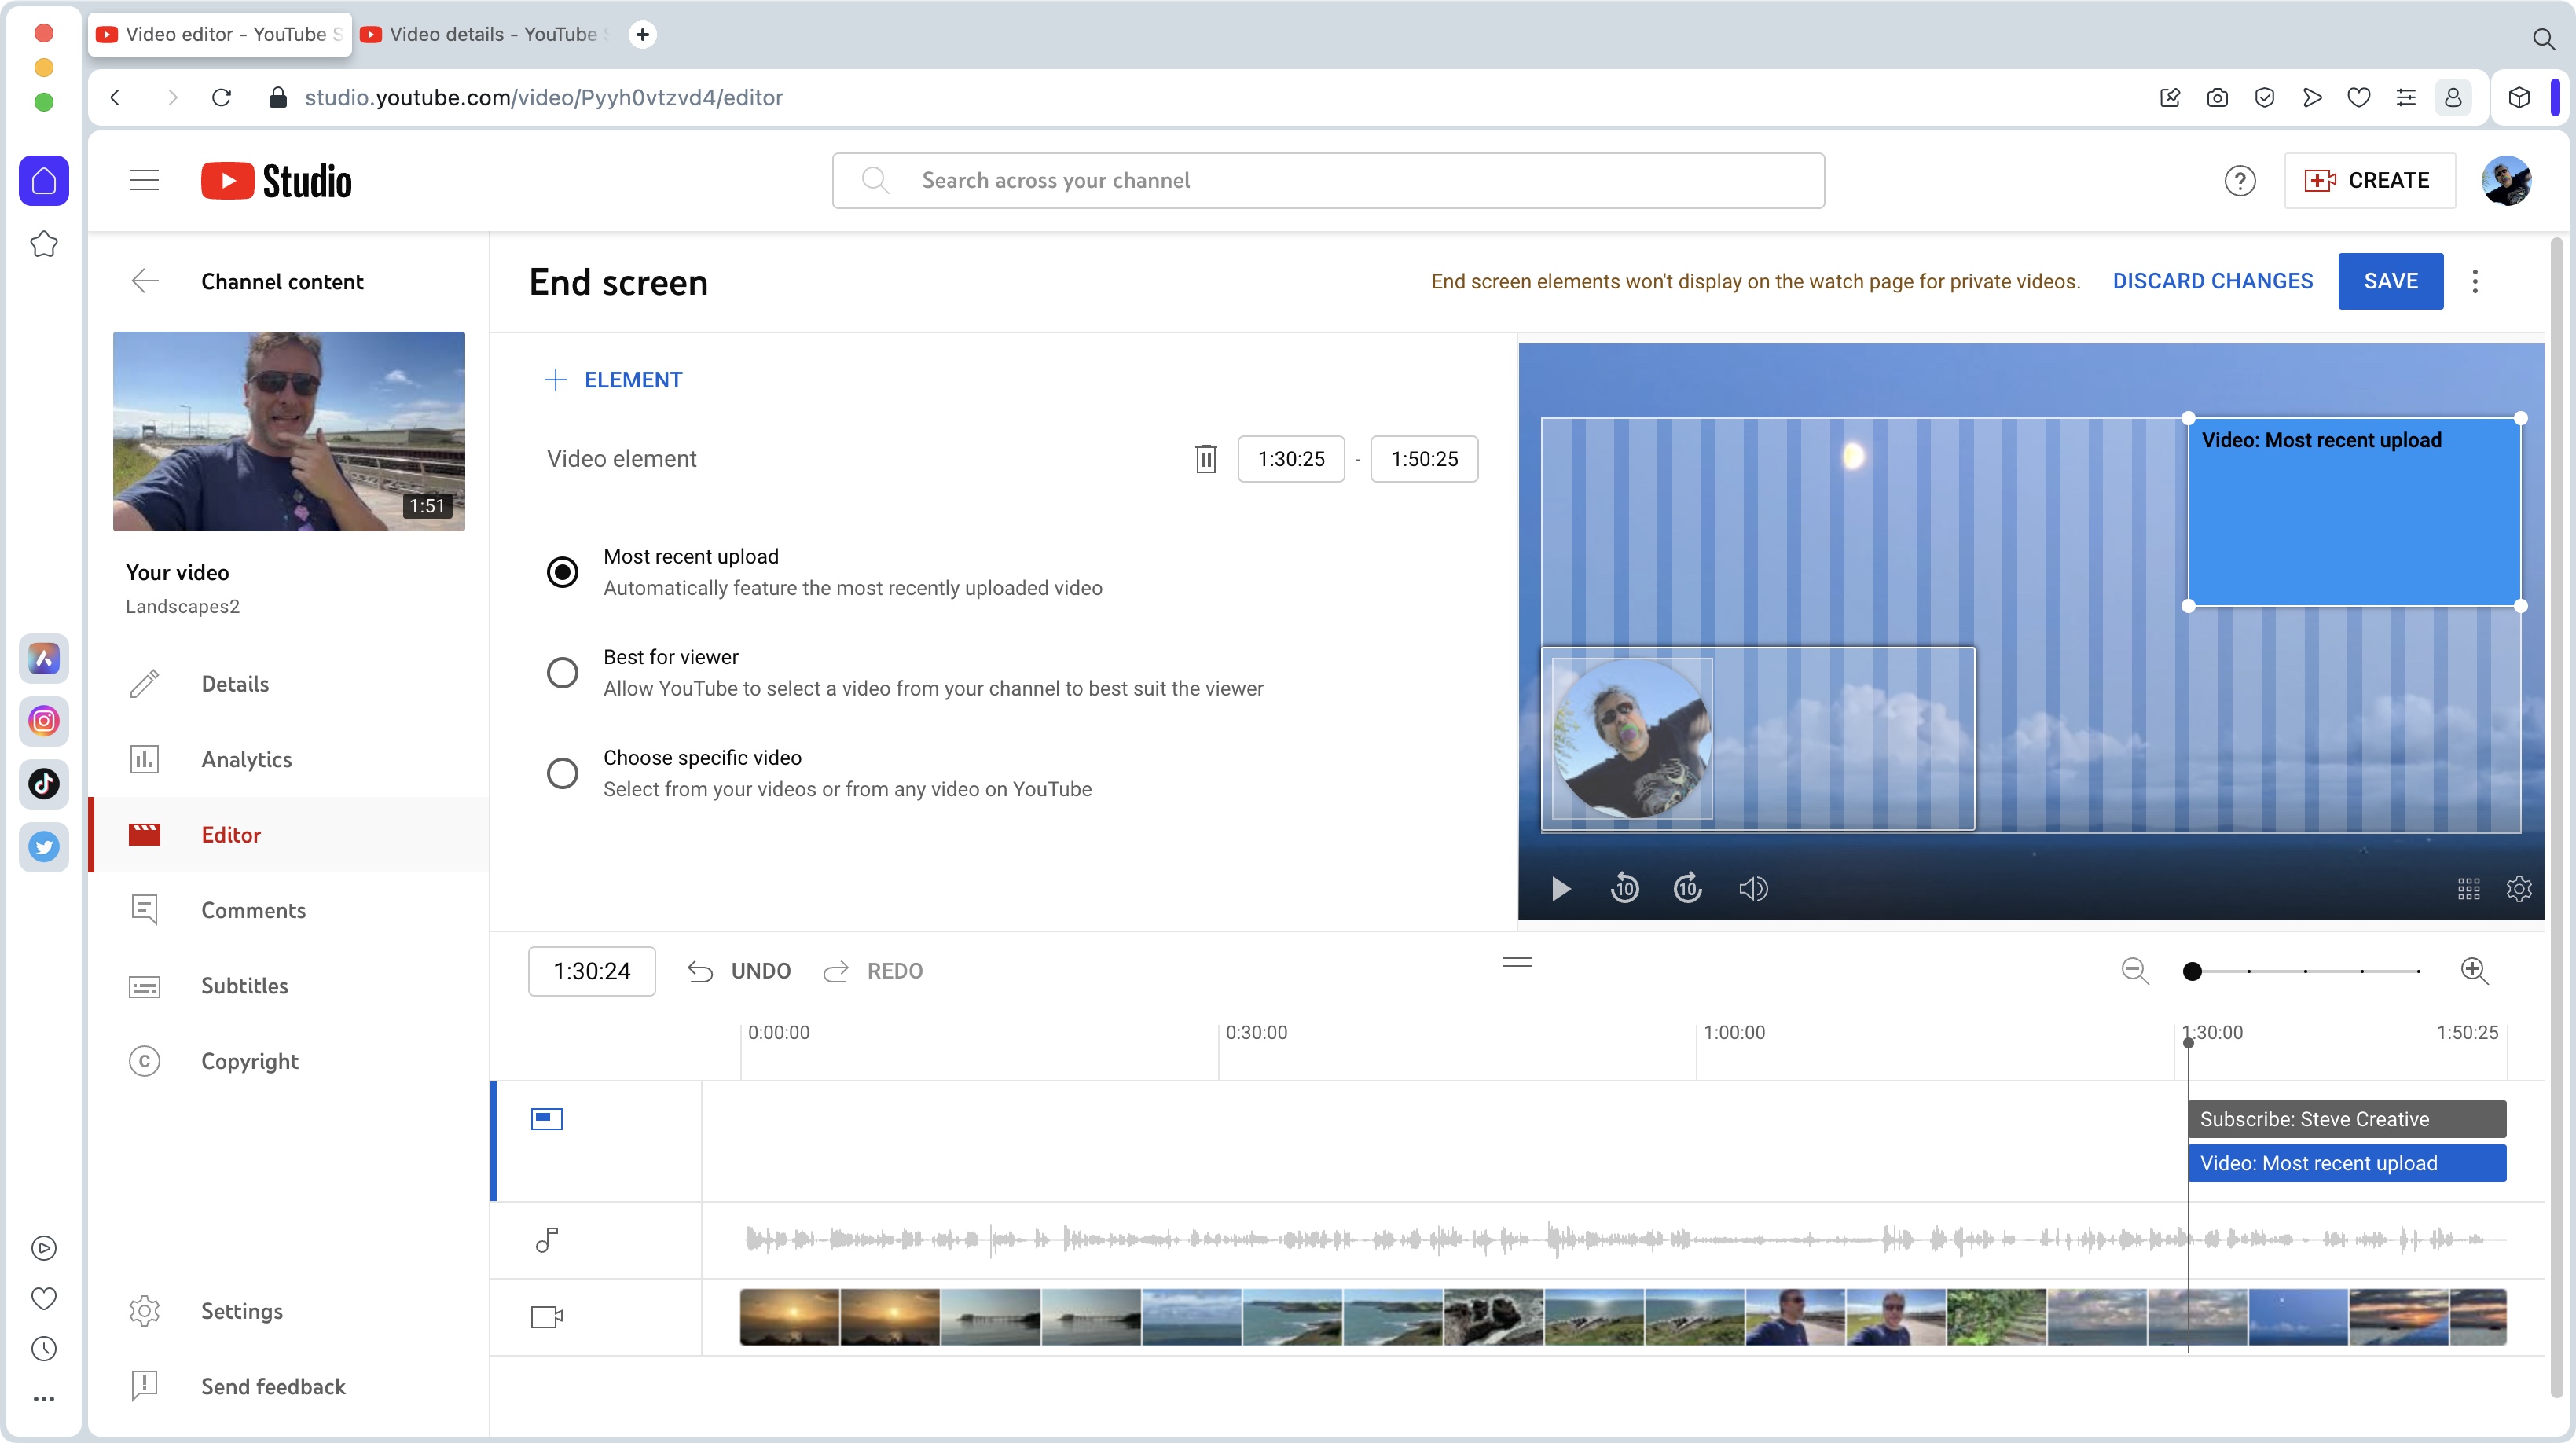
The last two sections are also available elsewhere in YouTube Studio, either as you upload a video and fill in various info about it, or in the general ‘Details’ section, where you’ll see ‘End Screen’ and ‘Cards’ button in the right sidebar.
Whichever ones you choose, the process is the same, except that in ‘Editor’ you’ll have a bigger preview section to work with.
End screens are used to point the viewer to other videos you’ve made, or to get them to subscribe to your channel. You’re also able to link to a playlist or even someone else’s channel, as long as you don’t add more than four such elements to any one video.
Info Cards work in a similar way, except they’re limited to links to videos, playlists or channels, and appear as a small banner, top right of your video. The advantage of them is that you can make them appear at any point in time. You also have the option of adding custom text to that banner, should you so wish.
Step 6: Rendering
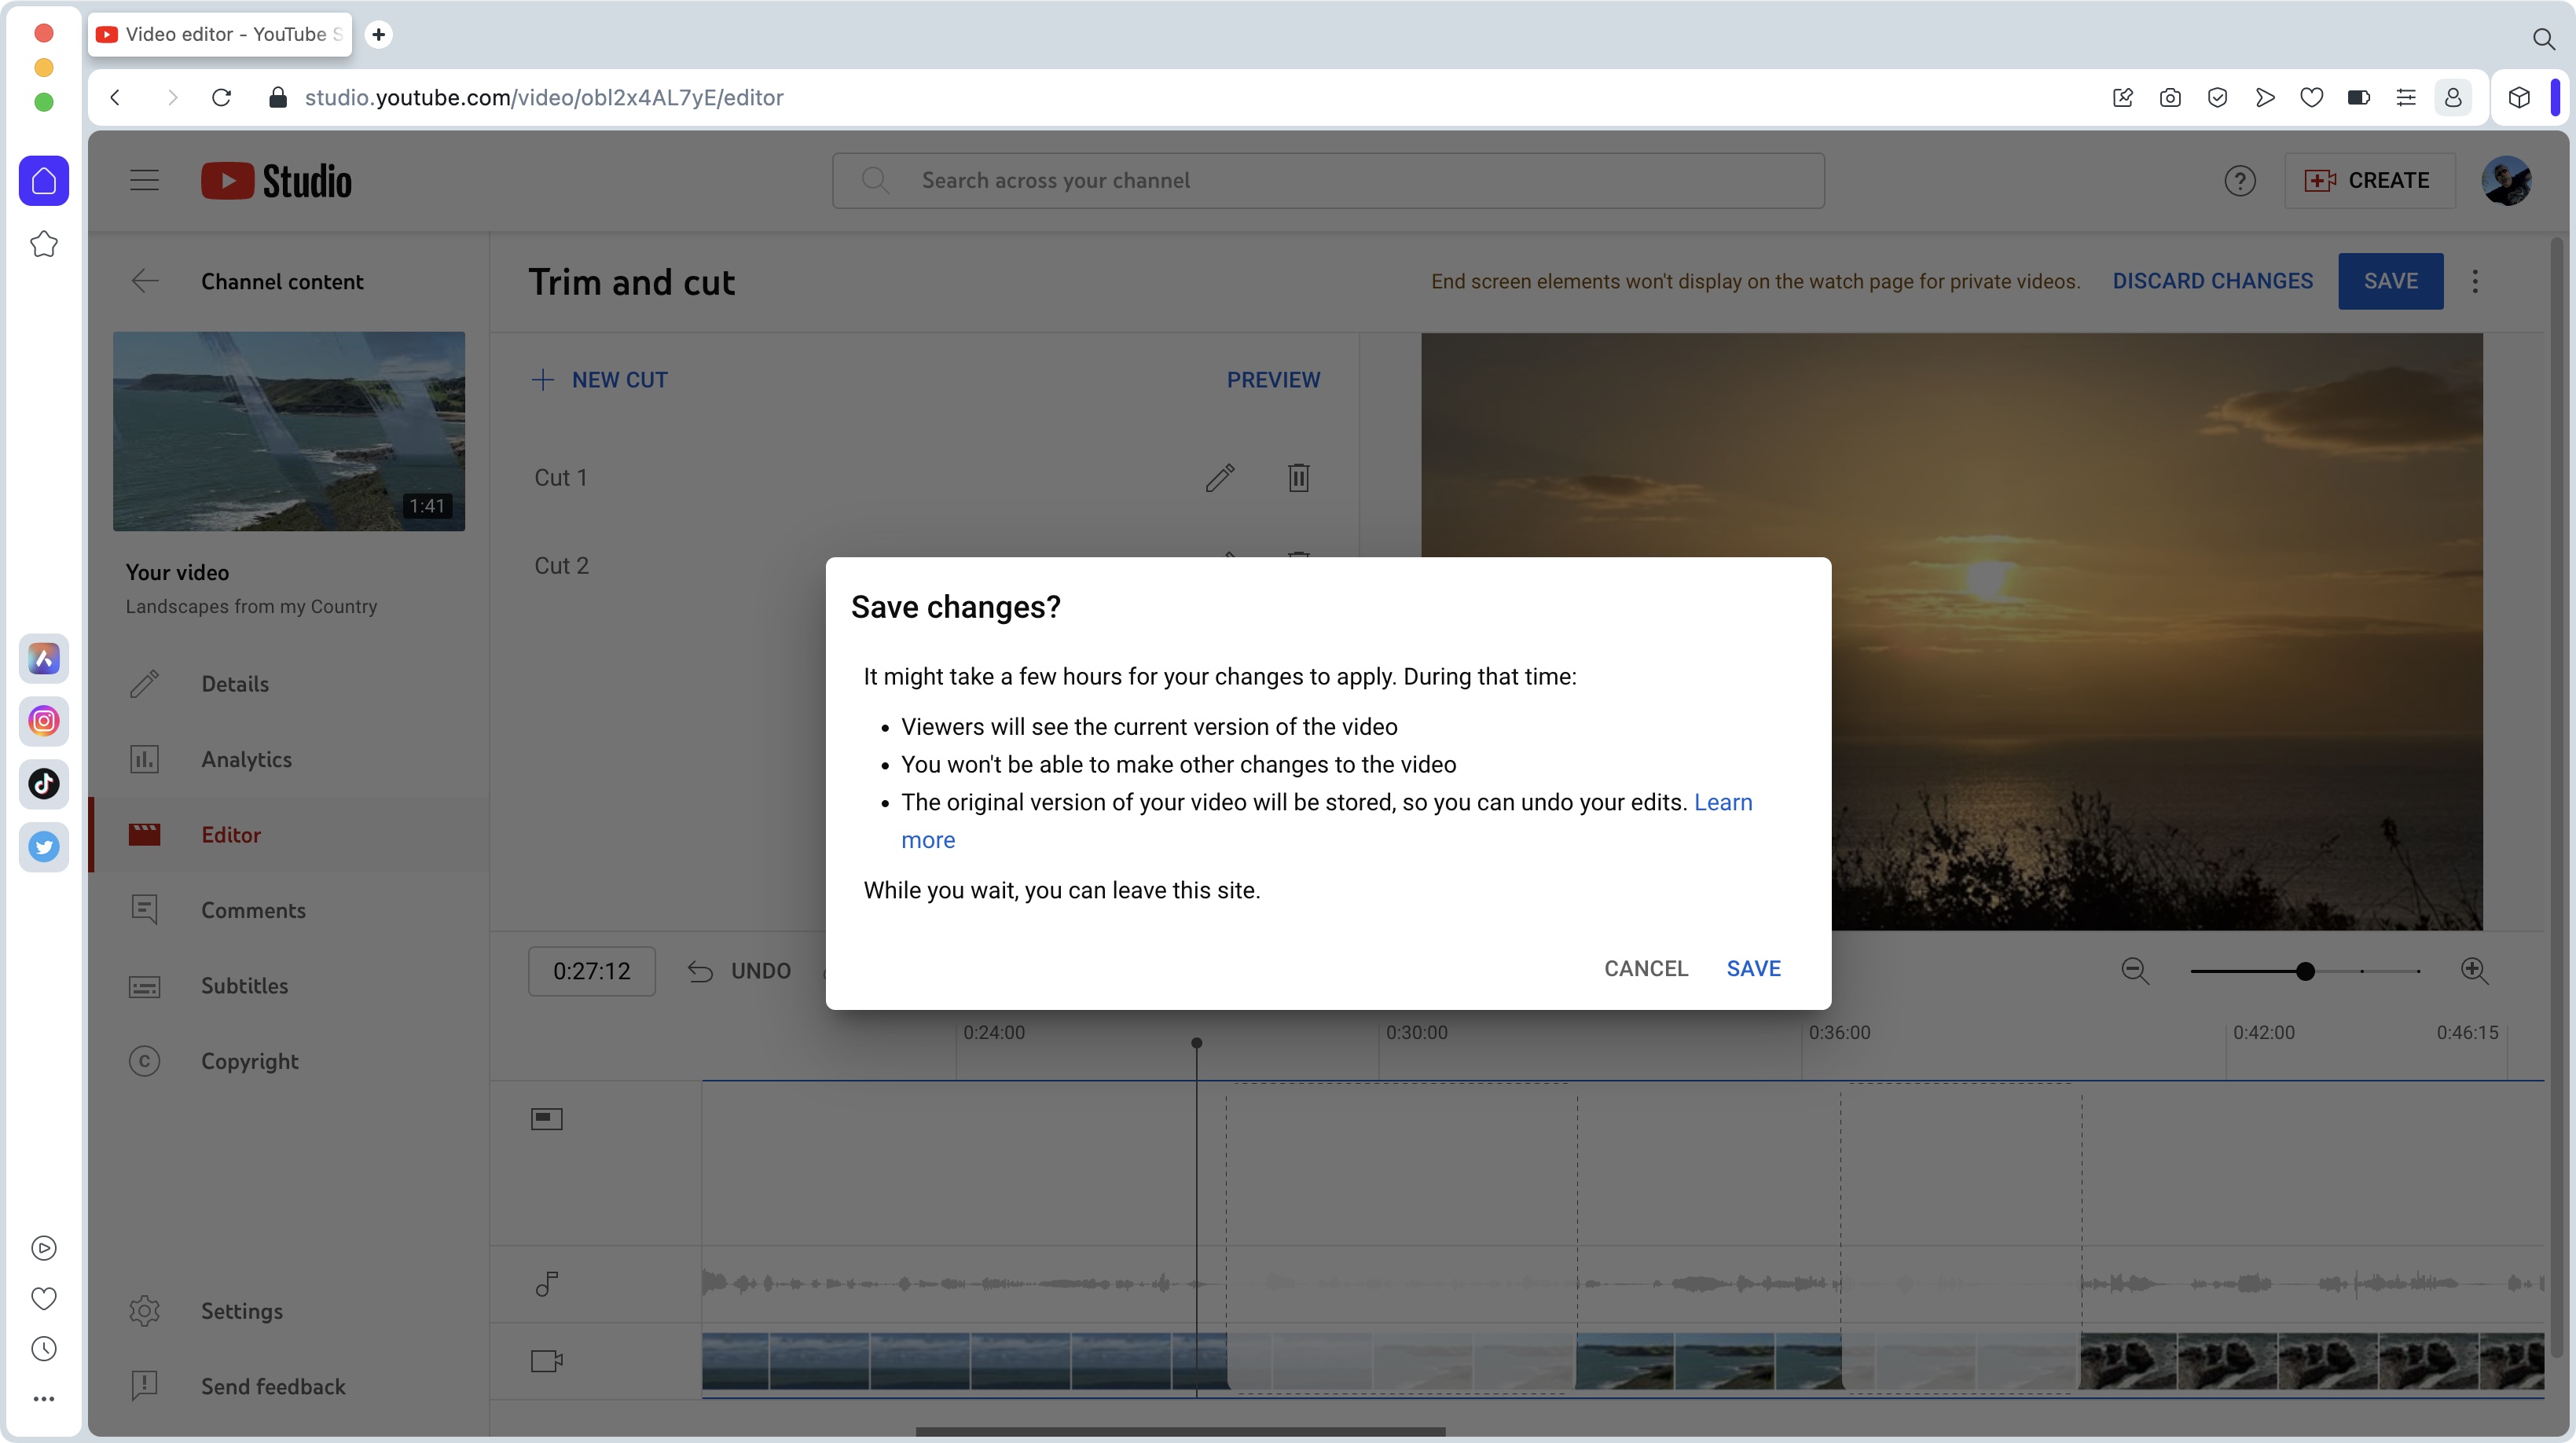
Once you’re happy with the changes you’ve made, you need to click on the ‘Save’ button, top right. Be aware though that it could take a while for the changes to take effect - YouTube advises it could take hours, but that greatly depends on the length of your video. In our experiments, it took a long time - far longer than the actual length of the project itself.
If that wasn't bad enough, you can’t keep working on your video during this process, and you need to do this for each change you make: add a soundtrack, save it and wait for it to render. Apply some cuts, save it, and wait for it to render. Blur a licence plate, save it, and wait for it to render. You get the idea. Not the most user-friendly approach. As you wait, your viewers can still watch your video, although it would be the unaltered one.
Final thoughts
YouTube’s Studio Editor isn’t exactly feature-rich. It can hardly even compare to the best video editing apps for mobile devices. But it’s the only way available to make a handful of alterations to your work. In most cases, it's the best way to make your videos more compliant, should a person or company take issue with something present in your video. In that respect, the tools are easy to use, even if they take what seems like forever to process.
Steve has been writing about technology since 2003. Starting with Digital Creative Arts, he's since added his tech expertise at titles such as iCreate, MacFormat, MacWorld, MacLife, and TechRadar. His focus is on the creative arts, like website builders, image manipulation, and filmmaking software, but he hasn’t shied away from more business-oriented software either. He uses many of the apps he writes about in his personal and professional life. Steve loves how computers have enabled everyone to delve into creative possibilities, and is always delighted to share his knowledge, expertise, and experience with readers.

 Become a TechRadar Insider


