
 Become a TechRadar Insider


So, you want to learn how to make a YouTube video? YouTube is a great platform for sharing videos online, but not really one for creating those videos in the first place (although it is possible).
If you’re looking to build an edit, and create a more refined experience for your viewers, then you need access to the best video editing software or the best video editing apps for mobile. You’ll find plenty available, from those designed for professionals who need studio-grade exports to video editing software for beginners.
To help you on your journey, we’re taking a look at how to use free video editors to properly export content for a YouTube channel in the right format. These tools are really easy to download and install on your computer, whether you’re using the best video editing Mac, Windows desktop, or even a Linux machine, and help you create captivating content for your channel.
How to make a YouTube video: Basic steps
What to do
- Open your favourite video editor
- Export in YouTube’s ideal format
- Upload exported file to your channel
What you'll need
- A video editing laptop or video editing PC
- An internet connection
- Raw footage
Shotcut

Shotcut is the first of two apps we’re showcasing here which are open sourced. This means a community of enthusiastic programmers maintain and improve the software over time.
You might find the interface feels pretty spartan, and if you’re unfamiliar with it, it will take you a few minutes to find your way around and realise how to even start getting some work done. It is worth getting acquainted with it, to see if this is software you could work with on a regular basis.
Aside from the basics of video editing, like adding clips, trimming them, applying effects, titles, and transitions, you’ll find Shotcut has a few interesting features, such as an elegant time remapping tool to play with the playback speed of your selected clip.
The crucial element is how easy it is to convert your project into a YouTube compatible format: click on ‘Export’, select ‘YouTube’ from the list of presets, and you’re good to go.
OpenShot

OpenShot is the second of our open-source video editing software. It’s a very versatile piece of software which boasts a friendlier interface, even though it may provide you with a little too much information at times. But if that’s the case, now you can switch between Advanced and Simple, to pare down what you see and ease yourself into the video editing world. We had no problem finding our way around, and were able to start editing in seconds.
There are an interesting number of features, like an Emoji panel, enabling you to insert these graphics anywhere over your project - if you’re into that kind of thing.
When it comes to exporting your project, select File > Export Project > Export Video from the menu bar. You’ll find ‘Simple’ and ‘Advanced’ options here as well, and the former truly makes it easy for you: select ‘YouTube HD’ from the ‘Target’ menu, and click on ‘Export Video’. OpenShot should handle the rest.
Apple iMovie

Even though it’s Mac-only, we felt we had to include Apple iMovie in our list as it’s the gold standard for free video editing for novices on iOS and macOS. Or at least it used to be. Sadly, it’s been resting on its laurels for some years, and some features do feel a little outdated, but it’s slick, and easy to use, and if you’ve spent a lot of money on your Apple computer, you deserve to download something that works well and is actually free (via the Mac App Store).
Some of the limitations may actually be welcomed by newcomers, like only being able to work with two layers of video, and you’ll find it’s incredibly easy to add clips, trim them, split them, move them around, add transitions, titles, etc. There’s even a section called ‘Trailer’ that is more ‘editing by numbers’: iMovie asks you for specific clips (long shots, landscape, close ups, etc), and will build a dynamic trailer based on your chosen genre.
When it comes to exporting your work, click on the ‘Share’ button, top right, and choose ‘YouTube & Facebook’. Just make sure you change the resolution from the antiquated default of 640x360 to HD (1920x1080), and the exported file will be perfect.
HitFilm

HitFilm is much more advanced than the other three video editors we’ve explored up to now (and there’s an even more advanced professional version, HitFilm Pro). The basic app is free, although you’ll need to create an account in order to use it.
You will be getting reminders to get one of the more powerful, subscription-based, versions, like when browsing through the various tools, many of which have a ‘Creator’ or ‘Pro’ tag attached to them, but that’s a small price to pay for a pretty powerful piece of software.
You can work with multiple layers of video, it comes with some free music, sound effects, and templates (most, again, have to be paid for, but at least the free ones are segregated, making those easy to select).
When it comes to exporting your work, simply click on the ‘Export’ button, top left of the interface, and select Default Presets > YouTube 1080P HD. HitFilm will take care of the rest. Once the render is done, they even provide a link which will open the folder it’s located in on your computer.
DaVinci Resolve
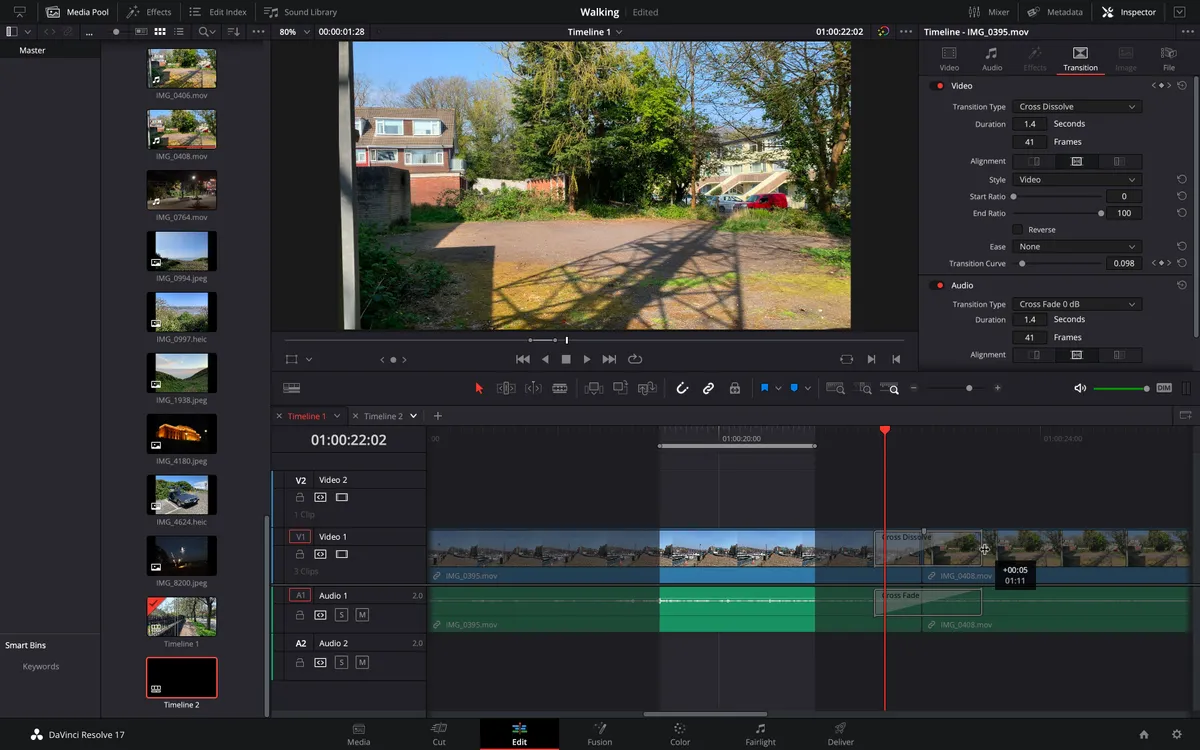
If you thought HitFilm was advanced, wait until you get a load of DaVinci Resolve. This truly is professional-grade software, available for free. There is an even more powerful paid-for version (available for a one-time fee).
If you’re new to video editing, the interface might feel quite intimidating, but this is to be expected. It’s definitely not for the casual editor, but mostly for those aiming to eventually turn their YouTube hobby into a full-time job. Why not learn the ropes now, rather than later, when you’ll be much busier and won’t actually have the time?
With Resolve, you have high-end editing tools, a visual effect suite called Fusion, powerful colour correcting tools, and a specialised audio-editor known as Fairlight. Pretty much all you need under one roof.
When you’re ready to export, as you might expect, the process is less automated. Switch to the ‘Deliver’ panel, select H.264 master, change the format from QuickTime to MP4, make sure the resolution and frame rate are correct, and click on ‘Add to Render Queue’. Once in the Queue, click on ‘Render All’, and Resolve will do the rest.
Final thoughts
Whichever software you end up using, the process, broadly speaking, is the same, and you’ll end up with an .mp4 file ready to upload to YouTube.
While we’ve looked at ways to do that using some of the best free video editing software, the process is similar using more advanced tools like Adobe Premiere Pro or any of the best alternatives to Premiere Pro. However, it’s worth having a working knowledge of video editing to get the most out of professional apps like these.
For more assistance in kick-starting your career as a content creator, we’ve also compiled an in-depth guide on How to create a YouTube channel and explored the age-old question, What do YouTubers use to edit videos?
