How to copy and paste edits on iPhone
Why keep doing the same thing when you only have to do it once
Sign up for breaking news, reviews, opinion, top tech deals, and more.
You are now subscribed
Your newsletter sign-up was successful
If you’ve ever gone to an event or outing and kept taking pictures, you’re probably going to have to make the same adjustments to each photo. In a situation like this learning how to copy and paste photo edits on your iPhone is a real timesaver, especially if you’re planning on posting them all to social media.
While some of us use the best photo editors available to get great results, some of us (read: me) prefer to do their photo editing on their phones. And, even before you start digging into third-party apps, there are quite a lot of adjustments that can be made within Apple’s own Photos app.
Here's how easy it is to take all the edits you made in one photo and apply it to another.
Steps for how to copy and paste edits on iPhone
- Open Photos app
- Press edit
- Copy edits
- Paste edits
Tools and Requirements
- iPhone with Photos app
Step by step guide
1. Open Photos app
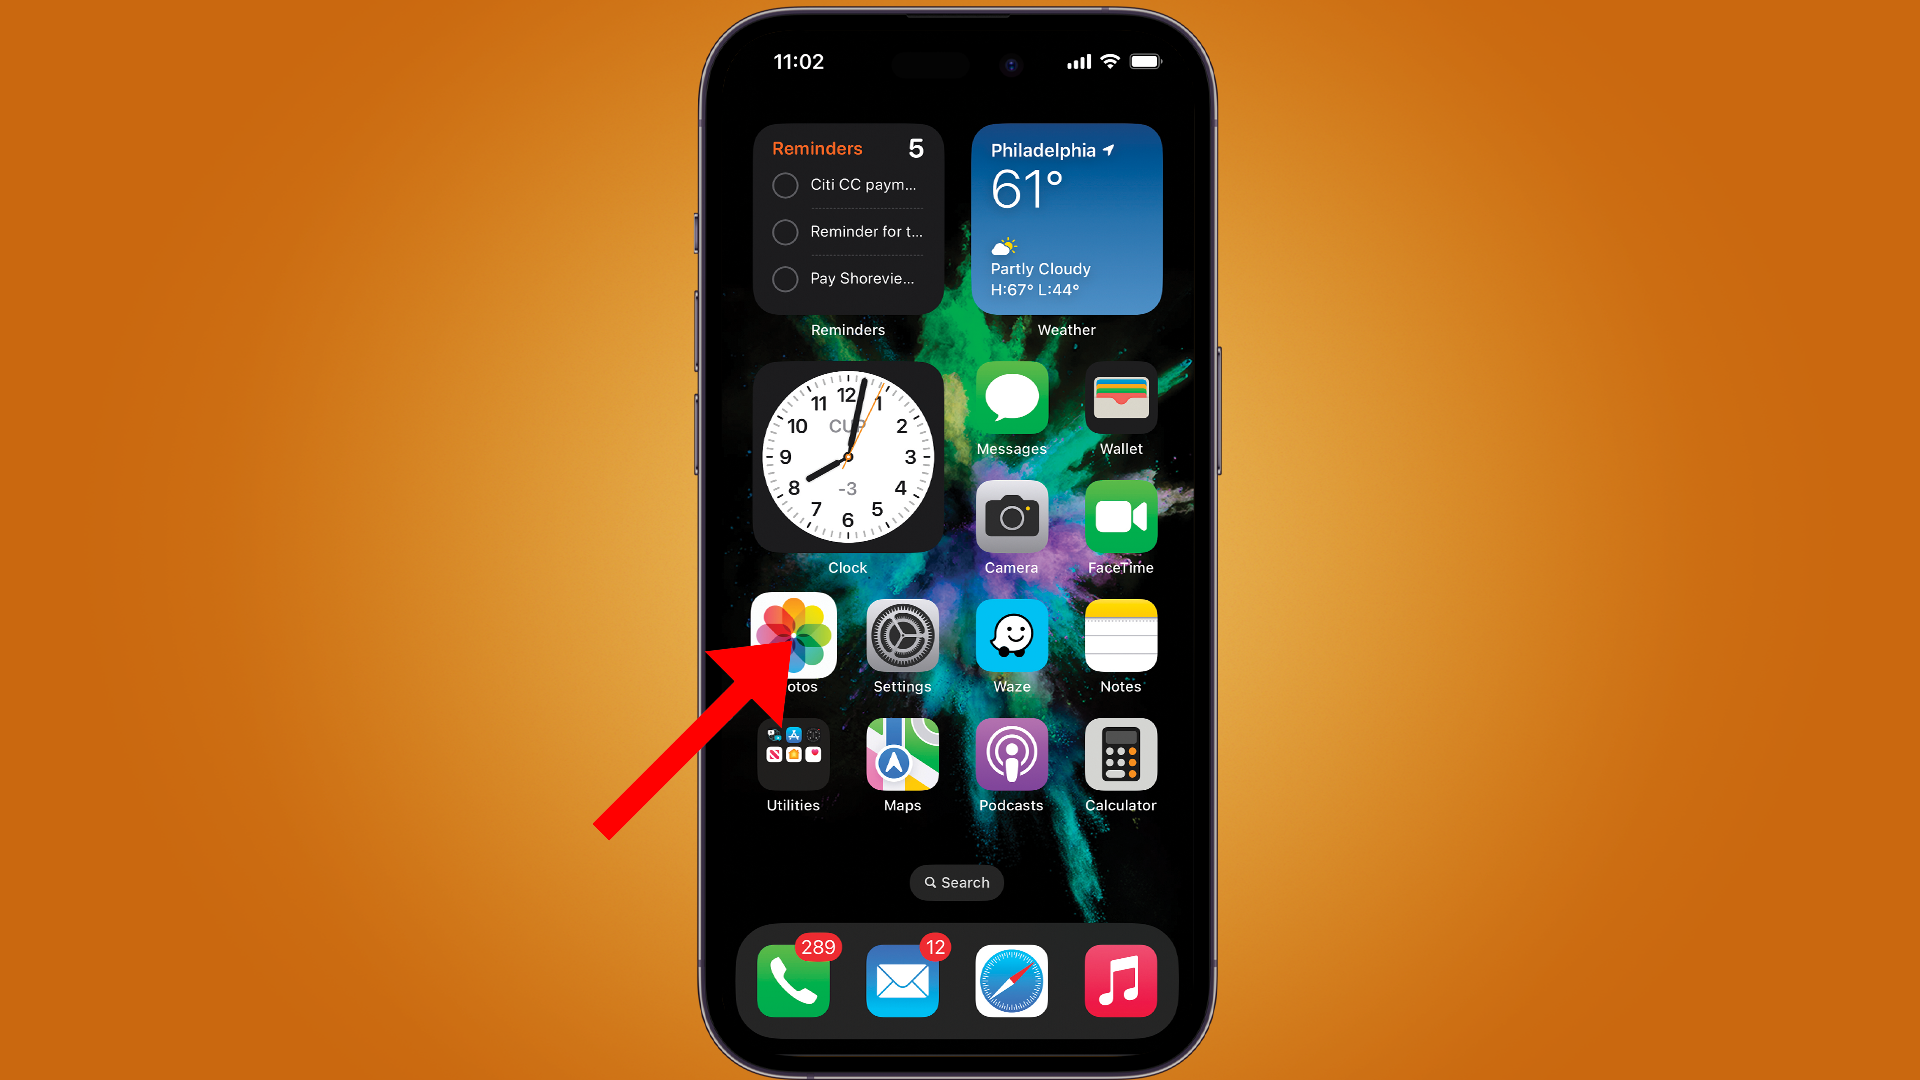
To start, open the Photos app by either clicking on the icon or typing Photos in the search bar.
2. Press edit
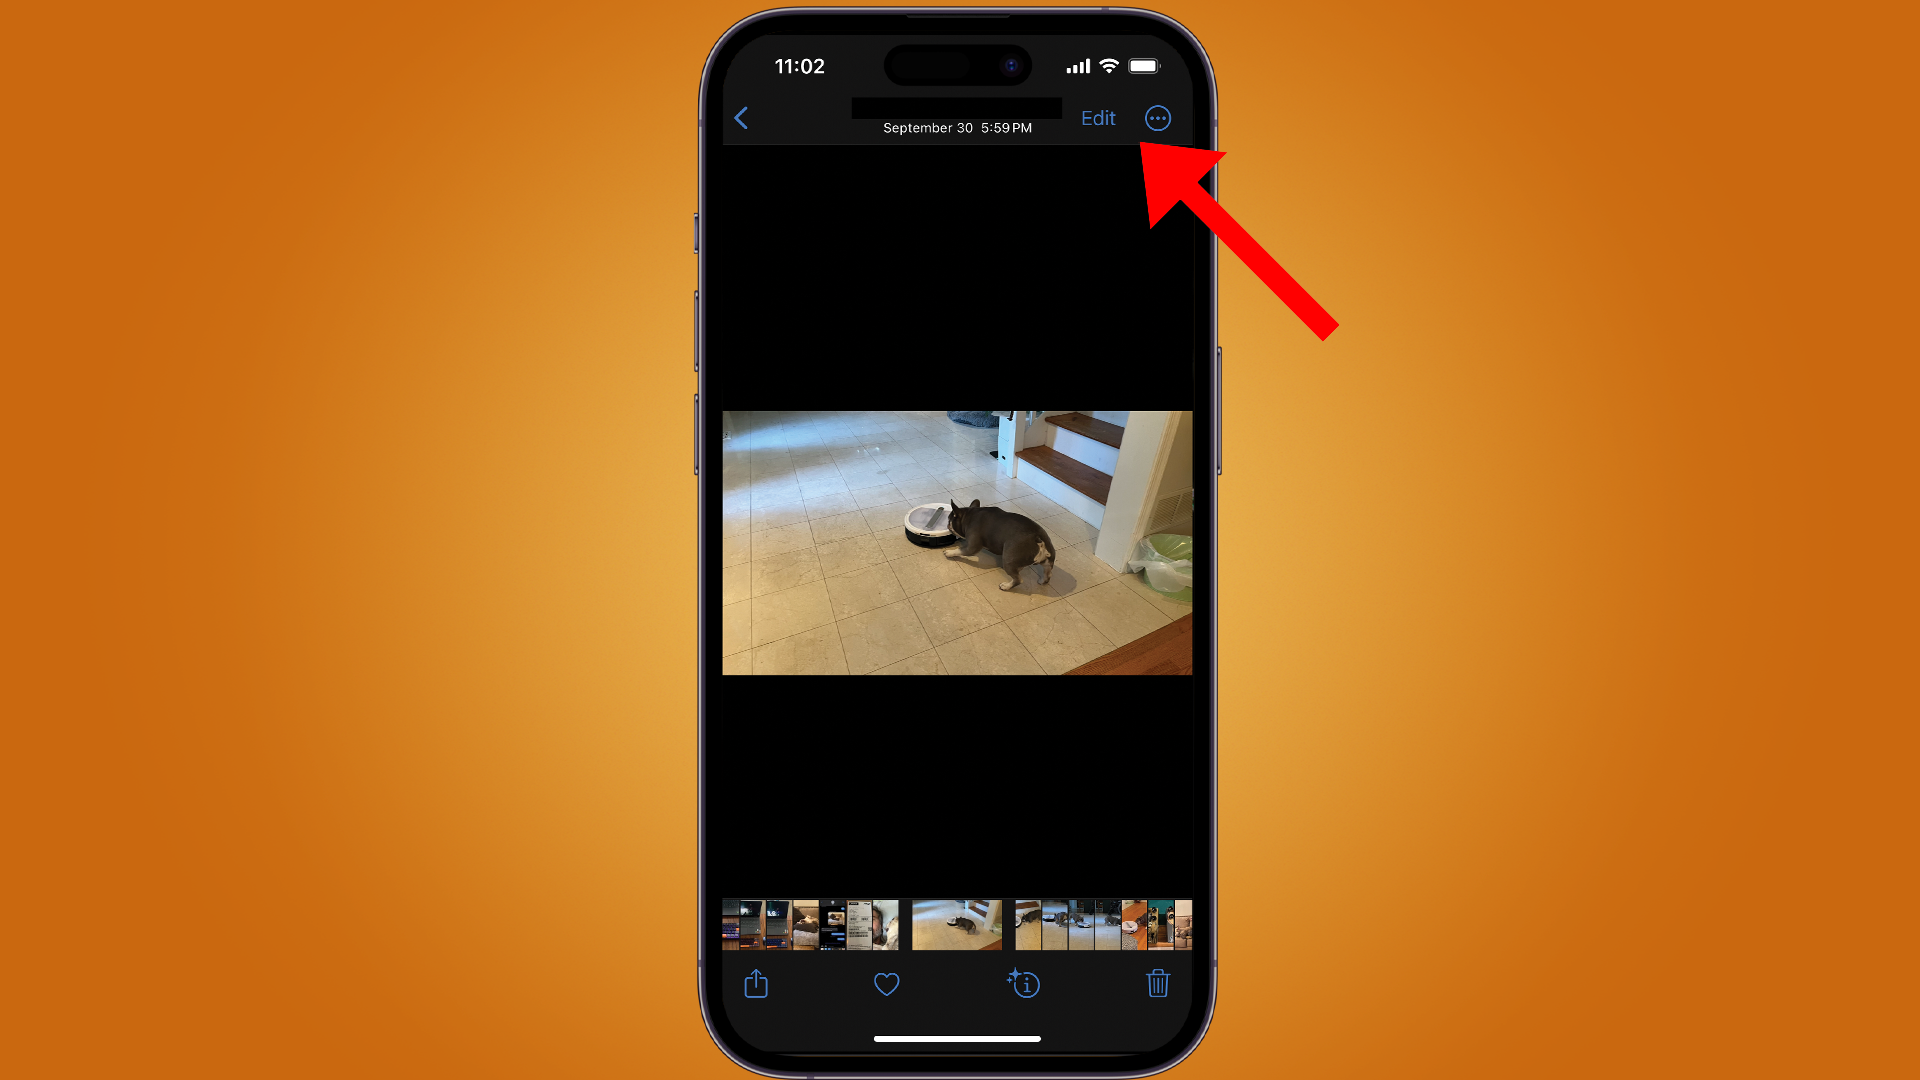
Before you can copy edits, you need to make some. So, tap Edit in the top right corner and adjust your first photo as you see fit.
3. Copy edits
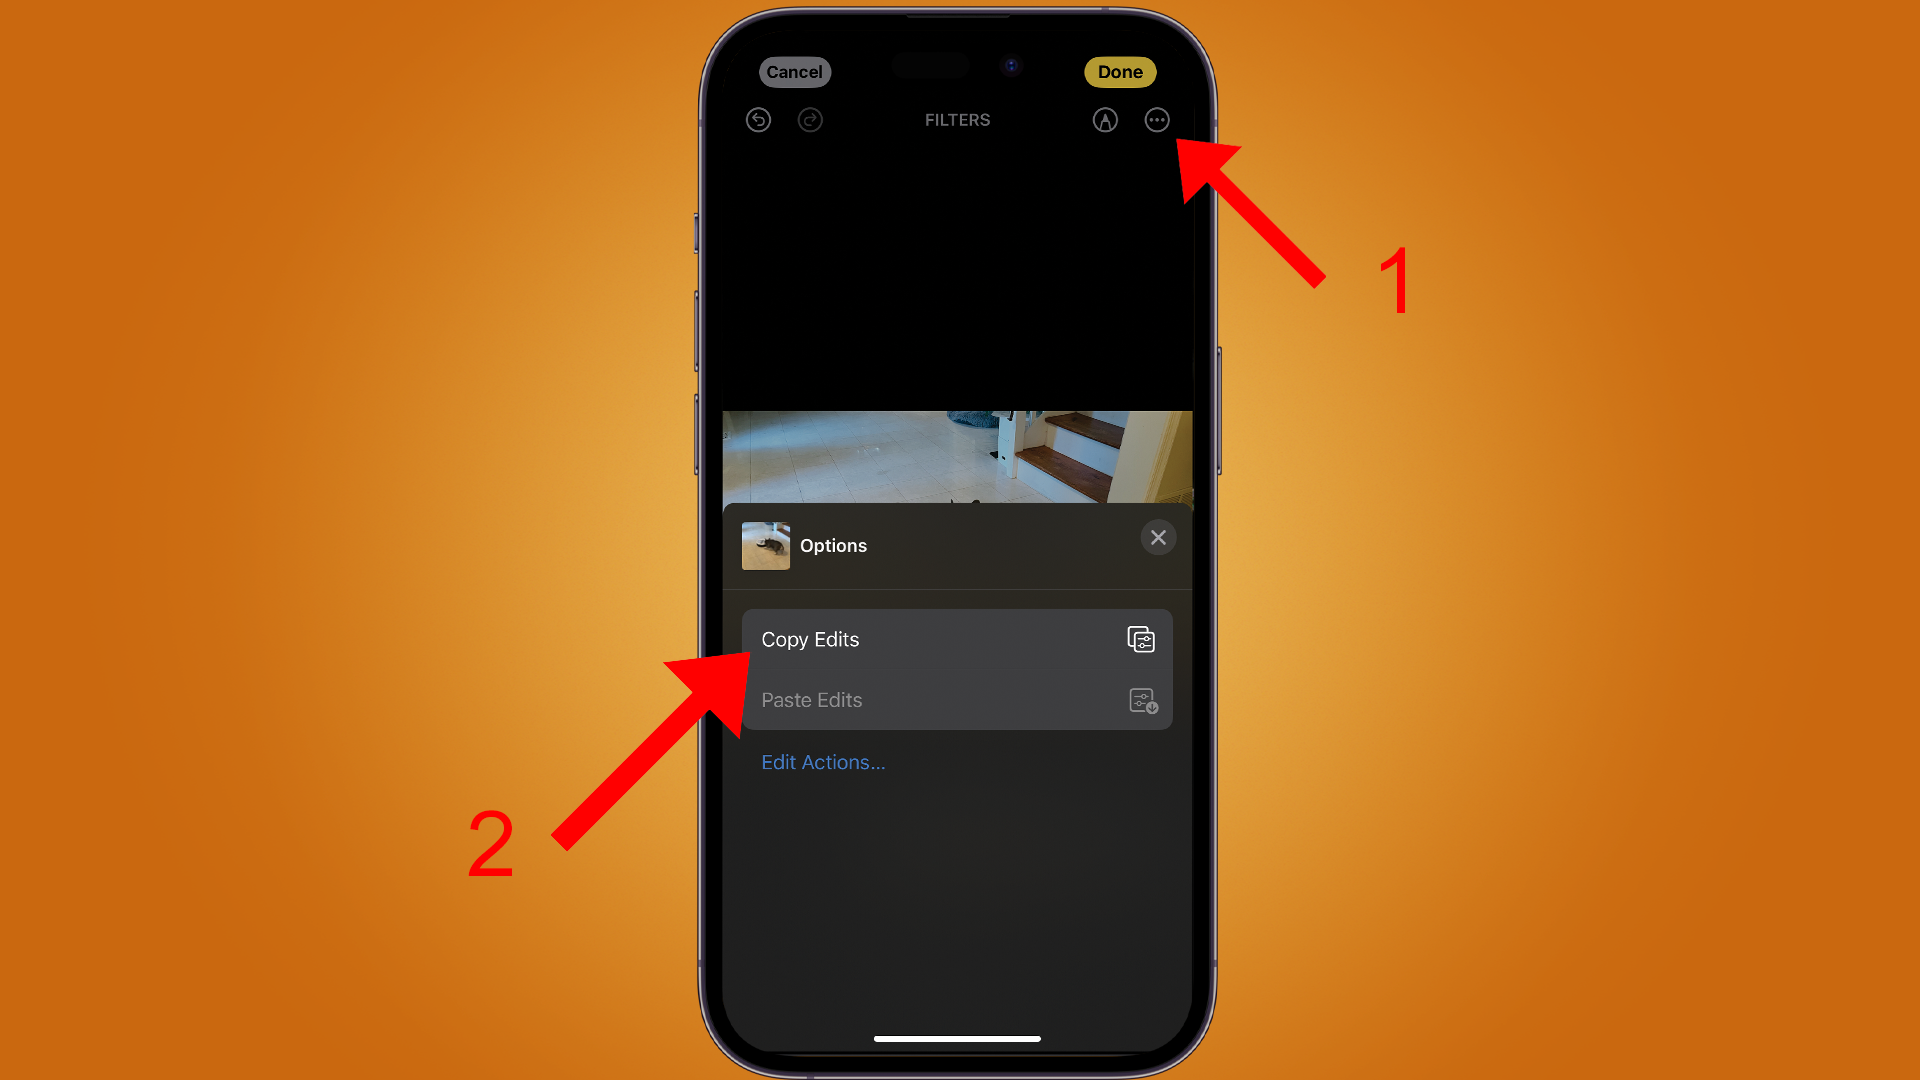
Once you’re done making your edits, tap on the More options icon indicated by a circle with three dots in the top right corner. A menu will pop up with two options: Copy Edits and Paste Edits. Tap Copy Edits.
Note: neither will be available if you haven’t made any edits and Paste won’t be available until you’ve copied previously made edits.
4. Paste edits
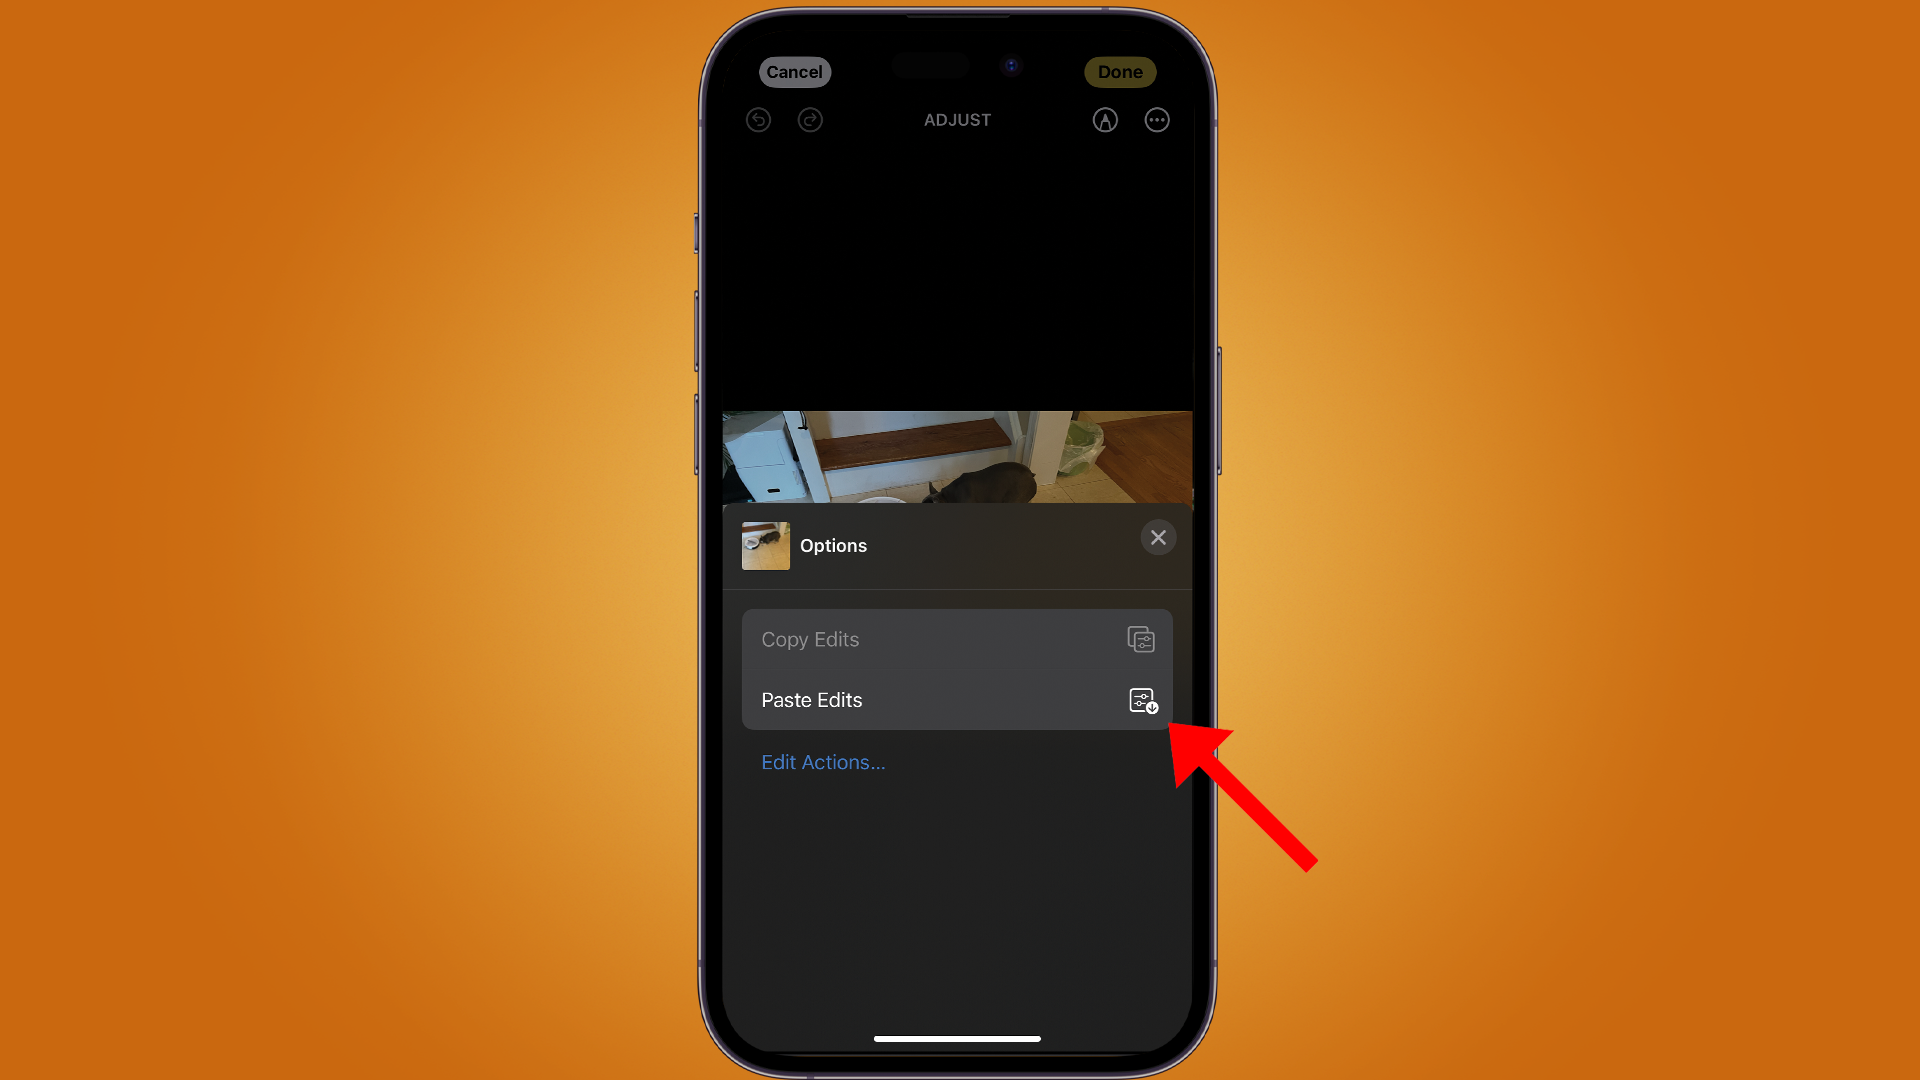
Tap Done on your current photo to save your work. Then go to the next photo you want to edit. Tap Edit > More Options > Paste Edits. Tap Done to save the changes. You can continue the process of pasting edits to any subsequent images as many times as you want without having to copy again, that is unless you change something.
5. Paste edits with one less step

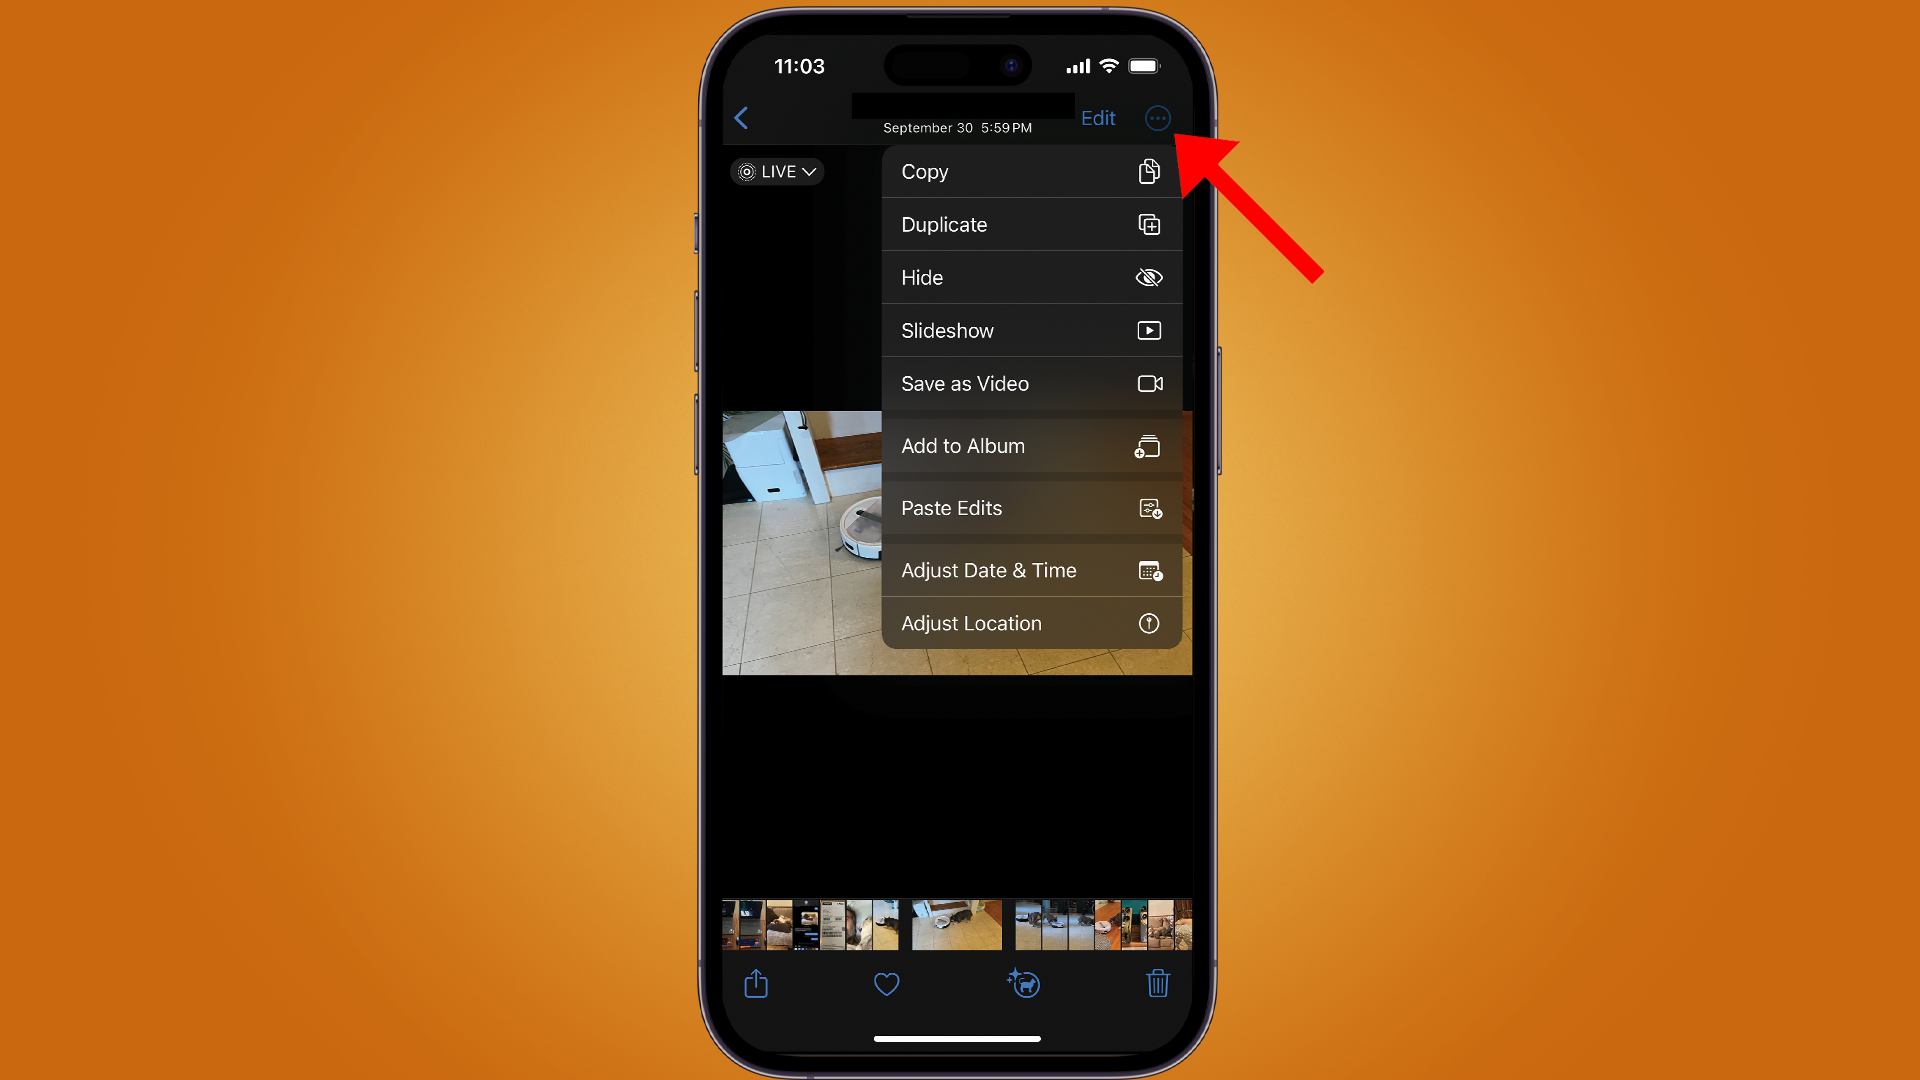
You can also skip a step and tap More Options > Paste Edits to copy over edits from the previous image to the current one.
Final thoughts
While this feature requires a tiny bit of menu diving, it’s incredibly useful to know and can save a lot of time if you’re trying to edit five or ten photos the same way. Plus, if you edit them individually, you might end up with slightly different results from picture to picture. That’s particularly true if you’ve made a lot of changes.
You might also like
- How to overlay images on iPhone
- 9 iPhone shortcuts I can't live without
- 6 iPhone automations that are Apple's best-kept secret
Sign up for breaking news, reviews, opinion, top tech deals, and more.

James Holland loves checking out gadgets of all sorts, whether it's audio equipment, laptops, or vacuums (especially of the robot variety), and does so for a number of Future Publications including TechRadar, Top Ten Reviews, Homes & Gardens, and T3. He's built up an expertise for in-depth reviewing over the last four years. When he's not putting in the work on the latest tech, he loves to travel, play music, and eat questionable food.