
 Become a TechRadar Insider


Spreadsheets needn't be drab, dull affairs. Excel has a slew of impressive graphics features that can help you brighten up otherwise dry information and present data in an attractive manner.
Here are our top 10 tips for using a variety of graphics to make your spreadsheets more interesting and easier to understand.
1. Charts
The easiest graphic to use is a chart, and their presentational impact shouldn't be underestimated.
To add a chart, select the values that you want to use and then pick the style you want from the Insert tab of the ribbon.
In earlier versions, launch the Chart Wizard from the toolbar.
2. Vectors
You can insert vector graphics directly into an Excel spreadsheet by using the Shapes tool.
In Excel 2007, select the Insert tab on the ribbon, click the 'Shapes' button and select the desired shape from the palette. Click-and-drag the shape into place and use the handles to resize it if necessary.
In earlier versions of Excel, choose 'AutoShapes' from the Drawing toolbar, choose a category and select the shape you want.
3. Grouping shapes
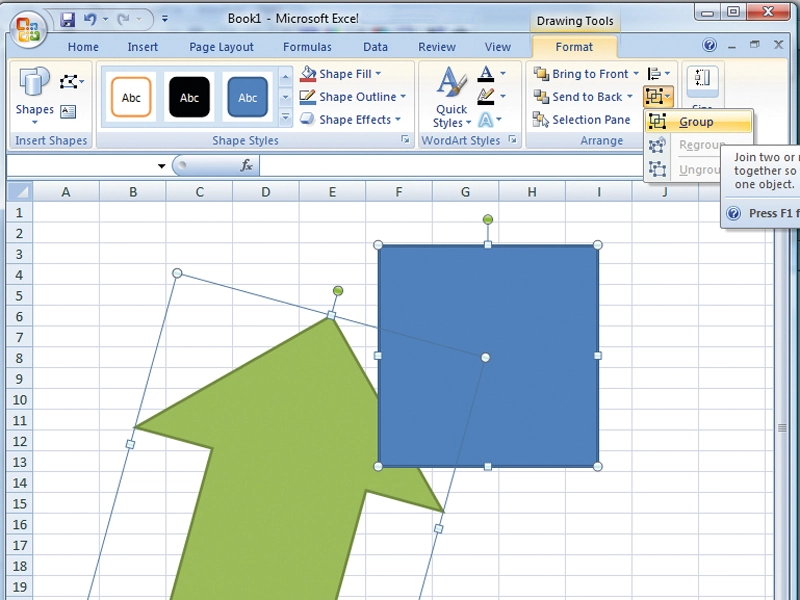
When you select a shape in Excel 2007, the ribbon switches to the Format tab and you can change its colour and style using the options in 'Shape Styles'.
To group a number of shapes together, select each one while holding down [Shift] and then choose 'Group' from the Arrange section of the ribbon. You can now resize, modify and move these shapes around at the same time, enabling you to use them like a logo if you wish.
You can find the 'Group', 'Ungroup' and 'Send to front/back' options on the Drawing toolbar in earlier versions of Excel.
4. Constraining objects
It can be difficult to draw perfect circles and squares, even if you're simply resizing an autoshape.
The answer to this problem is to hold down [Shift] as you drag the object into place. This applies constraints that force it to remain as a regular shape, whatever size you make it, meaning that circles don't become ovals and squares can't become rectangles.
It also means that lines and arrows stay true to horizontal or vertical. Holding [CTRL] ensures that the shape stays centred on its original centre point, while holding [ALT] when creating an object will ensure that it snaps to the gridlines in the worksheet, keeping your work neat.
5. Going freehand
Select 'Freeform', 'Scribble' or 'Curve' from the list of shapes. Freeform enables you to draw a closed shape with the mouse, Scribble simply draws a freehand line and Curve enables you to draw a closed curved shape in several stages.
In each case, you can modify the shape after drawing it by selecting it, right-clicking and choosing 'Edit Points' from the menu. Drag the black handles to alter the shape.
6. Word Art
As in Word, you can enter stylised text or Word Art objects in Excel.
Select 'Word Art' from the Insert tab on the ribbon in Excel 2007 or choose 'Insert Word Art' from the Drawing toolbar in earlier versions. Select the style that you want to use and enter your text. You can click and drag this to any part of the worksheet and add drop shadows, reflections and colour glow effects to the text.
7. Smart Art
Available in Excel 2007, Smart Art enables you to quickly produce a range of presentation graphics, including flow charts, block lists and hierarchy diagrams such as family trees.
On the Insert tab of the ribbon, choose 'Smart Art' and then select the style that you want to use. You can opt for a list, cycle, process or hierarchy, among many others.
8. Adjust Smart Art
The Smart Art object includes a text pane on its left-hand side, which is where you can enter and modify text in the different parts of the graphic and add or remove text objects. Change the look and feel of the graphic without altering its layout by moving to the Design tab on the ribbon and choosing one of the styles offered.
9. Other pictures
All recent versions of Excel enable you to import pictures from a file or from a clipart gallery.
In Excel 2007, select the Insert tab on the ribbon, choose 'Picture' and browse to the image that you want to use. Alternatively, click on 'Clip Art' and make a choice from the Clip Art pane.
In older versions of the program, you can choose the 'Insert Picture From File' entry from the Drawing toolbar.
10. Paste as graphic
This tool can be very useful if you want to include a small section of a spreadsheet within an image.
Select the range of values on the worksheet that you want to include and press [CTRL]+ [C] to copy it to the clipboard. Now move to any graphics program that you like and paste it in place. Save the file in your preferred format.
-------------------------------------------------------------------------------------------------------
First published in PC Plus Issue 118