
 Become a TechRadar Insider


Building a PC may be as easy as putting a child's playset together, but optimisation is a dark art. One scientist recently estimated that there are as many variations of different settings in your computer as there are neurons in the human brain.
OK, we just made that up for the purposes of this article, but the point stands. Optimising your PC takes much time and patience, as well as a solid understanding of how it's put together and how it works. And a screwdriver.
'Optimisation' itself is a bit of a blurry term, but we're going to assume that you want to do one of two things to your PC: make it faster, or make it quieter. There is some middle ground between these two paradigms - a fast PC doesn't have to be loud and, likewise, a quiet PC doesn't have to be slow.
Optimising a gaming PC means that it should run faster and have more room for ludicrous overclocks. System stability is key here, and the focus of a gaming PC is on vast amounts of airflow at the cost of quietness. Of course, quieter fans will make a big difference, but gaming cases' large fans tend to generate quite a lot of sound.
On the other hand, a quiet PC will tend to run warmer, but its silence makes it ideal for installation in a living room. Here underclocking, rather than overclocking, can prove useful as it means that the internal fans can be tuned lower, and make a little less noise as a result.
Bear in mind, too, that modern PCs are difficult to break, and most settings and components can be readily returned to their original state. With that in mind, prepare to unleash a faster and/or quieter PC.
Let's get down to brass tacks here. Before you start fiddling with fan speeds and CPU voltages, you'll need a computer. Otherwise you'll be fiddling with fan speeds in mid-air.
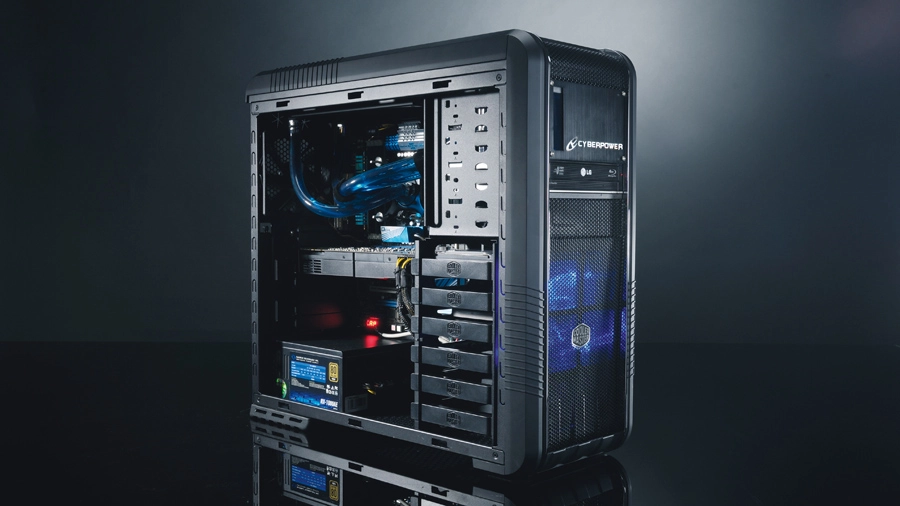
Whether you're buying an off-the-shelf PC or assembling your own, the most important thing to consider first is the case, or chassis. Cases generally come in two species: the quiet but warm and the ugly but cool. Quiet cases generally look sleeker, with no visible air intakes or giant glowing fans, but their silence comes at a cost: you'll often find that due to lower airflow the temperatures within these particular beasties are higher than their more gamey counterparts.
The ugly but cool cases often consist of little more than a vaguely cubic steel mesh into which you hang your motherboard and components. These cases are designed with performance in mind, and the huge air intake and output they're capable of means that all the innards stay nice and chilly.
There are some cases that straddle both the quiet and the cool. Thermaltake's BMW-designed Level 10 cases separate each component into its own section in order to provide better cooling and less noise - but the less said about this £200 poorly-performing behemoth, the better.
Cooler Master's more sensible Cosmos series includes both decent airflow and noise-dampening side panels, but the latest - the Cosmos II - will set you back a whopping £350.
Cheap chills

On the budget side, there are bargains to be had for around the £100 mark. Cooler Master's HAF series includes an incredible amount of cooling, and we've been impressed with what we've seen so far.
The HAF 932 - which has been around since 2008 - is still an amazing piece of kit, and it's £109. Antec's Performance One cases use as much noise dampening technology as possible, and you can pick them up for around £90.
There are other considerations when buying a case. Ever wondered what those strategically-positioned giant holes on the motherboard tray are for? They're not to save manufacturers splashing out on precious metal, Polo-style - they're for cable management.
Before you start putting components in your PC, it's a good idea to thread your SATA and power cables through these holes and zip-tie them in place. This ensures your airflow isn't akin to drying your hair through a pile of wet spaghetti.

Fans are - obviously - the things that deliver the airflow into and around your case. Quieter cases tend to have fewer, whereas gaming-oriented cases feature enough to drive a field of wind turbines. The majority of cases have extra spaces for fans, too, but it's important that they're facing in the right direction.
Prevailing wisdom is to (somewhat euphemistically) suck little and blow lots, so larger fans should be directed out of the case. It's also a good idea to make the front fans suck and the top and rear fans blow - that way you've got a constant airflow in one direction.
This may be an obvious point, but if you're installing case fans it's important to know which way they're going to blow. Generally speaking, air blows out of the side of the fan with the support arms and label, and air flows away from the curve of each blade.
If you really want to see what's happening to the air in your PC, it's a good idea to invest in a packet of smoke matches (£1.22 for 25 from www.toolstation.com). These produce more smoke than a beer garden - light one and hold it in front of a powered-up case to see where the cooler air is going, and if there are any vortexes where cold air is getting trapped. Just make sure you turn off your smoke detectors first.
The majority of cases also come with hard drive fans seated at the front, but their effectiveness is debatable. Hard drives have been designed from the ground up to operate without cooling fans, and the majority of failures are likely to be due to floundering mechanics rather than overheating.
If you've got three or more hard drives, heat accumulation could be a problem, but moving a single hard drive to a non-cooled location could result in better airflow to the rest of your PC, with the added bonus that it's not flowing over a lukewarm drive.
Aside from fans, hard drives are likely to be the loudest things in your PC. Many cases come with noise dampening mounts for your hard drives, which stop their annoying rattle reverberating around the whole PC. If your case lacks the requisite dampening, you can pick up a case of rubber grommets (£2.25 from www.toolstation.com) and wrap them around the hard drive mounts within your case.