iPhone 6S camera tested in depth
We test Apple's hyped-up iPhone 6S Plus camera in the real world – and get a few surprises
The Photo mode is not the only way to shoot images. Retro fans should also try out the Square mode which, as the name suggests, shoots square image rather than rectangular ones. The retro connection is the old 6 x 6cm twin-lens reflex and other medium format film cameras which took 12 (or 24) square images on a roll of film.
The advantage back then was that you didn't have to rotate the image through 90 degrees to take a portrait format shot – far from easy with a cumbersome medium format camera. The intention of the square format was, partly, so that you could crop the image horizontally or vertically later on, according to how you wanted to use it. But square images also have an aesthetic appeal of their own, forcing you into seeing and composing images in a new way.
Instagram fans will be used to shooting in the square format because it's only recently that other aspect ratios have been introduced. Meanwhile, the rest of the photo-sharing industry seems to have adopted the convention of displaying image thumbnails as squares, even when the originals are rectangular.
DP:
I wouldn't bother with the Square mode – I'd just shoot in the regular aspect ratio and crop it later if I wanted a square image.
The thing to note about the Square mode on the iPhone is that there's no going back. You can change your mind later about the photo filters (which we'll come to in a moment), but if you take a picture in the Square mode, it stays square for good – you can't 'uncrop' it later on to get back to a full size image.
The other point is that you are sacrificing some of the camera's megapixels – the iPhone 6's 8-megapixel sensor goes down to 6 megapixels, while the 6S drops from 12 megapixels to just over 9 megapixels.
Sign up for breaking news, reviews, opinion, top tech deals, and more.
The big advantage, apart from the retro appeal, is that you don't have to rotate the camera to take the shot. It's much more comfortable to hold the iPhone vertically than horizontally, your grip is much more secure and you're not going to leave your finger over the lens by mistake.
Filter effects
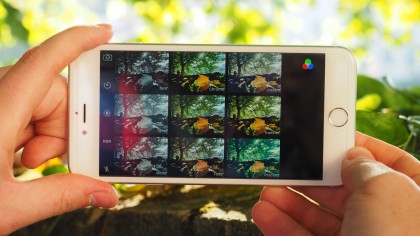
You can use the iPhone's effects filters in both Photo and Square mode, and you choose them by first tapping the button in the bottom right corner of the screen, then by tapping on whichever of the preset effects you like the look of in the grid – the great thing is that they all display a live rendition of the scene you're photographing. The central filter in the 3 x 3 grid is 'None' – tap this if you want to remove any existing effect.

You might be tempted to write these filter effects off as unwanted novelties, but they are worth a look, especially as you can change your mind later (more on this shortly). The Noir filter gives a high-contrast black and white effect with dramatically darkened skies, while the Chrome filter gives the supersaturated, high-contrast appearance of old-fashioned slide film.


DP:
It's nice to be able to shoot with the filters switched on so that you can plan the exposure and composition to suit the look, but I'd probably use software like Snapseed or VSCO Cam for more control and a wider range of effects.
Non-destructive editing
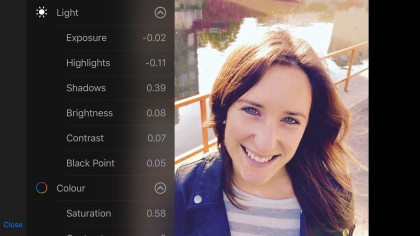
So let's say you use the Chrome effect and then wish you'd chosen the Instant effect instead. You can tap on your picture in the Photos app, tap the Edit button, tap the Filters icon at the bottom and simply choose a different filter.
They are completely non-destructive. The iPhone captures the original, unfiltered image (in fact this is all you see if you copy it to a computer) and your filter choice is simply a processing instruction stored alongside it, and one which can be changed at any time.

This applies to all the editing tools in the Photos app. Whatever you do to your image, whether you crop it, change the exposure and colors or even convert it to black and white, you can go back and change everything you've done. The changes you make are visible across all your devices if you use the iCloud photo library, but they're not applied permantly to the photo. The only way to make a permanent version is to send the picture to someone else in a message or email (or to yourself if you want to make a processed copy of the original).

Rod is an independent photographer and photography journalist with more than 30 years' experience. He's previously worked as Head of Testing for Future’s photography magazines, including Digital Camera, N-Photo, PhotoPlus, Professional Photography, Photography Week and Practical Photoshop, and as Reviews Editor on Digital Camera World.