Linux networking made easy
Common Linux networking questions answered
Sign up for breaking news, reviews, opinion, top tech deals, and more.
You are now subscribed
Your newsletter sign-up was successful
Is my ISP blocking or shaping my data?
Despite many ISPs advertising 'unlimited' broadband packages, very few offer what we'd call a genuinely unlimited service.
The two main targets for compromise are port blocking and traffic shaping. The former may stop you from running your own mail or web server, for example, or from using VoIP for internet phone calls. The latter will selectively reduce the amount of bandwidth for specific services, such as peer-to-peer networks, video streaming sites and FTP.
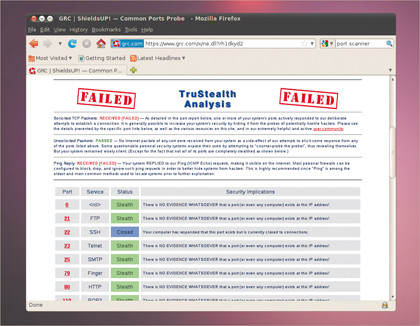
The best way of checking to see if your ISP is blocking access to ports on your network is to perform a scan on your network from somewhere else. From a remote Linux machine, for example, you could type nmap followed by the IP address of your network.
GUI lovers should take a look at Zenmap, and if you can't get access to a machine outside of your domain, try one of the many websites that will scan an IP address for you, reporting on any open ports it finds.
If you find that common ports are blocked (such as 80 for HTTP, or 25 for sending mail with SMTP), but are open when you run the same scan from within the network, then your ISP is blocking access.
You could try changing the port for those services: SSH and SFTP can easily be shifted using their configuration files. HTTP/Apache can do the same trick, but your users would then need to access your website by specifying the port manually rather than just typing the web address. If all else fails, you'll need to ask your ISP to remove the restrictions, or move to another ISP.
Sign up for breaking news, reviews, opinion, top tech deals, and more.
Detecting whether your ISP is shaping traffic is harder than finding out whether ports are being blocked. This is because your internet speed will normally fluctuate at certain times of the day, or during periods of high demand, regardless of whether your ISP is throttling your network or not.
The best indication is usually a bump in speed at the same time every night, which you can watch for if you're sharing your favourite distribution through Vuze, for example. But this change may not always be obvious or at the same time or day, or it may affect a service, such as video streaming, where a visible difference isn't so easy to detect. In these cases it's best to check with your ISP's quality of service statements, or ask them directly.
Side-stepping traffic shaping is like avoiding blocked ports. You need to make the problematic service look like something else, which invariably means changing the range of ports being used by the server.
ISPs will also look at the kind of traffic being transferred, rather than just the ports, and you can scupper this tactic by encrypting the data between your network and the remote site. But this is still an avoidance tactic, and you're still better off finding a better ISP.
Why can't I share my files?
If you've got more than one computer running on the same network, sooner or later you're going to want to get a file from one to the other. Unfortunately, as you might have already noticed, this seemingly simple request can quickly become a nightmare. But it is possible to set up file sharing without having to resort to sending it to yourself as an email attachment.
The key to this is something called Samba. This is the protocol used to negotiate the file moving from one machine to another, as well as convenient tasks like the remote browsing of files and folders, and even sharing a remote printer.
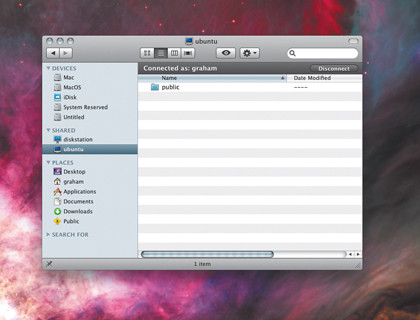
Samba can be installed and configured independently, but for ease of use and flexibility, we'd recommend trying to install it through your desktop environment first. And if you don't have a preference, we've had better luck with Gnome than KDE, which seems to have a few problems enabling file sharing.
With Ubuntu's Gnome, for instance, you just need to right-click on the folder and select Sharing Options from the menu that appears. If these options aren't there, install the nautilus-share package. You then need to enable Share This Folder, after which the system will install a few packages to enable the service then ask to restart the session.
When you're able to edit the folder options again, decide whether to enable others to view the folder and click on Create Share. You should now see two small arrow emblems above the folder icon, denoting that file sharing is enabled. Remote users should now see your folder, and be able to access it, when the browse the local network.
KDE users will need to make sure they've got both the kdenetwork-filesharing and main Samba package, neither of which are installed by Kubuntu. You now need to right-click on any folder you want to share, such as Public in your Home folder, and click on the Properties option.
From the window that appears, click on the Share tab, followed by the Configure File Sharing button. After entering your administrator password, you should see the File Sharing control module window. Now click on the Allowed Users button and select Allow All Users To Share Folders from the window that appears, and click on Apply. You should now be able to set per-folder sharing for the folder back in the Dolphin main window.
Why can't I access remote files?
Setting Samba so that other people can see your files is one thing, accessing other people's files through Samba is quite another. Fortunately, it's a much easier process, and doesn't normally require you to install any further packages.
From Gnome, for example, just select Network from the Places menu. In the file manager window that appears, you should see an icon for every Samba-running machine on your local network, and clicking on any of these will let you see specific files and folders that are being shared.
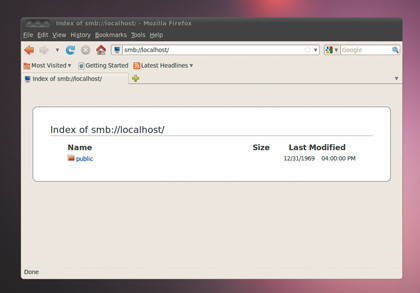
If the machine you want doesn't appear, and you know its IP address, you can select Connect To Server from the Places menu and then select Windows Share as the service type. Just enter the IP address into the server field and click on Connect.A file manager will then appear, hopefully showing the files and folder you're after.
KDE users need to open the Dolphin file manager, and can then browser the local network by clicking on the Network icon in the left-hand panel of the display. But you can also connect to a server directly by using a Samba URL in the form smb://username@server. If you omit the username, Dolphin will ask for both this and the password before opening the location within the current file browsing session.
You can also use the same SMB URL within Gnome, if you enter the location manually, and within other applications such as Firefox, which will enable you to browse a Samba share and download files through the same browser window.
How can I securely run SSH?
Most of us use SSH to connect to remote servers, using anything from a workstation to a games console. You may think that a tool whose acronym means 'secure shell', is already secure, and it is – for the most part. But there are some well-known vulnerabilities in SSH, which means that there's a lot you can do to make it safer.
The easiest, and probably the most effective of these fixes, is to make sure only certain users can log in through SSH and that their passwords are secure. This is the weakest link in the chain, and if you have an account called 'test' with a password of 'test', it's highly probable that before long someone will discover the weakness and gain access to your machine.
Another crucial step is to disable support for the older version, version 1, which has been successfully hacked in the past. This, and all the other configuration options for SSH, are hidden within its configuration file, which you can usually find within the /etc/ssh directory.
Newer versions are called ssh_ config, and you'll need to open this with your favourite text editor with root privileges (we recommend Nano). To disable support for the older version, look for the line 'Protocol 2,1'. This is telling the server to support both versions 2 and 1 of the SSH protocol, and we need to remove the '1' to disable support for the older. If this line starts with a # symbol, meaning it's commented out, remove this too.
While you're playing with the configuration file, there's lots more you can do to make your connections more secure. We'd recommend adding a line reading 'PemitRootLogin no', for instance, as this will disable anyone connecting directly to your system's administrator account. If you need root access, you can always su to switch from an ordinary user, or execute commands with sudo.
Another security tip for people connecting to your SSH server is to add 'MaxAuthTries 3' to the configuration file. This will only let people attempt three connections to your server before being kicked.
But perhaps the best change you can make if you're worried about unauthorised access is to move the SSH server from the default port of 22 to something else. This is because port 22 is very well known, and there are thousands of scripts running across the internet looking for SSH on port 22. Simply switching this to something else immediately solves the problem, and removes your server from the probing eyes of an unscrupulous script.
To change ports, look for 'Port 22' in the configuration file, and change this to something else. Alternatively, if you're running a firewall on a router before your Linux machine, just get some random remote port to point at port 22 on your SSH server. After you make any changes to the SSH configuration, you need to restart the server for them to have an effect.
Debian/ Ubuntu users can do this by typing service ssh restart from the command line, or by simply restarting your system.
What can I do about attacks by IP addresses on the internet?
Even if you open a single port from your local network to the internet, such as port 22 for SSH, it becomes immediately visible to millions of other computers. And it only takes a minuscule proportion of those millions to run nmap within a few automatic scripts and your machine becomes inundated with what can look like hundreds of malicious attacks.
This is why log files can be so important, because they'll contain the first signs of anything going wrong, and the one that you need to check is called /var/log/auth. This will list all attempts to log in to your system, either through the normal login manager, or through a service like SSH. It lists successful and unsuccessful attempts, and if you're getting dozens of the latter, you might want to take a few precautions.
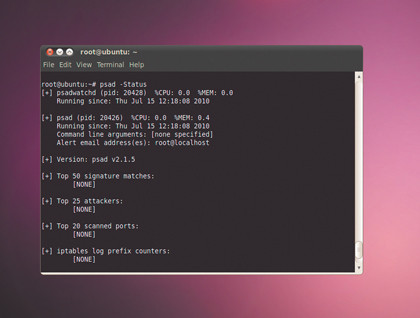
You'll probably see plenty more attempts from the same IP address, usually as a routine tries all the well known user account names and default passwords. If your usernames are less obvious, and your passwords of a decent strength, you'll have nothing to worry about.
Another solution is to block these overzealous attempts to access your machine. You could do this manually, adding the offending IP addresses to the /etc/hosts.deny config file. But there's an easier way, and this uses a tool called DenyHosts, which you'll probably need to install from your system's package manager.
This is a great utility that tracks changes to your log files, automatically detects spurious connections, and blocks the offender's IP address from further attempts if they pass various thresholds. After it's installed, these thresholds can be modified by opening /etc/ denyhosts.conf in your favourite text editor.
We'd recommend reducing the DENY_THRESHOLD_INVALID value from 5 to 2. This is the number of failed attempts allowed when the remote server tries a username that doesn't exist on your system. We'd reduce DENY_THRESHOLD_VALID, the parameters for attempts that do correspond to a valid username, to 3, which should give legitimate users a chance to access your system if they suffer brief password amnesia.
After editing the file, the daemon can be started by typing service denyhosts start as system administrator. The only danger now is that you lock yourself out of your own system. You'll then either have to get physical access to your machine, or wait for the period specified by the AGE_RESET_VALID parameter, which defaults to five days.
If you want to see how well DenyHosts is doing, check /var/log/denythosts. Each address that has been blocked will be listed, along with the results of a domain name search that might include contact details if you fancy dropping the offender's ISP an email.
Why isn't Wi-Fi working?
It wasn't so long ago that Wi-Fi was a configuration nightmare on Linux. Even if you had working drivers for your Wi-Fi device, it was still an effort to get it installed, configured and running. But things have changed so much over the last couple of years that most Wi-Fi devices will configure themselves automatically and run without problems.
You should be able to see the wireless signal strength indicator in your task bar, and switch between networks, enter passwords and stop the service with a couple of mouse clicks. But there can still be problems.
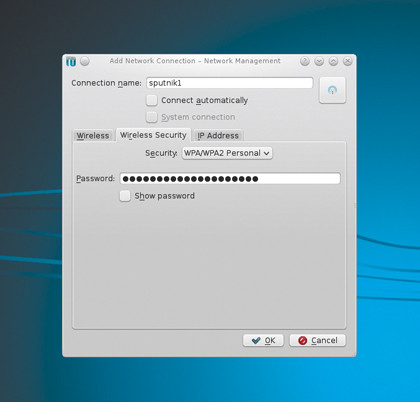
If your card isn't recognised in the first instance, the tool you need is iwconfig. This is the wireless equivalent to ifconfig, performing the same diagnostic and configuration functions on wireless, rather than wired, networks. And the best place to start is by typing iwconfig on the command line.
If your wireless device has been detected by the system, and the driver correctly installed, you should see a wireless device listed in the output. If not, you need to start looking at your system logs.
If you're using a USB device, try plugging it in and typing dmesg. You should see your system trying to detect the hardware used by the device, and hopefully, loading the driver. If not, you will need to check for driver support for your specific hardware on your chosen distribution.
But the hardware used by your device isn't always obvious. It's rarely the specification printed on the packaging or the device itself, for example. You need to know the exact chipset used by the hardware, and the best way to do this is by either typing lspci or lsusb on the command line when the device is connected, although you may also see the detected hardware listed in the output from dmesg.
The output from our USB Wi-Fi receiver included the following:
0cf3:9170 Atheros Communications, Inc. AR9170 802.11n
A quick Google for AR9170 revealed that the driver for this device was part of the 2.6.31 kernel, and as a result, would require a distro using at least that version. As soon as we switched to a distribution using that kernel (Ubuntu 10.04), the device worked without any further configuration.