iMovie for iPad: how to edit your videos quickly and easily
Your iPad's large screen and portability makes basic video editing a breeze
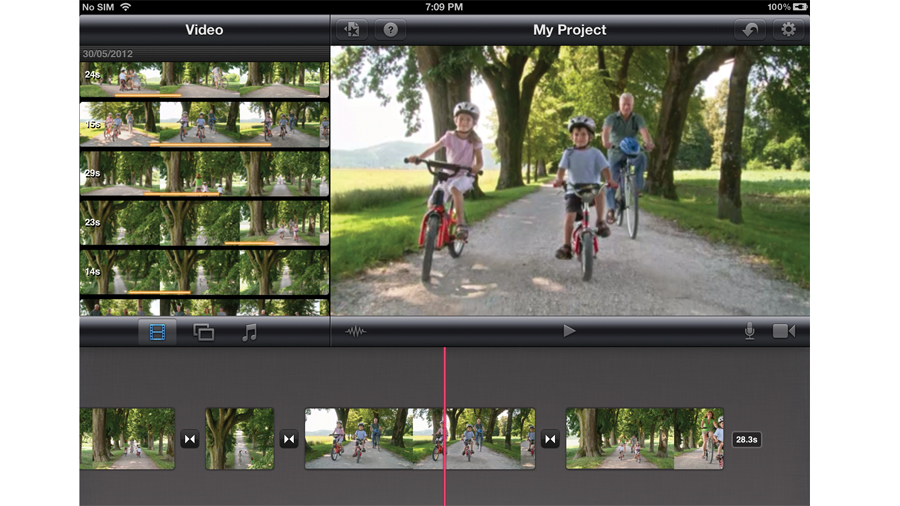
Apple has made it really easy to edit home movies on your Mac thanks to the constantly refined iMovie app. But with the release of the iPhone and iPad, Apple went one step further and introduced a portable version of iMovie to enable you to edit on the go.
Of course, it's pretty bare bones compared to what you can do on a Mac, but that's not the point: with iMovie for iOS, you can edit wherever you are, taking advantage of the long battery life of iOS devices.
More often than not, you can have a finished movie by the time you get home. Although bulkier than an iPhone or iPod touch, an iPad gives you more space to edit in, making the process a more comfortable experience.
Article continues belowWith the help of the iPad Camera Connection Kit, you can also easily transfer shots from your iPhone or iPod touch to your iPad, so one person can keep shooting while another edits, giving you immense flexibility.
We'll show you the basics of editing on an iPad. Then you can hit the ground running without feeling that video editing is solely the preserve of 'proper' computers.
How to perform basic video edits on the iPad
1. Create a New Project
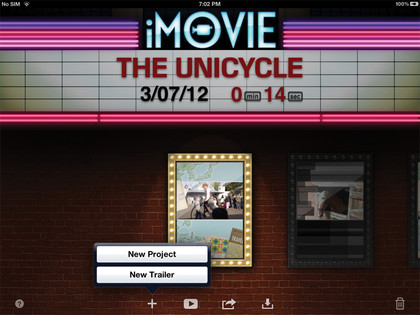
Launch iMovie and you'll be presented with an old-style American front-of-house movie theatre. Previous projects are represented by posters (made up of a still image of your project, along with a design that's based on your chosen theme - more on that later).
Sign up for breaking news, reviews, opinion, top tech deals, and more.
Here you can rename your project by tapping on its title; you can also play your film back or export it with the options available at the bottom. To create a new film, tap on the '+' button. Choose the option to create a new Project.
2. Library and themes
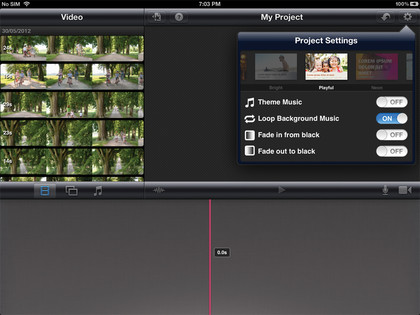
All the clips stored on your iPad are available on the top-left part of the interface (we're using landscape orientation in this tutorial). Media is divided based on type: videos, photos and audio - which includes music from your library as well as sound effects and themespecific background tracks.
With themes you can add titles and transitions to your project. You can choose the one you want by tapping on the Gear menu, top-right, and swiping the thumbnails until you find the one you like.
3. Preview and clip selection
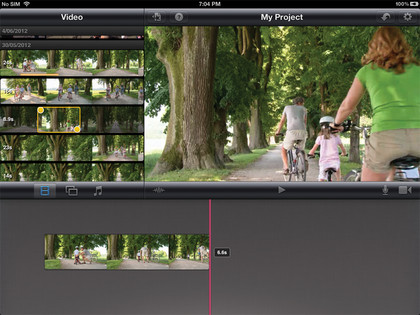
Go back to your library's Video section. You can preview any clip in the top-right section of the interface by dragging your finger over it. To select a clip, tap on it. You can then drag the yellow handles on either side inwards to only select part of your clip; use the main preview section to trim your selection precisely.
Then tap on the clip and it'll jump down into the timeline. Add a few more to build up your edit. Notice in the library that any clip or clip-part that's used in the project now has an orange line under it.
4. The timeline
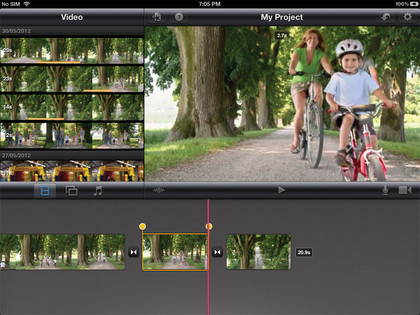
The red line represents the playhead and the image shown top-right of the screen is the frame that the playhead's over. This playhead is stationary. You move your project by dragging it to the left or the right.
You can further fine-tune your edit straight from the timeline: tap any clip to bring up yellow handles. Use them to add or remove parts of that clip from your project (the currently used part is still linked to the main clip you took from the Library). To zoom in or out, move two fingers away or closer together.
5. Reordering and splitting
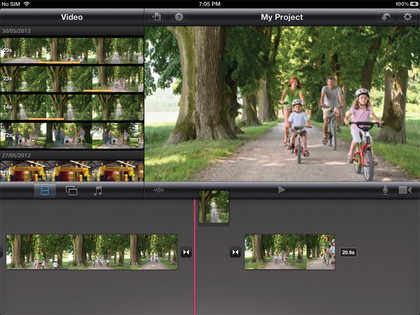
To change the order of clips, tap and hold on one. This removes it from the timeline. With a finger still touching the screen, you can move that clip to another position. If you release it while it's out of the timeline, it's removed from the project.
You can also perform more complex edits like inserting a new clip in the middle of an existing one: move the playhead over the clip then select it. Now, swipe down over the playhead to cut your clip in two. You can now insert a new clip in between those two parts.
6. Working with transitions
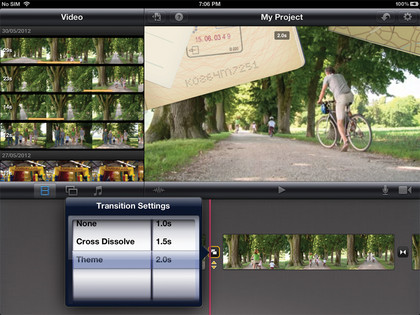
A transition is added between each clip, which may not be what you want. You can alter those transitions by double-tapping on them. You can choose between no transition (i.e, a straight cut) to a cross dissolve, to one based on your chosen theme; the transition icon changes to reflect your current choice.
You can also alter the duration. Select Theme, move the playhead back a bit and press the Play button to preview. You can then return to the Gear menu, select a theme and see what that transition looks like.
- Also check out the best video editing software
Steve has been writing about technology since 2003. Starting with Digital Creative Arts, he's since added his tech expertise at titles such as iCreate, MacFormat, MacWorld, MacLife, and TechRadar. His focus is on the creative arts, like website builders, image manipulation, and filmmaking software, but he hasn’t shied away from more business-oriented software either. He uses many of the apps he writes about in his personal and professional life. Steve loves how computers have enabled everyone to delve into creative possibilities, and is always delighted to share his knowledge, expertise, and experience with readers.

 Become a TechRadar Insider


