Fixing larger laptop models
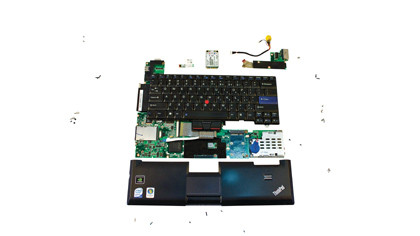
For the final laptop model we've taken on a complex business-class model. Your standard 15-inch Intel Core model tends to be very simple inside, if you ever open one up you'll be lucky to find much more to it than the mobo and cooling module. Everything else is directly soldered to the mobo, this helps to cut costs across the board from development and manufacturing to maintenance and support.
Effectively, they're not scary at all! Beyond regular upgrades the most common issues with laptops tend to be ports failing, primarily the power connector but this extends to headphone jacks and USB ports.
If you're lucky the laptop design has these as removable modules or plug-in connectors, but this is unusual. More likely they are soldered directly onto the mobo making them harder to replace but not impossible. We've shown you below how you can replace both a soldered-on component and a plug-in module.
This, in theory, will work for any component, however the easiest onboard components to replace are generally power sockets and audio jacks. We'd shy away from USB ports and they tend to have far more physical support due to their size.
Fix her up
As we mentioned with netbooks, replacing an entire mobo isn't out of the question. They're easy enough to remove and transferring the CPU is straightforward too. If yours has one, the GPU can be switch too. Your main problem will be locating the replacement motherboard in the first place.
eBay tends to be your best bet, but there's no harm checking to see if the original manufacturer will supply one direct, but it will remain costly.
So far we've taken things about as far as we can, having stripped the system right down to the last component. The chassis can be damaged with cracks or have chunks taken out of them and you don't need to live with that.
Sign up for breaking news, reviews, opinion, top tech deals, and more.
Most DIY stores sell epoxy putty, this is a solid form of epoxy that you can mould in your hand and sculpt to form a section of case or push into cracks and gaps. It sets rock hard so reinforcing and keeping a damaged chassis water proof. It's also possible to sand the set epoxy down and paint it for a professional finish.
Another common pain that laptop owners have to suffer are external power supply unit failures. Again eBay is the simple answer, with replacement PSUs available at a fraction of the cost.
Frayed power connectors are another annoyance with PSUs. Standard replacement DC power plugs are easily sourced on eBay or Maplin and are simple enough to fit.
Screen repair
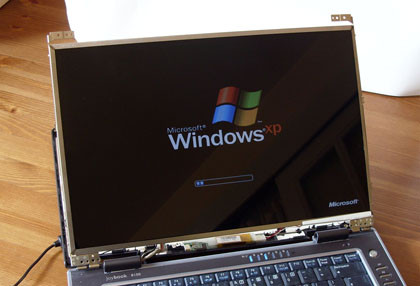
Once you've confirmed it is a broken screen you'll need to track down a suitable replacement either on eBay or from specialists such as at www.accupart.co.uk and it could cost as little as £60.
If you're having other display problems such as a dim or flickering screen, the likely cause is the inverter that powers the screen. You should try and replace this first on its own, as it's a far cheaper part than the panel. If the problem turns out to be the panel's backlight then that will require a new panel.
To access the panel itself remove the rubber grommets and the screws hidden beneath. This will free the plastic facia and provide access to the panel itself. You'll need to disconnect any cables connected to the back of the original panel and unscrew it from the securing frame.
Installing the new panel is a case of reversing this process.
Power connector
Replace a busted power connector to resurrect a dead laptop
01. Power issues
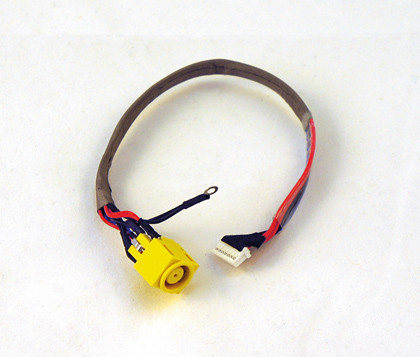
A commonly damaged component due to its heavy use is the power connector of a laptop. While some might like to put this down to some type of conspiracy theory it's actually more so corporate buyers know devices can be easily serviceable. So you'll find that many use drop-in replacements such as the pictured one available from eBay.
02. Drill down and down
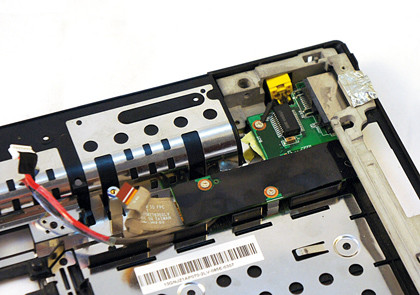
The power connector is often located under many layers of your laptop. Ideally if it's an attached component, as in this case, you'll just need to order the correct part from the manufacturer or eBay. On cheaper models it's likely to be soldered directly to the mobo in which case follow the walk-through below.
03. Replace the damaged one
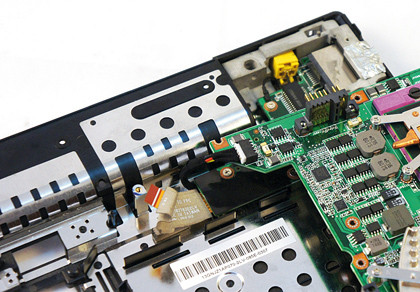
Lenovo has thoughtfully added millions of screws between us and the connector but also a bunch of removable add-in cards. Once there it's a case of attaching a single connector and a ground line, the rest is down to routing the cabling under the add-in network card.
Connection replacement
A common issue are damaged on-board connectors
01. Survey the damage
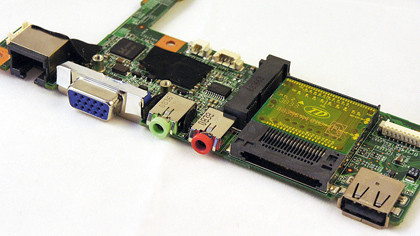
Crackling and intermittent cut outs can be caused by a few things but one of the main culprits beyond damaged cables is the connection itself. Over time the physical twisting and yanking, plus expansion from heat, can eventually break a solder spot and start to cause audio problems or make the entire connection fail.
02. Out with the old
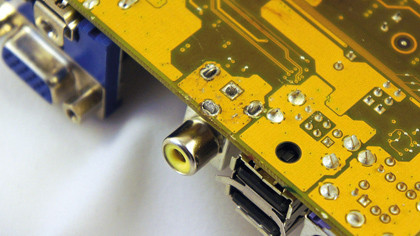
To remove a mobo-soldered connection you'll need a soldering iron, solder and 2mm de-soldering braid. Place the braid over the solder spot, hold the iron on this for a second, add a small amount of solder, reapply the iron for a second and lift. The braid will suck up all the solder, simply repeat until it's all gone.
03. In with the new
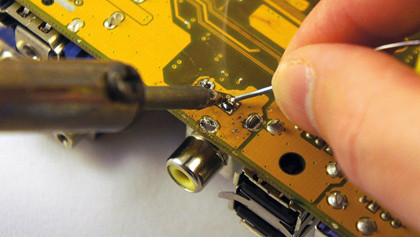
Make sure you select the correct replacement connection. Push it firmly against the PCB and melt solder into the solder points. Try not to hold the soldering iron on a spot for more than a couple of seconds, else you're likely to start damaging plastics and components. Test and you should be done.