How to build the perfect Steam PC
Get everything ready for Steam OS
5. Install some storage

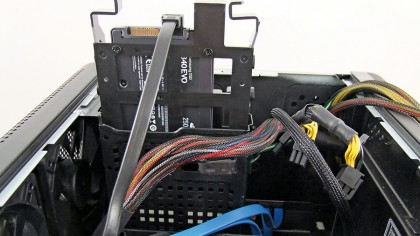
Once you've used an SSD, it's tough to go back to spinning platters. This is why we've opted for a Samsung EVO SSD (250GB or 1TB depending your budget). The 250GB is big enough for an OS and some games, and is fine for a small form factor build. The Hadron Air has drive trays that will house both 3.5 and 2.5-inch drives, so you could install a data HDD in there as well. Slot in your storage, connect the SATA cables to the board and the SSD, and give it some power.
6. Fit your graphics card

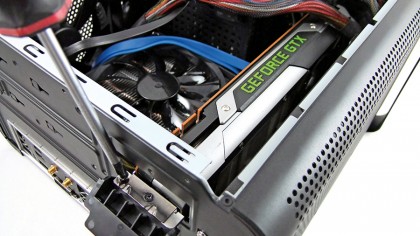
We're getting mighty close to the end now, so it's time to slot in the sexiest component of the lot - your new graphics card. It's also probably the chunkiest of the components after the PSU brick, which is why we've left it until towards the end of the build. Ensure it's seated firmly in the PCIe slot and screw it into the chassis to stop it moving around or rattling. It's worth making sure now there are no cables obstructing its fans, otherwise it's going to get too toasty.
7. Check your cables

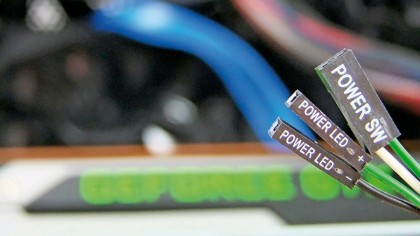
Now it's time to start plugging everything in. First things first though - get the chassis' controls and hubs plugged into the motherboard. So often we've put a build together, forgotten this simple step and wondered why we couldn't power up. Your mobo will have a key to show which front panel cable goes where. Plug in the control and lighting cables, as well as any USB 2.0 or 3.0 hubs and audio connectors too, and double check mobo and GPU power cables.
8. Give it life

With all your components seated in your new chassis, and everything wired up, it's time for some housekeeping. Air-flow in a small form factor case is important so make sure there aren't any cables obstructing the CPU, GPU or case fans. It's also worth leaving the side off when you first boot, just to make sure all the fans are spinning as they should. Now plug in your keyboard, mouse and monitor, and boot up your new rig. Nip straight into the BIOS, set up the XMP for your RAM, save and start booting from your OS installation media. Once your OS is up and running, your new rig is ready for you to get gaming.
Our choice of parts
1. CPU: Intel Core i7-4770K ($299, £258), Intel Core i5-4570 ($199, £150)
You'll notice we're not recommending AMD CPUs or APUs here. They may be the budget option - you could build a mobo/APU combo for only a little more than a Core i5 costs on its own - but they deliver much weaker performance. We need to spare a thought for compatibility, too.
AMD processors work fine within Windows, indeed Win8.1 is set up to take advantage of their technology, but seeing as the inaugural Steam Machine is going to be Intel-powered, it would seem prudent to go for an Intel CPU if you want to prepare for SteamOS.
We've picked the top-end 4770K here, simply because you can get some serious overclocking done with that chip and the Asus RoG mobo. The advantage of going for a larger chassis than the Steam Machine prototype is that you have the option for water cooling should you wish, and you'll get a good 4.7GHz out of this chip with a decent closed-loop cooler.
Sign up for breaking news, reviews, opinion, top tech deals, and more.
Alternatively, the i5-4570 offers a great balance between price and performance at stock speeds. If you're going for a standard low-profile CPU air-cooler then you're not going to be overclocking are you? It may only have the four threads of processing power, but they're full fat cores - no HyperThreading business here.
2. CPU cooler: Zalman LQ310 ($70, £52), Gelid SlimHero ($36, £25)
The CPU cooler you choose for your Steam PC will depend upon the chassis you opt for. In something like Valve's prototype, there isn't the height for a proper tower-cooler, or the space for a small 120mm water radiator for a closed-loop liquid CPU cooler.