Troubleshooting tips for new Mac owners
Got a Mac for Christmas? Then you'll need this handy guide
Sign up for breaking news, reviews, opinion, top tech deals, and more.
You are now subscribed
Your newsletter sign-up was successful
How to fix preferences and permissions
There's no Mac equivalent of the dreaded Windows registry, so you don't have to worry about cleaning it up. But there are a couple of housekeeping tasks that may occasionally help to keep Mac OS X running smoothly. If a particular application acts weird, try resetting its preferences.
Preference files, with the extension '.plist', are stored in /Library/Preferences and /user/Library/ Preferences, where user is your home folder. It's usually obvious which plists belong to which apps.
Having quit the app, make a folder on the Desktop called Suspect prefs (for example) and move all its plists into this. When you relaunch the app, it will rebuild its preferences, which should solve the problem, at the expense of undoing any custom settings. If it doesn't help, put the plists back.
Further general oddness can often be sorted out by fixing the 'permissions' for your hard disk. In the Utilities folder inside Applications is a program called Disk Utility. Launch this and select your Macintosh HD on the left, then click Repair Disk Permissions. It's as easy as that.
"Where are the menus in my application windows?"
This is one of the few fundamental differences between the Mac OS and Windows. In Windows, when you open two documents in the same application, you're effectively running two copies of that application, each in its own window containing its own menu bar and toolbars.
Sign up for breaking news, reviews, opinion, top tech deals, and more.
In Mac OS X, you can only ever run one copy of each app, with one menu bar and one set of toolbars, within which you can have any number of document windows.
The menu bar is always at the top of the screen, and changes to reflect which app is currently active. The first menu is always the Apple menu, containing the same system options, and the second is always the application menu, bearing the name of the current app and giving access to its preferences.
It's all perfectly logical once you get used to it, and it does reduce the amount of clutter on screen.
"Where's the Start menu and how do I right-click?"
Two good questions! In Windows, the Start menu enables you to run programs, search for items, browse your hard disk, change settings and shut down the system. These functions are found in various different places on the Mac.
You can run programs from the Dock, which sits at the bottom of the screen like the Windows Taskbar but shows all your commonly used programs, not just those that are currently running. Those that are active have a blue blob below them. Like the Taskbar, the Dock appears when you move your mouse to the bottom of the screen; it can also be invoked with Cmd+Option+D.
Adjust how the Dock works via Dock on the Apple menu. At the right end of the Dock are commonly used folders, including Applications and Documents; click these to show their contents. You can add more programs or folders by dragging them onto the Dock, or remove them by dragging them off, which doesn't affect the programs or folders themselves.
To search, you use Spotlight, accessed from the magnifying glass icon at the top right of the screen or by pressing Cmd+[Space]. To shut down, restart or put your Mac to sleep, look at the Apple menu.
Now, on to that elusive right-click button. Apple's Mighty Mouse and new Magic Mouse do have two buttons, but they're invisible.
In System Preferences > Mouse & Keyboard > Mouse, you'll see there are separate functions for the left and right buttons, which should normally be set to Primary Button and Secondary Button.
Born-again Mac purists can revert to the traditional one-button Apple mouse by setting both functions to Primary; to activate right-click features such as displaying a contextual menu (as in Windows), you'll then need to hold Ctrl while clicking. See, the Ctrl key had to be useful for something.
How to back up with Time Machine
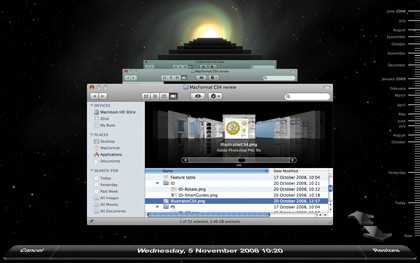
Apple's vastly superior equivalent to Windows Backup is Time Machine, included with Mac OS X 10.5 and later. To use it, you need any USB or FireWire hard drive, preferably of a similar size to your main hard disk.

It can be a drive that you've previously used with your PC, as long as you first use Disk Utility to erase it and format it as 'Mac OS Extended (Journaled)'. Plug in your drive, go to the Time Machine pane in System Preferences, turn it on and tell it to use this drive.
Current page: Preferences, menus and permissions
Prev Page Internet and networking Next Page Keyboard shortcuts and security settings