How to get started with iMessages
The Messages app in iOS 9 is an obvious place from which to send text and multimedia messages, and it's also packed with advanced features for managing conversations. Many of these features are tied into Apple's iMessage system.
An iMessage is a type of message that can be sent only between Apple devices, whether they be iPhones, iPads, iPod touches, or Macs – they just need to be online. Messages saves you resorting to a social network such as Facebook to arrange meeting up with a number of people.
That's because iMessage allows everyone who has an Apple device to take part in a group conversation so that the details can be agreed upon together. When plans are less definite, you can share your location – either at that point in time, or with live updates for a few hours if you're likely to roam elsewhere.
Messages also gives you control over how intrusive any conversation can get, regardless of whether it takes place by iMessage or SMS, by suppressing notifications about one while allowing another to still grab your attention. Also welcome is the fact that Messages – and the Phone and FaceTime apps, too – can block unwanted contact, whether it's from people you actually know or cold calls from salespeople.
1. Sign in to iMessage
The Messages app is able to send three different kinds of message: iMessage, which is a method available only on Apple devices; and SMS and MMS, which can be relayed to and sent from your iPad if you set up that capability on your iPhone.
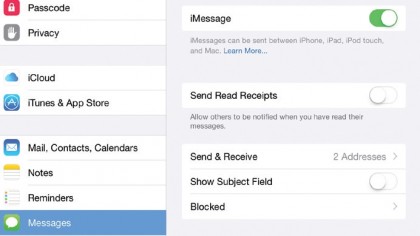
iMessage offers practical benefits as long as all the people you want to reach have Apple devices, of course. In Settings, find and tap Messages, turn on the iMessage switch, and sign in with your Apple ID.
2. Contact options
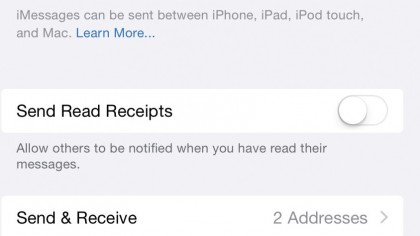
Tap Send & Receive to pick which email addresses linked with your Apple ID can be used by other iOS and Mac users to contact you.
Simply tap an address to toggle whether it can be used; those that can have a tick beside them. If you also use an iPhone, your phone number is permanently enabled. Further down this page you can choose whether your phone number or an email address is used to identify you when you send a new iMessage.
3. Write a text message
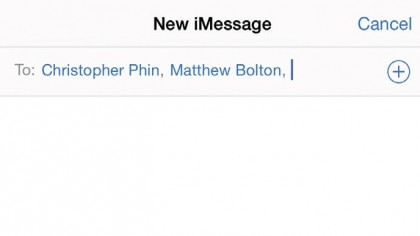
Open the Messages app and tap the pen and paper icon at the top right to start writing a message. Type the name of someone in your contacts list, or tap the + to select from that list.
A message can have multiple recipients, but beware that doing this for an iMessage doesn't just send a copy of the message to each person (like SMS). Instead, it starts a group conversation, and everyone in the conversation receives the other participants' responses by default.
4. Messaging options
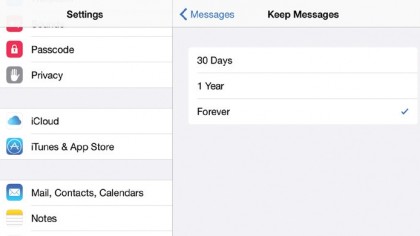
There are various options in Messages, including enabling Read Receipts (see next step), showing the Subject Field of your conversation, as well as dealing with blocked senders. In terms of message management, you can choose how long messages are stored on your iPad before they are deleted – 30 days, a year, or forever.
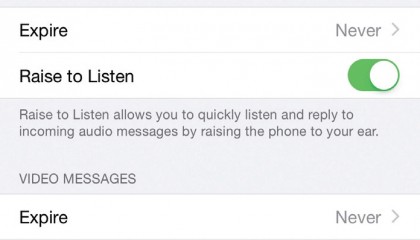
Audio and video messages are set to expire after two minutes by default. Change this via Settings > Messages.

5. Read receipts
After sending an iMessage, 'Delivered' should appear below the message's bubble to confirm receipt. If the recipient has read receipts enabled, that will eventually change to 'Read', with the time at which they did so. If you don't want your iPad to send read receipts, turn off Messages > Send Read Receipts in the Settings app.
Dates appear between message bubbles. To see the time messages were sent, swipe from right to left and keep your finger on the screen.
6. Group messaging
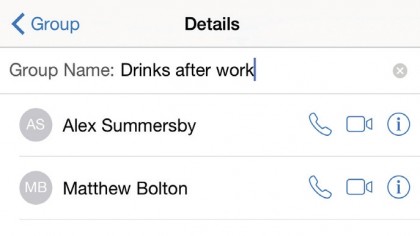
Group conversations are listed by their participants' names, but you can assign a more meaningful label. Tap Details at the top right of the conversation, and then swipe downwards to reveal a field above the list of participants, into which you can type a label, such as 'Reunion'.
Swipe from right to left on a participant's name to reveal a Delete button; tap this to stop them receiving your contributions. Tap Add Contact to add more people to the conversation.
7. Share your location
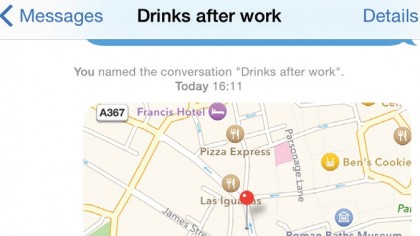
When meeting someone, tap Details and look under the Location heading. You can share your current location if you'll be there for a while or share your live location for a period of time – an hour, until the end of the day, or indefinitely.
When you receive a location, tap the map to view it full screen. Choose walking or driving directions and tap Start, or tap Apps to find navigation apps that will help get you there by, say, public transport based on where you are.
8. Mute a conversation
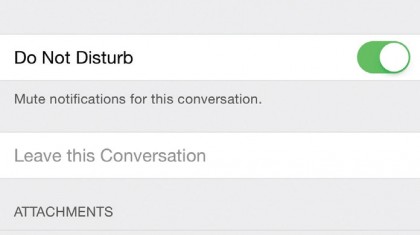
Notifications from chatty conversations can become a distraction when you're busy. Tap Details at the top-right of the conversation and turn on the Do Not Disturb switch on this page.
This doesn't turn on Do Not Disturb for everything on your iPad, as the switch of that name in Control Centre does – it mutes only this conversation. You'll still receive messages so you can catch up on the discussion later, and at any time you can turn this switch off again.
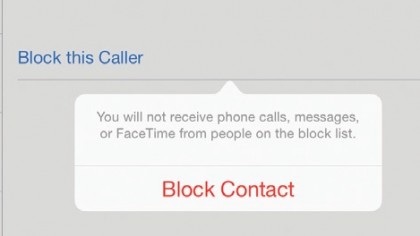
9. Block senders
A sender of unwanted messages can be blocked by tapping Details, the 'i' symbol next to their name, and then Block this Caller. This also prevents contact through FaceTime. You can review who is currently blocked under Settings > Messages > Blocked.
You can pre-emptively block people there, too, if they're among your contacts. In the Contacts app, add the pest to a Blocked group and tap Groups to hide it so that only valued people are shown.
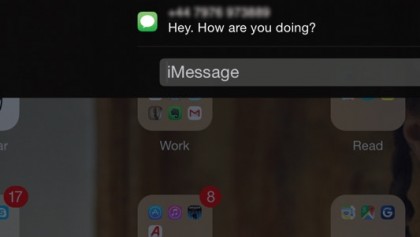
10. Reply quickly
When you get a notification of a new message, you don't need to stop what you're doing and open up the Messages app. Since iOS 8 the option to reply directly from a notification has been added – at the Lock screen, swipe left on the message and tap Reply, or pull down on the notification at the top of the screen if you're already using your iPad.
Either way, you can quickly type a reply and send it without having to quit what you're doing or unlock your iPad.
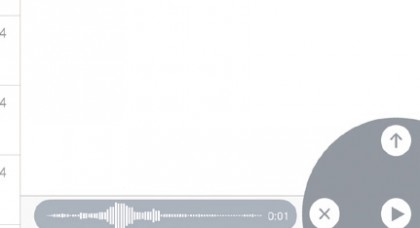
11. Audio option
Tap and hold the microphone button to the right of the field into which you would type an iMessage. The app will record as soon as – and for as long as – you hold your finger on that button.
When done, slide your finger upwards onto the arrow to send the soundbite, or slide it left onto the cross to delete the soundbite. To listen to the soundbite before making this decision, lift your finger and then tap the play button that appears where your finger was.
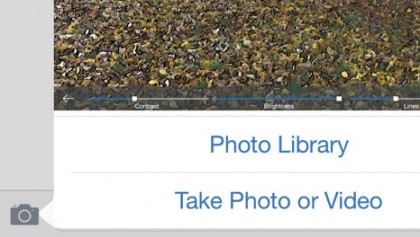
12. Send a photo or video
Tap the camera icon on the left of the message bar to attach a photo or video to your text. There are two options here. The first is to add an existing photo or video from your Photo Library – tap Photo Library, scroll through your media until you find the one you want, then tap Use.
The second option is to select Take Photo or Video. This will launch the Camera app. Take a photo or video by pressing the shutter button and then tap Use Photo or Use Video.

13. Review attachments
Tap Details in a conversation and then scroll down to see photos, videos, sound bites and other attachments sent and received. Tap and hold one for actions: attachments can be copied and pasted between conversations, or deleted.
Tap More to mark several attachments to save or delete. In Settings > Messages there are two items labelled 'Expire', which can be set to remove audio and video attachments after two minutes (the default) or never.
14. Set expiry dates
The text in iMessages doesn't take up much storage space, but you may want to have them deleted automatically after a period of time so that you don't have to manage them yourself.
Go to Messages' settings and tap Keep Messages. The options available are to keep messages for 30 days, one year, or forever. If you choose either of the first two options, you'll be forced to delete messages that are already older than that right away.
15. Routing to a Mac
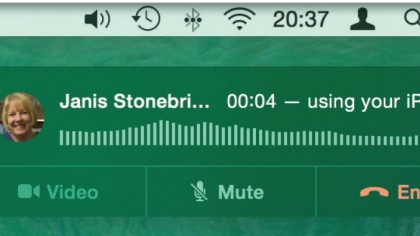
In iOS 8 and OS X Yosemite Apple introduced Continuity features, one of which is the ability to make and receive SMS and MMS messages and phone calls using Macs and iPads. It does this by relaying them through your iPhone.
All devices – including your iPhone – need to be connected to the same Wi-Fi network, and signed in to the same iCloud account. In Contacts on your iPad, open a person's contact card and tap the speech balloon or phone icon next to their number.
The former takes you to Messages to send either an SMS or an MMS. The latter immediately calls the person from your iPad. Both kinds of communication are relayed over the Wi-Fi network to your iPhone.
- Enjoyed this article? Get more tutorials, guides, and tips on how to get the most from your Apple devices inside MacFormat. Take advantage of an exclusive offer in our sampler today.
Sign up for breaking news, reviews, opinion, top tech deals, and more.
You are now subscribed
Your newsletter sign-up was successful