Build a Raspberry Pi CCTV camera network
You own home-wide camera network

Viewers of Crimewatch UK will be familiar with the grainy images of suspected criminals in off-licences and jewellery shops across Britain. Members of the public are asked to come forward and identify someone’s face from an image that looks like it’s been smudged with a calloused thumb.
This is particularly hard for people used to viewing videos on YouTube and Vimeo in crisp HD. As much as we all would like to do our civic duty and bring people to justice, this is hard without buying a state of the art CCTV system and having sufficient storage space for high-quality video.
Until now, this has been beyond the reach of the average person but since the invention of the Raspberry Pi and inexpensive HD webcams, it’s perfectly possible to network several Raspberry Pis into a state of the art security system at a fraction of the usual cost.

Planning your layout
The requirements for this project are fairly minimal. It’s helpful, initially, to sketch out what set up you want. You may wish, for instance, only to have a single camera above your front door so you can see who is outside each time the doorbell rings.
Alternatively, you might want multiple cameras dotted around the place for you to survey from up on high in your hermetically sealed bedroom.
Once you have planned a basic layout for your security camera network, you will have an idea of the equipment you’ll need.
The most sensible setup is to have a Raspberry Pi 2 or 3 as your central computer for viewing the camera feeds and storing footage and a Raspberry Pi Zero with camera for each additional area you want covered by CCTV. You should also pay careful consideration to your casing.
Sign up for breaking news, reviews, opinion, top tech deals, and more.
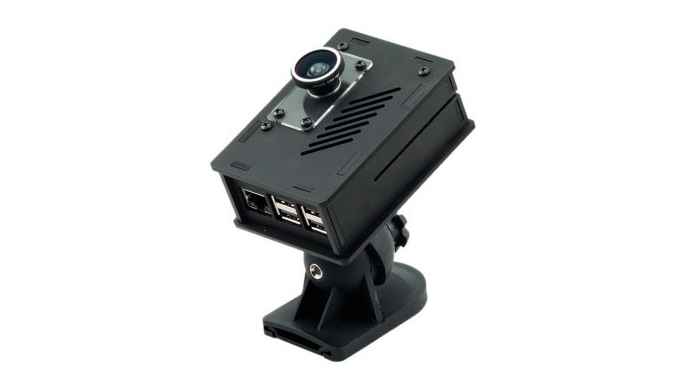
One excellent and easy setup is to use the Pi Camera Bundle from ModMyPi . Note: you may recognise these as Nwazet products but they’ve been rebranded as ModMyPi.
The bundles come with a special case for a Raspberry Pi B+/2/3 made from acrylic and include a fisheye lens for a panoramic view. It has a neat magnetic connector that enables you to connect the Pi camera to the lens and snap it into place.
If you’re handy with a drill and rawl plugs, the casing also comes with screws so it can be mounted to a wall. If you are more of a hobbyist, it’s also possible to pick up fake CCTV cameras from your local bargain bin and place your Raspberry Pi inside, though naturally you’ll need to drill holes to allow entry of the power cable and find your own way to mount the Raspberry Pi camera.
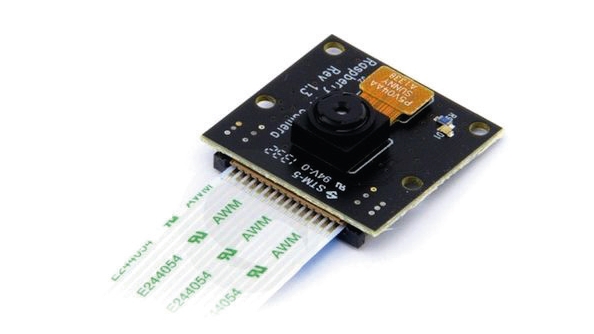
On the subject of cameras, there are several options. The Nwazet casing is designed to work with the official Raspberry Pi Camera. Version 2 of the Camera module, which was released back in April 2016, is a staggering improvement on the original.
It uses a Sony IMX219 8-megapixel sensor and therefore has no trouble recording HD videos and photos.
It can be attached to the CSI port on your Raspberry Pi in a couple of minutes. If the area you want to monitor is poorly lit, you may want to consider using the Pi NoIR infrared camera module which does everything the standard camera module does but allows the camera to see in the dark with infrared.
For those on a shoestring, the Raspberry Pi also supports a number of USB webcams although this can be very much trial and error. For the purposes of this tutorial, a Microsoft HD-3000 USB webcam was attached to a Raspberry Pi Zero to work as an additional camera and worked out of the box, with some help from a USB OTG cable.
If you decide to keep costs down and use a Raspberry Pi Zero for additional security cameras but still want to use the official Raspberry Pi or Pi NoIR camera modules, bear in mind the camera port is smaller on the Zero. Luckily, you can buy a camera adaptor cable from the Pi Hut.
The easiest way to access additional cameras is over a wireless network, and it makes sense to have a Wi-Fi dongle for each Pi-camera you want. The Pi 3 comes with its own Wi-Fi chip.

Naturally, each Raspberry Pi will also need a microSD card to store the OS. For your principal Raspberry Pi which will run the security software, you may also wish to attach external storage such as a USB stick to have plenty of space for photos/footage.
A final consideration before beginning your set up is placing your Raspberry Pi security cameras so that they are near to a power supply. If you want to place one in a particularly hard to reach location, either run a power line there or use a rechargeable battery pack.

MotionEyeOS supports multiple security cameras which will allow you to monitor a number of areas at once. If you’re using the official Raspberry Pi Camera Module or the Pi NoIR, then simply follow steps 1-3 in the walkthrough on the next page to install MotionEyeOS on the additional Raspberry Pi and add the video stream on your main Raspberry Pi.
To set up a Raspberry Pi with a USB camera, then read on. First, set up your extra Wi-Fi-enabled Raspberry Pi with a clean install of Raspbian but don’t connect your USB camera just yet.
Next SSH into your Raspberry Pi and run
sudo apt-get install motion
to install the motion application, which will access your USB camera and stream the video. Type
sudo nano /etc/motion/motion.conf
to edit the main motion config file. Change
DAEMON = OFF
to 'ON' and
stream_localhost = ON
to 'OFF' .
Use Ctrl+x to exit and save your changes. Next, run the command sudo nano /etc/default/ motion to open the config file then scroll down and change start_motion_daemon = no to 'yes' . Now connect your USB camera to the Raspberry Pi. You can run the lsusb to make sure the Raspberry Pi can detect it. Next, start the motion service with sudo service motion start .
You can test that streaming is working by opening a web page on any device and visiting http://192.168.x.x:8081 where 192.168.x.x is the IP address of your Raspberry Pi. Finally, you will need to add the camera stream in the MotionEyeOS admin panel by clicking on the dropdown box at the top left and choosing ‘add camera’.
I spy with my MotionPie
MotionEyeOS (formerly named MotionPie) is a customised OS for your Raspberry Pi, which will turn it into a CCTV system out of the box.
The basic steps for setting it up are outlined over the page. Once installation of the OS is complete, all you need is the IP of your Raspberry Pi to be able to log into the handy web interface.
You can obtain this from logging into your router or if you have an Android phone, install the handy app Fing from the Google Play Store which will list the IP address of all devices connected to your network.
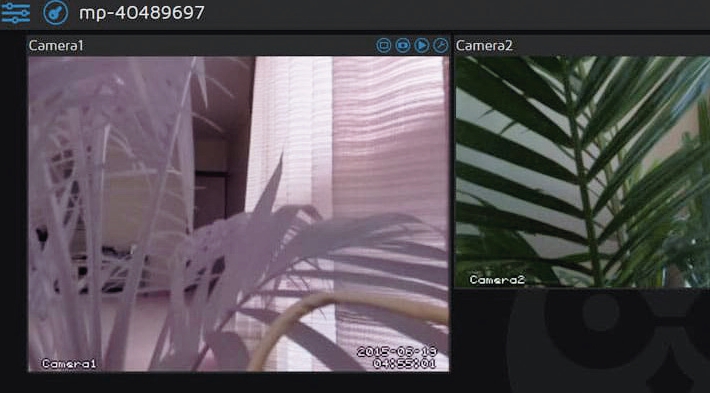
Next, use the device of your choice to go to this IP address. If you are asked to log in, use username ‘admin’ and leave the password field blank. The user interface is very slick and intuitive.
If you have a supported camera connected, then the feed from this will show right away. For the sake of security, click on the Settings icon at the top left, enable Advanced Settings and set an admin password to make sure no one else has access.
Next, it’s worth expanding the Network tab and entering the name and password for your wireless network. This is necessary if you wish to add other cameras to your system.
Once your camera has been added, the Video Device tab can be expanded to change some of the default settings. This is where you can name your camera to something more illuminating than ‘Camera 1’ such as ‘Front Door.’ You can also alter the resolution of the camera.
Experimentation with a Raspberry Pi 3 showed that a resolution of 800x480 and a framerate of 30 is an excellent trade-off between speed and avoiding traditional blurry CCTV video quality.
The Video Device tab also has a handy rocker switch for ‘Light Switch detection’ to only start recording when lights are switched on. ‘Automatic Brightness’ can also be enabled to allow the Raspberry Pi to set the brightness level though it’s best to set this yourself as the automatic feature can be quite erratic.
If you favour crisp black and white footage, saturation can also be set to zero. The File Storage tab stipulates where any photos or video footage are stored. If you have an external drive, enter the path to it here, as the microSD card will fill up quickly.
Fortunately, MotionEyeOS also tells you how much storage space is available. There are also options to add more cameras and specify under which conditions the camera is to record.
The Video Streaming section is the most useful if you want information on how to view the camera’s footage passively. The ‘Streaming URL’ will provide a link to the camera feed without the control panel, so make sure to note this down.
If you wish to embed the live stream inside a web page there’s also an embed URL. You can also click on the ‘Footage’ button for each camera from within the Admin interface to see all movies/pictures recorded by that camera.
Nate Drake is a tech journalist specializing in cybersecurity and retro tech. He broke out from his cubicle at Apple 6 years ago and now spends his days sipping Earl Grey tea & writing elegant copy.