How to create eye-catching designs in seconds with iStock Editor

You don’t need to be able to use Photoshop to combine words, text and logos in intricate designs.
A new, free tool from popular stock image library iStock by Getty Images makes it quick and easy to do all those things without any training.
iStock Editor allows you to find your perfect photo or illustration, crop it and customise it, with intuitive controls that anyone can pick up and use.
Work in the web browser
You don’t need to download any software; everything takes place in the web browser. This means iStock Editor will work on any type of desktop PC, laptop, notebook or Chromebook that has a web connection. You can see it in action in this video:
Your designs are automatically saved to the cloud as you go, and then you can download your final image at the end. You have to pay for this image, but it’s surprisingly affordable – iStock by Getty Images is famed for its low-cost, high-quality imagery – plus the tool itself is free to use.
iStock Editor is perfect for creating designs of all kinds, from web and social media images to printed posters, flyers, postcards and more. It provides you with a variety of image filters, fonts and text styles, and a simple way to upload your own logo or graphics.
While you’re designing, you’ll work with a watermarked version of your chosen image, but your finished download will be watermark-free. Follow the six-step walkthrough below to see just how simple it is to use in practice. As an example, we’re going to put together a quick image for a fictional online campaign against smoking.
Sign up for breaking news, reviews, opinion, top tech deals, and more.
1. Choose your image

First up, you need to find the image you want to use on iStock, so go to istockphoto.com and start typing keywords into the search bar. The more keywords you add, the more your search will be narrowed down and the less time you’ll have to spend scrolling through images to find the right one.
iStock also offers you a host of other ways to hone your search and find what you’re looking for more quickly. You’ll find all the different option in the black rectangle on the left-hand side of the page. For example, you can search for images in one orientation (horizontal, vertical, square etc), by colour, the number of people in the image, and more.
2. Start to edit your image
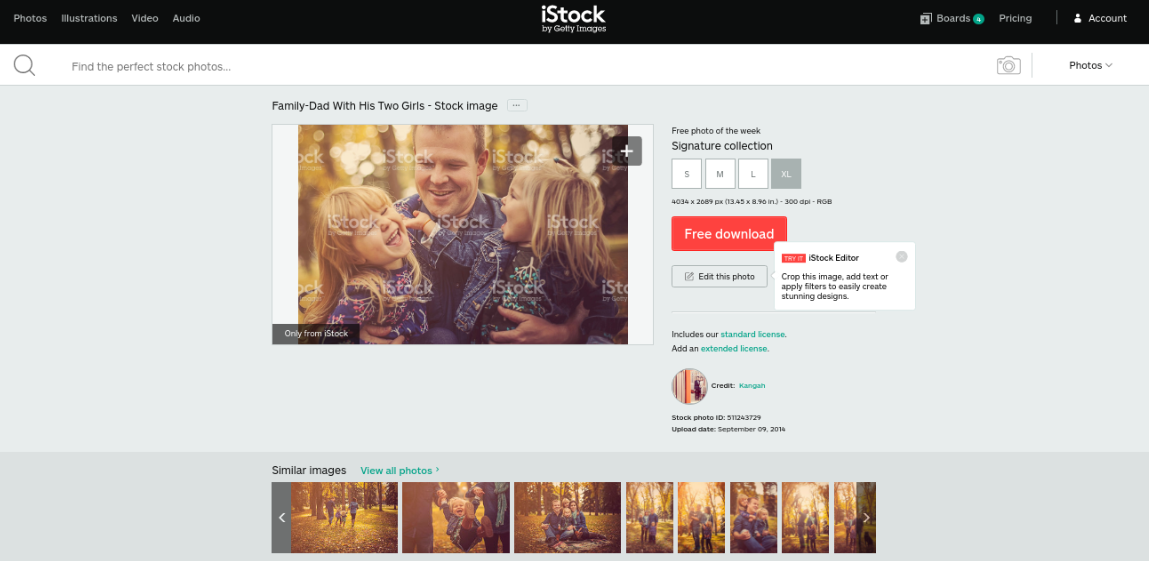
Once you’ve found the perfect image, click on it and you’ll be taken to the image’s own web page. To the right of the image you’ll see a big red button that reads ‘Download this image’. Underneath that is a smaller button titled ‘Edit this photo’. Click this button to begin editing.
3. Choose your image size
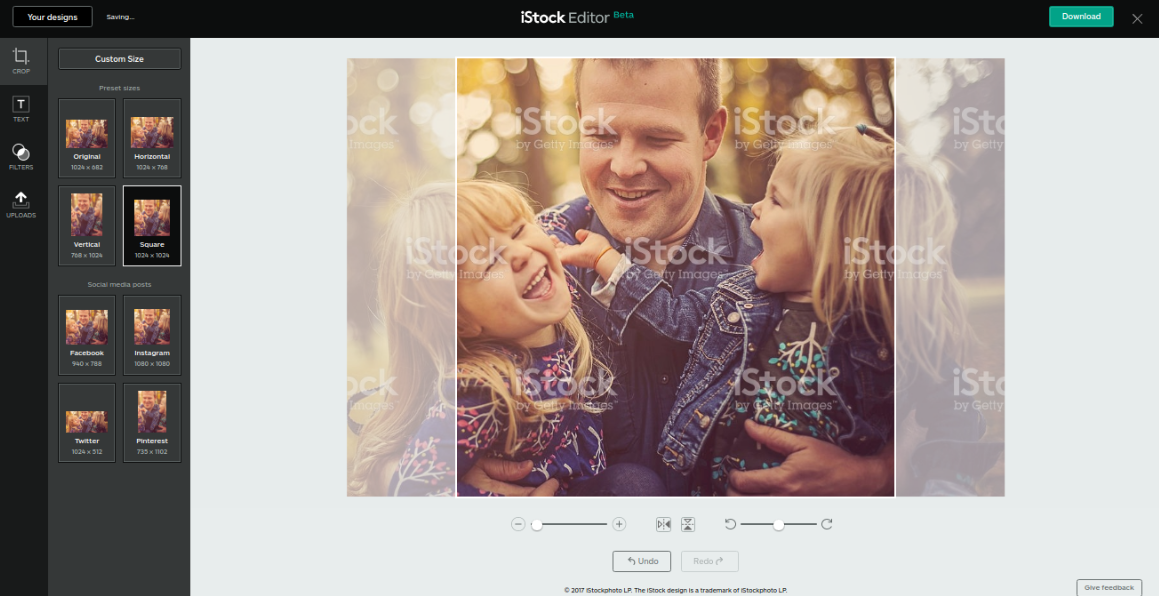
When you first go through to the editing screen, you’ll notice you can choose to crop your image into three preset shapes – horizontal, vertical, square – or you can just do nothing and stick with the original dimensions. There are also four presets for image sizes that correspond to four popular social media sites: Facebook, Pinterest, Twitter and Instagram.
If you want to crop your picture to one of these sizes, click the appropriate choice and a white rectangle will appear over your image. You can then drag the picture forward and backwards across the white rectangle, zoom it in and out with the left-hand slider, and rotate it using the right-hand slider. You can also use the small arrows in-between the sliders to flip the image horizontally or vertically.
If you don’t like any of the custom sizes by the way, you can just click on the ‘Custom Size’ button at the top of the black rectangle, and set the specific size you want your image to be.
4. Choose your filter
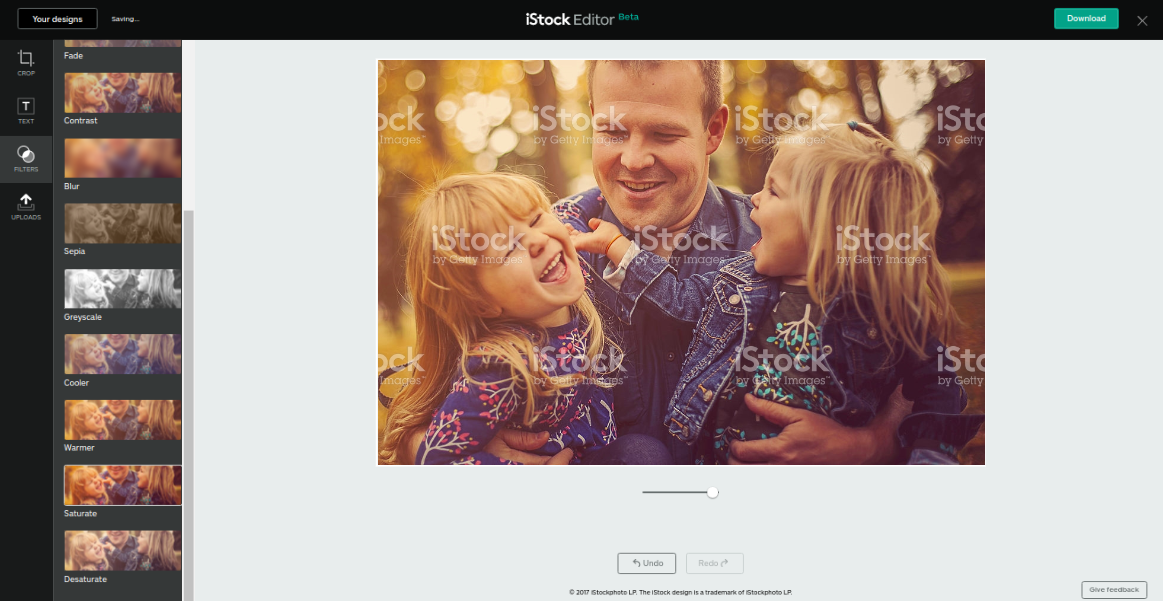
Once you’re happy with your image crop, click on the ‘Filter’ button (the third one down on the left hand side of the page), and a selection of options will appear. Scroll down to see what they are, and try them out by clicking them. You can adjust the amount of filter applied to your image by using the slider below it. For example, with the Blur filter, you can make it more or less blurred by moving the slider to the right or left. Here we’ve used the Saturate filter to bring up the intensity of the colours a little.
5. Add some text
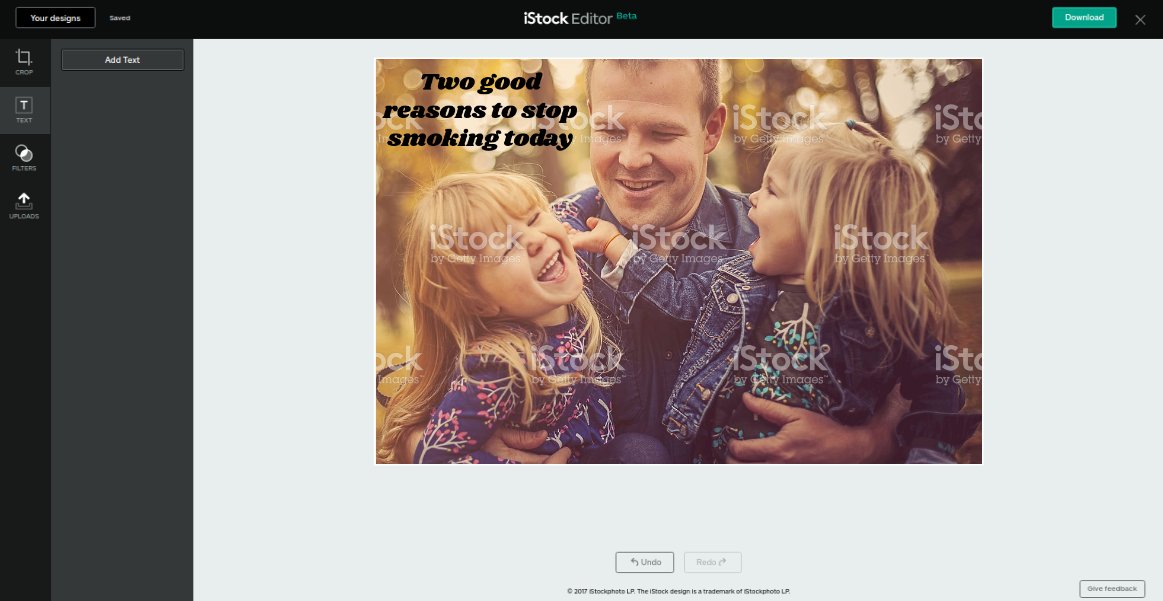
Now it’s time to add your text. Click on the ‘Text’ button on the left-hand side and a box will appear in a random place on your image with the words ‘Enter text’. Click inside it and type the words you want to appear. Then use your mouse to drag it to the place you want and the options in the left-hand side of the screen to adjust the text size, style, font and so on. There are also sliders you can use to make the text smaller or bigger, and to rotate it. You can add as many text boxes as you like.
6. Add your logo
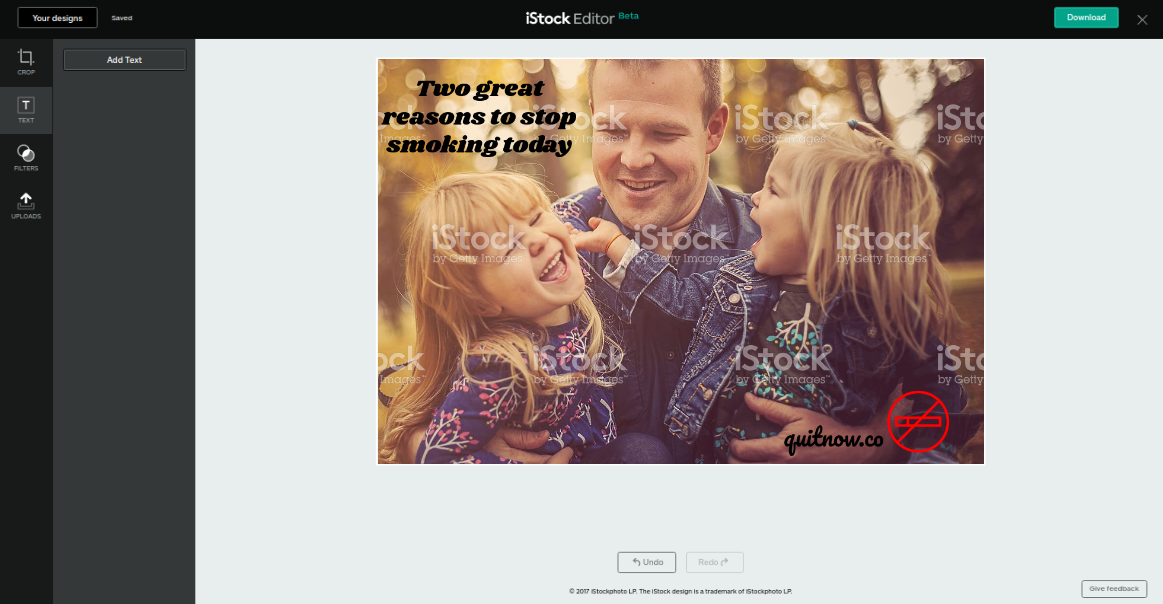
Finally, if you want to add your logo to your image, click the ‘Upload’ button on the left-hand side. A new button will appear above and to the right of it, called ‘Upload logo or graphic’. Once you’re happy with your image, you can download a final, non-watermarked version.

Special discount for TechRadar readers
It’s totally free to try the iStock Editor and see what it can do, so why not start designing with the iStock Editor today? Or if you just want to find awesome, royalty-free photographs and illustrations at super-affordable prices, sign up for a free account at iStock and start searching.
Either way when you come to buy your image, use this special discount code, especially for readers of TechRadar: ZKFPC46N, which will get you an amazing 10% off iStock credits.