Building a great website is tough, but finishing the code and layout is only half the story. Too many sites have problems after going live because they weren't tested properly first.
Lots of things can and do go wrong, from poorly formatted code that some browsers choke on, to pages that break when opened on other platforms. If you developed your site on a Mac, what guarantee do you have that it'll look the same on a PC, for example?
Even now, when HTML structures are likely to be served as part of a CMS template system, it's important that all the basics are in place. You need a soak test: a checklist of crucial areas that you can test are working before the site goes live.
That's exactly what we've put together here. Follow our tips and your site will be as problem-free as possible.
Clean up your code
Clean, glitch-free code with no stray tags or unclosed comments looks better, is easier to edit and is less likely to spring surprises on you when your site goes live.
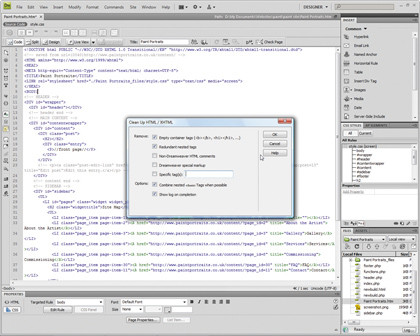
WYSIWYG web authoring tools already include features for tidying up your code. Let's face it – some of us really need them. Dreamweaver will even format and indent your HTML following your configuration guidelines.
Sign up for breaking news, reviews, opinion, top tech deals, and more.

Go to 'Commands | Clean Up HTML' or 'Clean Up XHTML'. We prefer to run static code through HTML Tidy, which is available as a stand-alone program from here, or as a plug-in for manual code-editing tool NoteTab Light. The software deletes stray tags, adds any missing tag elements and completes open tags for you.
Meet HTML standards
Compliance with World Wide Web Consortium (W3C) standards makes your sites more accessible and usable, and also helps them to perform well on multiple platforms.
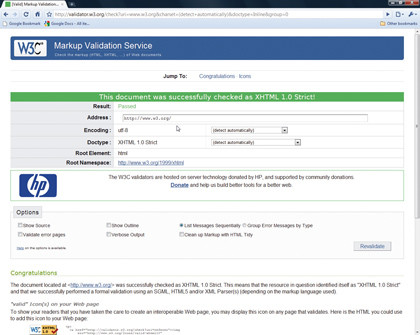
You can see whether your site is compliant with XHTML and CSS standards by using W3C's online validation tools. You'll find the main testing page here. This gives you a full breakdown of all the syntax and code errors in any page submitted. You can then update your code in accordance with the guidelines.

Don't be disheartened if your site fails. Some of the web's biggest sites have XHTML errors according to the validator, including Google and Microsoft's homepages.
To use the W3C's validation tool, follow the link above and enter the URL of the web page you wish to test. You can also upload code from a local machine or paste HTML mark-up into the Direct Input box. The validator can only check one page at a time.
Meet CSS standards
There's a second service available to help you check and correct CSS scripts. It can be found here. Again, you can point the validator to a version of the file you wish to check online, upload the code or paste it directly into a box.
The errors returned come with detailed explanations of how you can fix them. The validator will identify even the smallest of problems, including missing line terminators and brackets.
Enable resizing
Remember the early days of the web, when sites came with front-page disclaimers such as 'Optimised for Internet Explorer at a resolution of 800 x 600 pixels'? How we groaned. Don't forget that people are viewing your site on different platforms, with different display settings and monitor resolutions.
Enabling your page to resize to any browser means that it will work better on multiple platforms, from desktop machines to handheld devices. The key is to use percentage sizes when creating layers rather than specifying fixed sizes. It's a tough habit to get into, especially if you've become used to creating exactly positioned layouts.
First, check that your site looks good on the largest monitor size your setup can muster, then work backwards – down to 800 x 600 pixels.
Right-click your Windows desktop and choose 'Properties'. Click 'Settings' and you'll be able to change your default desktop resolution using a slider. If you use Vista, choose 'Personalise' from the contextual menu instead.
It's even easier in Windows 7 – there should be a right-click menu item labelled 'Screen Resolution'. Some video card control panels let you do this without venturing into Windows' display settings.