How to guard your home with Raspberry Pi
Guard your home with a Pi
Sign up for breaking news, reviews, opinion, top tech deals, and more.
You are now subscribed
Your newsletter sign-up was successful
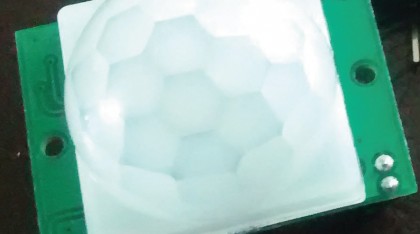
In brief, our goal is to build an alarm system with our Raspberry Pi that's triggered by a PIR sensor, which detects movement.
Once the alarm is tripped, a camera will take a quick picture of the event, and then record 10 seconds of video. To alert the user that the alarm has been triggered a text message is sent. So let's get started!

1. Connect the PIR
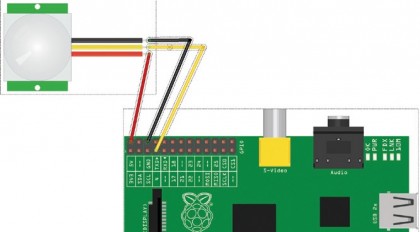
Our PIR sensor needs three connections to work: VCC (5V), Out and Ground (GND). To connect our sensor to the Raspberry Pi, we need to use female to female jumper cables.
You can buy them from many online retailers. On the sensor, locate the VCC pin and gently push a cable until it is firmly in place.
On your Raspberry Pi, locate Pin 2 and gently push the VCC cable into place. We connect the VCC pin on the PIR sensor to a 5V pin on a Raspberry Pi, which is Pin 2.
When connecting anything to the GPIO, ensure that the Raspberry Pi is powered off and that all connections are checked before powering on your Raspberry Pi.

2. Ground and Out
We then need to repeat the process and connect the GND pin of our sensor to GND on a Raspberry Pi, which is Pin 6. Lastly, we connect our Out pin to Pin 7.
Sign up for breaking news, reviews, opinion, top tech deals, and more.
For our connection to the PIR sensor, we will require no resistors inline as the PIR has a diode to protect the board, and the signal sent via the Out pin is 3V and safe with our Raspberry Pi.
Our PIR sensor needs three connections to work: VCC (5V), Out and Ground (GND). To connect our sensor to the Raspberry Pi, we need to use female to female jumper cables. You can buy them from many online retailers. On the sensor, locate the VCC pin and gently push a cable until it is firmly in place.
On your Raspberry Pi, locate Pin 2 and gently push the VCC cable into place. We connect the VCC pin on the PIR sensor to a 5V pin on a Raspberry Pi, which is Pin 2. When connecting anything to the GPIO, ensure that the Raspberry Pi is powered off and that all connections are checked before powering on your Raspberry Pi.

3. Connect the camera
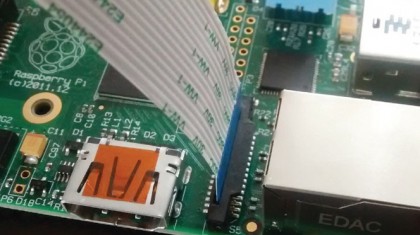
Our next piece of hardware is the Raspberry Pi Camera, and to insert the camera, you need to locate a plastic port between the HDMI and Ethernet port on the board.
Gently lift the plastic lock from the port and then slide the ribbon cable into the slot, with the silver strips of the ribbon facing the HDMI port.
Once fully slid into place, press the plastic lock back into its original position. The ribbon cable will now be locked in place.