How to use Check In on iOS 17
Learn how to take advantage of this new iOS 17-only safety feature
Sign up for breaking news, reviews, opinion, top tech deals, and more.
You are now subscribed
Your newsletter sign-up was successful
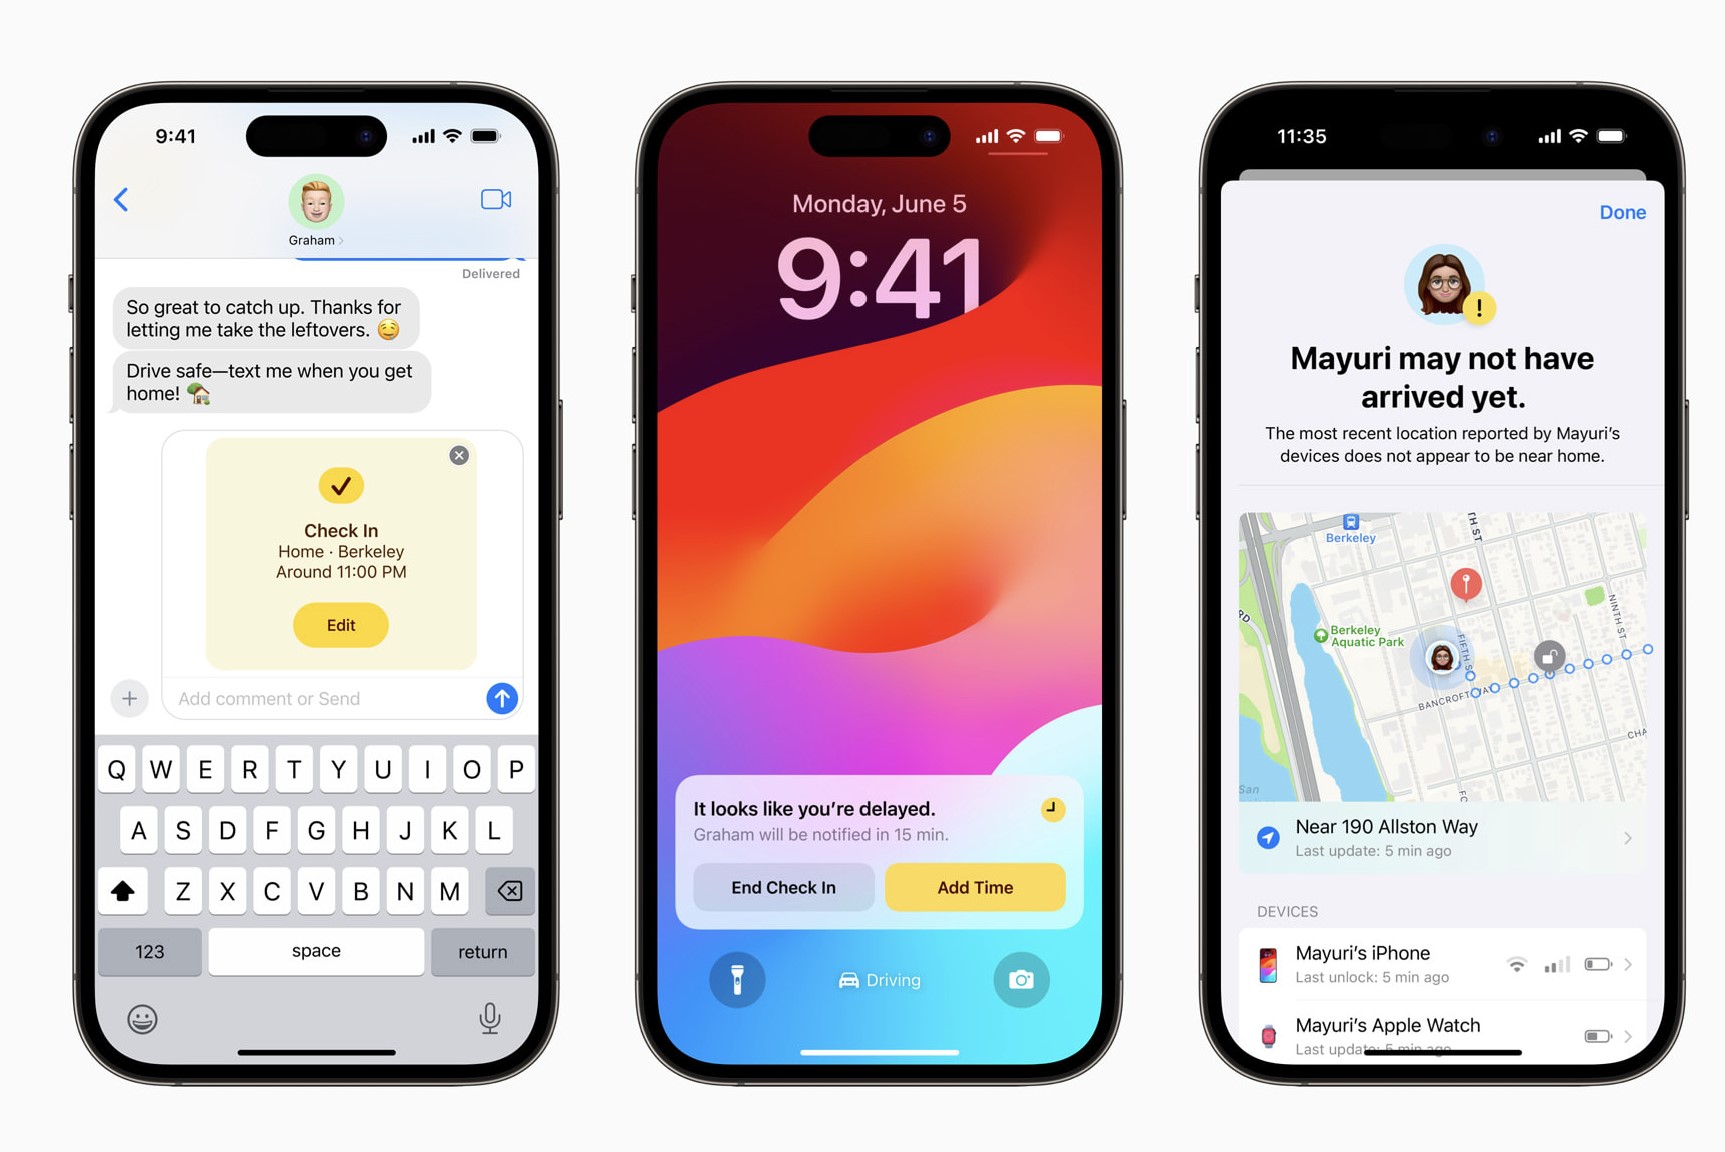
The Check In feature included in the new iOS 17 is an intriguing and, more importantly, useful addition to Apple’s mobile ecosystem. Now, you don't need to worry about letting someone know when you’ve made it home safely; you can just use this feature and it will automatically do it for you when you get to wherever you’re going or after a set amount of time.
It’s a safety feature that adds convenience to keeping your friends and family informed. If you don’t check in, the recipient of the Check In feature will receive a notification from your phone showing a combination of location, route, phone battery life, network strength, and the last time you unlocked your phone depending on what you choose to share.
This excellent new feature is incredibly easy to use and one that could see its way into all sorts of scenarios, whether you want to notify a friend when on a date or a family member when you’re out for the evening.
Steps on how to Check In on iOS 17
- Start or open an existing conversation
- Tap + in the conversation
- Tap on More
- Tap Check In
- Press on the Edit button
- Choose “When I Arrive” or “After A Timer”
- Enter desired information
- Press Done
- Send Check In
Tools and requirements
- Two iPhones equipped with iOS 17 (yours and the recipient of the Check In)
- iMessage installed on both phones
- Mobile Data and Location services on
As easy as using the Check In feature is, there are some settings and factors that will affect whether you can use it. Since you don’t want to be caught scrambling to figure this out in the heat of the moment, you should adjust ahead of time.
The first and most important thing to keep in mind is that you can only use the Check In feature when you and your contact both have iOS 17 installed. You also need iMessage to be installed as this feature doesn’t work as a regular text message. You should also send a message to your contact first to establish a message thread. Mobile Data and Location services also need to be on.
Most likely you don’t need to do anything except make sure both people on the message thread have iOS 17 installed. It is new, after all.
Step by step guide
1. Start or open an iMessage conversation
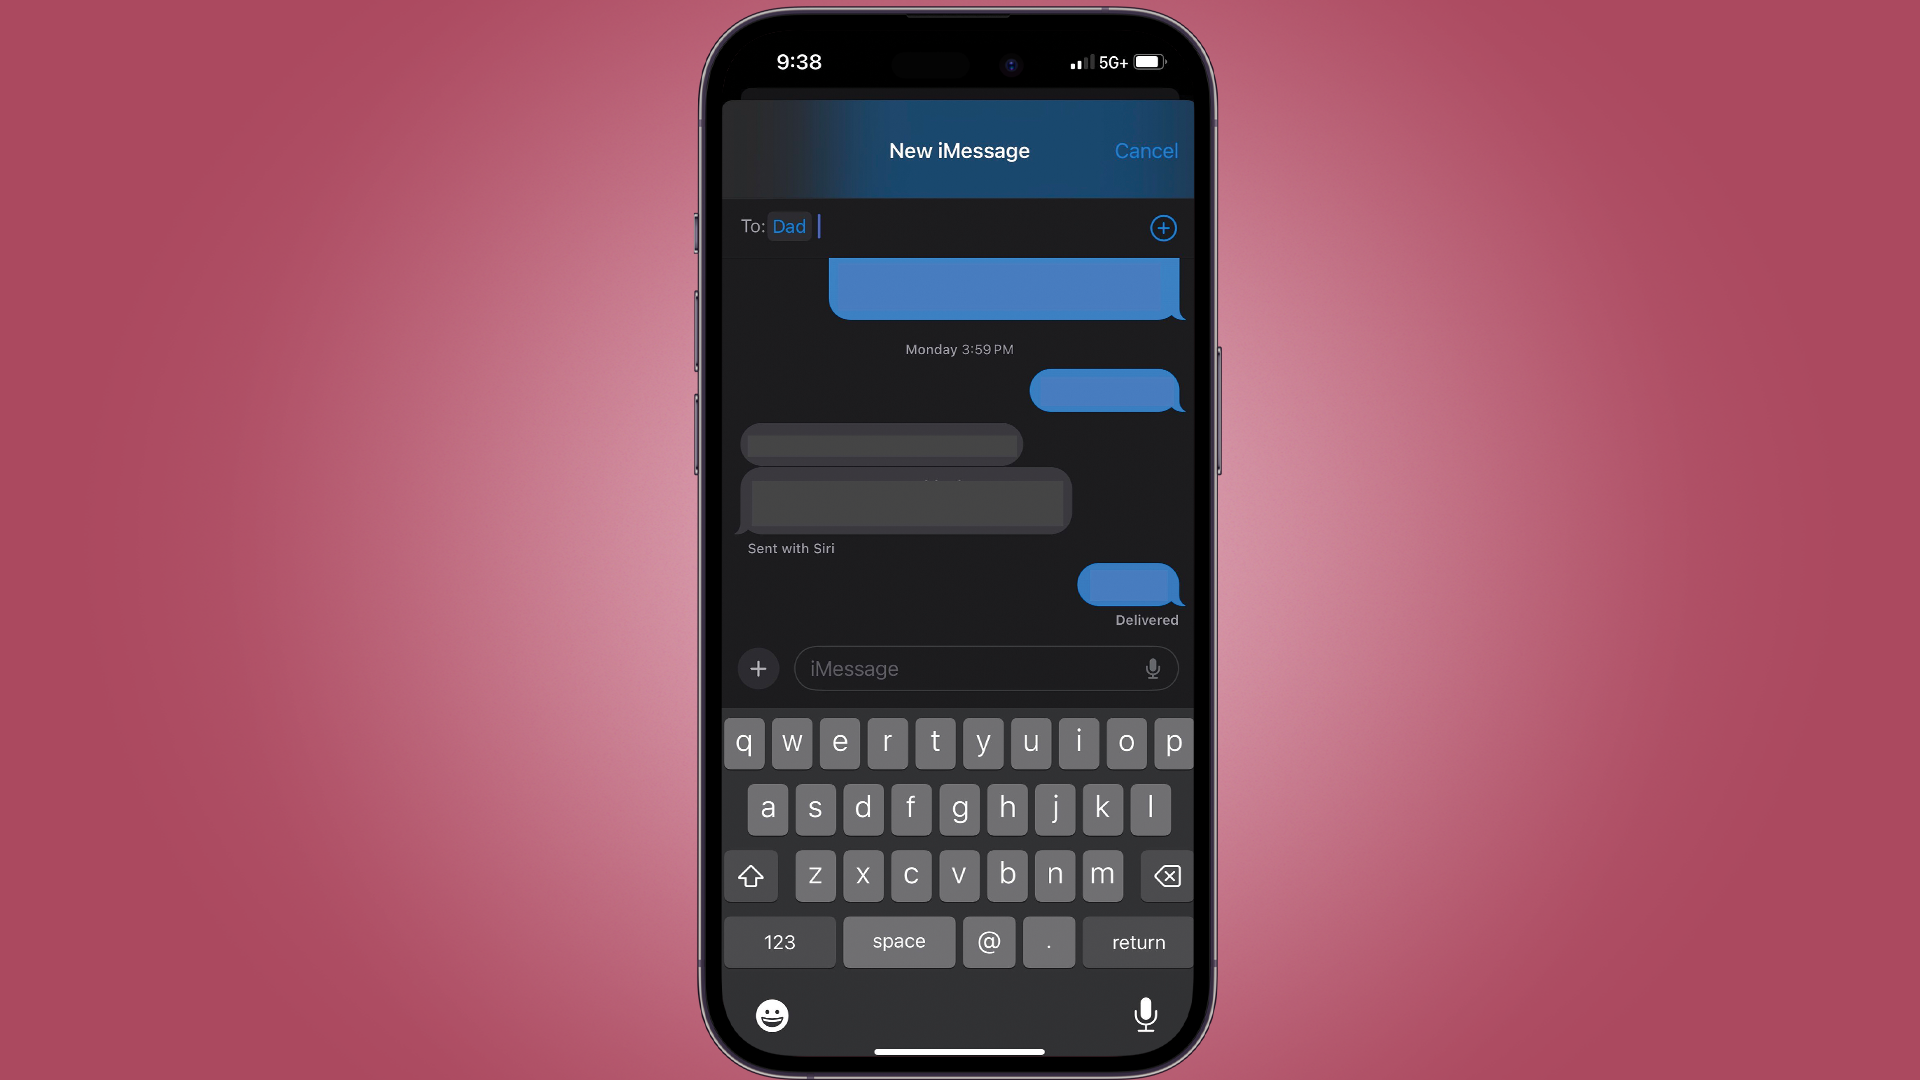
Before you can use the Check In feature, start or open a conversation with the person you want to send a Check In notification to.
2. Tap '+' in the conversation
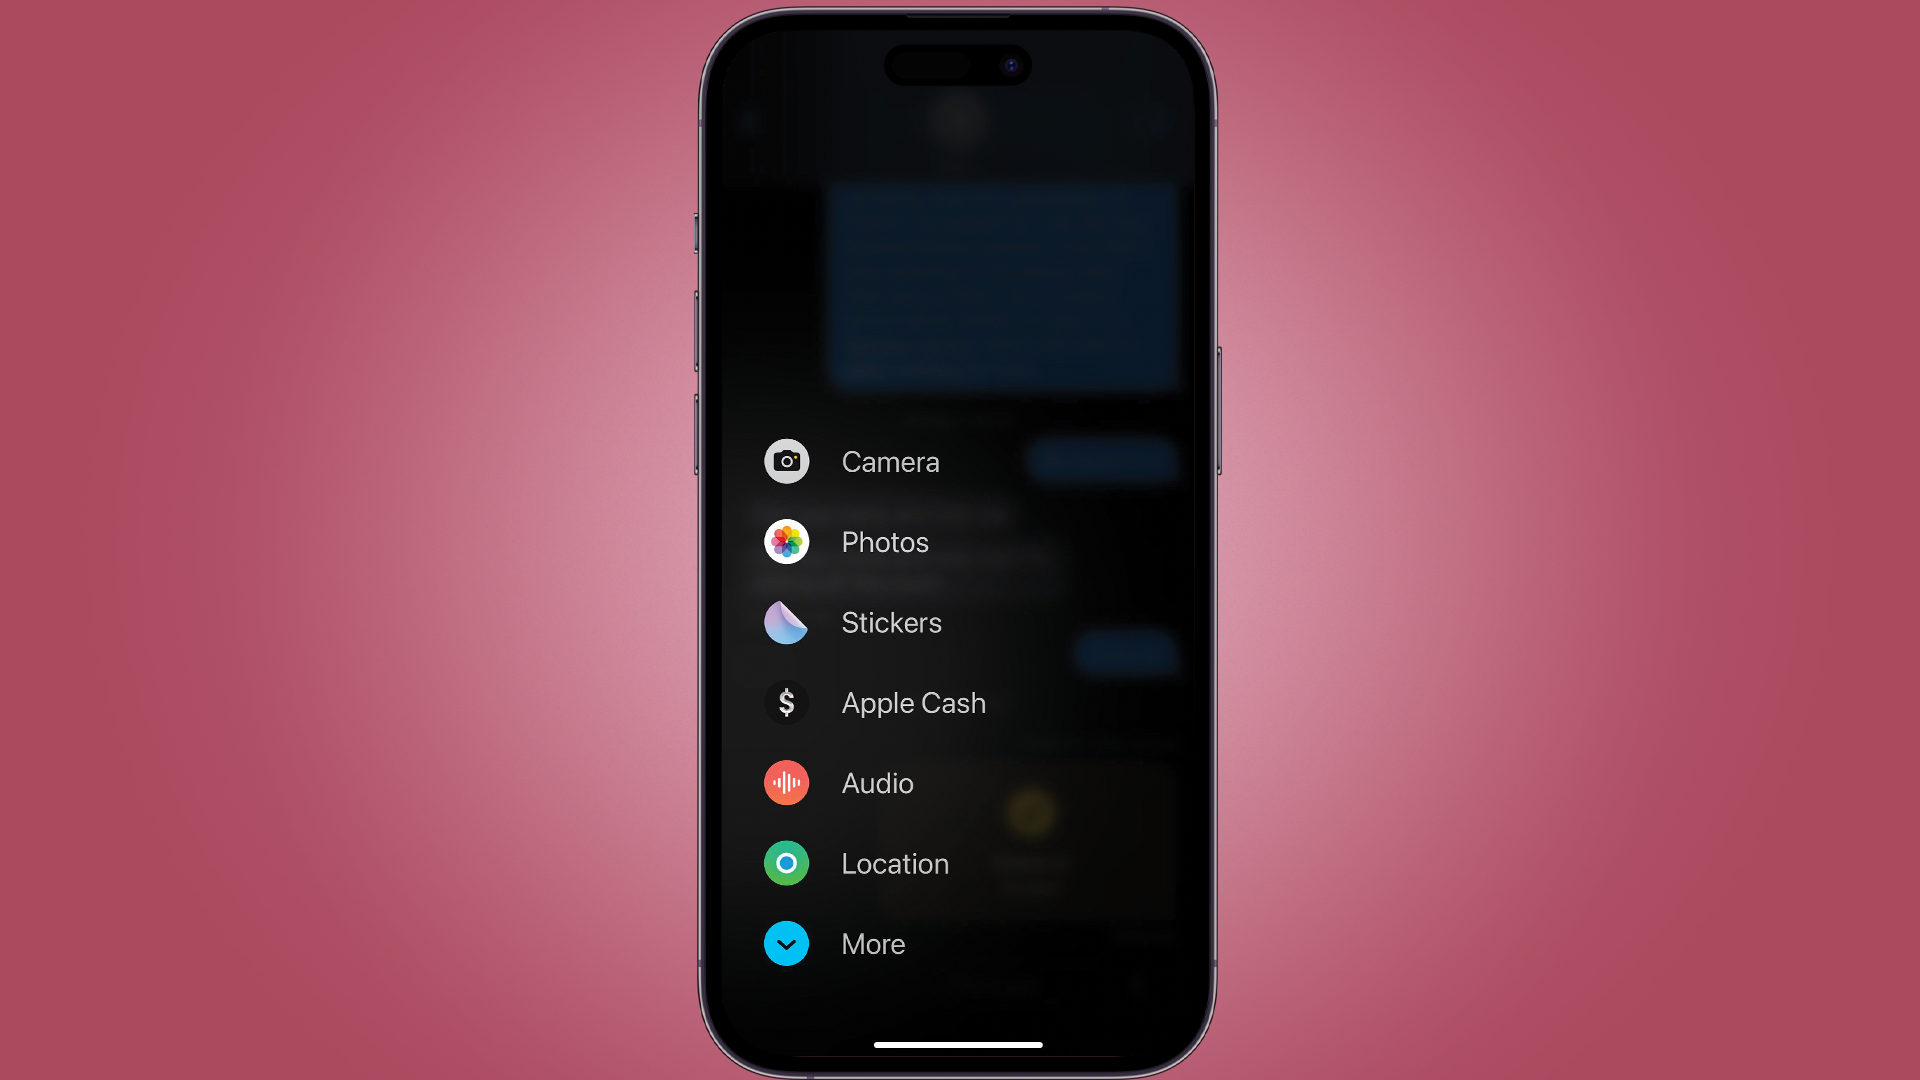
Tap the '+' button next to where the text message bar. A menu will pop up with a number of options that you can send to the recipient.

3. Tap on More
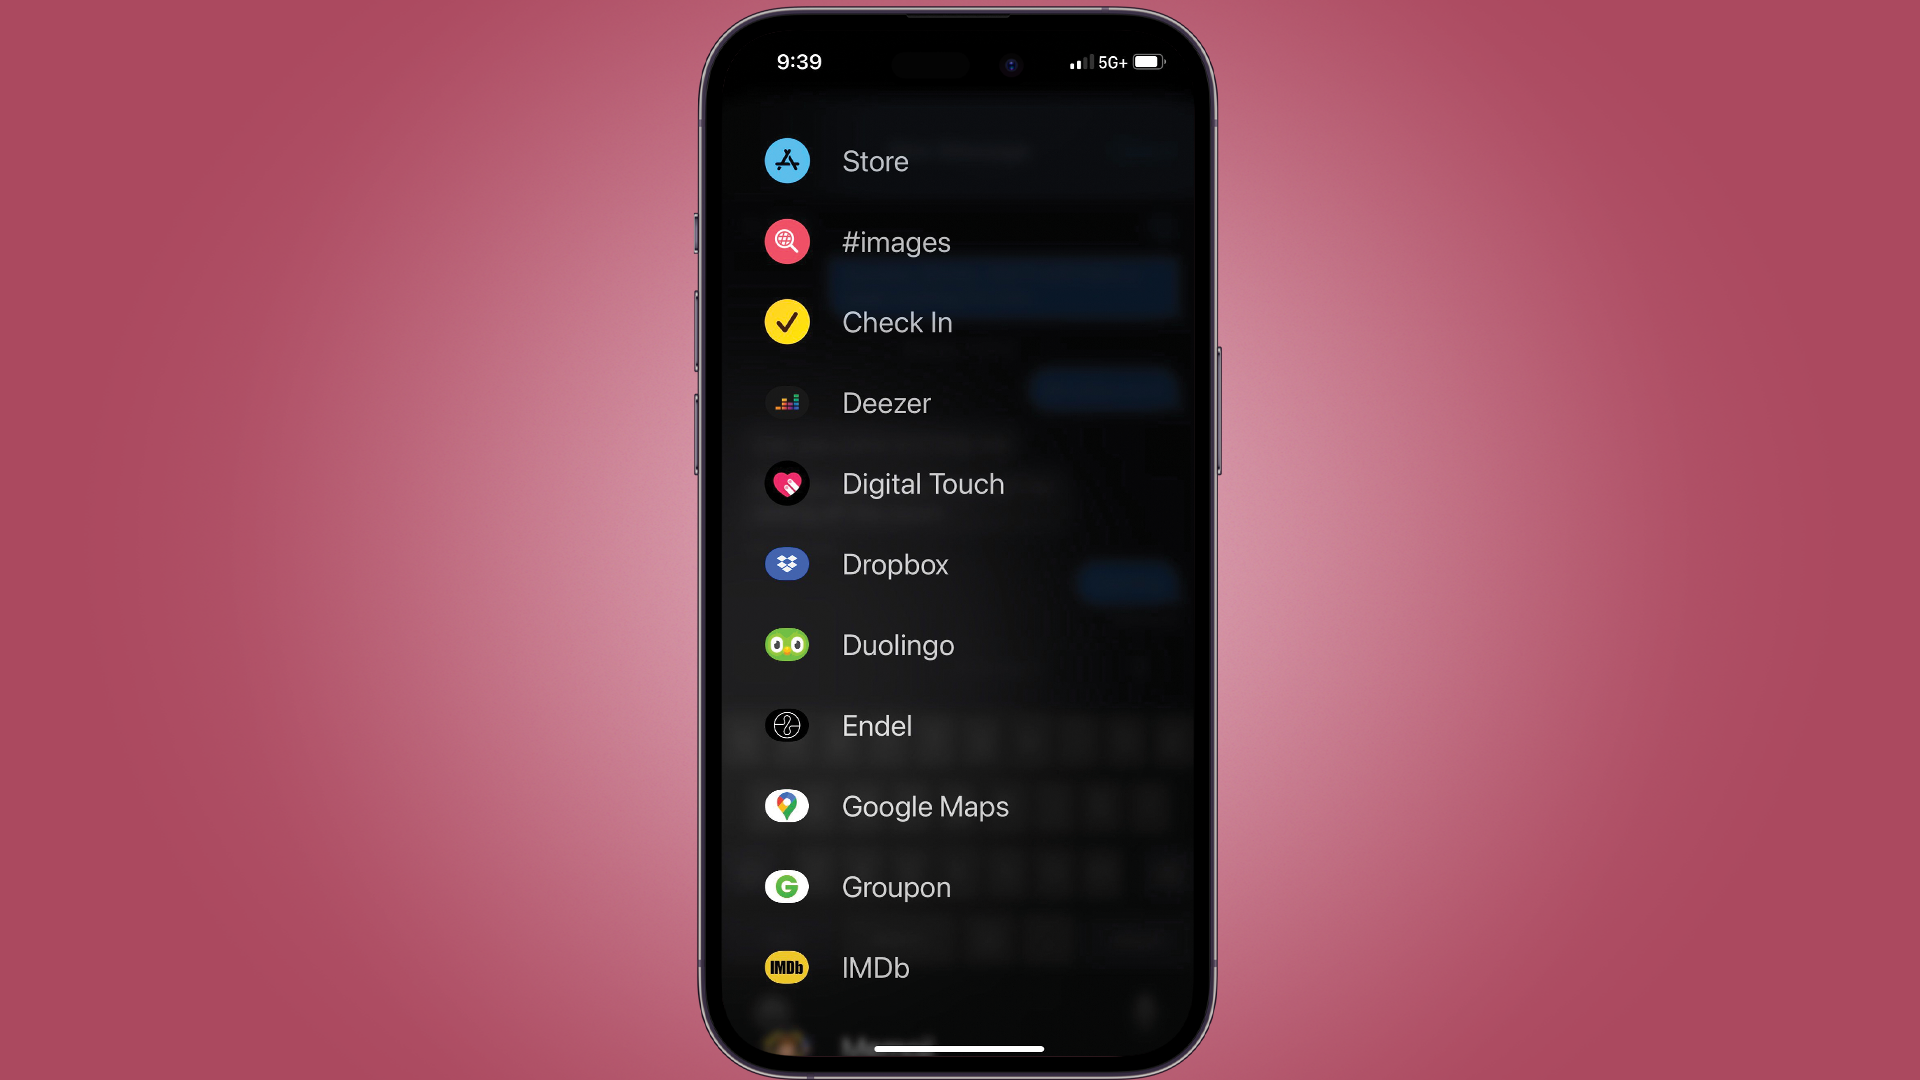
The Check In feature is buried below the initial options, so tap on More to see the second list of options.
4. Tap on Check-In
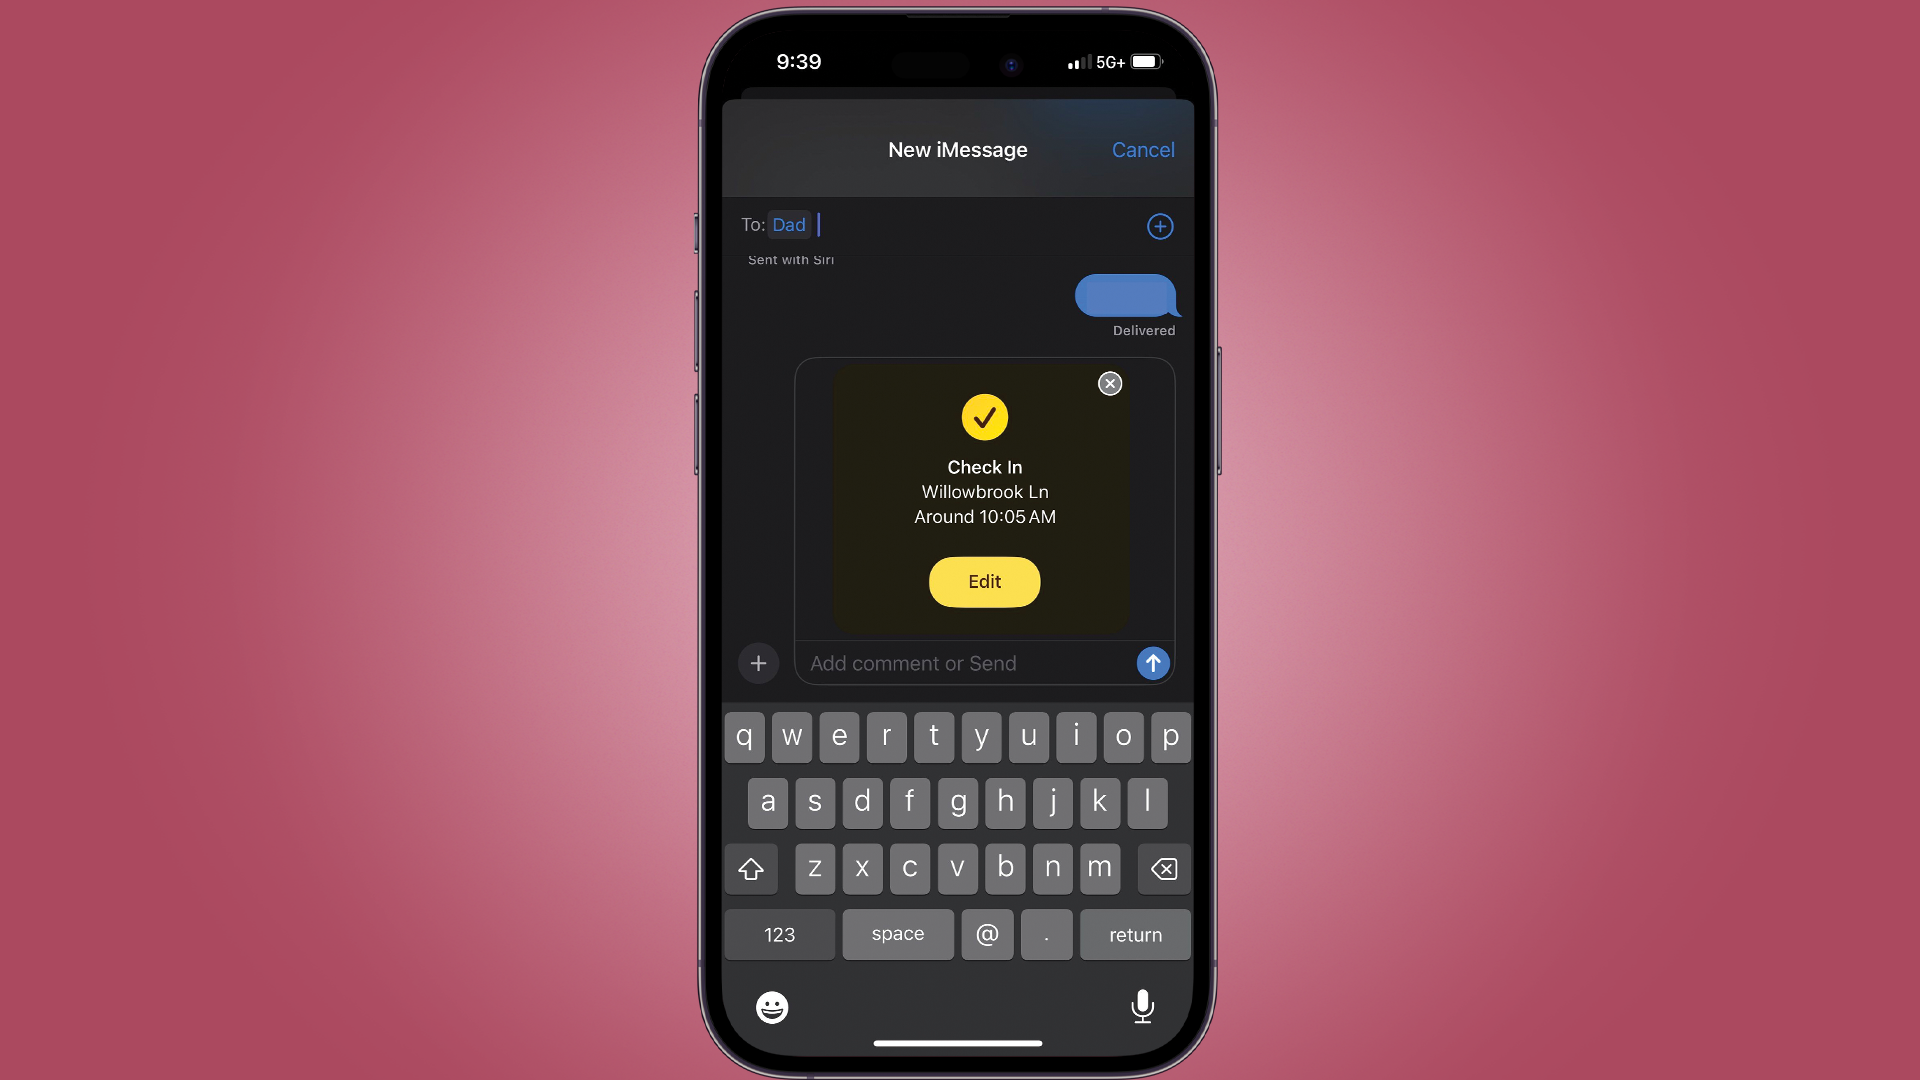
Tap on Check In and a preset Check In will appear in the text message bar.
5. Press on the Edit button
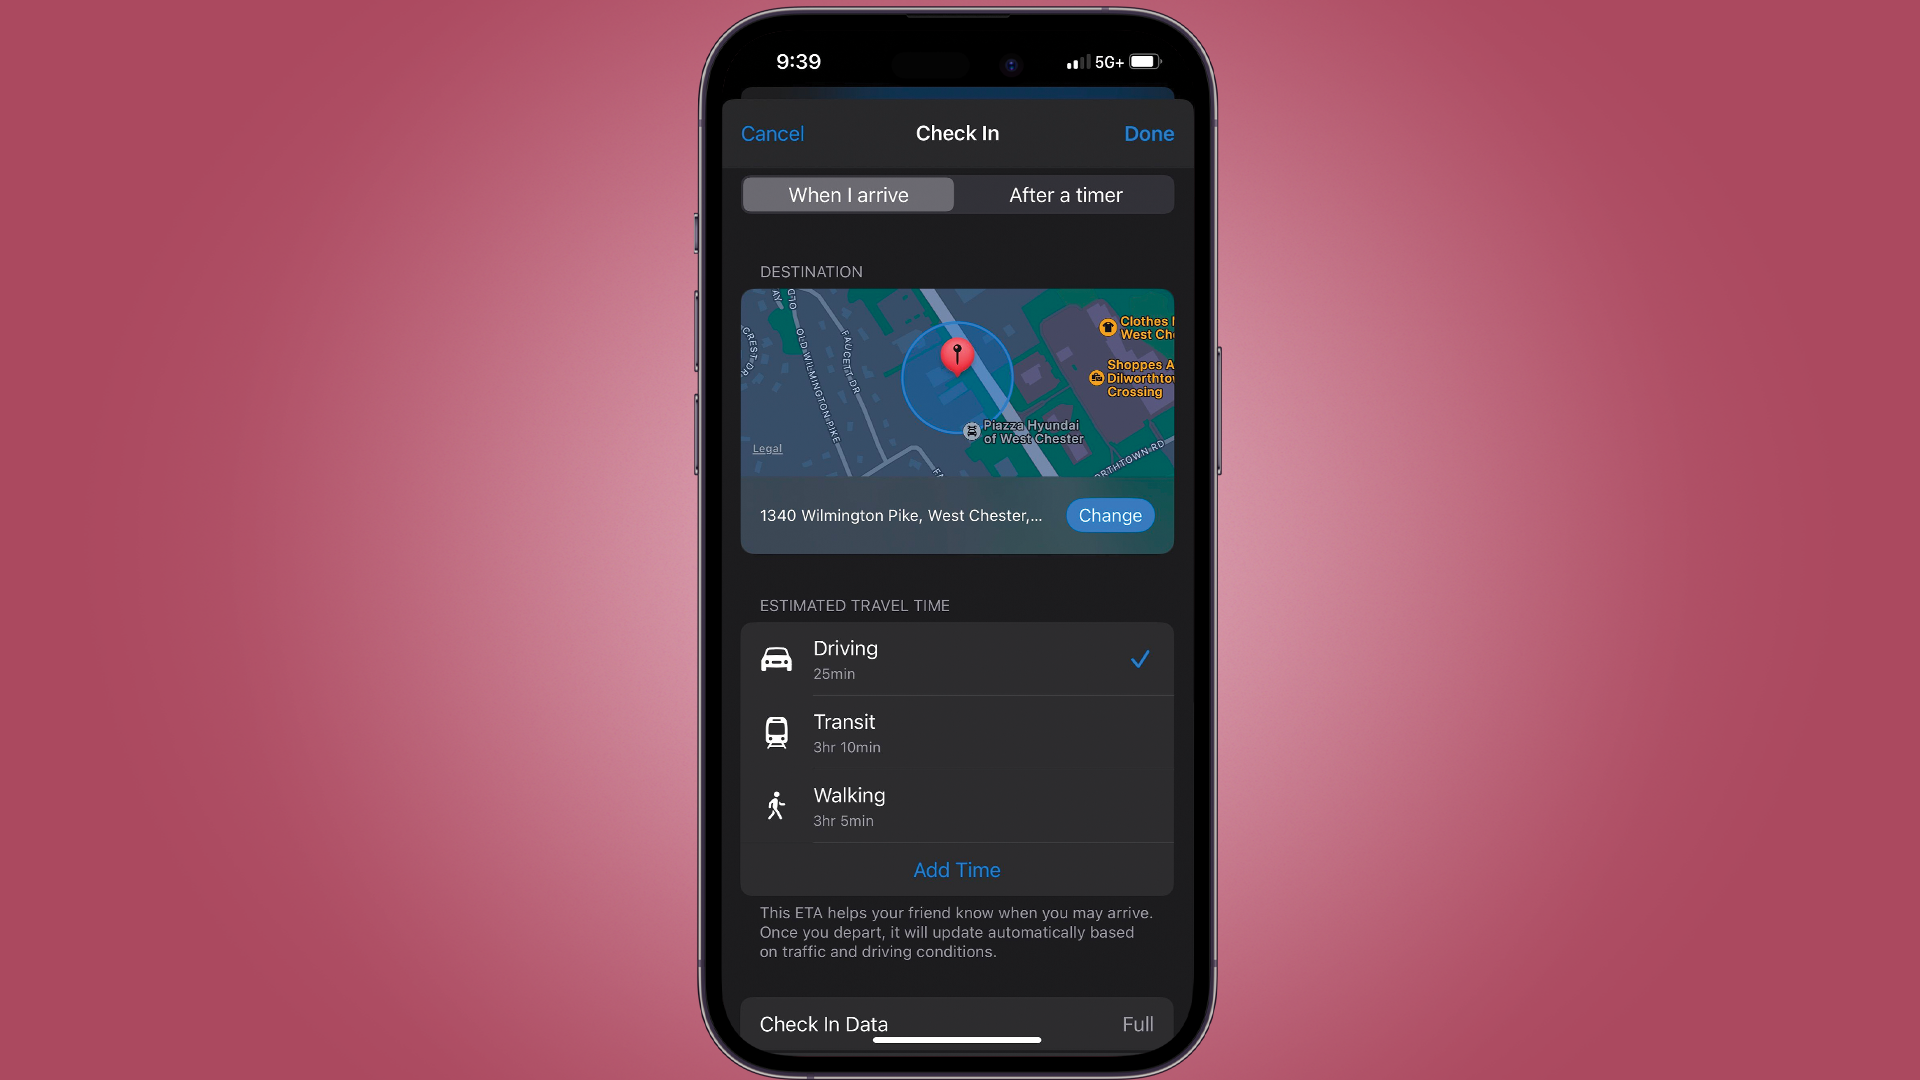
Don't press send just yet! Press on the Edit button to add the information you want to send.
6. Choose your Check In settings
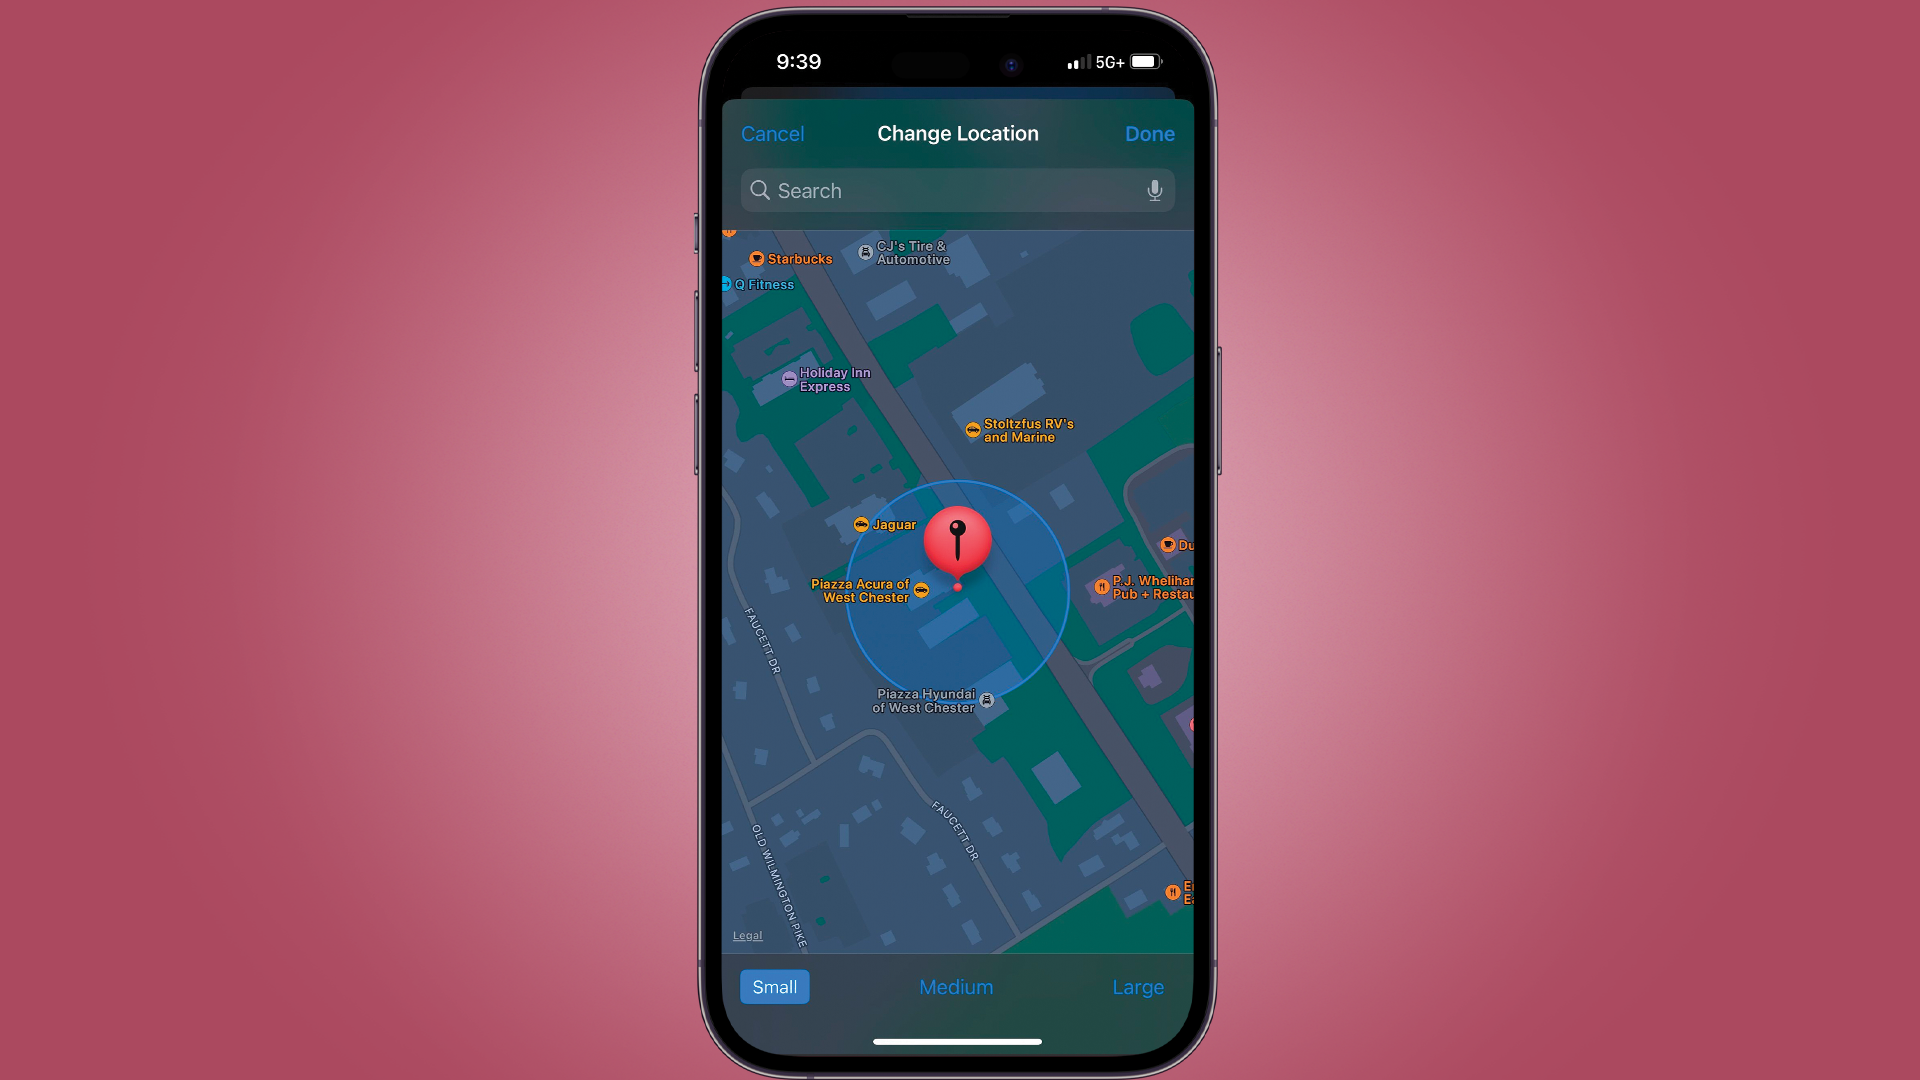
You'll see two options at the top of the screen - 'When I Arrive' or 'After A Timer'. Pick the appropriate one. If you want the recipient to know that you've arrived safely at a specific destination, choose the first. If you want to give them a time frame instead (maybe you're checking in through a first date), press on that instead.
If you pick 'When I Arrive,' put in the address for your destination. If you pick 'After a Timer,' put in the amount of time you're allotting yourself.
7. Press Done and send your Check In
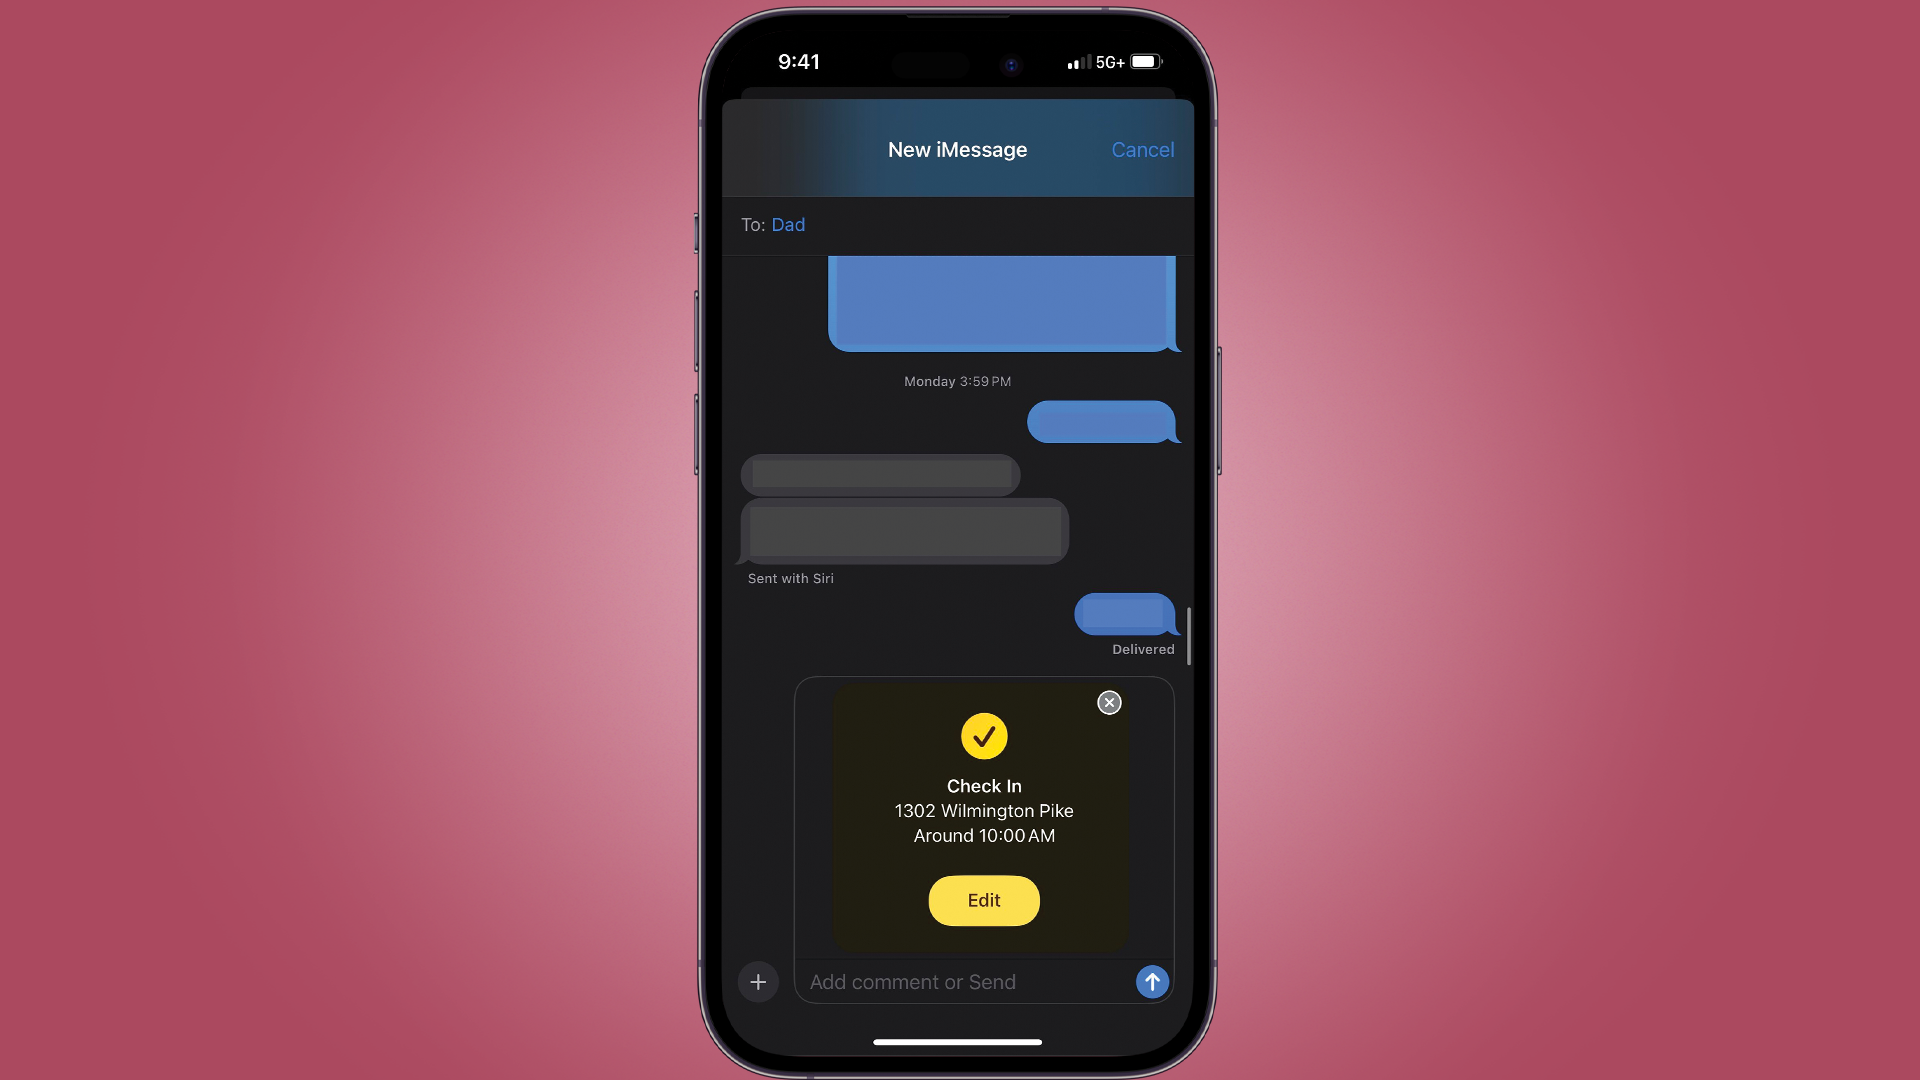
Press done at the top of the screen when you're done adjusting the Check In. The info box in the text message bar will be updated with the new information.
You can now press Send to share the Check In with the recipient. If you’ve selected a destination, the Check-In feature will automatically notify your contact when you’ve successfully arrived. If you're taking a long time or aren’t progressing in the direction of that destination, the feature will also notify your contact. That way, they can follow up or even come get you if there’s reason for concern.
If you’ve selected a timer instead, the feature will notify your contact if you end the timer indicating you don’t need to be checked on anymore. If the timer runs out, your contact will also be notified that you haven’t checked in.
Final thoughts
Apple continues its streak of prioritizing safety and privacy in its ecosystems with the Check-In feature. Not only is it easy to use, but you can fine-tune it to only share the information you want it to share. It also does a nifty thing when you lose signal or your phone dies as the recipient will get a notification then.
Sign up for breaking news, reviews, opinion, top tech deals, and more.
The only real drawback with this feature is that it requires everyone involved to not only own an iPhone, but to be on iOS 17. That will be less of an issue with time as people buy new phones or are forced to update. Currently, however, you’ll be limited to using this feature with early adopters.
You might also like

James Holland loves checking out gadgets of all sorts, whether it's audio equipment, laptops, or vacuums (especially of the robot variety), and does so for a number of Future Publications including TechRadar, Top Ten Reviews, Homes & Gardens, and T3. He's built up an expertise for in-depth reviewing over the last four years. When he's not putting in the work on the latest tech, he loves to travel, play music, and eat questionable food.