Using Linux to map routes and walks
exiftool -s *.JPG > exif_backup.txt
If it all goes pear-shaped, you can use this to restore the original data.
Geotagging

In the next step, you will use the EXIF time stamps in the photos to correlate them with the GPS tracklog. We shall then write the GPS position data to the appropriate EXIF tags in the photos. This process is known as geotagging.
Now you are going to use GPS Prune to geotag the photos. Assuming that you've corrected any time differences between your GPS track and photos, the first step is to load the GPS track in GPSPrune. From the Photo menu, choose Add Photos and choose the directory containing your photos. From the Photo menu, choose Correlate Photos.
This dialog has various options which allow you to set Correlation Limits, as it's likely that the data in your GPS tracklog and photos match exactly. The two most useful options are:
Time Limit
Distance Limit
If the time or distance in the EXIF field and the tracklog are within the limits you have set, GPSPrune will consider the photo and tracklog point to be correlated. GPSPrune will then tick the checkbox for every photo where it can correlate the EXIF time with the GPS time.
Sign up for breaking news, reviews, opinion, top tech deals, and more.
Once you click OK, GPSPrune wil show points corresponding to each photo on your tracklog. Clicking on the point will display the associated photo. You can then write the latitude and longitude information to the relevant EXIF field in each photo. Select Save to EXIF from the Photo menu. This will display a list of photos to which the EXIF data will be written.
As a safety measure, you can choose not to overwrite the original photos, in which case they will be copied to a file with the extension_original. GPSPrune will now append new track points to the end of your GPS file, with the position of each photograph, time stamp and the photo's full path and filename. An example is shown below:
7492011-02-20T09:53:57Z
20022011085.jpg
Creating thumbnails
You need to create a thumbnail for each image you want to display on the map. There are dozens of ways to do this, but you will use a simple shell script, which calls the imagemagick convert program to make thumbnails 75px wide. The thumbnails use the original filename prefixed with .thumb. Place the following script, in the directory containing the photos
FILES="$@"
for i in $FILES
do echo "Processing image $i ..." /usr/bin/convert-thumbnail 75 $i thumb.$i done
and run:
./thumbnail.sh *.JPG
which will create thumbnails from any files in the directory with the extension .JPG.
Point of Interest
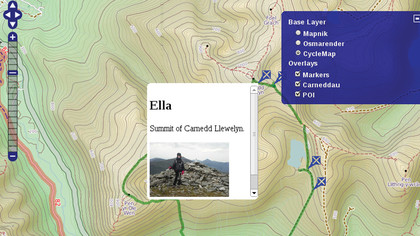
In order to show the position where each photo was taken on your map, you will create a Point of Interest (POI) corresponding to each one. Luckily, OpenLayers will load the data to display the POI from a file, so you don't have to add each POI manually.
The various data fields are shown below. Note that fields must be tab separated and records separated by a line feed.
lat lon title description icon iconSize conOffset.
URLs can be placed in the text field. We shall use this to display a thumbnail of the photo, plus a link to the full-sized image and some descriptive text. You need to extract the track points, which contain the photo data, from the GPX file you created by geotagging the photos with GPSPrune.
GPSPrune helpfully appends this data to the end of your GPX tracklog, so we can easily extract it using a text editor. Copy the XML data, taking care to include all the necessary tags, and paste it into the template below. Note the template contains a single track point which shows what the correct syntax should be. Save the data to a file, for example photos.gpx.