You don't need to spend thousands on lighting equipment to get professional looking portraits. In this tutorial we'll show you ways to use a basic home studio kit to shoot really creative portrait photography worthy of any photographer's portfolio!

Luckily, these are readily available and relatively inexpensive - and if you don't have one or aren't inclined to buy one, you can adapt the principles of this walkthough with an off-camera flashgun and a few basic accessories.
Article continues belowOnce you've got your gear, you'll soon discover several ways to control the quality of light. You can dramatically alter the look of a portrait using a few simple tools, accessories, tips and techniques and it's worth investing some time to experiment with different set-ups.
Accessorise your creative portrait shoot
There's a bunch of lighting accessories to control the intensity of light: softboxes, umbrellas, snoots, barn doors, beauty dishes and so on. Most starter kits come with a softbox and an umbrella.
These are great for diffusing the light, making it softer in quality, while snoots, barndoors and honeycombs are good for concentrating it.
You can also control the quality of light by positioning the lights strategically. It can seem daunting at first, but it isn't as complicated as it seems. Most lights come with a modelling light, a constant light that's on all the time but isn't strong enough to affect the exposure.
It's perfect for showing you how the light will fall on your subject, and making sure this is turned on should be your first port of call.
Move a light further away from your subject, and it will become more diffused and softer; move it closer and it'll become harder with stronger shadows.
The height is also important. Most of the time, you'll want the light to be above the subject, but it's worth experimenting and seeing how the light looks at different heights. Think about the angle too: light falling across and from above is generally more flattering.

How to practice shooting in your home photo studio
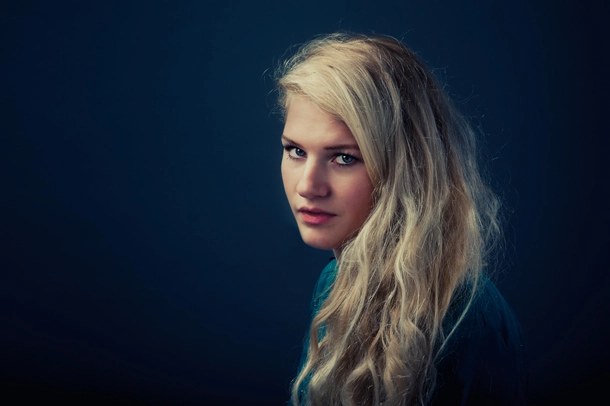
A classic lighting set-up, and one that's good to get started with, is often called Rembrandt lighting, named after the famous painter. When it's done correctly, this set-up will create a triangle of light on one side of the face in the cheek area, as often seen in Rembrandt's work.
Ideally, you should try and set the lights up in such a way that the shadow from the nose points towards the end of the subject's lip.
While the classic Rembrandt set-up is a good starting point, don't be lulled into using it all the time. Different subjects and situations may well be better suited to a different configuration of light and shade.
The great thing about digital cameras is that you can easily experiment and see the results instantly on an LCD screen. Gone are the days when you needed to be careful about wasting expensive film, and then wait for it to be developed to see how each different technique turned out for you.
In addition to lighting, you've also got to ensure that you are able to coax the best possible pose, expression and mood from your subject - along with a striking composition, of course.
