A lightweight and powerful distro designed for respins
Arch Linux is designed specifically for its users to customise it from the ground up. "Big wow", we hear you say, "so is everything else in this feature".
Of course that's true, but unlike projects such as UCK and SUSE Studio, Arch Linux experiences rolling updates to cover bugs and security issues, so you can spend more time considering which desktop or office suite you're going to use rather than what order each package and its associated dependencies need to be compiled.
This also means that Arch Linux doesn't have set releases, as each version is automatically upgraded to the next, so it's brilliantly stable, which is a very important consideration when you're choosing a base for your distro.

For this reason the Arch Linux base package is a great starting point if you want to make more fundamental decisions about your distro than you can with either Ubuntu Customisation Kit or SUSE Studio.
The initial kernel installation tends to be fairly uniform from system to system. You get the chance to set which base packages and drivers are installed, but the rest of the kernel setup is primarily concerned with setting time zone and locale, as well as installing the kernel and bootloader to a hard disk partition.
You are also expected to manually set up several configuration files but if this is your first build you can safely use the defaults in the Arch Linux wiki entry mentioned in the step-by-step guide.
Sign up for breaking news, reviews, opinion, top tech deals, and more.
The advantage of using the wiki entry is that you can always edit the files again later to better tailor Arch Linux to reflect your decisions. After rebooting from the kernel install (see below), there are a few steps to take before we can have the fun of installing a desktop, window manager, file manager, etc.
First, type adduser into the console screen and follow the instructions to add a user to log in with an associated password.
Then we need to upgrade the system by running the following:
pacman -Syu
You can probably guess from this that pacman is our package manager, but this stage should not take too long, as you only have a minimal environment at this stage.
Arch Linux uses sudo by default, but if you'd rather use su to gain root privileges, we can install it and add our user to the list of sudoers by using the following commands:
pacman -S sudo
visudo
just below root(ALL)=(ALL)ALL in the file that appears, add:
user(ALL)=(ALL)ALL
replacing user with the login name you chose during the configuration steps.
Setup Xorg
Now we can start setting up a GUI, and a vital component is the X.org. Type in the following to install the binary package:
sudo pacman -S xorg
If you have an Nvidia graphics card, use the following commands to install the driver, configure it then apply it to your installation:
sudo pacman -S nvidia
sudo nvidia-xconfig
cp /etc/skel/.xinitrc
Users of ATI graphics cards will find extensive information about setting things up from here, as each card tends to use a different driver or needs some additional configuration.
Once this step is complete use the latter two lines, replacing nvidia-xconfig with ati-xconfig to achieve the same result.
Install Gnome
You can install any desktop manager you care to mention on Arch Linux. To install Gnome and the various extra utilities, for example, run the following two lines:
pacman -S gnome
pacman -S gnome-extra
Each time you'll be asked if you want to install the lot or fine-tune what you install. Either way, simply follow the on-screen instructions to install a Gnome desktop.
Then you need to open /etc/rc.conf, look for the part that says DAEMONS and ensure it includes portmap, fam and hal somewhere within the brackets.
If you've installed GDM as your login manager (the package name is gdm), you can set it up by opening /etc/inittab and looking for these lines:
# Boot to console id:3:initdefault:
# Boot to X11
#id:5:initdefault:
and changing them to:
# Boot to console
#id:3:initdefault:
# Boot to X11 id:5:initdefault:
Then scroll to the bottom and uncomment the following line by removing the hash:
x:5:respawn:/usr/sbin/gdm -nodaemon
Save and exit. If you would like Gnome to run applications and scripts at startup, run the following command:
/.config/autostart/*
Install KDE
To install the basic KDE 4 desktop, do:
pacman -Sy kde
If you like the idea of more eye-candy and plugins for your KDE environment you can also install the following packages:
pacman -S kde-extragear
pacman -Sy qtcurve-gtk2 qtcurve-kde4
You can then set up KDM by installing the following packages:
pacman -Sy kdebase kdebase-workspace
then open /etc/inittab and alter the file in the same way as you would with Gnome, this time replacing gdm with kdm. Finally, to ensure KDE can run applications at startup, do:
/.kde/Autostart
Extend and improve
Now you have a base install of Arch Linux that automatically updates and upgrades, you can install any package you care to mention on your system.
Will you install OOo or choose AbiWord and Gnumeric instead? You could install Firefox with your own custom branding (as mentioned here).
Another bizarre possibility is to replace your entire desktop with Openbox and use Avant Window Navigator to launch applications.
If you would like to create a live CD version of your efforts, you could use larch, a script that will produce an ISO from a hard drive image of your install. It is available for download from here.
Arch Linux does take more effort than UCK and SUSE Studio, and you don't have complete control over how packages are managed, but the end result is a great deal more flexibility and control. This is the closest you can get to building your own distro without recompiling every component from source…
Step by step: Install an Arch Linux base
1. Main menu
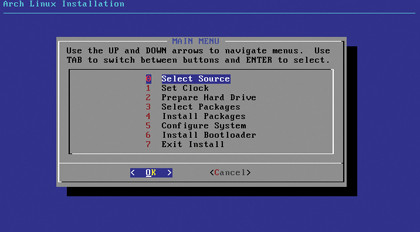
Welcome to the world of text-mode installers! Work your way sequentially from option 0 to 7 following the on-screen instructions to install the Arch kernel.
2. Locale
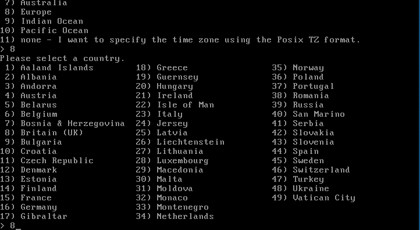
After defining your method of installation, just hit the correct numbers to select your country and define your time zone.
3. Partition
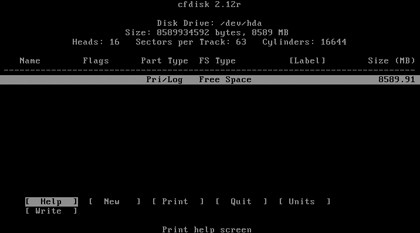
You can partition your drive using the built-in GUI tools included in the installer, or you could use cfdisk if you prefer to do things manually.
4. Packages
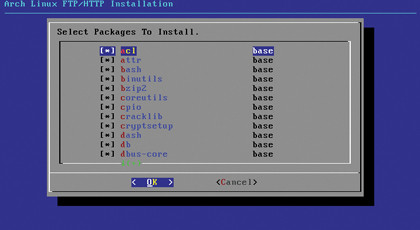
After selecting which categories of package you want, you can choose which individual packages you want. Press Space to select/ deselect and Enter to proceed.
5. Configure
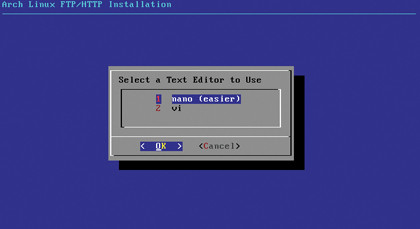
Select your text editor (we recommend Nano for newer users). You can get some example scripts from the Arch Linux wiki.
6. Boot
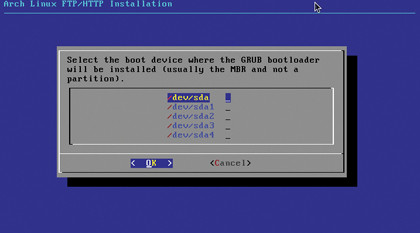
Select which partition you want Grub to boot when you're installing the bootloader. Once all is complete with the kernel installation, you can start on the desktop installation!