Make every decision from the ground to build your ultimate distro. For true Linux power users who want to define everything about their distro, from the choice of kernel drivers to whether the default text editor is Vi or Emacs, there is no more thorough way than to build your own kernel and every vital component of a Linux distro from scratch.
And this is exactly where Linux From Scratch comes in. LFS is an ebook created by the online community with this goal of helping inveterate tweakers to create their own unique distro with as little hassle as possible.
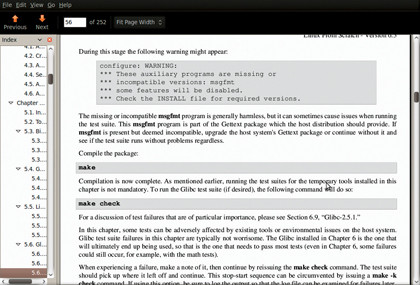
The ebook itself (available on this month's coverdisc) details everything you need to know, from building a cross-compiler to using chroot to set up the user environment. However, there are a few gotchas to watch out for when you are creating your own LFS system.

Naturally though, we've put the hard yards in so you don't have to. What follows is the LXF refinement of the ebook, and every one of these tips was bought in blood, sweat and sleepless nights.
Our tests followed LFS 6.3 as this was accompanied by a stable live CD with all the tools, packages and patches we needed, but if you would prefer the latest and greatest LFS available (6.5 as we went to press) then all the ebooks cover how to use your mainstream distro to build an LFS system.
Whichever way you go, these tips should help you to a hassle-free install!
Partitioning
Sign up for breaking news, reviews, opinion, top tech deals, and more.
When you start the initial cfdisk, a common error is to leave without saving your changes (people then wonder why mke2fs returns a '/dev/ hda1 does not exist' error), so double-check your partitions are available for use by your system before proceeding.
Source location
If you are using the LFS live CD, all your tools, sources and patches are stored in /lfs-sources. It is recommended that you copy these over to $LFS/sources once you've set up the 'lfs' user, as you will then be able to complete most of the stages correctly without needing root permissions.
If you experience any problems, double-check that your working directory is $LFS/sources and that the following command returns /mnt/lfs.
echo $LFS
Bootstrapping
The first time you run a build of GCC (using the 'bootstrap' option), we recommend that you go away and make a cup of tea and drink it. Then make another one – this particular stage takes a while, as you're compiling GCC three times, then comparing the third build to the second build.
The point of this is to check that the second and third builds are the same, which implies that you built GCC correctly the first time round. It is possible to skip bootstrapping, but we wouldn't recommend it, as you may encounter strange errors that are difficult to diagnose later.
New LFS users scattered over various forums often post wondering why GCC is taking so long to build and whether this is normal. Rest assured that it is, but your patience will be rewarded with a guarantee of far fewer problems in future.
On a related subject, it's very common for the build process after you've typed make to take longer than your short-term memory can remind you to type make install when it finishes. Make sure there is no way you could possibly forget to do this, or you will encounter errors later that will have you retracing your steps to troubleshoot the problem.
Kernel API headers
A common mistake is to expect the kernel API headers to be in their own package. This is not the case – you will need to extract the kernel source package (usually of the form linux-2.6.x.tar.bz2) and then move into the extracted directory to follow the steps in the ebook.
Shell quirks
It's important to be familiar with the subtleties of Bash before you embark on an LFS build. You'll be creating symlinks and writing multi-line commands (meaning that where you see \ this should be followed by pressing Enter). However, you may be caught out at this point by the ebook formatting.
Throughout the ebook a multi-line command will not contain a on each line (though you will see this in the terminal). However, if you see a in the ebook, make sure that you type this character in as well with your command. We missed this accidentally while typing this in:
gcc -dumpspecs | sed 's@^/lib/ld-linux.so.2@/tools&@g' \
> 'dirname $(gcc -print-libgcc-file-name)'/specs
and got a bizarre error stating that a file didn't exist. The second line should look like this in the terminal:
> > 'dirname $(gcc -print-libgcc-file-name)'/specs
No typos
If you're using a mainstream distro as a host system, we heartily recommend copying and pasting in shell commands. This is primarily because you are less likely to mistype anything, which may produce an error later on in the process (this usually requires a complete rebuild to solve).
For those of you who are determined to type everything in manually or are using the live CD, ensure you double-check every command before you execute it, and that you're using the correct type of bracket.
Typing in manually makes sense to start with, but eventually you'll encounter this particular beast of a command:
GCC_INCLUDEDIR='dirname $(gcc -print-libgcc-file-name)'/ include &&
find ${GCC_INCLUDEDIR}/* -maxdepth 0 -xtype d -exec rm -rvf '{}' \; &&
rm -vf 'grep -l "DO NOT EDIT THIS FILE" ${GCC_ INCLUDEDIR}/*' &&
unset GCC_INCLUDEDIR
We tried to type this all in one go and accidentally used standard brackets, which wiped out all everything we'd done up to that point! You can avoid this mistake by copying and pasting or by typing in each line individually where you see &&.
Avoid complacency
After the second pass of your GCC build, it becomes easy to configure and install a series of packages with the exact same steps:
./configure --prefix=/tools
make
make install
However, this doesn't last forever, and you'll quickly hit packages that need workarounds and patches for your LFS build to work properly. For this reason you should check with the ebook at frequent intervals to avoid strange behaviour later and possible errors later.
Move to root
You should be logged in as user 'lfs', but as soon as you're instructed you should change to root. You can do this by holding Alt and the right arrow key (you can return to the lfs user by doing the same with the left directional button).
Make sure you make a backup at this stage, as the ebook instructs. All it takes is a badly timed rm command in the wrong directory and your hours of hard work will be rendered pointless.
You can create an archive (and hence save a bit of space) by running the following command:
tar -cvf --file=$LFS/tools/lfs_build.tar $LFS/tools
then copy the tarball to external media or somewhere you can easily recover your system from. Even if you don't use the archive as a backup, you can use it to build other LFS systems more quickly in future.
Build your dream distro
Linux From Scratch opens a window of infinite possibilities, and its accompanying ebook, Beyond Linux from Scratch, has been created for the purpose of extending and customising a standard LFS-based distro.
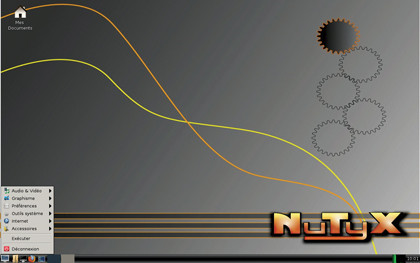
It discusses package management as well as how to build desktop environments and common packages. To see the scope of what Beyond Linux From Scratch can do, take a look at Nutyx. It's in French and there's no option to use English so far, but the distro has a full desktop and application suite, so it's completely usable.

They key thing with LFS is that you have complete control over which patches and updates are applied. Everything is compiled from source so it's lightning fast, and you always get the choice of whether to upgrade the kernel and which software does or doesn't run on your system.
It takes some serious time and dedication to achieve this kind of distro building nirvana and then maintain it, but the results are worth the effort.