Make music on iOS: create amazing tracks with your iPhone or iPad
The ultimate guide to the apps and hardware you need
Those who can read music like the back of their hand should give these entry-level apps a go, too: there is so often inspiration to be gained from going back to the start and looking at something in a different way.
The Yamaha TRN-i app is a perfect example - it throws the traditional methods of representing pitch out of the window, instead using a matrix of buttons that you tap to illuminate. Aside from looking devilishly pretty, it pulls the rug from under your established compositional practices, forcing you to go about things differently - and so you end up with things you would never have thought to try otherwise.
The Tenori-On hardware that the app is based on is prohibitively expensive, and this proves one of the key points of iOS as a platform: it brings innovative formats and the sound of high-quality gear from the sweaty clutches of the privileged few into the grasp of the everyday humble musician.
Apps like this require nothing more than a deft finger and some spare time, but most others benefit from hooking up a piece of extra kit. MIDI gear (most popularly keyboards) allows you to control software instruments. It's much easier to play tunes on a real piano than it is jabbing with one finger at an on-screen virtual 'board!
How can you connect your MIDI gear to your iOS device without any hitches? Well, iOS 4.2 was the big update for musicians: it brought CoreMIDI support into the fold, allowing your device to communicate with other MIDI devices over either USB or Wi-Fi connections.
Apple's Camera Connection Kit enables some MIDI hardware to be hooked up almost directly, but only if the unit doesn't require too much power. If your kit is causing a warning message to flash up on your iPhone, iPod touch or iPad, introduce a powered USB hub into the chain - this will do the trick nicely.
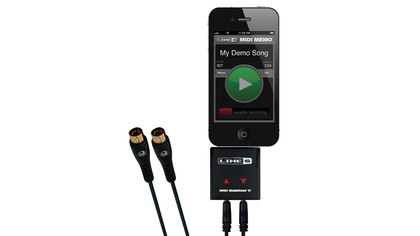
If you've got a piece of gear that runs on traditional 5-pin MIDI rather than over USB, you'll be able to connect over dedicated interfaces such as IK Multimedia's iRig MIDI and Line 6's MIDI Mobilizer. These little black boxes plug into your dock connector one end and your unit's MIDI port the other, and that's it - setup complete!
Sign up for breaking news, reviews, opinion, top tech deals, and more.
If you've already got a sweet studio setup that you're inspired to slot your iOS device into, or you know that you want to work with not just MIDI instruments but also guitars, microphones and more, you should buy an all-in-one interface solution.
We mentioned the Alesis iO Dock as a piece of key kit, and for our money it really is the best iOS interface out there. It's got all the ports a serious musician needs, plus preamps and phantom power for getting condenser microphones involved in the party. Just slot your iPad into the dock and hook up any piece of gear as and when you please, and you're ready to go.
On record

You don't want people to grit their teeth every time they hear your vocals, and a key part of getting this right is capturing the audio using a decent microphone.
Hold up a sec, though: it helps to know a little about mics before you hit that big red Record button. Broadly speaking, there are two varieties: condenser and dynamic. Condenser microphones are more sensitive to sound, making them perfect for capturing the expressively wide range of volumes heard in a vocal or instrument performance. These mics require phantom power to work, as well as a preamp, which increases the gain level.
Dynamic microphones are more robust and not quite so sensitive, so they're great in a noisy environment - such as on stage or when recording drums - where you don't want the mic to go into shock every time it hears a loud noise.