How touchscreens are changing computing
From the iPad to Windows 8, touchscreen tech is key
Sign up for breaking news, reviews, opinion, top tech deals, and more.
You are now subscribed
Your newsletter sign-up was successful
Though it might seem like we've been using mice and keyboards to control our computers forever, the advent of touchscreen phones and tablets has shown us a third way to take control - one that requires no tools but our fingers.
Touchscreen technologies have been supported by Windows for years, but only since the release of Windows 7 have they moved firmly into the mainstream.
These days you'll find a range of products, from monitors, tablets and laptops to complete all–in-one PCs, all offering a multi-touch interface to complement your traditional mouse and keyboard, and the number is growing all the time.
Improvements in touchscreen technology mean that the stuff of science fiction is now reality. If you think touchscreens are simply about tapping icons on the screen then you're missing out on a whole lot more.
In this feature we'll explore how today's touchscreens work, supporting multi-touch gestures like taps, flicks and swipes to deliver a feature-rich environment in which to work. You'll find out how touchscreens have developed over the 50 years since their invention, and discover how to take full advantage of your touchscreen PC or monitor using technologies and features already built into Windows 7 itself.
You'll find out how simple touch is to set up in Windows, then learn how to use it and tweak its settings to work perfectly in tandem with your needs, either as an extension of the familiar point-and-click approach of the mouse, or in some cases in place of it.
We'll then look into how Windows 8 will take things one step further. Not only does it provide a version of Windows optimised for tablets, phones, laptops and desktops, it's also designed to put the multi-touch interface front and centre. We'll reveal five great features coming in Windows 8 that use touchscreen technology, and reassure you that the familiar desktop environment you've come to love won't be disappearing just yet.
Sign up for breaking news, reviews, opinion, top tech deals, and more.
We'll also take a peek into the future to see where this exciting technology is going next. The simple fact is that the days of the mouse and keyboard as primary interface between you and your computer are coming to an end. You'll learn about the exciting new touchscreens that will soon make with your PC even faster and more natural.
Touchscreens are here, and they're not going away. Spend a few minutes with a touchscreen display and you won't want to go back. Read on to discover not just what they have to offer, but also how simple they are to use, and prepare to embrace the future.
How it works
There are many forms of touch technology, and Windows 7 supports different types. The first touchscreen appeared in 1965, and while we think of them as a relatively recent development, it's easy to forget we've been using them in devices like cash machines for nearly 30 years.
More recently, we've seen two main types of touchscreen technology. The older resistive type uses a screen comprising two separate layers with a small gap between them. Pressing down on the top layer makes it touch the bottom layer, and the connection is recorded as a tap. The biggest drawback with resistive screens is that they're far less accurate than other technologies, and most don't support multi-touch.
Capacitive touchscreens use glass displays insulated with a conductive layer. As our fingers are also conductive, touching the screen produces a small charge that produces a disruption in the screen's electrostatic field, which is recorded. Capacitive technologies are more accurate than resistive, and support multi-touch gestures.
Despite their obvious advantage, capacitive screens have their disadvantages too: they rely on the charge in your finger, so they won't work with gloves.
These days, a new technology based on old standards is gaining ground. Optical touchscreens are developed by a company called NextWindow. These cost less to manufacture and produce brilliant results, making them increasingly popular.
Five of the best Windows devices
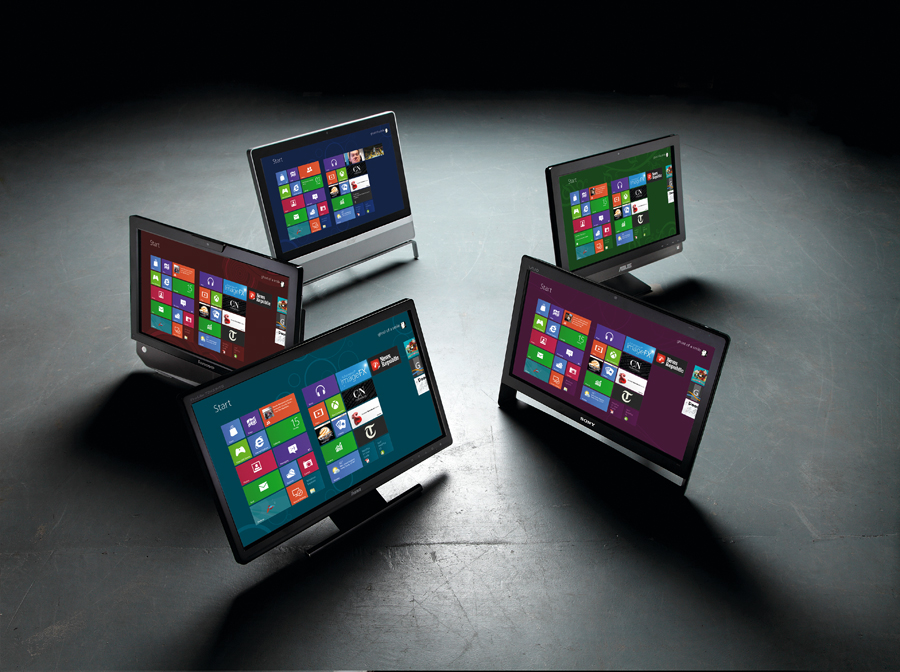
1. Acer All In One Z3 series
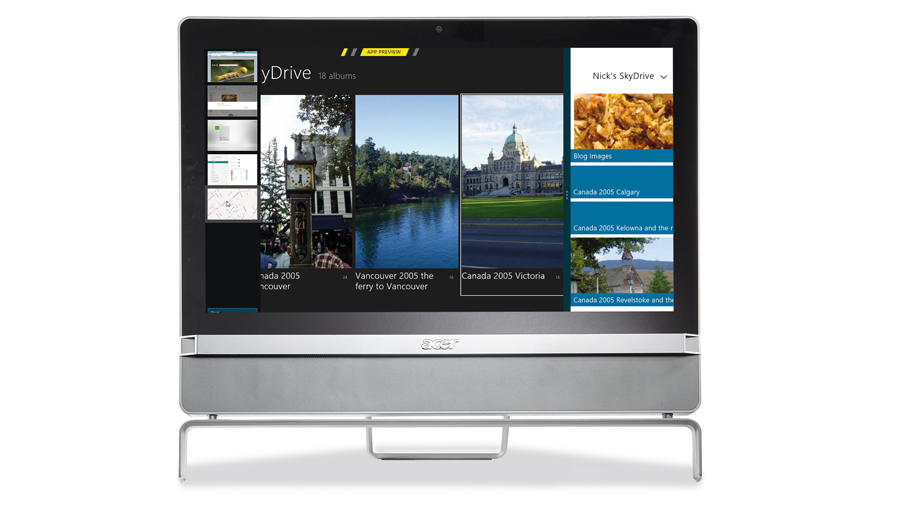
Acer's all-in-one touchscreen PC is designed with a modern, minimalist setting in mind, and the PC's components are housed in the monitor itself. Despite this, you get an AMD quad-core processor, 3GB RAM, a 1TB hard drive, DVD-RW drive, wireless keyboard and mouse, and - of course - the 21.5-inch 1080p HD multi-touch screen.
Not only does the screen support all of Windows 7's touch capabilities, it also includes Acer's own suite of TouchPortal apps. These include tools for photo and video editing, along with a music player and web browser. Despite its small footprint there's plenty of connectivity - it has six USB 2.0 ports, an eSATA port and a memory card reader, plus built-in wireless LAN and a digital TV tuner.
2. Lenovo IdeaCentre B320
The IdeaCentre B320 sports an optical multi-touch screen and comes with optional software to make the most of its capabilities. The 21.5-inch display is full HD, and the PC itself is pretty impressive, powered by an Intel Core i3 processor. The entry level model comes with 4GB RAM and 500GB of storage, but this is a model designed to be upgraded.
Despite its slim all-in-one design, you'll find a sliding cover that gives you easy access to its RAM and hard drive, plus two PCI-E slots. If you opt for a pricier model, you can also benefit from USB 3.0, AMD Radeon 6540HD graphics, 8GB RAM and even an optional OneKey button that allows you to switch to a dedicated TV mode, complete with its own built-in HD recording capabilities.
3. Asus EeeTop PC ET2010AGT
If slim is your thing then the EeeTop won't disappoint, at just 54.3mm deep. It's easy on the power consumption too - just 90 watts in total. The 20-inch widescreen display isn't capable of full HD, sadly, but can still deliver a decent 1,600x900 resolution, and is backed up by powerful ATI Radeon HD 5470 graphics.
The standard ASUS Eee Docking software includes a dedicated app - Fun Touch - to make the most of its multi-touch capabilities. The dual-core Athlon processor is backed up by 2GB RAM (expandable to 8GB), 500GB HD, a DVD rewriter, a webcam and wireless LAN. There's also a HDMI port, which enables you to plug in an entertainment device and use the monitor for watching movies or playing games while your PC gets on with other tasks in the background.
4. Sony Vaio VPCJ23S1E
If you're looking for a solid all-in-one Windows 7 PC, Sony's Vaio J-series won't disappoint. Powered by an Intel Core i3 processor and packing 4GB RAM (expandable to 8GB), it comes with a 750GB hard drive, Blu-ray player/multi-DVD rewriter, and plenty of connectivity options: Wi-Fi, Bluetooth, four USB ports (two of which are USB 3.0), and a memory card reader.
The key component, of course, is the 21.5-inch widescreen display. Like all of the others on test here, it's full HD and offers multi-touch support. It's optimised for use with Windows 7, but is also compatible with Windows 8. There's a nifty Quick Web Access button too, allowing you to boot up the PC in 25 seconds for a quick spot of web browsing.
5. Iiyama ProLite T2451MTS
The technology's in the display, so you don't have to ditch your PC to take advantage of touchscreen technology - just invest in a dedicated monitor. This ProLite 24-inch widescreen display offers a full HD resolution, and uses the latest optical touchscreen technology, with support for the multi-touch functions found in Windows 7 and Windows 8.
All the connectivity you need is supplied: DVI-D, HDMI (x2) and VGA covering desktops and laptops, plus the obligatory USB port for hooking the monitor up to your PC and enabling the multi-touch functions. It's an incredibly efficient option too, thanks to the LED-backlit display. Consuming just 0.5 watts in standby and less than 25 watts when running, it won't super-size your electricity bill.
How to set up touch in Windows 7
Have you just switched on your new multi-touch PC? Then you're pretty much good to go - Windows 7 will have already installed all the necessary drivers, and you can get on with exploring its features with the help of the guides here. If you've bought a multi-touch monitor you'll find it connects to your PC via two leads: the standard monitor connection, and USB to enable its multi-touch capabilities. Install any drivers that came with the monitor after connecting it up, and you should be ready to go.
Using your touchscreen
The most obvious use of a touchscreen is tapping on the screen with your finger to indicate a mouse click or selection - you should see a small white dot appear to indicate where your finger has landed on the screen.
On its own this would be pretty limited, but Windows 7 supports a much wider range of gestures. It can take a little time to grasp the basics of using your new touchscreen interface, but there's plenty of help on hand.
Flicks come with their own practice tool - right-click the Flicks icon in the Notification area and choose 'Flicks training' to access it. You'll also find a number of useful free tools and games from Microsoft that can help you master your new touchscreen - if you've bought an all-in-one PC, they should already be installed; otherwise,you can download them here.
Once installed, you'll find them all under 'Start > All Programs > Microsoft Touch Pack for Windows 7'.
Step-by-step: Configure your multi-touch settings
1. Calibrate touchscreen
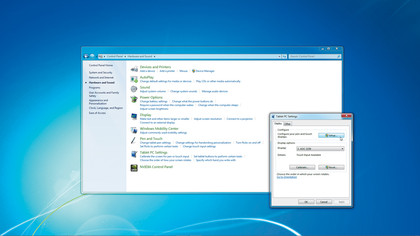
Click 'Start' and select 'Control Panel'. Select 'Hardware and sound' and then 'Calibrate the screen for pen or touch input' under 'Tablet PC settings'. Click the 'Setup' button, then touch to verify which screen you're using. Once complete, click 'Calibrate' and follow the crosshairs to configure it. Then click 'OK'.
2. Configure touch
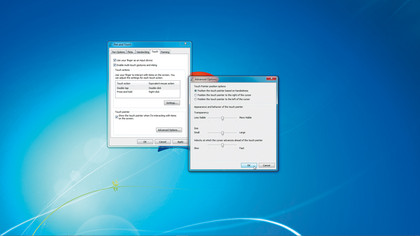
Click 'Change touch input settings' under 'Pen and touch'. From the Touch tab, make sure both top boxes are ticked, then click 'Settings' to change the speed at which you need to tap for it to register a double-tap. If you'd like a more visual pointer, tick 'Show the touch pointer' and then click 'Advanced options'.
3. Tweak panning settings
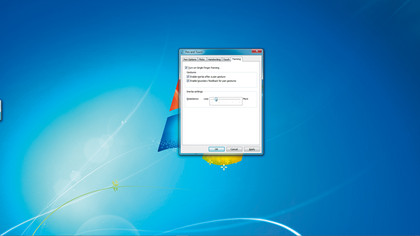
Use the Panning tab to configure how you scroll around large documents using your finger. Untick 'Turn on single finger panning' if you want to restrict panning to two-finger swipes, and untick 'Enable inertia after a pan gesture' to prevent the movement from continuing after you've removed your finger.
4. Custom flicks
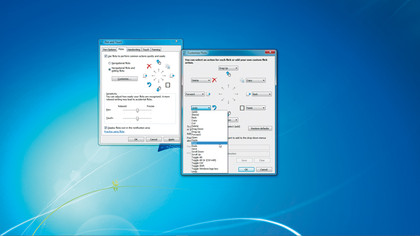
Switch to the Flicks tab. Selecting 'Navigational flicks and editing flicks' enables four diagonal flicks for deleting, copying, pasting and undoing. Click the 'Customize' button and you can alter the behaviour of any of these flicks - choose 'Add' to specify your own keyboard shortcut. Click 'OK' twice when done.