How to make awesome pixel art
Think of retro games and you'll probably think of the pixellated look of titles released on consoles such as the NES.
Games such as Bomberman and Kid Icarus worked within the limitations of 80s technology, yet offered hours of fun and some iconic looks.
The style faded into obscurity with the development of more powerful game consoles and 3D graphics, but has seen a recent renaissance in indie games such as Savant: Ascent.
The art is still drawn pixel-by-pixel using a limited palette, but is much smoother thanks to careful shading and muted hues not available to 1980s game developers.
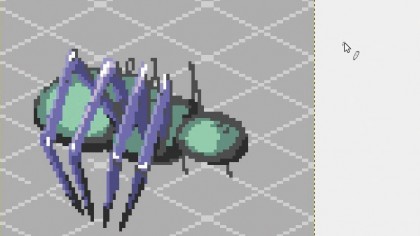
One of the most popular uses of pixel art is in role-playing games based on an isometric grid. We're going to create a character (or sprite) for use in such a game.
1. Prepare your canvas
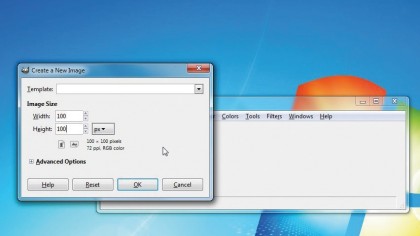
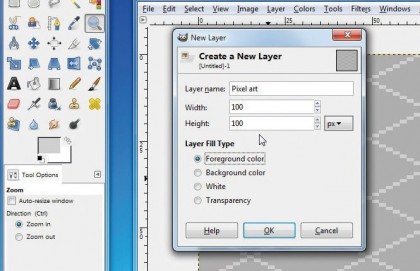
Start by creating a new image in GIMP, which is a free image editing application. A canvas size of 100x100 pixels is plenty - much larger pieces of pixel art are possible, and look very impressive, but take weeks of work to complete.
Now select the Pencil tool. This, Fill and Zoom are the only tools we'll be using, but first we need to alter some settings so we can draw individual pixels.
2. Sharpen your pencil
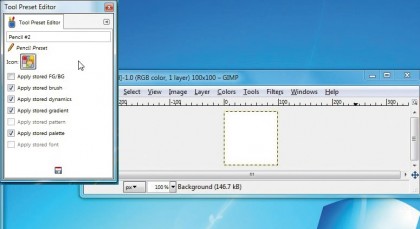
With the pencil selected, click Brush Type and select '1 pixel'. Change the size to 1 and turn dynamics off. Deselect Apply Jitter and Smooth Stroke.
You can save it as a preset by clicking the blue floppy disk icon at the bottom let of the toolbox. Click on New Tool Preset, give it a handy name like 'Pixel art' then the floppy disk icon to save it.
3. Zoom in
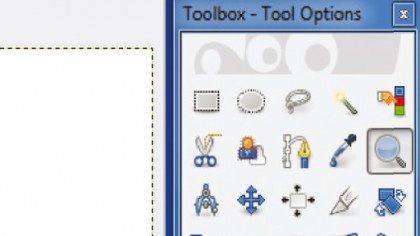
Use the Zoom tool to take a closer look at your image (about 550% should be fine, although it will depend on your monitor's resolution).
You want to be able to see and manipulate each pixel easily. Make sure you zoom out periodically while you're working to check that your art looks okay when viewed at actual size.
4. Paint it grey
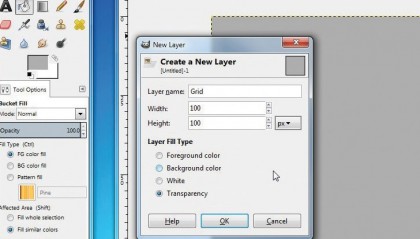
We need to make careful use of shadows and highlights to ensure our pixel art character looks three-dimensional. Select the Bucket Fill tool and make the whole image a medium grey colour.
This neutral background shade will make it easier to judge how bright to make highlights, and how dark to make shadows.
5. Create a guide
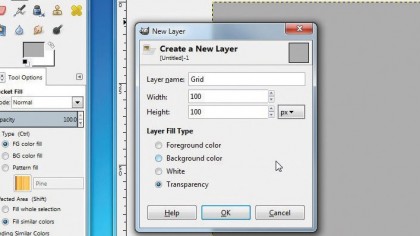
Now we're going to create an isometric grid as a guide to making pixel art. Create a new layer and call it 'Grid'. Select the pencil tool and choose a different shade of grey.
Now click the top left pixel of your image, then hold [Shift] and move your mouse pointer to the right-hand side. When the co-ordinates at the bottom left read '99 49', click to draw a line.
6. Line it up
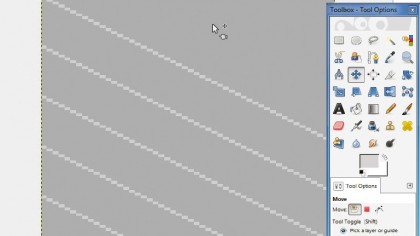
Click Ctrl + C to copy the line and Ctrl + V to paste it, then select the Move tool and move the pasted line a little below the original.
Click on the background to deselect the line, then copy and paste both lines. Repeat the process until the image is filled with evenly spaced diagonal lines.
7. Build a grid
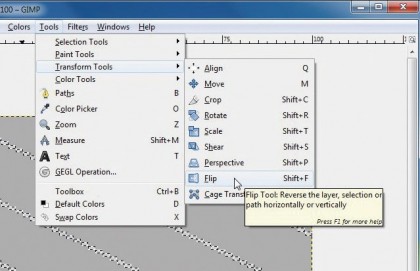
Now copy and paste all the diagonal lines, but don't deselect them. Instead, click Tools > Transform tools > Flip. Click once anywhere on your image to flip the copied lines.
This will give you an isometric grid. Because it's on its own layer, you'll be able to delete it easily when you've finished.
8. Pick a subject
Create a new layer and call it 'Pixel art'. The next step is largely up to you, but we're going to draw a spider-like creature, which could be an enemy in a computer game.
Make sure you use the grid as a guide to help you get the right perspective, and don't use any tools other than your customised Pencil and Fill.
9. Sketch it out
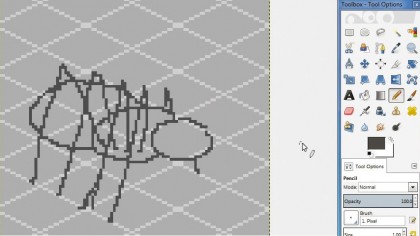
Take a leaf out of the classic artist sketchbook and start simple. Rather than trying to get every pixel perfect first time, make a rough sketch of your idea. It's very easy to edit and refine as you go along.
Just make sure you use the isometric grid as a guide, and always bear in mind that your character is a three-dimensional object.
10. Refine it
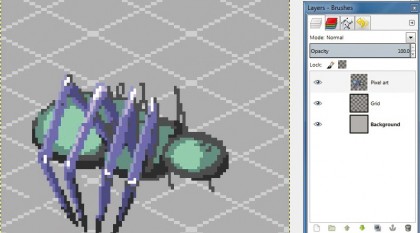
Once you've got a rough sketch, try filling each section with a different colour to make them easier to identify. You can then decide where your light source is and begin adding shades and highlights accordingly.
Feel free to tweak; here we've decided to make our spider's legs tilt inward to make it look more alien.
11. Add texture
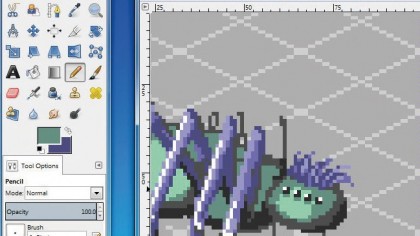
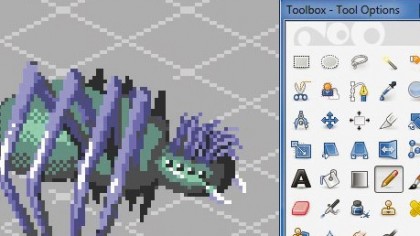
You should try to create the impression of different textures rather than making your character uniformly smooth. Here, we've decided to give our spider some fur on its head, using 'strokes' of differing shades to represent sections of hair.
Zoom out regularly to check that your texture effects work when viewed at 100%.
12. Try dithering
Early videogames required pixel art that used as few colours as possible. One way to get around these limitations was to use dithering, a chequerboard of lighter and darker pixels that blends together to look like a single, mid-toned colour. Give it a try!
You can create an interesting texture if the two colours are quite different.
13. Prepare to export
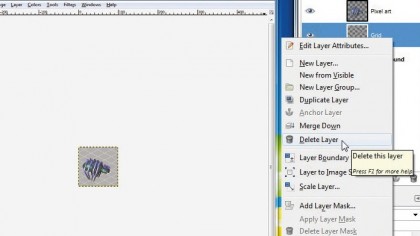
Once you're happy, click on the Grid and Background layers in the right-hand palette and delete them. Now click File > Export As.
We want to keep our transparent background, which means saving it in either PNG or GIF format. Don't save it as a JPG – this format doesn't support transparency and the compression will ruin your intricate art.
14. Keep it transparent
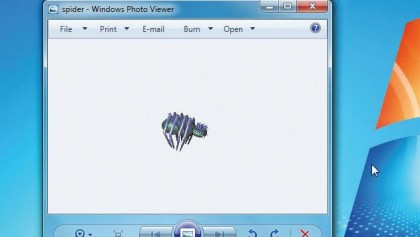
Select a file type from the drop-down list and give it a name. At the next dialog box, uncheck Save Background Colour and 'Save colour values from transparent pixels', then click Export.
Your finished pixel art will now be saved with a transparent background, ready for use in a game, as an icon on your desktop, or on a web page.
15. Convert to ICO format
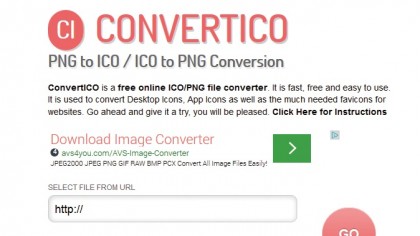
One of the easiest ways to use your pixel art is to convert it into an ICO file and use it to replace one of the program icons on your desktop.
You can do this using a website called ConvertICO. Simply browse for the PNG or GIF file on your computer, then click the 'Go' button and it will be converted instantly.
16. Use on the desktop
You'll see a preview of your icon on the right-hand side of the page. Click the large arrow and download the icon to a convenient place on your computer.
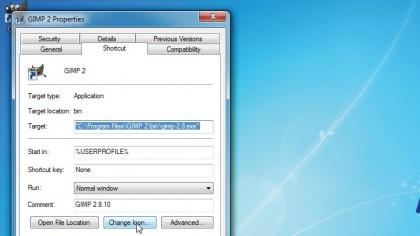
Now go to your Windows desktop, right-click an icon and select Properties. Click Change Icon, browse to your newly made ICO file and click OK. Click Apply, and enjoy!
Sign up for breaking news, reviews, opinion, top tech deals, and more.
You are now subscribed
Your newsletter sign-up was successful