Photoshop Curves Tool: 6 techniques every photographer must know

Sign up for breaking news, reviews, opinion, top tech deals, and more.
You are now subscribed
Your newsletter sign-up was successful
Join the club
Get full access to premium articles, exclusive features and a growing list of member rewards.
The Photoshop Curves tool is one of the most powerful commands you have in the digital darkroom. But it can be intimidating to some. Here are 6 Photoshop Curves techniques every photographer should incorporate into their workflow.

The Photoshop Curves command is your most powerful tool for adjusting tones to brighten, darken, add contrast and shift colours, yet many users choose to avoid it.
The problem is, despite being the most effective, it's also one of the most difficult commands to get to grips with. This may be why Adobe has never included it in the more beginner-friendly Photoshop Elements.
Article continues belowAs Elements gets better and better with every new release, the lack of a full Curves command remains one of the few big reasons not to plump for the more wallet-friendly version of Photoshop.
Beginners need not fear. After you've spent a little time experimenting, Curves quickly becomes the go-to tool for many tonal tweaks. It's often the first edit you make on an image.
And as well as being one of the most powerful tools Photoshop has on offer, it's one of the most versatile.
Whether you want to lighten a dark scene, boost contrast and colour, check for clipped pixels or make a variety of colour shifts, Curves is the tool for the job.
Sign up for breaking news, reviews, opinion, top tech deals, and more.
So, read on for six top tips to help you master the best tonal tool Photoshop has to offer.
Essential Photoshop Curves Techniques: 01 Curves Adjustment Layer

Curves is best applied as an Adjustment Layer. Go to the Layers Panel, click the Create Adjustment Layer icon at the bottom and choose Curves.
Now your original image remains untouched.
Whatever settings you apply are editable by double-clicking the layer thumbnail, and you can take advantage of all the options working with layers allows, such as Masks, Blend Modes and Opacity.
READ MORE
Blend Modes: the 10 best blends for photographers (and how to use them)
Photoshop Layers Demystified: a beginner's guide to smarter photo editing
Adobe Lightroom: what every photographer must know about the 'alternative Photoshop'
Essential Photoshop Curves Techniques: 02 The Curve line

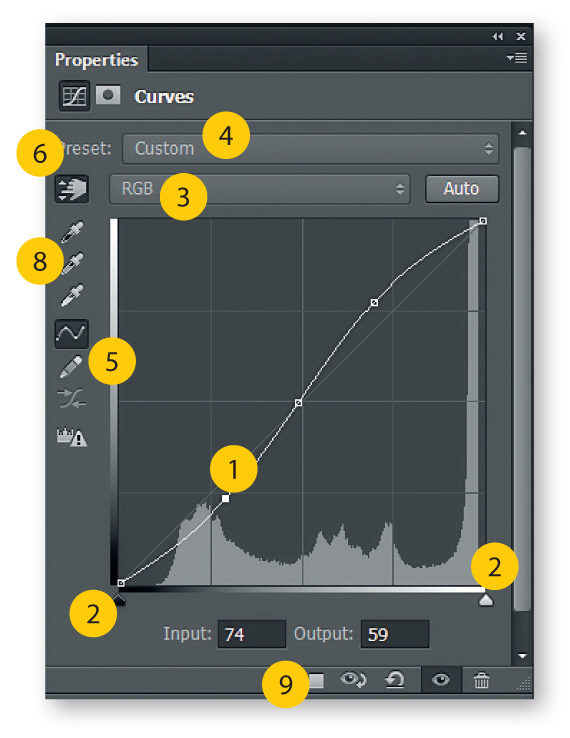
You can drag anchor points up or down on the Curve line to lighten or darken tones.
Think of the X-axis as a scale from dark tones on the left to light tones on the right.
It's important where you place a point, as this determines which part of the tonal range you wish to alter.
Points towards the left will target shadow tones, and towards the right will adjust highlight tones.
READ MORE
Best Photo Editing Software? 6 budget alternatives to Photoshop tested and rated
Crop photos the right way: classic mistakes and how to avoid them
Photoshop Effects: using Layers to rescue exposure
Essential Photoshop Curves Techniques: 03 Set white and black points

Hold Alt and drag inwards on the white and back point sliders (at the bottom right and left of the graph) for a greyscale view that shows any clipped pixels in your shot.
This is of great help when setting pure black and pure white tones.
Most images will benefit from containing a full range of tones, so drag the white and black points inwards while holding Alt until the point where pixels begin to appear.
READ MORE
Exposure Problems: how to make selective adjustments with older software
What is HDR? Everything you ever wanted to know about high dynamic range images
9 creative photo ideas to try in March
Essential Photoshop Curves Techniques: 04 The amazing S-curve

Made by dragging one point upwards in the highlights and a second down in the shadows (and sometimes with a third to anchor the midtones) the S-shaped curve is a classic tonal tweak for boosting contrast and colour saturation.
The more pronounced the S-shape, the more the image will pop.
If you want to leave colour saturation unchanged, change the Blend Mode of the Curves Adjustment layer to Luminosity.
READ MORE
Famous Photographers: 100 things we wish we knew starting out
Photoshop Ruler Tool: how to straighten horizons and draw straight lines
Creative Photography: 10 tips for getting out of your comfort zone
 Become a TechRadar Insider


