How to show hidden files in macOS
Discover other files on your computer

Sign up for breaking news, reviews, opinion, top tech deals, and more.
You are now subscribed
Your newsletter sign-up was successful
Removing certain files on your MacBook or Mac desktop could feasibly brick your device. It’s because of this Apple hides these files, making them harder to find and delete. And yet, it’s possible to access these files, if necessary.
Hidden files on macOS Big Sur take many forms. These include libraries and files, backend directories, and more. Altogether, these files efficiently run your system. Apple provides various ways to unhide hidden files on your computer. This includes viewing them through 'Finder' or using Mac’s 'Terminal' app.
The average Mac user shouldn't need to delete or modify system files. Keep this in mind before going further. Nonetheless, these directions are useful for developers and anyone receiving tech support from Apple.

1. Using Finder to view hidden files
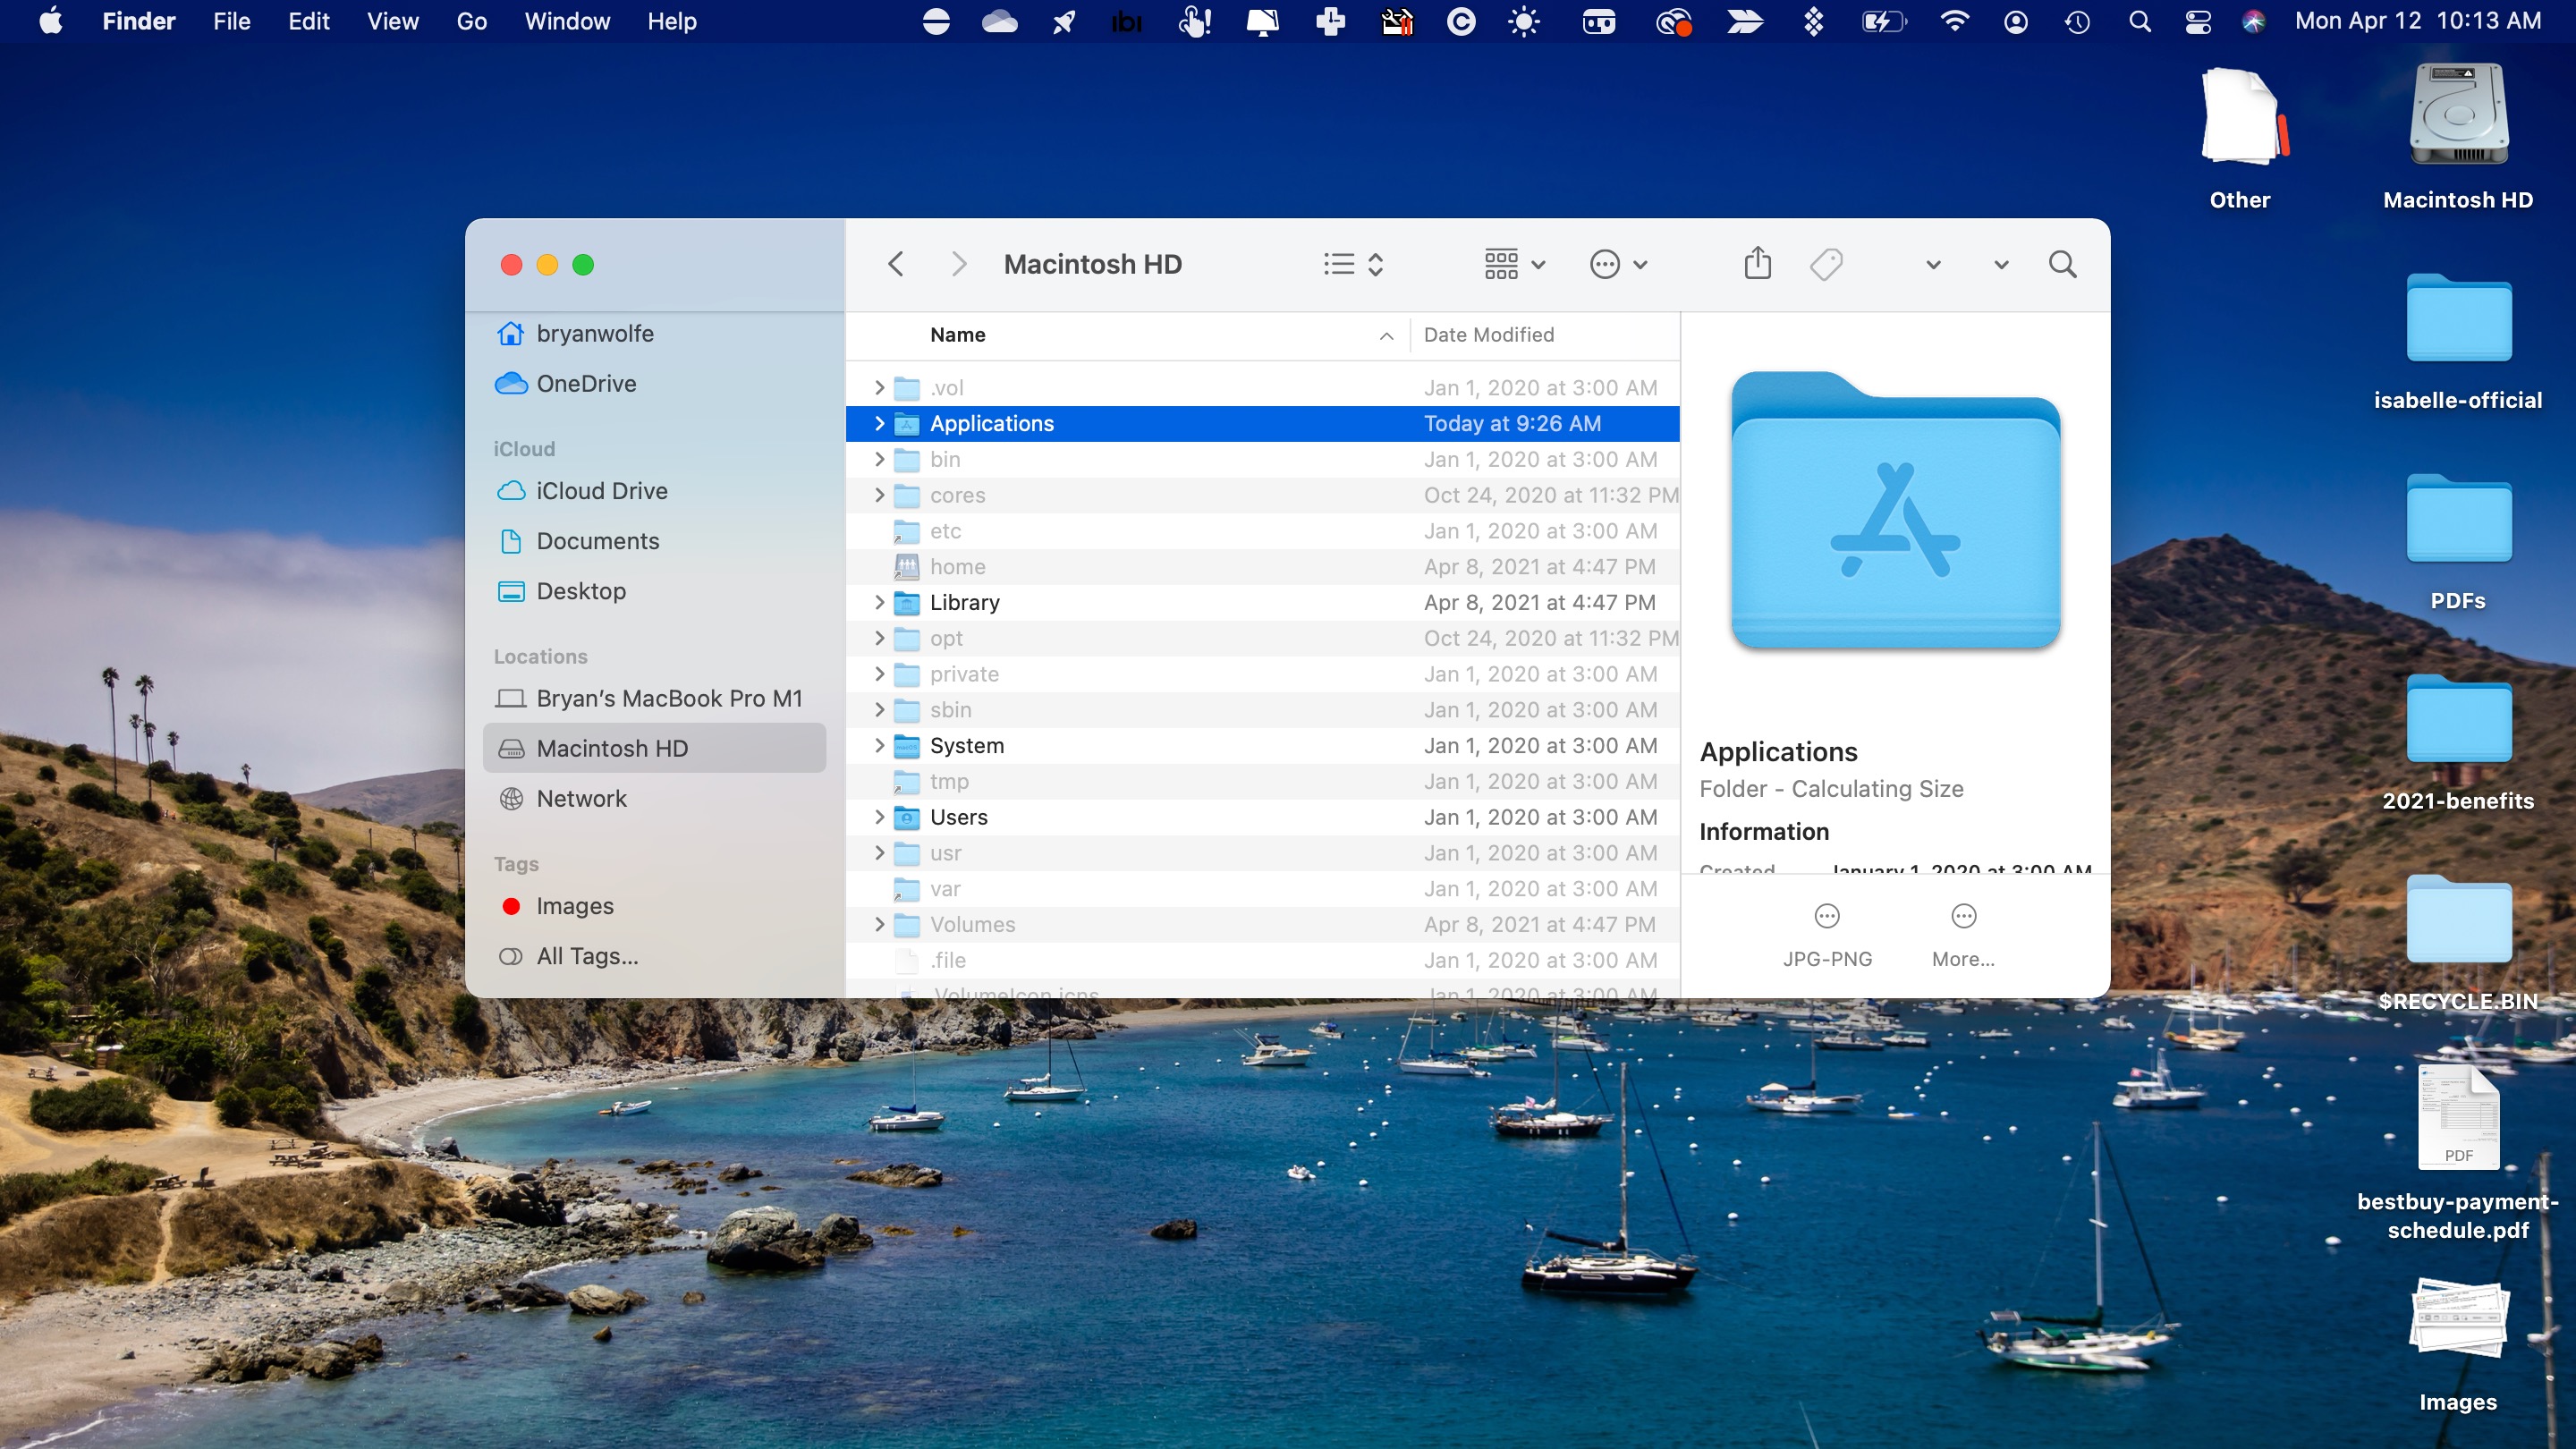
Using 'Finder' is the easiest way to uncover hidden files. To get started, click the 'Finder' app on the Mac dock. Choose the 'Macintosh HD folder' under Locations on the left side of the 'Finder' window. Next, press 'Command' + 'Shift' + '.' (the period key) at the same time. The grayed-out files are those typically hidden.
You can perform the same steps in the 'Documents', 'Applications', and 'Desktop' folders. To hide the files once again, press 'Command' + 'Shift' + '.' (the period key) at the same time.

Viewing the hidden ~/Library folder
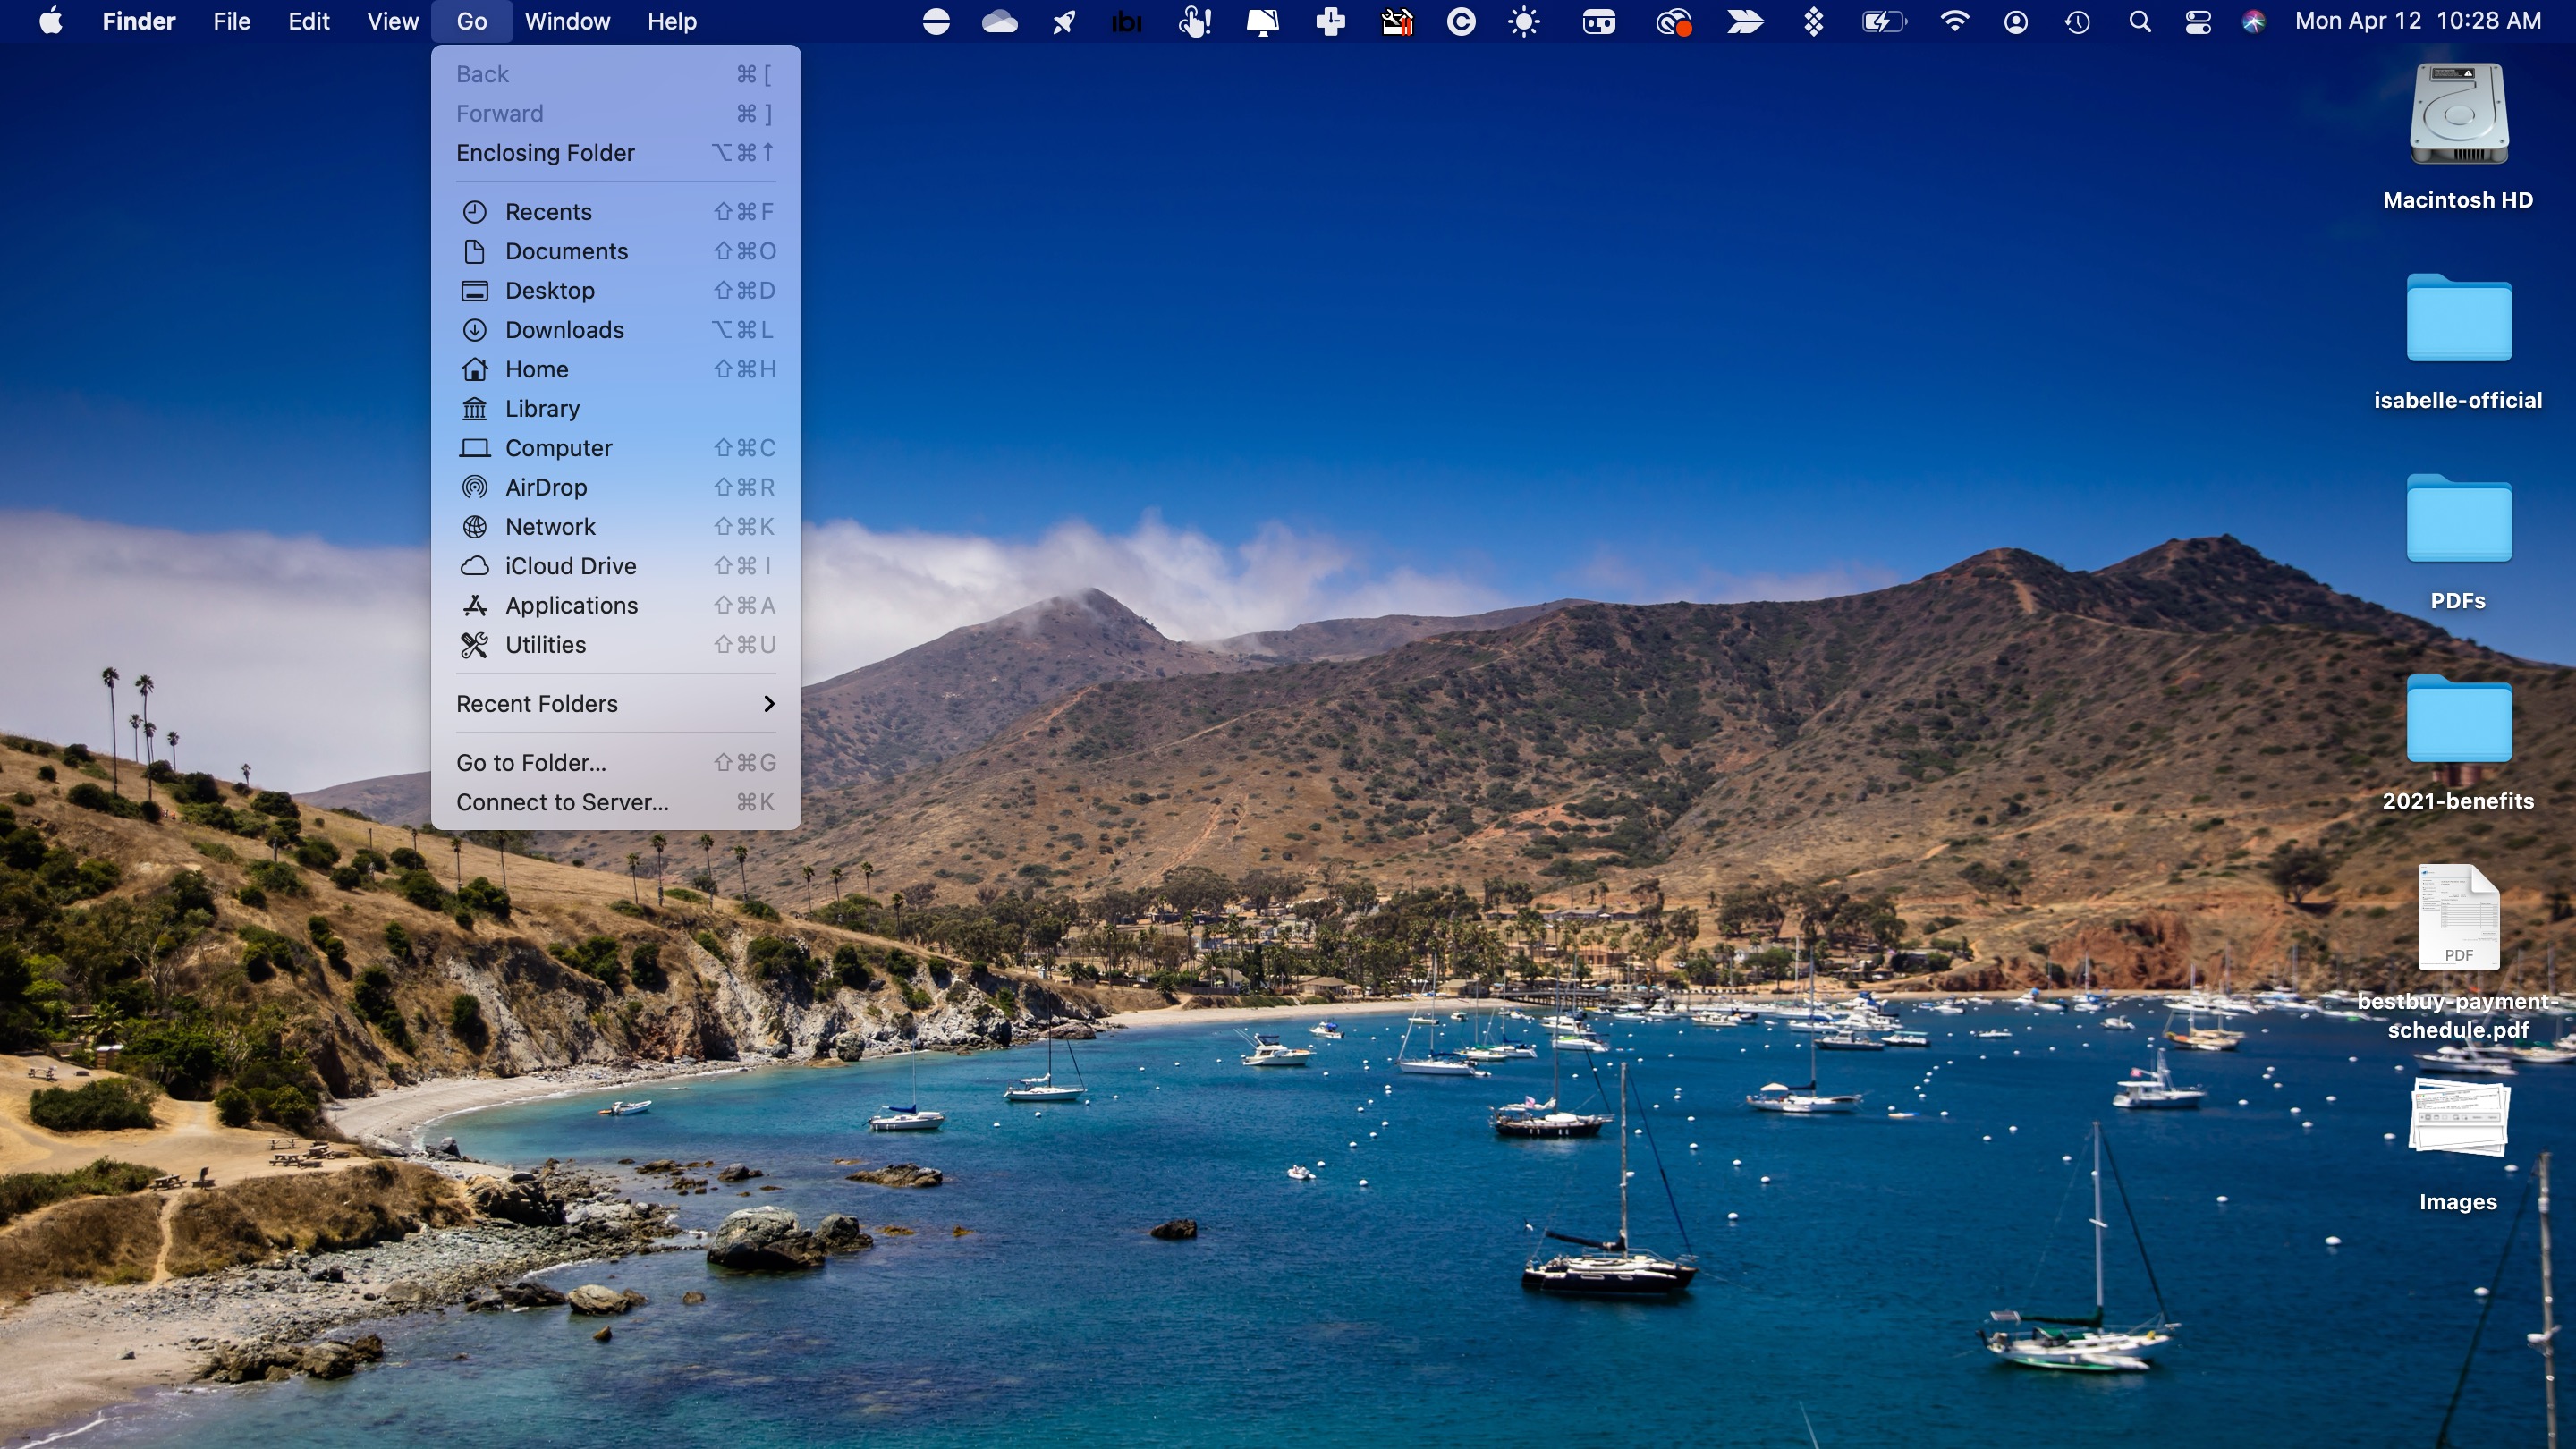
The hidden '~/Library' folder is located in the 'Finder's' top menu. It's where key operating system files are stored on a Mac. To view these, go into 'Finder' and click on 'Go' on the menu bar. Next, hold down the 'Option' key on your keyboard. You'll now see the hidden '~/Library' listed as 'Library' on the' Go' menu. Click on it to see the content.
Just unclick to 'Option' key to hide the '~/Library' folder again.
Sign up for breaking news, reviews, opinion, top tech deals, and more.

2. Using Terminal to view hidden files
The 'Terminal' app allows you to get text-based access to hidden files. Programmers and developers alike might want to follow these steps.
To use 'Terminal', click 'Finder' on the dock. Then choose 'Go' from the menu bar, then 'Utilities'. In the 'Utilities' folder, select 'Terminal'.
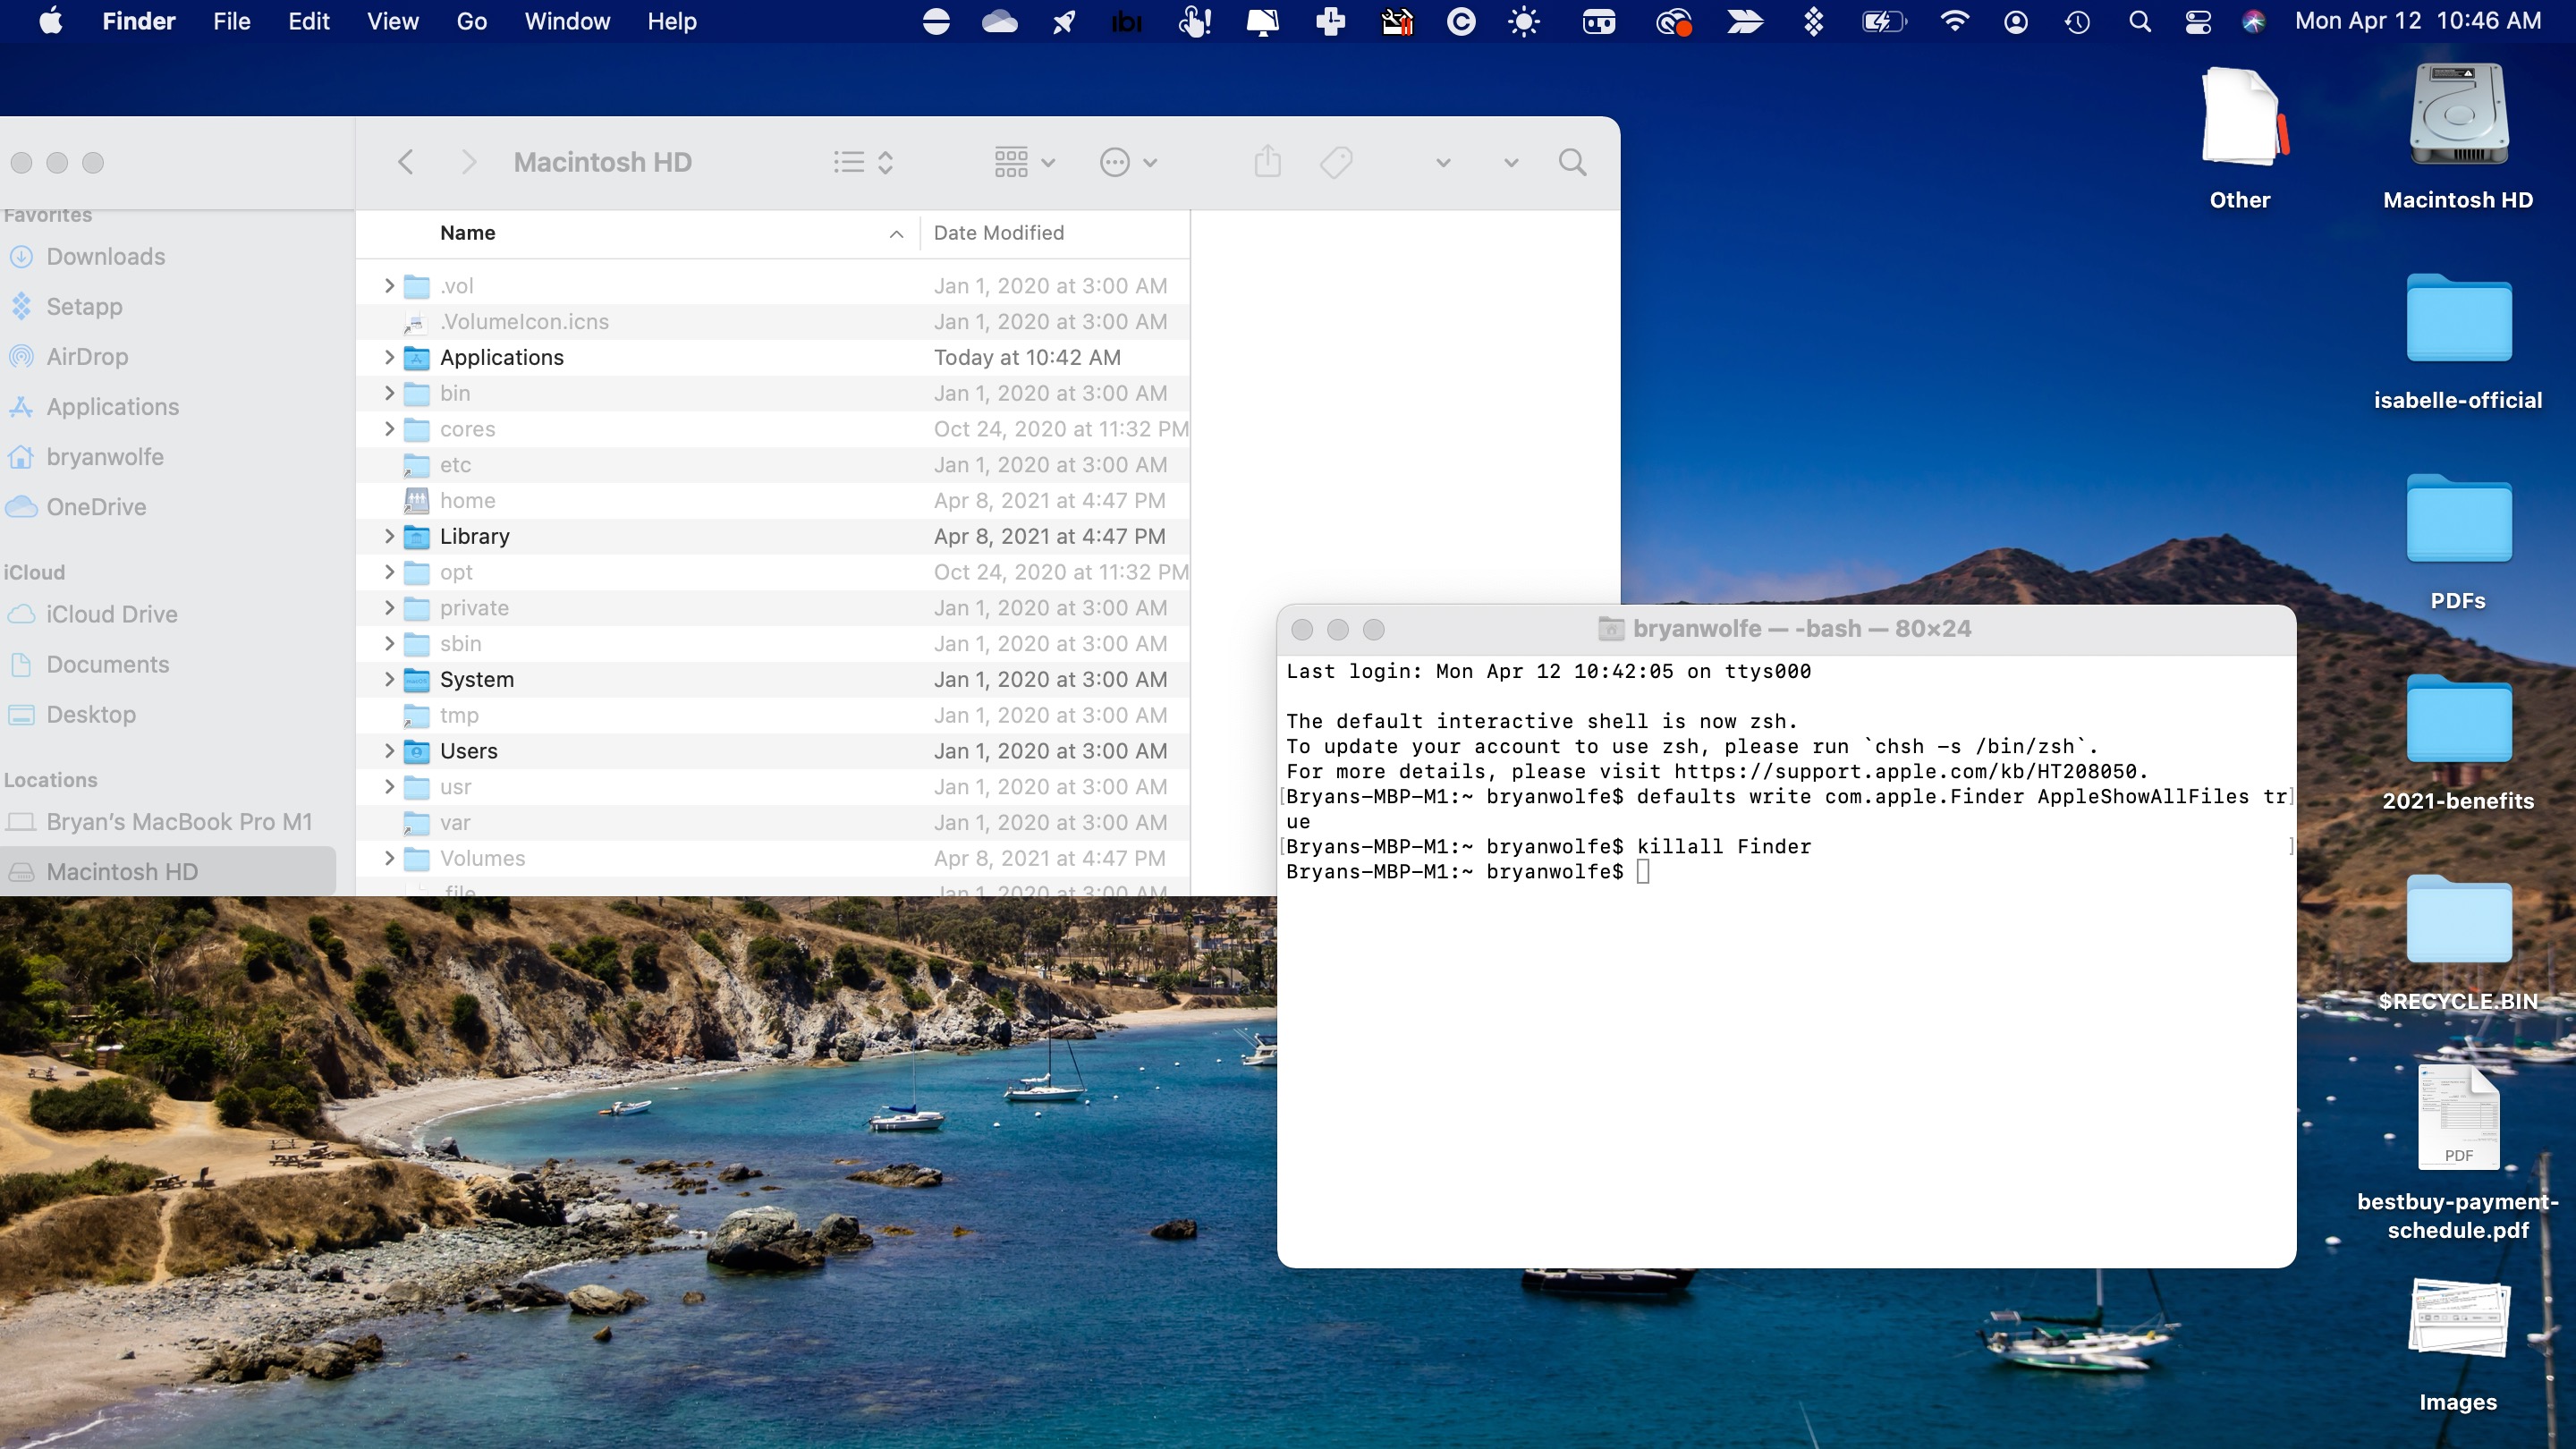
Type the following into 'Terminal' then hit the 'Enter' key:
defaults write com.apple.Finder AppleShowAllFiles trueNext, type the following into 'Terminal', then hit 'Enter' on your keyboard:
killall FinderYou can now view hidden and temporary files through your Mac's file system.
When you're finished, you should once again hide these files. To do so, use the following command, then click 'Enter'.
defaults write com.apple.Finder AppleShowAllFiles falseNext, type this command in Finder, followed by the 'Enter' key:
killall FinderThe files are once again hidden.
- See the best MacBook and Mac desktops of the year

Bryan M. Wolfe is a staff writer at TechRadar, iMore, and wherever Future can use him. Though his passion is Apple-based products, he doesn't have a problem using Windows and Android. Bryan's a single father of a 15-year-old daughter and a puppy, Isabelle. Thanks for reading!